This past week I painted 3 of the six Kobolds from the Bones 3 Stoneskull Expansion set. The last time I painted Bones Kobolds as back in May of 2016, so I referred back to my past color schemes for these guys.
I prepped the figures in the usual way; soaking them in a dish of water with a couple drops of dish- soap added, then giving them a light scrub with a soft toothbrush, and then rinsing and drying them. I then glued the figures to 7/8" fender washers with Aleene's Tacky glue. I then glued the washers to a tongue depressor with a couple drops of the Elmer's glue each.
I began by painting the figures entirely Ceramcoat "Black". When the Black was dry, I painted their skin Folk Art "Barnyard Red". I then painted any pants of leggings with Reaper MSP "Olive Skin", and then painted any tunics/clothing with Folk Art "Dark Brown". After that, I painted loincloths, if they had one with Americana "Terra Cotta".
Next, I painted the armor on the central one with Citadel "Snakebite Leather", and the belts on all three with Americana "Sable Brown". I then painted the ax handles and the shield backs with Americana "Light Cinnamon", and then did the front of the shields with Folk Art " Deep Tomato Red". AFter that, I painted the glove on the central one with Americana "Mississippi Mud".
I then painted the metal work on the shields with the "Black", and then did the swords and axe heads with Folk Art Metallics "Gunmetal Grey". I let the figures dry for a while, and then gave them all a wash with Citadel "Nuln Oil" wash. As you might be able to tell, I applied the wash a little too heavily. The figures turned out so dark, I felt I could get away with highlighting by just using the base colors. So, when the wash was dry, I highlighted the figures' skin with the base color "Barnyard Red". I then painted black noses on the Kobolds, and Reaper MSP "Holly Berry" dots for eyes. I realized at this point that a couple of them had mouths open enough for the teeth to show, so I went back and painted them Crafter's Acrylic "Light Antique White". I then applied a little Citadel "Agrax Earthshade" over the teeth.
As I mentioned, highlighting the clothing and armor was done by just re-applying the base colors. I then highlighted the swords and axe heads with Ceramcoat "Metallic Silver". Lastly, I painted the entire base with Americana "Mississippi Mud".
I let the figures dry overnight and the next day I gave them a coat of Americana "DuraClear Matte" varnish. Then, when the varnish was dry, I used some white glue to flock the bases. Another overnight dry, and I sprayed them with Winsor & Newton Professional "Matt Varnish".
Well, there they are. I have to say, these were not great figures, and seem almost Bones 1 in their level of quality as opposed to Bones 3; with soft details, and a bit of flash. And I'm afraid I was rather uninspired to give them really top notch paint jobs. But, they are perfect for mixing in with all the other Kobolds I have assembled from the other Kickstarters, so will look just fine on the tabletop.
So, it looks like domestic shipping of Bones 4 will start next week... (fingers crossed) so there is a good chance my box could arrive sometime the following week (week of April 1st). My plan is to paint up the other three Kobolds that came in Stoneskull for next Monday, and after that I should be able to post an unboxing post; perhaps on Thursday the 4th or Monday the 8th; followed by my first Bones 4 painted figures!
My Efforts to Paint the Miniatures From the 1st, 2nd, 3rd, and 4th BONES Kickstarters!
Monday, March 25, 2019
Monday, March 18, 2019
Translucent Slimes: Bones 2 Figure
This past weekend was the Cold Wars miniatures gaming convention, so I needed something real quick to paint last week, since I only had a few days to complete it and I was still frantically painting cavalrymen for my War of the Roses game. So, I chose the two translucent slimes that came with the Bones 2 Gelatinous Cube & Slimes Add-On set.
I prepped the figures in the usual way; soaking them in a dish of water with a couple drops of dish-soap added and then rinsing and drying. I then glued them to 1/2"x1/2" black-primed steel bases with Gorilla superglue gel. I then glued the figures to a tongue depressor with a couple drops of the Elmer's glue each.
I decided I would go for a Green Slime look with the vertical one, and an Ochre Jelly look for the flat one. So, I began by painting the vertical one with Mr Color "Clear Green" (This is not an acrylic paint and comes with all sorts of scary warnings on the label, so I would not recommend it. I only have it as I picked up on clearance at a local hobby shop before I realized what it was. I hope to replace it soon with some Tamiya clear.) , and I painted the flat one with Tamiya Color "Clear Yellow".
Next, I gave the vertical one a wash with Iron Wind Metals "Dark Green" ink, and the flat one a wash with Iron Wind Metals "Orange" ink.
I was happy with the how the vertical one looked at his point, but wasn't satisfied with the flat one; so I painted the shallow areas and crevices of the flat one with some Tamiya Color "Clear Orange" using a wet brush to thin it a little. Lastly, I painted the base of the green one with Americana "Zinc
When they were dry, I gave them a coat of Americana "DuraClear Gloss Varnish". I realized I still wanted the base of the green one to be matte, so I subsequently sprayed the figure with Testor's "Dullcote". When that was dry, I went back over just the slime with the "DuraClear Gloss Varnish", leaving the base flat.
While simple, I'm really happy with how these turned out.
And in those that didn't hear the news, Reaper announced that they have begun Bones 4 Kickstarter fulfillment! If you didn't see it, check out the Reaper CEO's video message for an amazing look at one of their Kickstarter fulfillment warehouses!
I prepped the figures in the usual way; soaking them in a dish of water with a couple drops of dish-soap added and then rinsing and drying. I then glued them to 1/2"x1/2" black-primed steel bases with Gorilla superglue gel. I then glued the figures to a tongue depressor with a couple drops of the Elmer's glue each.
I decided I would go for a Green Slime look with the vertical one, and an Ochre Jelly look for the flat one. So, I began by painting the vertical one with Mr Color "Clear Green" (This is not an acrylic paint and comes with all sorts of scary warnings on the label, so I would not recommend it. I only have it as I picked up on clearance at a local hobby shop before I realized what it was. I hope to replace it soon with some Tamiya clear.) , and I painted the flat one with Tamiya Color "Clear Yellow".
Next, I gave the vertical one a wash with Iron Wind Metals "Dark Green" ink, and the flat one a wash with Iron Wind Metals "Orange" ink.
I was happy with the how the vertical one looked at his point, but wasn't satisfied with the flat one; so I painted the shallow areas and crevices of the flat one with some Tamiya Color "Clear Orange" using a wet brush to thin it a little. Lastly, I painted the base of the green one with Americana "Zinc
When they were dry, I gave them a coat of Americana "DuraClear Gloss Varnish". I realized I still wanted the base of the green one to be matte, so I subsequently sprayed the figure with Testor's "Dullcote". When that was dry, I went back over just the slime with the "DuraClear Gloss Varnish", leaving the base flat.
While simple, I'm really happy with how these turned out.
And in those that didn't hear the news, Reaper announced that they have begun Bones 4 Kickstarter fulfillment! If you didn't see it, check out the Reaper CEO's video message for an amazing look at one of their Kickstarter fulfillment warehouses!
Monday, March 11, 2019
Basilisk: Bones 2 Figure
This past week I wanted an easy to paint figure because of the pressing last minute painting I'm doing in preparation for Cold Wars this coming weekend. So, I picked the Basilisk out of my remaining Bones 2 pile.
I had no idea what a Basilisk was supposed to look like, so I turned to my old 1978 Monster Manual for Guidance. It's description describes them as being dull brown with yellowish underbellies and glowing pale green eyes; so thats the coloration I decided to go for.
I prepped the figure in the usual way, soaking it in a dish of water with a couple drops of dish-soap added, then giving it a light scrub with a soft toothbrush, and then rinsing and drying it. I then glued the figure to a black-primed 1" fender washer with Aleene's Tacky glue, and then placed the figure in my painting grip.
I began by painting the whole figure including the base with Americana "Raw Umber", and then did the underbelly with Apple Barrel "Yellow".
Then after those colors had time to dry, I gave the entire figure a wash with Citadel "Agrax Earthshade" wash. When the wash was dry, I drybrushed the main body with Ceramcoat "territorial Beige", followed by a lighter drybrush with Americana "Khaki Tan".
I continued with the drybrushing of the main body, moving next to Crafter's Acrylic "Taupe", and then just a touch of Americana "Bleached Sand". After that, I used the "Bleached Sand" to paint the teeth, then highlighted the underbelly with Crafter's Acrylic "Daffodil Yellow". Next, I painted the eyes with Crafter's Acrylic "Citrus Green", and then painted the center of the eye with the lighter Americana "Margarita". I then lightly drybrushed around the eye with the "Margarita" to provide a little of the eyes' Object Source Lighting "glow". I finished the figure by painting in Americana "Snow White" pupils in the eyes.
I let the figure dry overnight and the next day I gave it a coat of Americana "DuraClear Matte" varnish. Then, when the varnish was dry, I used some white glue to flock the base. Another overnight dry, and I sprayed it with Testor's Dullcote".
Well, it was a rush job, and I think it shows a little; but in general I'm happy with it as a gaming figure.
I had no idea what a Basilisk was supposed to look like, so I turned to my old 1978 Monster Manual for Guidance. It's description describes them as being dull brown with yellowish underbellies and glowing pale green eyes; so thats the coloration I decided to go for.
I prepped the figure in the usual way, soaking it in a dish of water with a couple drops of dish-soap added, then giving it a light scrub with a soft toothbrush, and then rinsing and drying it. I then glued the figure to a black-primed 1" fender washer with Aleene's Tacky glue, and then placed the figure in my painting grip.
I began by painting the whole figure including the base with Americana "Raw Umber", and then did the underbelly with Apple Barrel "Yellow".
Then after those colors had time to dry, I gave the entire figure a wash with Citadel "Agrax Earthshade" wash. When the wash was dry, I drybrushed the main body with Ceramcoat "territorial Beige", followed by a lighter drybrush with Americana "Khaki Tan".
I continued with the drybrushing of the main body, moving next to Crafter's Acrylic "Taupe", and then just a touch of Americana "Bleached Sand". After that, I used the "Bleached Sand" to paint the teeth, then highlighted the underbelly with Crafter's Acrylic "Daffodil Yellow". Next, I painted the eyes with Crafter's Acrylic "Citrus Green", and then painted the center of the eye with the lighter Americana "Margarita". I then lightly drybrushed around the eye with the "Margarita" to provide a little of the eyes' Object Source Lighting "glow". I finished the figure by painting in Americana "Snow White" pupils in the eyes.
I let the figure dry overnight and the next day I gave it a coat of Americana "DuraClear Matte" varnish. Then, when the varnish was dry, I used some white glue to flock the base. Another overnight dry, and I sprayed it with Testor's Dullcote".
Well, it was a rush job, and I think it shows a little; but in general I'm happy with it as a gaming figure.
Monday, March 4, 2019
Behir: Bones 3 Figure
This past week I painted the Behir figure from the Bones 3 Stoneskull Expansion, as I continue to work my way through the remaining figures I haven't painted yet from that set while waiting for the arrival of Bones 4. At this point, all I have left are the Kobolds and the big Iron Golem.
I prepped the figure in the usual way, soaking the pieces in a dish of water with a couple drops of dish-soap added, then giving them a light scrub with a soft toothbrush, and then rinsing and drying them. Next, I assembled the figure using Gorilla Superglue gel. I then glued the figure to a 3" fender washer with Aleene's Tacky glue. In my rush to begin, I forgot to pre-prime the washer; so after I glued the figure on, I painted the washer with a brush on clear primer. The washer didn't fit in my painting grip, so I hand held the washer for painting.
I began by painting the head and main body with Crafter's Acrylic "Tropical Blue", and then painted the top back portion and the body crest with Americana "Forest Green". After that, I painted the belly scales with Folk Art "Celadon Green".
I prepped the figure in the usual way, soaking the pieces in a dish of water with a couple drops of dish-soap added, then giving them a light scrub with a soft toothbrush, and then rinsing and drying them. Next, I assembled the figure using Gorilla Superglue gel. I then glued the figure to a 3" fender washer with Aleene's Tacky glue. In my rush to begin, I forgot to pre-prime the washer; so after I glued the figure on, I painted the washer with a brush on clear primer. The washer didn't fit in my painting grip, so I hand held the washer for painting.
I began by painting the head and main body with Crafter's Acrylic "Tropical Blue", and then painted the top back portion and the body crest with Americana "Forest Green". After that, I painted the belly scales with Folk Art "Celadon Green".
Next, I painted the horns with Americana "Wedgewood Blue", and then painted the mouth with Crafter's Acrylic "Tutti Frutti". I then painted the teeth with Crafter's Acrylic "Light Antique White", and the claws with Reaper MSP "Frosty Blue".
At this point, I repainted the main body scales with Folk Art Color Shift "Blue Flash". I let the figure dry for a while, and then I gave the entire thing a wash with Citadel "Nuln Oil" wash. When the wash was dry, I drybrushed the main body scales with the base "Blue Flash" mixed with a little Folk Art Pearl "Aqua Moire". I then hit a few individual scales with just the "Aqua Moire".
Next, I drybrushed the back and body crest with Folk Art "Color Shift "Green Flash", and then drybrushed the belly scales with the base "Celadon Green", and then a little Americana "Snow White". I then hit each claw with a dab of the "Celadon Green" as well. After that, I highlighted the legs with a mix of the "Tropical Blue", and Crafter's Acrylic "Cool Blue". I worked on the head next, highlighting the mouth with Crafter's Acrylic "Cherry Blossom Pink", and the teeth with the "Snow White". I then highlighted the horns with Ceramcoat "Denim Blue". After that, I painted the eyes with Crafter's Acrylic "Margarita " and gave them Black pupils, and then used the Black to paint in the nostrils as well. Lastly, I painted the entire base with Americana "Mississippi Mud".
I let the figure dry overnight and the next day I gave it a coat of Americana "DuraClear Matte" varnish. Then, when the varnish was dry, I used some white glue to flock the base. Another overnight dry, and I sprayed it with Testor's Dullcote". When the Dullcote was dry, I painted the eyes with Americana "DuraClear Gloss Varnish".
I'm really happy how this figure turned out. I have to say though, the way it corkscrews around and has legs sticking out everywhere, it was a bit of challenge to paint. This is one that might benefit from being painted disassembled first; or maybe assembled into top and bottom halves before painting.
Monday, February 25, 2019
Goremaw, Great Worm: Bones 3 Figure
This past week I decided it was finally time to finish up the Goremaw Optional Add-On figure I got with Bones 3. I've been messing with the figure for at least a year I think.
I prepped the figure in the usual way; soaking the parts it in a dish of water with a couple drops of dish-soap added, then giving them a light scrub with a soft toothbrush, and then rinsing and drying them. I then assembled the figure using Gorilla Superglue Gel. After that, I traced the base onto an old CD. I then created a paper mask for the area the base covered on the CD, and taped that on the CD. Next, I sprayed the CD with Flat White primer. When the primer was dry, I removed the mask, revealing a base sized area that was unpainted; and using hot glue, affixed Gormaw's base to the un-primed area of the CD.
I then used some regular white glue to glue some coarse sand onto the area of the base where the body of Gormaw joins it. This was to help hide the joint, and to make the area when the body is emerging from the ground look a little more rough and churned.
I looked back on my blog, and it was back sometime before July 30, 2018 that I actually applied the first paint to Goremaw, and posted a photo in a "miscellaneous" post here called: Project Avalanche.
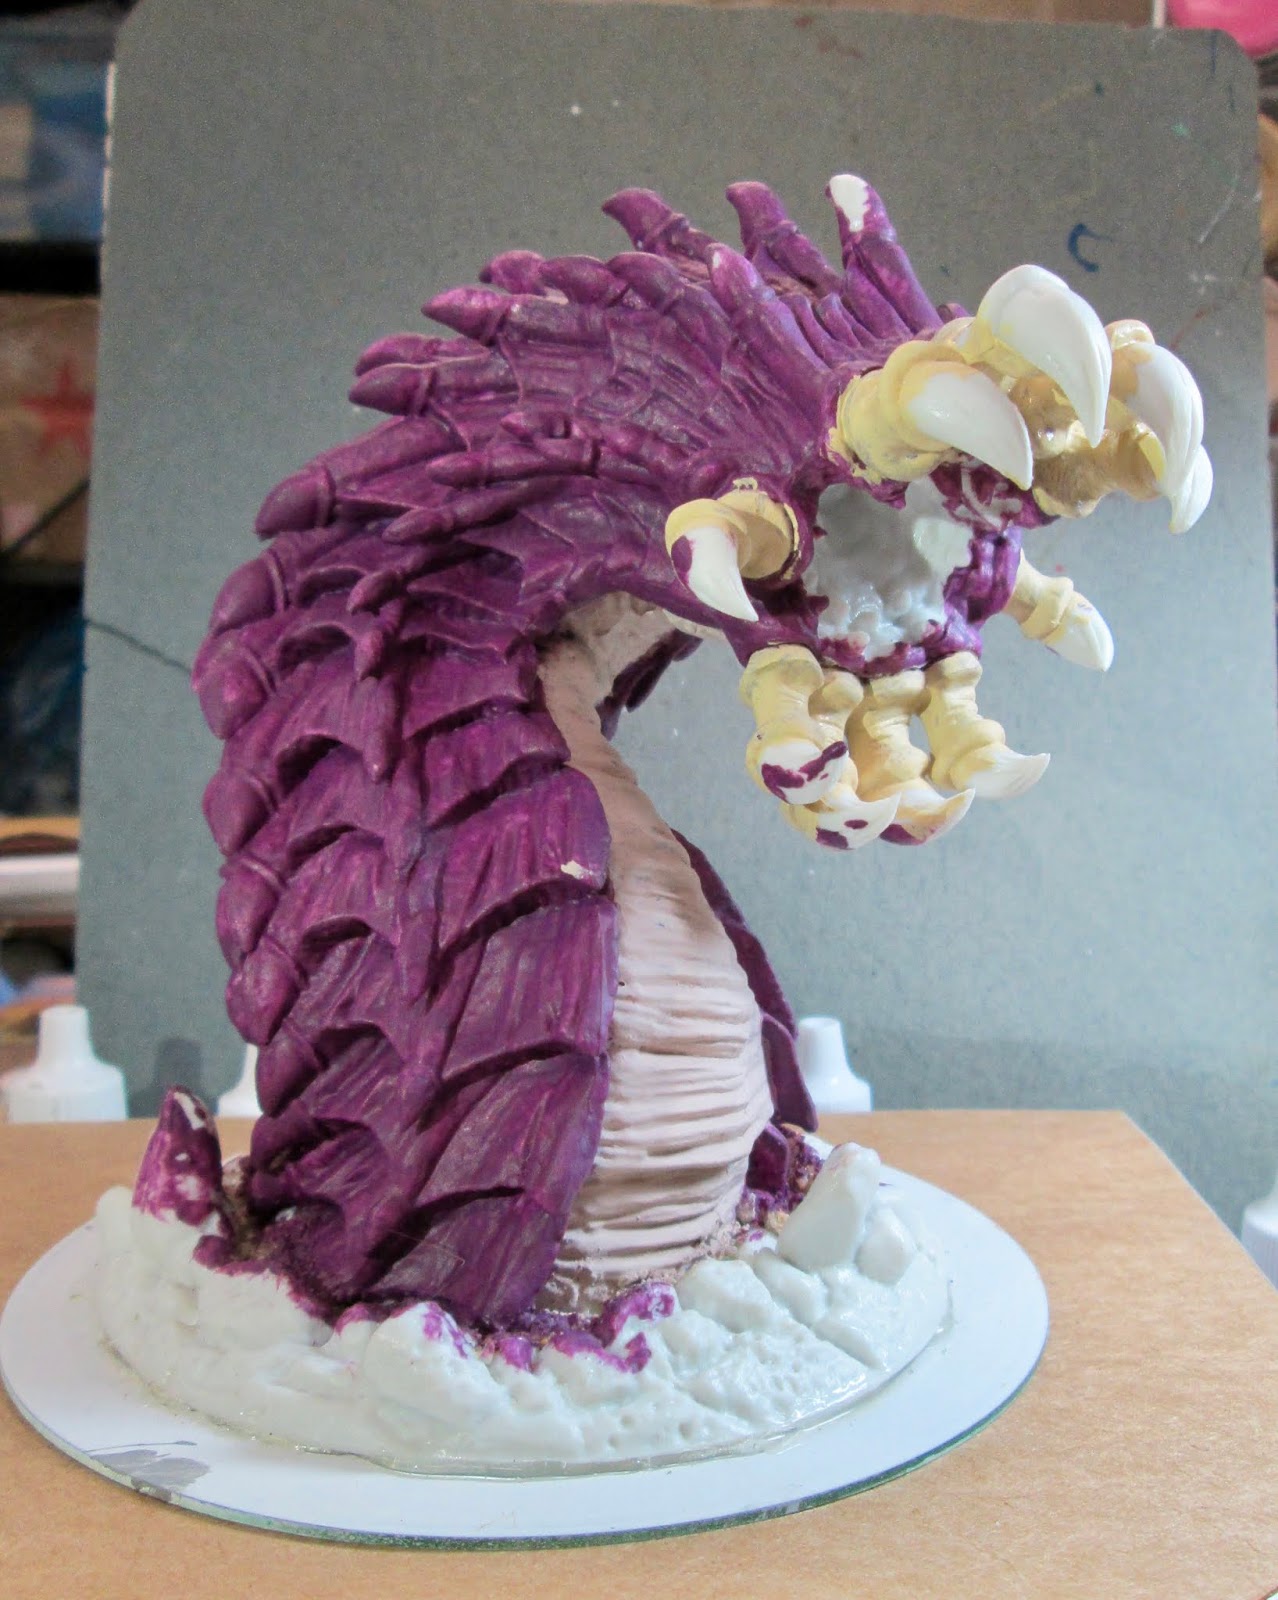
Anyhow, at that point, I had just applied a first coat of Anita's "Violet" to the body. I later followed up by painting his underside with Folk Art "Milkshake". I then mixed a little of the "Violet" and "Milkshake" together and painted the area along the edges where the scales and underside meet to help give a natural blending to where the two colors meet on the body. After that, I painted the base of the teeth with Americana "Antique White".
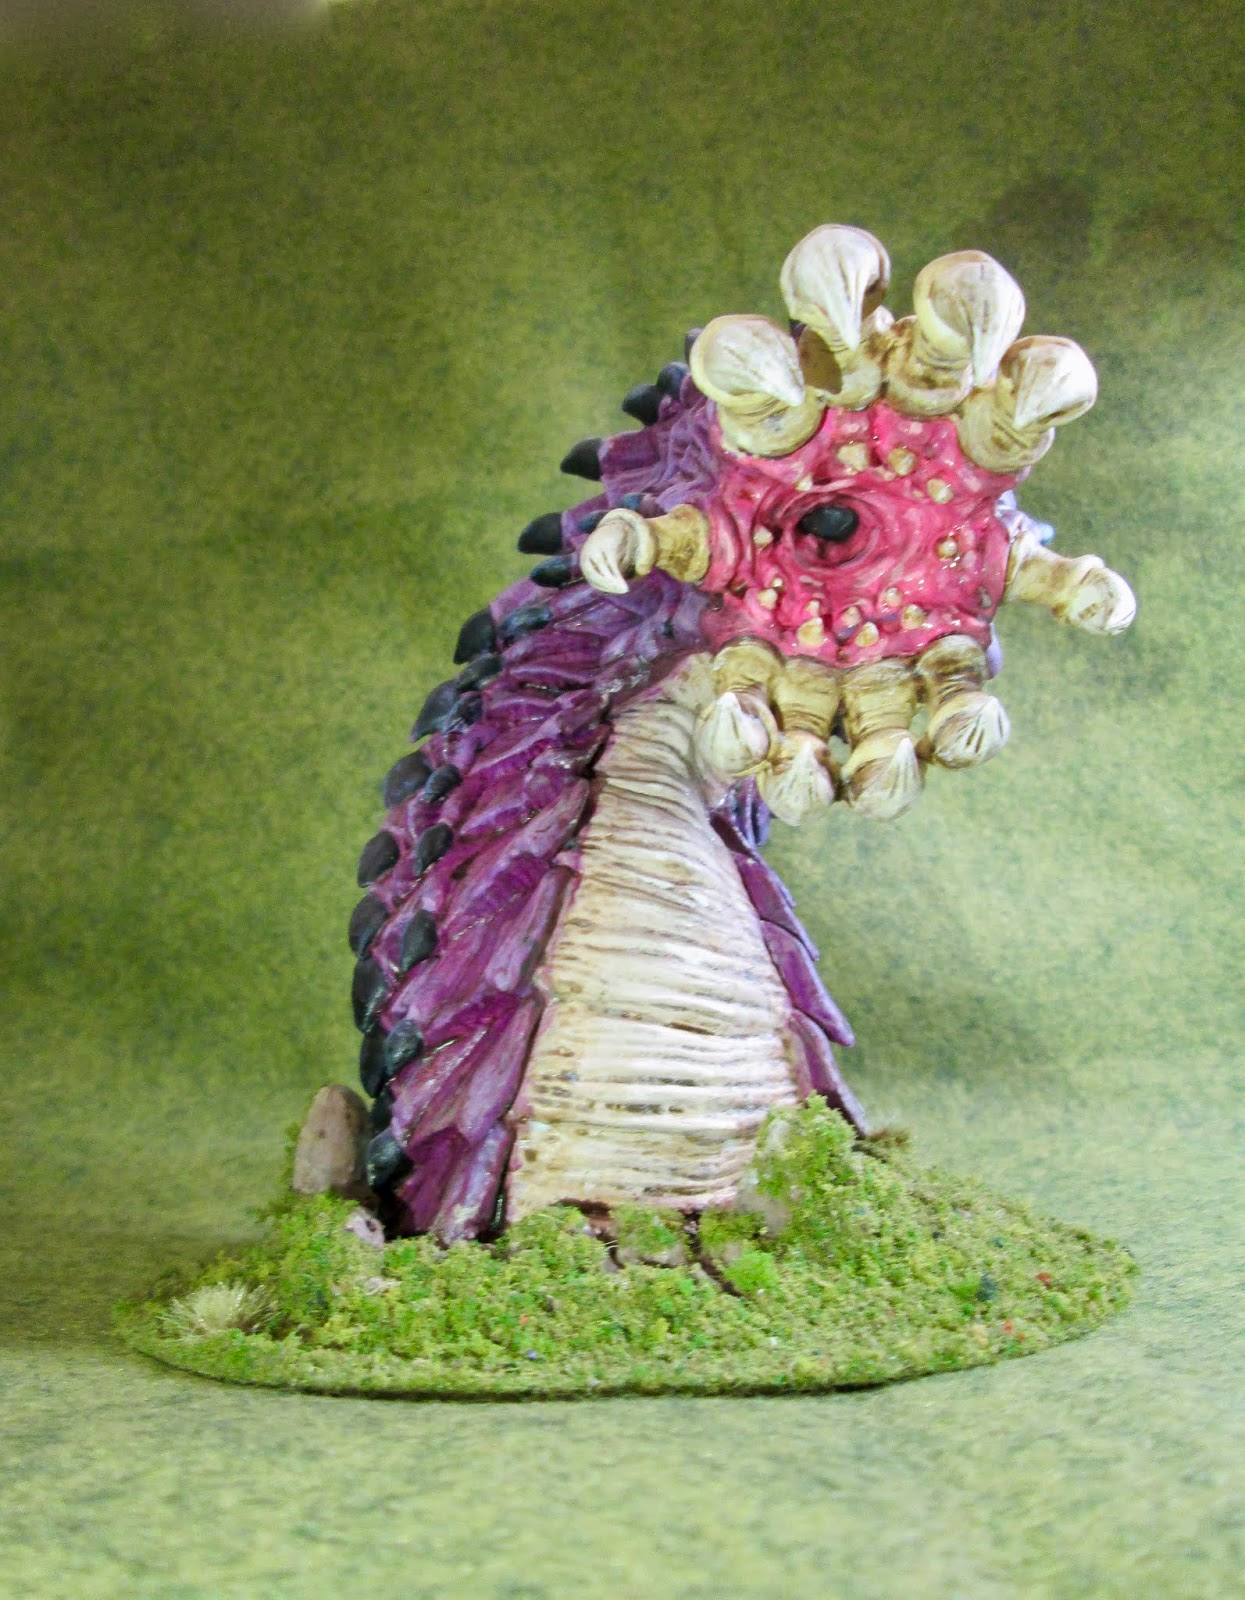
Next, I worked on the mouth; first highlighting the inner maw with a mix of the base "Tutti Frutti", and some Apple Barrel "Apple Light Pink". Then I used a little of just the "Apple Light Pink". I then highlighted the base of the teeth with Americana "Buttermilk", and the teeth themselves with Crafter's Acrylic Light Antique White".
I then turned to the base, drybrushing it first with Ceramcoat "Territorial Beige", and then with Folk Art "Butter Pecan". I then gave it a very light drybrush with the "Bleached Sand". Then, looking at it, I felt the cracks between the chunks of earth did not have enough shadow in them from the "Agrax Earthshade" wash to look like really deep fissures; so I went in and applied Reaper MSP "Brown Liner" directly in all the crevices.
I let the figure dry overnight and the next day I gave it a coat of Americana "DuraClear Matte" varnish. Then, when the varnish was dry, I used some white glue to flock the base, trying just to apply it to the tops of the chunks of ground, and not in any of the fissures. Another overnight dry, and I sprayed the beast with Testor's Dullcote". When the Dullcote was dry, I repainted the inside of his mouth with Americana "DuraClear Gloss Varnish".
I'm really happy with how this big fellow came out; and I'm glad to have him done before I get more big figures in Bones 4. Often these large figures seem like such a hurdle, but this turned out to be a really easy figure to complete. The only challenge was spraying the Dullcote and hitting all the deep crevices in the armor plating. Even now I can see areas where in the deep down recesses it's still a little shiny.
![]() |
| Straight from the Bones 3 Kickstarter shipping box. |
I then used some regular white glue to glue some coarse sand onto the area of the base where the body of Gormaw joins it. This was to help hide the joint, and to make the area when the body is emerging from the ground look a little more rough and churned.
I looked back on my blog, and it was back sometime before July 30, 2018 that I actually applied the first paint to Goremaw, and posted a photo in a "miscellaneous" post here called: Project Avalanche.
Anyhow, at that point, I had just applied a first coat of Anita's "Violet" to the body. I later followed up by painting his underside with Folk Art "Milkshake". I then mixed a little of the "Violet" and "Milkshake" together and painted the area along the edges where the scales and underside meet to help give a natural blending to where the two colors meet on the body. After that, I painted the base of the teeth with Americana "Antique White".
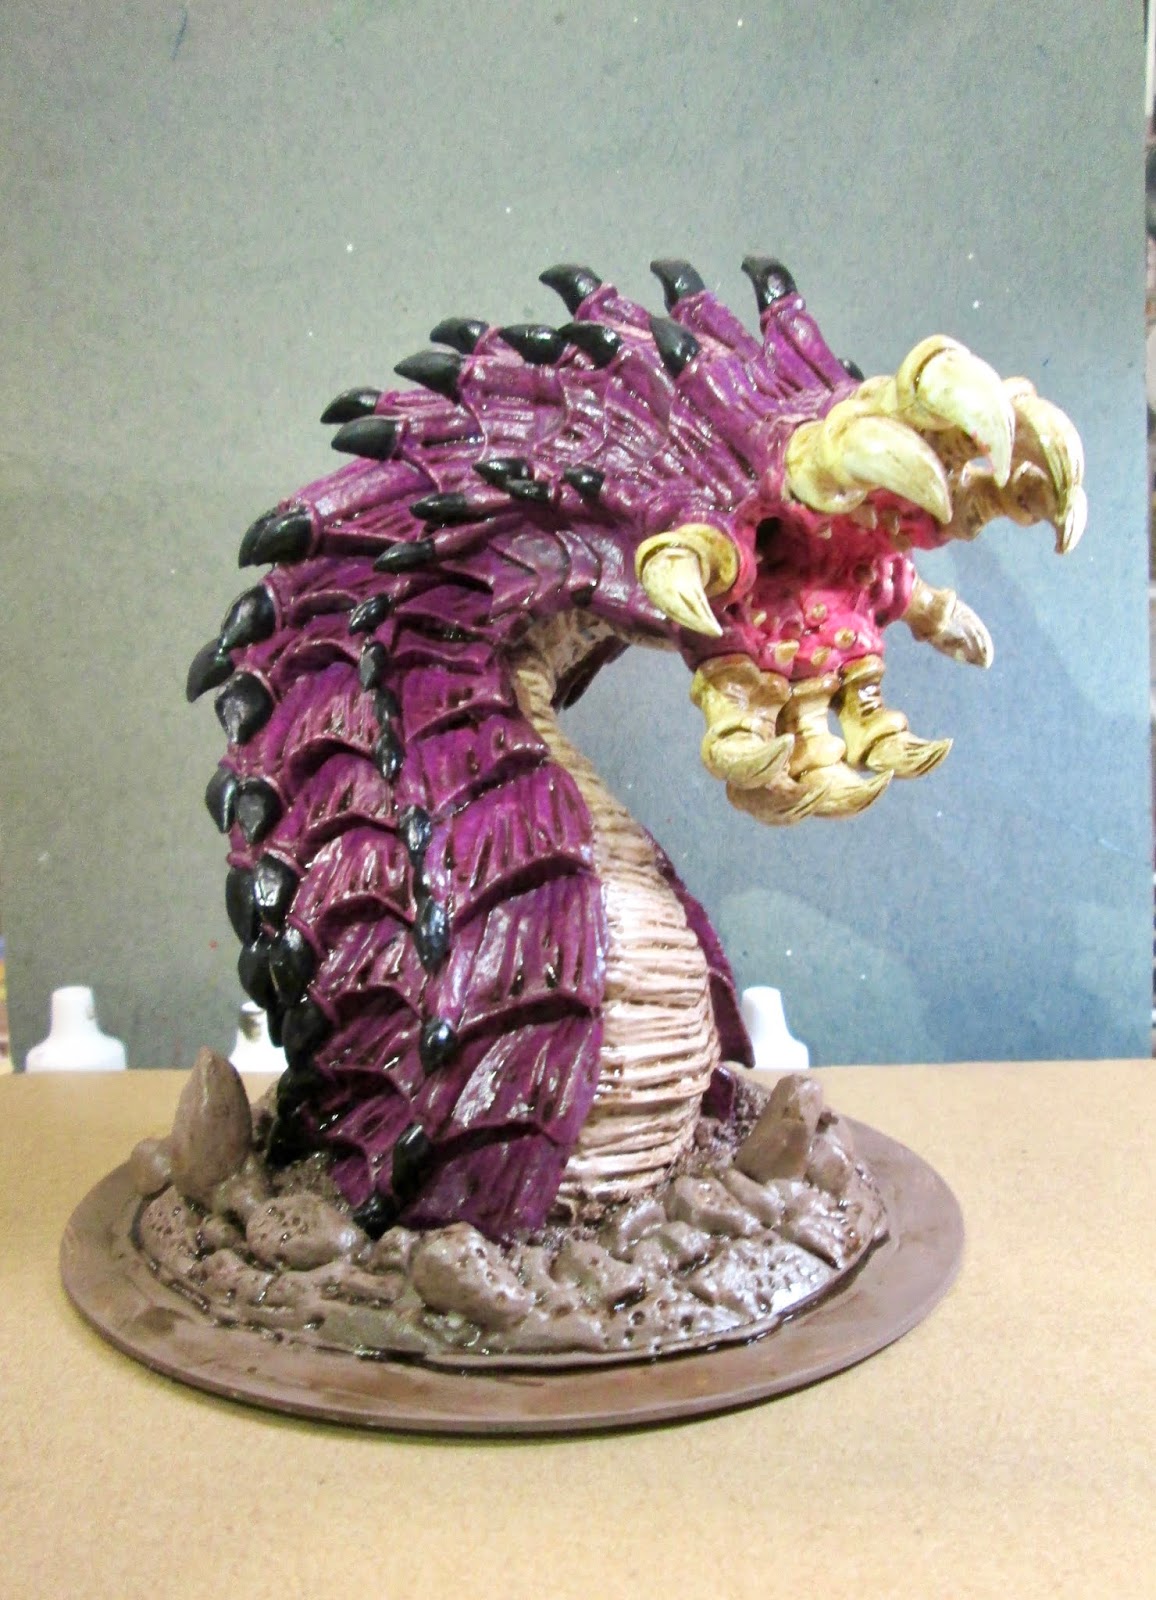
Next, I painted the open mouth with Crafter's Acrylic "Tutti Frutti". Here again, I mixed some of the "Violet" and "Tutti Frutti" together to blend the area where the two colors meet on the body, to help make it look more natural. I then painted the teeth themselves with Americana "Bleached Sand", and the spine hooks on the body with Ceramcoat "Black".
Then, I painted the base with Americana "Mississippi Mud". I let everything dry for awhile, and then I went back and applied some Citadel "Reikland Fleshshade" wash to the inside of the mouth. When that was dry, I applied Citadel "Agrax Earthshade" wash to the rest of the body and the base. Another drying period, and I came back and applied Citadel 'Nuln Oil" to the very center of the mouth, and to the undersides of all the body armor plate joints.
When all the washes were good and dry, I started the highlighting. I began with the body armor plates, drybrushing them with a mix of the base "Violet", Apple Barrel "Apple Lavender", and just for the heck of it, some Folk Art Color Shift "Purple Flash" thrown in. Next, I gave the underbelly a drybrushing with the base "Milkshake"; and then a little of the "Milkshake with some Americana "Snow White" added. After that, I highlighted the spine hooks with Citadel "The Fang".Next, I worked on the mouth; first highlighting the inner maw with a mix of the base "Tutti Frutti", and some Apple Barrel "Apple Light Pink". Then I used a little of just the "Apple Light Pink". I then highlighted the base of the teeth with Americana "Buttermilk", and the teeth themselves with Crafter's Acrylic Light Antique White".
I then turned to the base, drybrushing it first with Ceramcoat "Territorial Beige", and then with Folk Art "Butter Pecan". I then gave it a very light drybrush with the "Bleached Sand". Then, looking at it, I felt the cracks between the chunks of earth did not have enough shadow in them from the "Agrax Earthshade" wash to look like really deep fissures; so I went in and applied Reaper MSP "Brown Liner" directly in all the crevices.
I let the figure dry overnight and the next day I gave it a coat of Americana "DuraClear Matte" varnish. Then, when the varnish was dry, I used some white glue to flock the base, trying just to apply it to the tops of the chunks of ground, and not in any of the fissures. Another overnight dry, and I sprayed the beast with Testor's Dullcote". When the Dullcote was dry, I repainted the inside of his mouth with Americana "DuraClear Gloss Varnish".
I'm really happy with how this big fellow came out; and I'm glad to have him done before I get more big figures in Bones 4. Often these large figures seem like such a hurdle, but this turned out to be a really easy figure to complete. The only challenge was spraying the Dullcote and hitting all the deep crevices in the armor plating. Even now I can see areas where in the deep down recesses it's still a little shiny.
Monday, February 18, 2019
Gremlins, Part 2: Bones 3 Figures
This past week I again continued making my way through the last few figures I have from the Bones 3 Stoneskull Expansion, and painted the remaining 2 Gremlin figures. There were 4 of them in the set, and I painted the first 2 back in October: Gremlins, Part 1. This week I was frantically getting figures ready for a Cold Wars playtest game I was running at Friday's club meeting, (See: WotR Playtest) so I thought I'd work on the Gremlins since they were small simple figures to do.
I prepped the figures in the usual way; soaking them in a dish of water with a couple drops of dish-soap added and then rinsing and drying. I then glued them to 7/8" black-primed fender washers with Aleene's Tacky glue. I then glued the figures to a tongue depressor with a couple drops of the Elmer's glue each.
I began by painted the both entirely with Accent "Golden Oxide". I then painted the lefthand one's clothing using Reaper MSP "Olive Skin Shadow" for his tunic, Americana "Neutral Grey" for his collar, and Reaper MSP Bones "Cinnamon Red" for his hat. Next, I did the righthand one's cloths, using Apple Barrel "Apple Black Green" for his collar, and the "Olive Skin Shadow" for his loin cloth.
I then painted their pouches with Crafter's Acrylic "Cinnamon Brown", and the the knife handle and the righthand one's sling with Americana "Raw Umber". After that, I painted the stone in the sling with Crafter's Acrylic "Storm Cloud Grey", the knife blade with Ceramcoat "Black", and their teeth with Americana "Bleached Sand". I let the figures dry for a while, and then gave both of them an entire wash with Citadel "Agrax Earthshade" wash.
When the wash was dry, I painted their eyes, and then highlighted their teeth with Crafter's Acrylic "Light Antique White". I then highlighted their skin with Ceramcoat "Maple Sugar Tan". Next, I highlighted the clothing on the lefthand one using; Crafter's Acrylic "Orange Spice" for his hat, Duncan "Sate Grey" for his collar, and Reaper MSP 'Olive Skin" for his tunic. On the righthand one, I used; the "Olive Skin" on his loin cloth, and totally forgot to do highlights on his collar! I then highlighted the pouches with Folk Art "Teddy Bear Brown", and the sling with Americana "Light Cinnamon". Finally I painted the knife, belt buckle, and knee armor on the lefthand one with Folk Art Metallics "Gunmetal Grey".
Lastly, I painted the the bases with Americana "Mississippi Mud".
I let the figures dry overnight and the next day I gave them a coat of Americana "DuraClear Matte" varnish. Then, when the varnish was dry, I used some white glue to flock the bases. Another overnight dry, and I sprayed with Testor's Dullcote".
I'm generally happy with these guys, though you can tell they were a side project while working on other stuff; as I realized when I saw the photos that I had totally forgot to highlight the righthand one's collar, and apparently forgot to paint the back of the knife blade with the "Gunmetal"! I may go back and fix these, or because these guys are so wee, I just may leave them as is, and assume no one will probably ever notice.
At this point, all I have left from the Stoneskull Expansion are the Kobolds, and the Behir. (I traded off the Naga and Flesh Golem, as I just weren't fans of those figures.) I'm glad I'm getting near the end, as Reaper announced Friday that the last Bones 4 shipping container is on the water from China, and expected early March; with shipping possible as early as mid March.
I prepped the figures in the usual way; soaking them in a dish of water with a couple drops of dish-soap added and then rinsing and drying. I then glued them to 7/8" black-primed fender washers with Aleene's Tacky glue. I then glued the figures to a tongue depressor with a couple drops of the Elmer's glue each.
I began by painted the both entirely with Accent "Golden Oxide". I then painted the lefthand one's clothing using Reaper MSP "Olive Skin Shadow" for his tunic, Americana "Neutral Grey" for his collar, and Reaper MSP Bones "Cinnamon Red" for his hat. Next, I did the righthand one's cloths, using Apple Barrel "Apple Black Green" for his collar, and the "Olive Skin Shadow" for his loin cloth.
I then painted their pouches with Crafter's Acrylic "Cinnamon Brown", and the the knife handle and the righthand one's sling with Americana "Raw Umber". After that, I painted the stone in the sling with Crafter's Acrylic "Storm Cloud Grey", the knife blade with Ceramcoat "Black", and their teeth with Americana "Bleached Sand". I let the figures dry for a while, and then gave both of them an entire wash with Citadel "Agrax Earthshade" wash.
When the wash was dry, I painted their eyes, and then highlighted their teeth with Crafter's Acrylic "Light Antique White". I then highlighted their skin with Ceramcoat "Maple Sugar Tan". Next, I highlighted the clothing on the lefthand one using; Crafter's Acrylic "Orange Spice" for his hat, Duncan "Sate Grey" for his collar, and Reaper MSP 'Olive Skin" for his tunic. On the righthand one, I used; the "Olive Skin" on his loin cloth, and totally forgot to do highlights on his collar! I then highlighted the pouches with Folk Art "Teddy Bear Brown", and the sling with Americana "Light Cinnamon". Finally I painted the knife, belt buckle, and knee armor on the lefthand one with Folk Art Metallics "Gunmetal Grey".
Lastly, I painted the the bases with Americana "Mississippi Mud".
I let the figures dry overnight and the next day I gave them a coat of Americana "DuraClear Matte" varnish. Then, when the varnish was dry, I used some white glue to flock the bases. Another overnight dry, and I sprayed with Testor's Dullcote".
I'm generally happy with these guys, though you can tell they were a side project while working on other stuff; as I realized when I saw the photos that I had totally forgot to highlight the righthand one's collar, and apparently forgot to paint the back of the knife blade with the "Gunmetal"! I may go back and fix these, or because these guys are so wee, I just may leave them as is, and assume no one will probably ever notice.
At this point, all I have left from the Stoneskull Expansion are the Kobolds, and the Behir. (I traded off the Naga and Flesh Golem, as I just weren't fans of those figures.) I'm glad I'm getting near the end, as Reaper announced Friday that the last Bones 4 shipping container is on the water from China, and expected early March; with shipping possible as early as mid March.
Monday, February 11, 2019
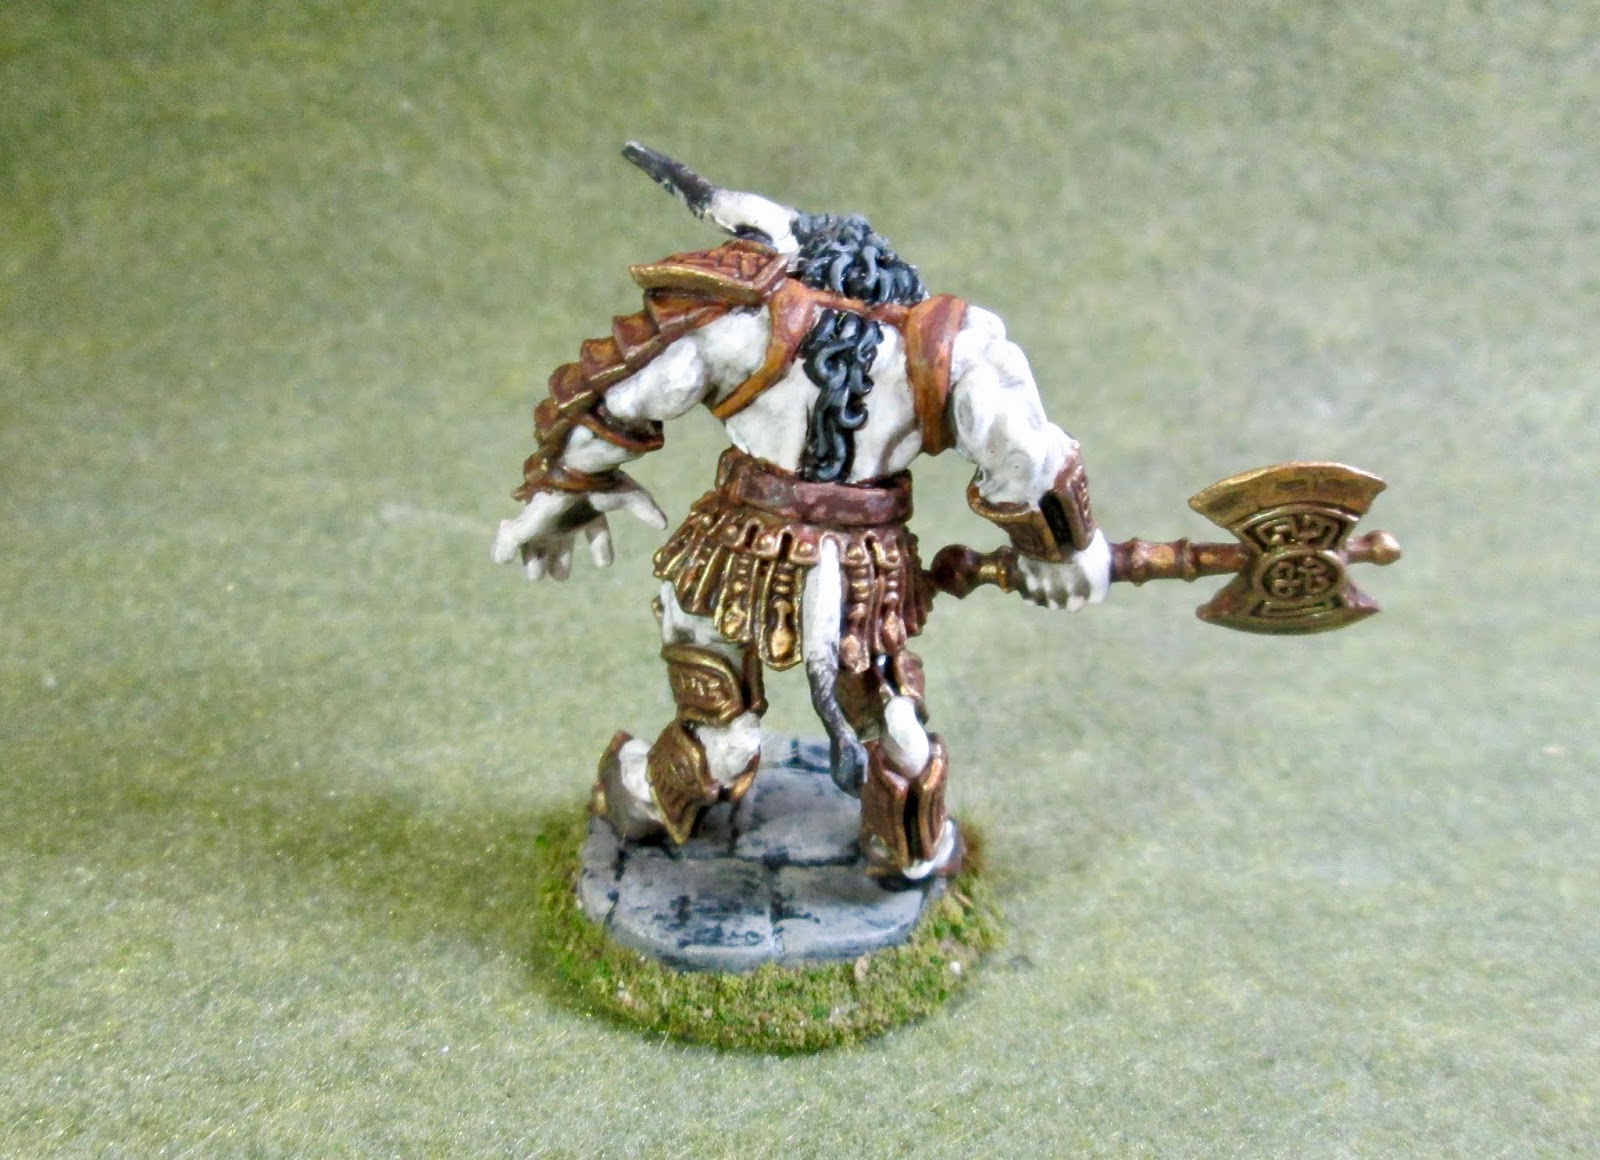
Minotaur: Bones 3 Figure
This past week I painted the Minotaur figure from the Bones 3 Stoneskull Expansion, as I continue to work my way through the remaining figures I haven't painted yet from that set while waiting for the arrival of Bones 4.
I prepped the figure in the usual way, soaking it in a dish of water with a couple drops of dish-soap added, then giving it a light scrub with a soft toothbrush, and then rinsing and drying it. I then glued the figure to a black-primed 1.25" fender washer with Aleene's Tacky glue, and then placed the figure in my painting grip.
I decided I wanted to do something different with this Minotaur, having already painted a couple ones brown colored before (Minotaur Hero and Minotaur Barbarian); so I decided I would make this one white instead. I also had the idea, since I was painting him white, that I would give him one blue eye just to make him look a little more interesting.
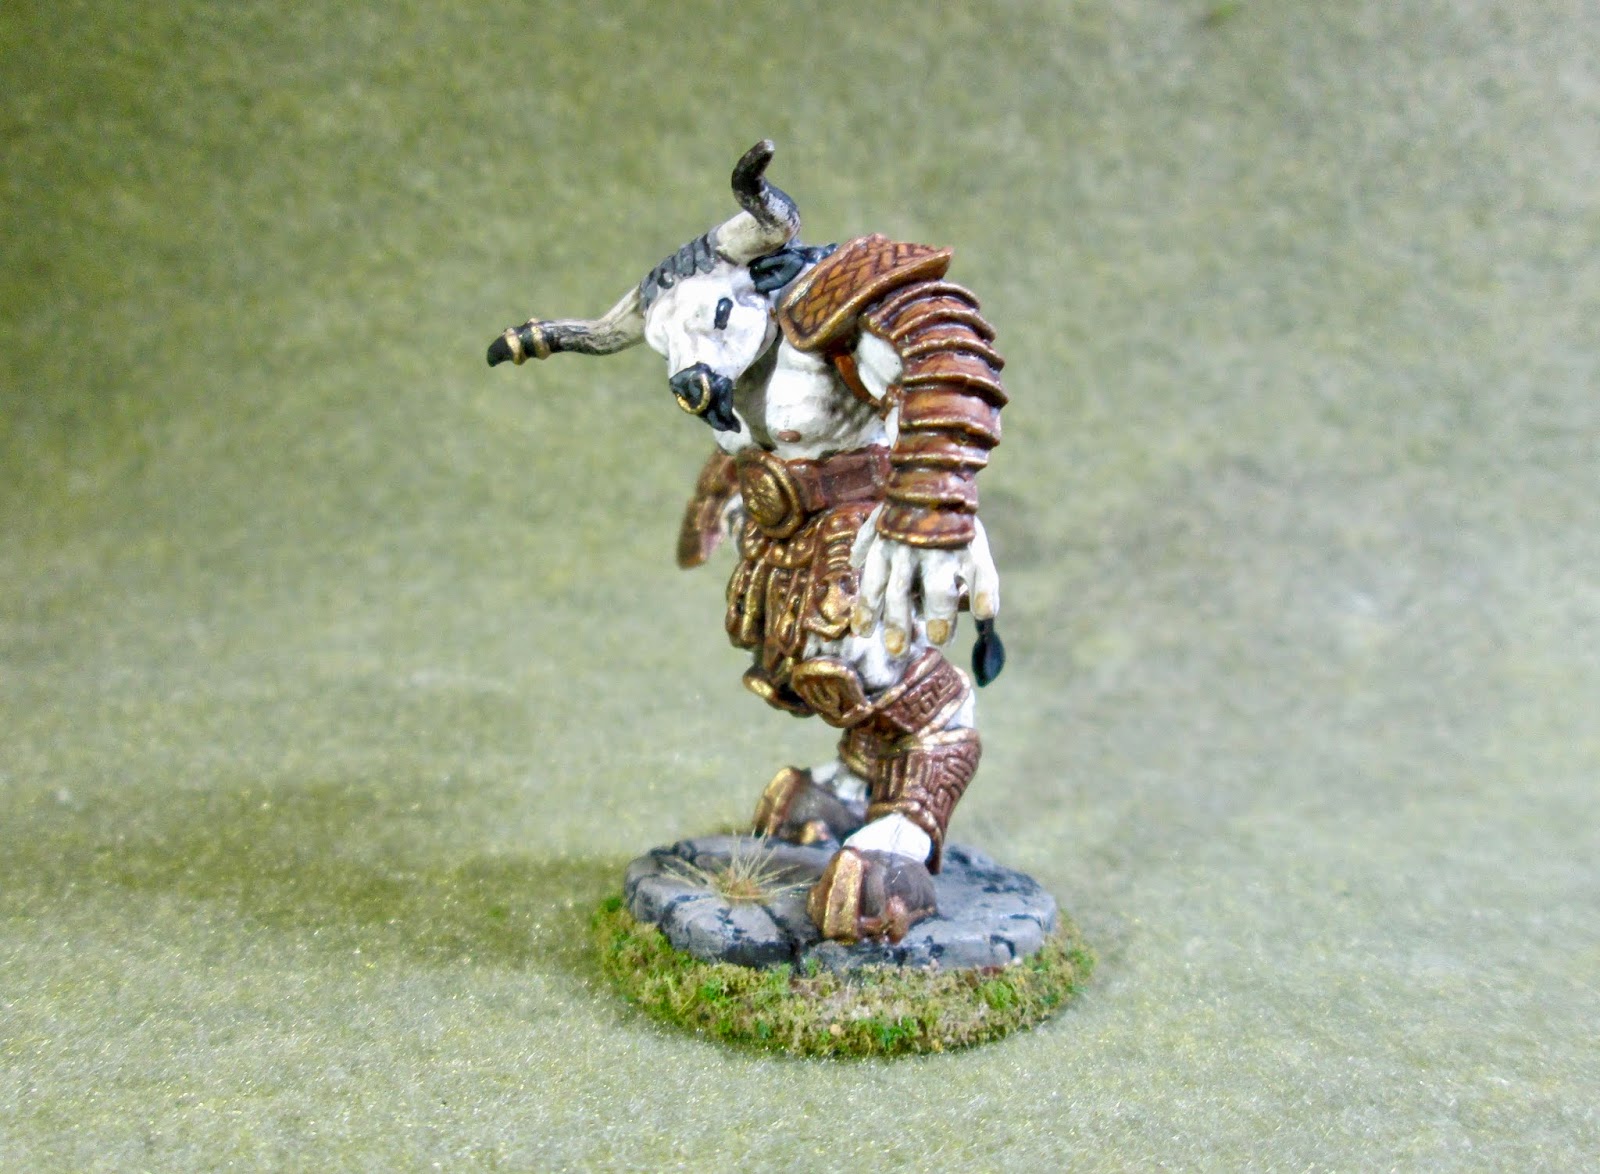
So, I began by painting the whole body with Ceramcoat "White". I then painted all the armor, straps, and the weapon with Crafter's Acrylic "Cinnamon Brown", his hooves with Americana "Charcoal Grey", and his main belt and the axe handle grip, with Accent "Real Umber".
Next, I painted his horns with Americana "Bleached Sand". After that, I painted the edges and decorations on all the armor, as well as the axe, with Folk Art Brushed Metal "Brushed Bronze". I let everything dry for a while, and then gave the entire figure a wash with Citadel "Nuln Oil" wash.
Then, when the wash was dry, I highlighted all his body with Americana "Snow White". Next, I painted his muzzle, horn-tips, tail end, eyes/sockets, and mane/hair with Ceramcoat "Black". When the "Black had dried, I highlighted it with some Americana "Zinc", and then some Crafter's Acrylic "Storm Cloud Grey". After that, I gave him a blue iris on his right eye with Crafter's Acrylic "Tropical Blue".
Next, I highlighted all the leather armor and straps with Ceramcoat "Raw Sienna", and his belt and axe handle with Folk Art "Teddy Bear Brown". Then, I highlighted his hooves with a mix of Americana "Mississippi Mud" and the base "Charcoal Grey". I realized he had fingernails, so I tried painting them with Americana "Antique White" which didn't quite look right; so I went back and gave each one a dab with a little Citadel "Agrax Earthshade" wash to help tone them down and define them. I also put some of the "Agrax Earthshade" on his left shoulder pad to help tone down the highlighting I had done on the herring-bone weave pattern. I also noticed he had nipples(!), and not really knowing what color they would be, I guessed at a pinkish grey. So, I mixed some of the "Black" with some Americana "Shading Flesh", and used that for the nipples, highlighting with a little Folk Art "Milkshake". At that point I worked on the metal, highlighting all the "Brushed Bronze" with a mix of Ceramcoat "Bronze" and Ceramcoat "14K Gold". I painted his nose ring, and the rings on his right horn with the "14K Gold".
At this time I worked on his integral base, painting it with the "Black". When dry, I dry brushed it with some Americana "Neutral Grey", and some Folk Art "Platinum Grey". Lastly, I painted the washer portion of the base with the "Mississippi Mud".
I let the figure dry overnight and the next day I gave it a coat of Americana "DuraClear Matte" varnish. Then, when the varnish was dry, I used some white glue to flock the outer rim of the base. Another overnight dry, and I sprayed it with Testor's Dullcote".
I'm really happy with how this fellow turned out. I think the white color makes for a much more dramatic figure.
I prepped the figure in the usual way, soaking it in a dish of water with a couple drops of dish-soap added, then giving it a light scrub with a soft toothbrush, and then rinsing and drying it. I then glued the figure to a black-primed 1.25" fender washer with Aleene's Tacky glue, and then placed the figure in my painting grip.
I decided I wanted to do something different with this Minotaur, having already painted a couple ones brown colored before (Minotaur Hero and Minotaur Barbarian); so I decided I would make this one white instead. I also had the idea, since I was painting him white, that I would give him one blue eye just to make him look a little more interesting.
So, I began by painting the whole body with Ceramcoat "White". I then painted all the armor, straps, and the weapon with Crafter's Acrylic "Cinnamon Brown", his hooves with Americana "Charcoal Grey", and his main belt and the axe handle grip, with Accent "Real Umber".
Next, I painted his horns with Americana "Bleached Sand". After that, I painted the edges and decorations on all the armor, as well as the axe, with Folk Art Brushed Metal "Brushed Bronze". I let everything dry for a while, and then gave the entire figure a wash with Citadel "Nuln Oil" wash.
Then, when the wash was dry, I highlighted all his body with Americana "Snow White". Next, I painted his muzzle, horn-tips, tail end, eyes/sockets, and mane/hair with Ceramcoat "Black". When the "Black had dried, I highlighted it with some Americana "Zinc", and then some Crafter's Acrylic "Storm Cloud Grey". After that, I gave him a blue iris on his right eye with Crafter's Acrylic "Tropical Blue".
Next, I highlighted all the leather armor and straps with Ceramcoat "Raw Sienna", and his belt and axe handle with Folk Art "Teddy Bear Brown". Then, I highlighted his hooves with a mix of Americana "Mississippi Mud" and the base "Charcoal Grey". I realized he had fingernails, so I tried painting them with Americana "Antique White" which didn't quite look right; so I went back and gave each one a dab with a little Citadel "Agrax Earthshade" wash to help tone them down and define them. I also put some of the "Agrax Earthshade" on his left shoulder pad to help tone down the highlighting I had done on the herring-bone weave pattern. I also noticed he had nipples(!), and not really knowing what color they would be, I guessed at a pinkish grey. So, I mixed some of the "Black" with some Americana "Shading Flesh", and used that for the nipples, highlighting with a little Folk Art "Milkshake". At that point I worked on the metal, highlighting all the "Brushed Bronze" with a mix of Ceramcoat "Bronze" and Ceramcoat "14K Gold". I painted his nose ring, and the rings on his right horn with the "14K Gold".
At this time I worked on his integral base, painting it with the "Black". When dry, I dry brushed it with some Americana "Neutral Grey", and some Folk Art "Platinum Grey". Lastly, I painted the washer portion of the base with the "Mississippi Mud".
I let the figure dry overnight and the next day I gave it a coat of Americana "DuraClear Matte" varnish. Then, when the varnish was dry, I used some white glue to flock the outer rim of the base. Another overnight dry, and I sprayed it with Testor's Dullcote".
I'm really happy with how this fellow turned out. I think the white color makes for a much more dramatic figure.
Subscribe to:
Posts (Atom)