Showing posts with label Prehistoric. Show all posts

Monday, March 22, 2021

Sabertooth Pug: Bones 4 Figure

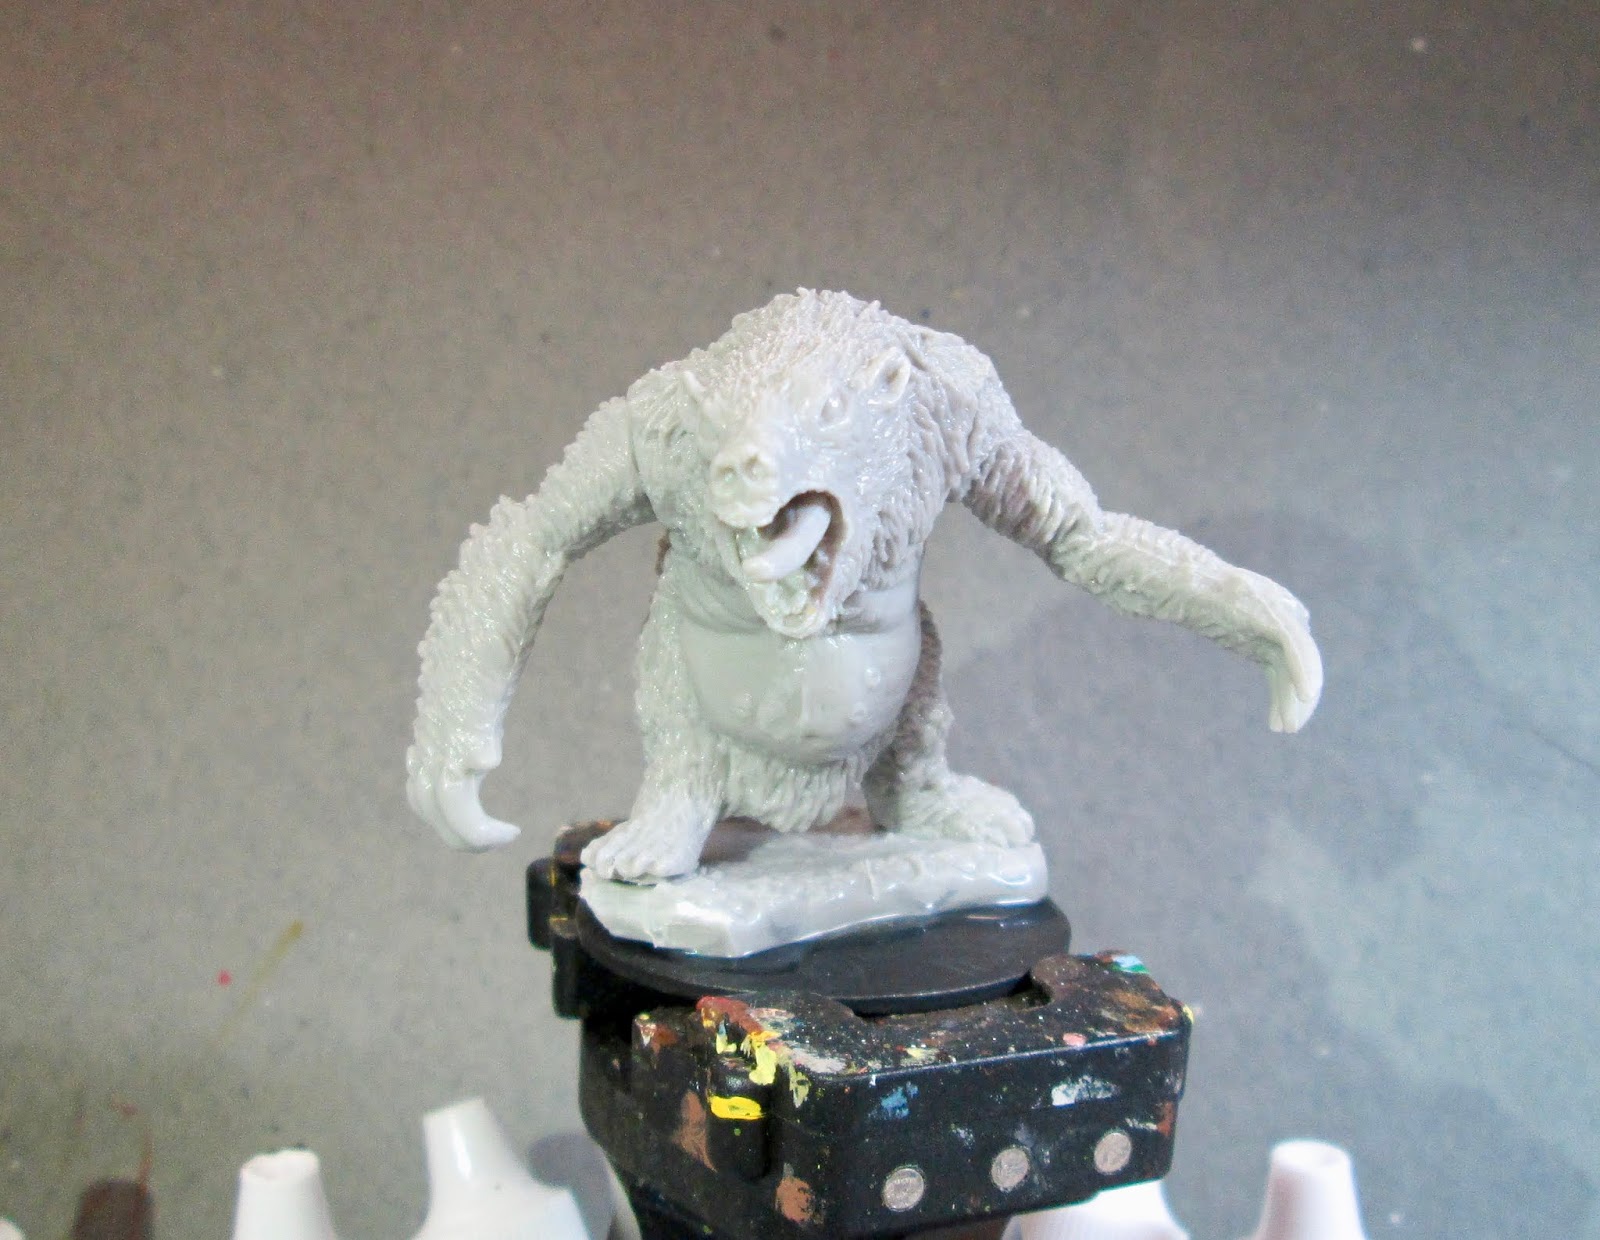
     This past week I painted the "Sabertooth Pug" figure from the Bones 4 Trolls Set.  The first thing I did was to Google pictures of pugs to get an idea of the coloring I needed to achieve.
      I prepped the figure in the usual way, soaking it in a dish of water with a couple drops of dish-soap added, then giving it a light scrub with a soft toothbrush, and then rinsing and drying it.  I trimmed down the base a little, and then glued the figure to a black-primed 1.5" fender washer with Aleene's Tacky glue.  I then placed the figure in my painting grip.    

     I began by painting the entire figure with Reaper MSP "Graveyard Bone".  When dry, I gave the entire figure a coat of Citadel "Agrax Earthshade" wash.
     When the wash was dry, I drybrushed the figure.  First with the base "Graveyard Bone", then with Crafter's Acrylic "Light Antique White", and lastly a little Ceramcoat "White".  I tried to apply it heavier towards the bottom to represent the lighter underbelly.
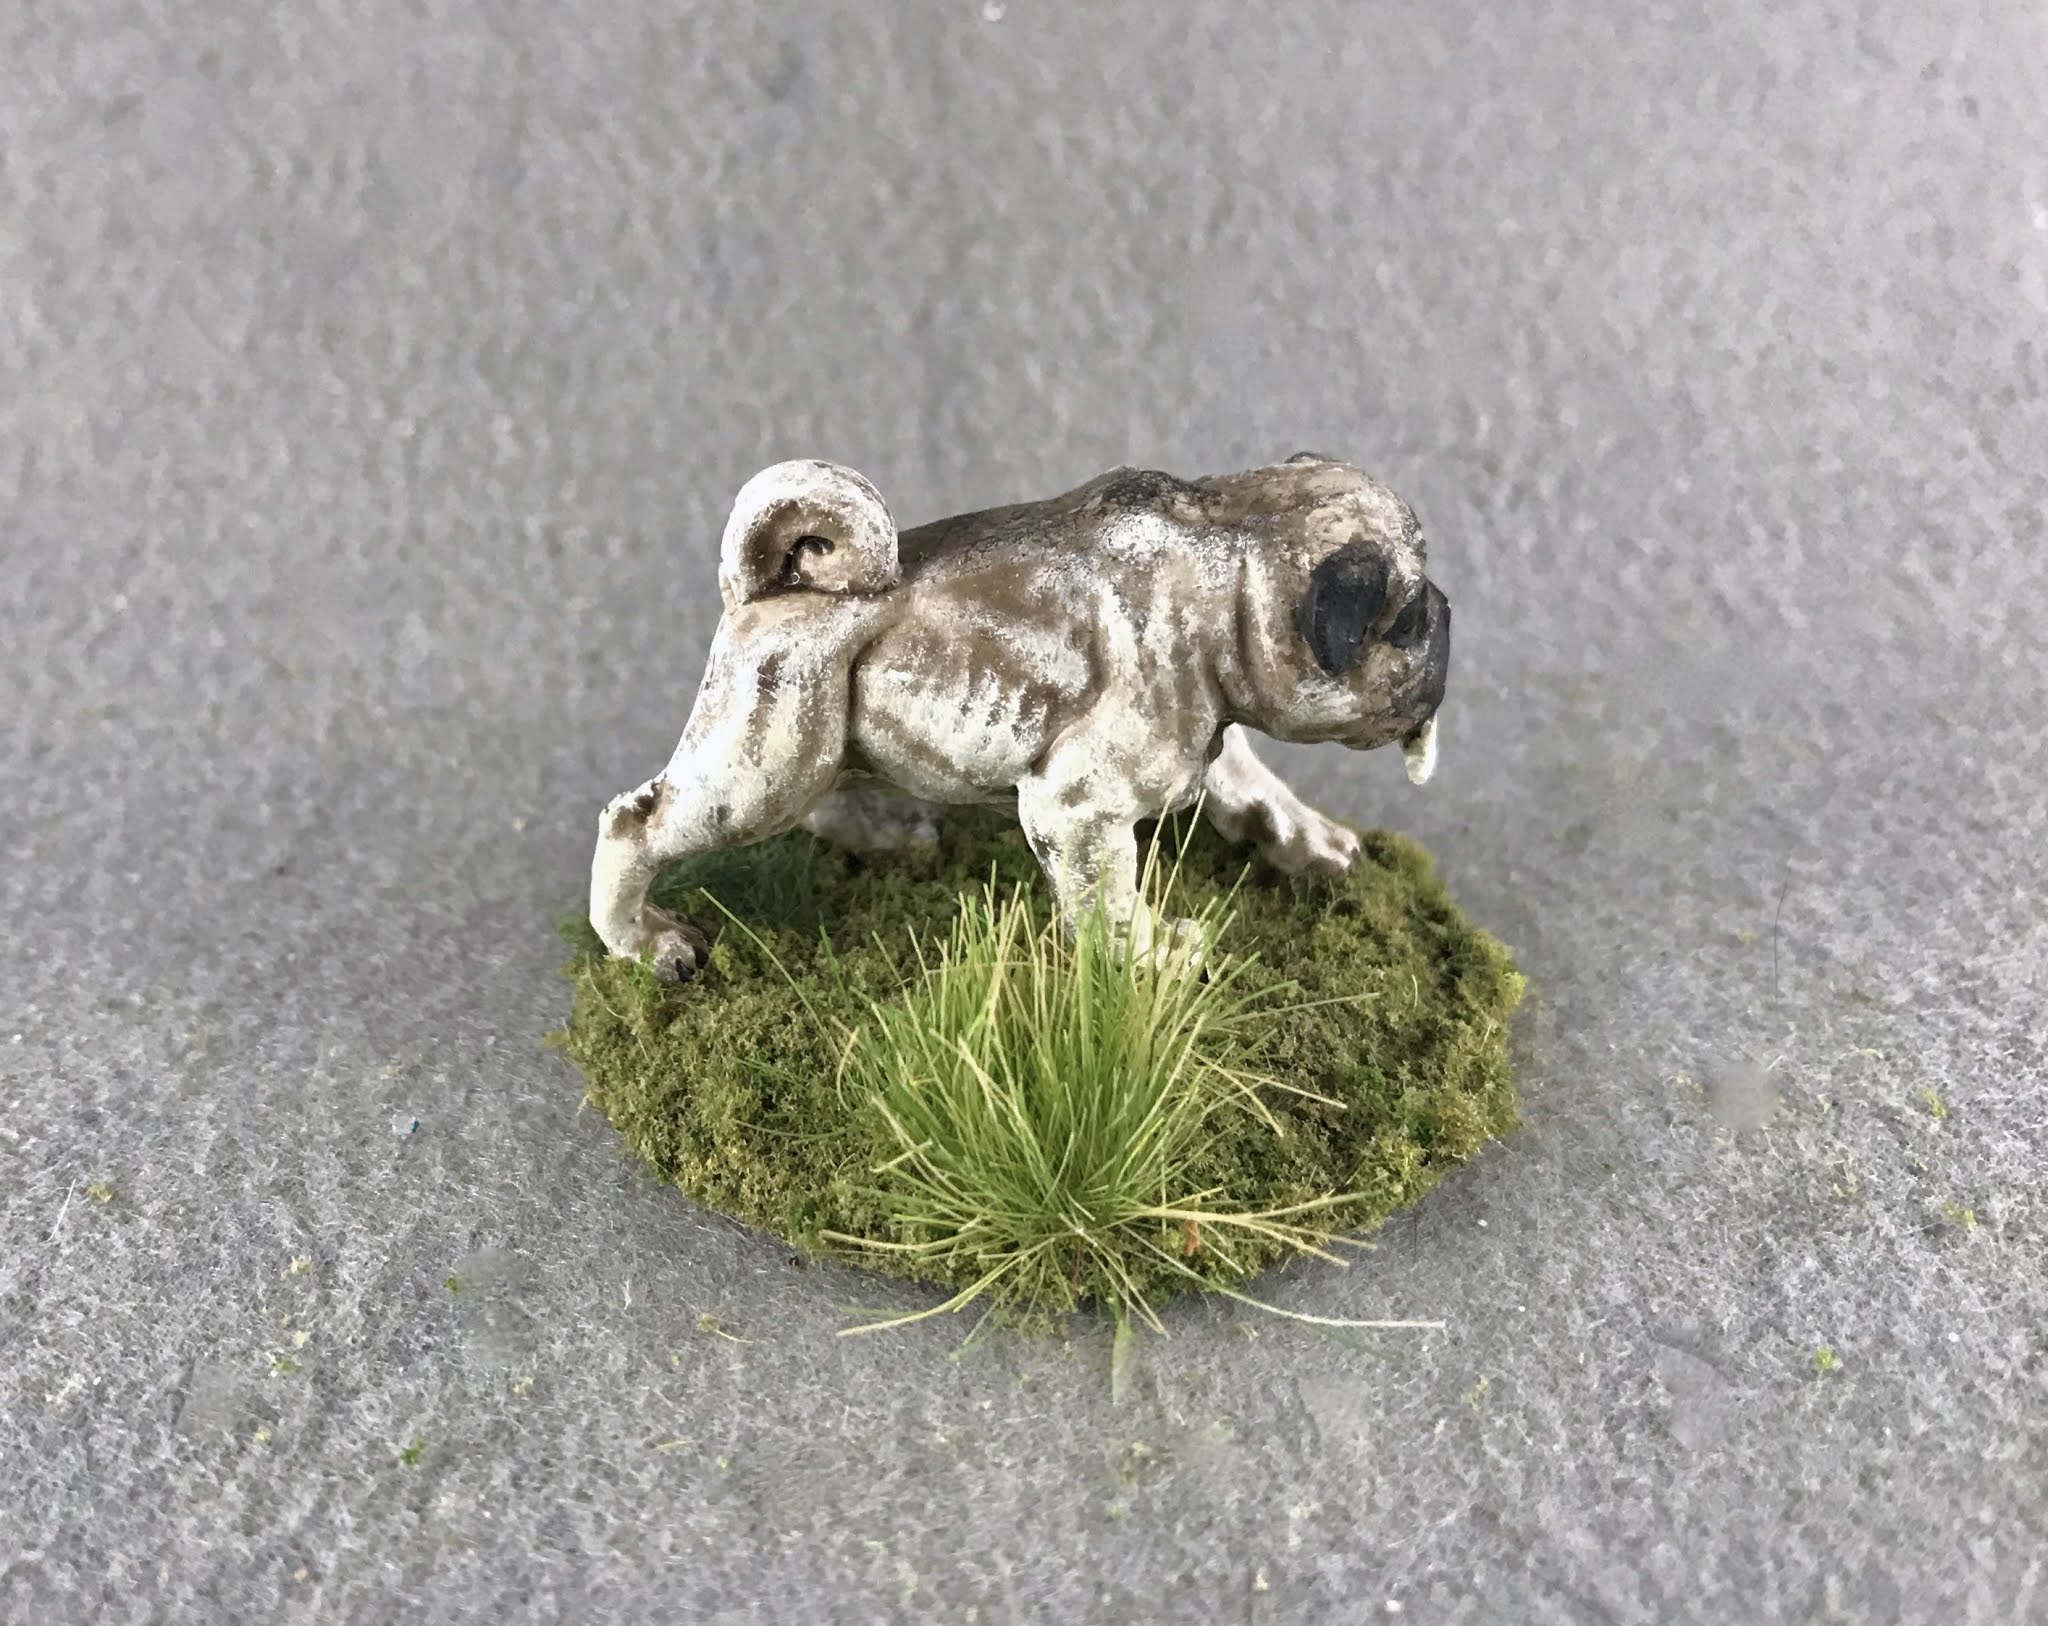
      Next, I painted his ears and muzzle with a mix of Ceramcoat "Black" and Americana "Charcoal Grey".  I then drybrushed this color around his whole face, and down the center of his back.  After that, I painted his eyes and nose with just the "Black", and his fangs with Americana "Antique White".  I let the fangs dry, and then painted a little Citadel "Nuln Oil" wash at the tops to give them a better delineation from the figure's upper lip.
     I then painted his claws with the "Black", and added highlight dots to his eyes with the "White".  After that, I highlighted the fangs with the base "Antique White", then some Americana "Bleached Sand", and lastly, a little of the "White". Lastly, I painted his base with Americana "Mississippi Mud".
      I let the figure dry overnight and the next day I gave it a coat of Americana "DuraClear Matte" varnish.    Then, when  the varnish was dry, I used some white glue to flock the base.  Another overnight dry, and I sprayed it with Testor's "Dullcote". When the "Dullcote" was dry, I went back and repainted the eyes with a little Americana "DuraClear Gloss" varnish.


     In general, I'm pleased with how this fellow turned out.  It's a fun little figure and was fun to paint.  

Thursday, July 18, 2019

Axebeak: Bones 4 Lost Valley Figure

  This past week I also painted the Axebeak from the Bones 4 Lost Valley Expansion set.  This was one of the last remaining monsters I needed to complete my Ghost Archipelago bestiary, so was happy to finally get it in my hands.
       I prepped the figure in the usual way, soaking it in a dish of water with a couple drops of dish-soap added, then giving it a light scrub with a soft toothbrush, and then rinsing and drying it.  I then glued the figure to a pair of black-primed 1" fender washers, set adjacent to one another, with Aleene's Tacky glue, and then placed the figure in my painting grip.
     I began by painting its body with Americana "Wedgewood Blue", its beak and eyes with Reaper MSP "Hearth Fire", and its crest and tail with Americana "Grey Sky".
     Next, I painted the legs and "hands" with Ceramcoat "Raw Sienna", and his tongue with Americana "Shading Flesh".  I then let the figure dry for a while, and afterwards gave the entire thing a coat of Citadel "Nuln Oil" wash.  When the wash was dry, I drybrushed the main body with a mix of the base"Wedgewood Blue" and some lighter Crafter's Acrylic Tropical Blue".
     I then drybrushed the beak with some Americana "Tangerine", and did further highlights with a mix of the Tangerine and some Apple Barrel "Lemon Chiffon". Next, I drybrushed the tail and the crest with Americana "Snow White", and the legs and "hands" with a mix of the base "Raw Sienna" and some lighter Ceramcoat "Maple Sugar Tan".    After that I used some of the "raw Sienna"/"Maple Sugar Tan" mix and painted highlights directly on the ribbing on the legs.  I followed up by painting the talons with just some of the "Maple Sugar Tan", and highlighting his tongue with the base "Shading Flesh".
     Next, I painted  toucan-like markings on his beak, and did his eyes, with Ceramcoat "Black".  I then went back and painted irises in the eyes with Americana "True Blue", and added in "Black" pupils and some "Snow White" highlight specks.  Lastly, I painted the entire base with "Americana "Mississippi Mud".
       I let the figure dry overnight and the next day I gave it a coat of Americana "DuraClear Matte" varnish.    Then, when  the varnish was dry, I used some white glue to flock the base.  Another overnight dry, and I sprayed it with Testor's "Dullcote".  When the "Dullcote" was dry, I went back and hit is eyes with a little Americana "DuraClear Gloss" varnish. 


I  added this phone picture to show the size.

     This is a nice simple figure, and was an easy one to paint up. I'm generally pleased with how it turned out.

Monday, May 6, 2019

Cave Sloth: Bones 4 Lost Valley Figure

     This past week, I continued to work on filling out some of the holes in my Ghost Archipelago Bestiary, and painted the Cave Sloth from the Bones 4 Lost Valley Expansion.
     I prepped the figure in the usual way, soaking the parts in a dish of water with a couple drops of dish-soap added, then giving them a light scrub with a soft toothbrush, and then rinsing and drying them. The figure comes with the body and right arm pre-glued, and the left arm and base requiring gluing.
     So I used some Gorilla Superglue Gel to assemble the parts, and I then glued the figure to a black-primed 1.5" fender washer with Aleene's Tacky glue after trimming the base so it would fit. I then placed the figure in my painting grip.
     I began by painting the entire figure with Americana "Charcoal Grey".  When dry, I gave the entire figure a wash with thinned Vallejo Game Ink "Black".
     I then drybrushed the figure using, in sequence: Ceramcoat "Territorial Beige", Americana "Khaki Tan", and Americana "Bleached Sand".  I used the "Bleached Sand" heavier on the face to try to give the figure a more realistic lighter colored Sloth face.
      Next, I mixed some Ceramcoat "Black" with Americana "Bittersweet Chocolate" and painted the area around his eyes, his nose and mouth area, and his claws.  After that, I painted the inside of his mouth with a mix of Apple Barrel "Apple Light Pink" and Folk Art "Milkshake".  I then did his teeth with Crafter's Acrylic "Light Antique White"
     I then applied a wash to the inside of his mouth using Citadel "Agrax Earthshade".  While it was drying, I painted his eyes "Black", and then added colored irises using Crafter's Acrylic "Cinnamon Brown".  I also painted the insides of his nostrils with the Black".  Next, I highlighted his claws using Crafter's Acrylic "Storm Cloud Grey".  I went back and added highlights to the exterior of his nostrils with Americana "Dove Grey", and also used this color to do a little further highlighting on his claws. I used some Americana "Snow White" to highlight his eyes.  The inside of his mouth was dry now, so I also used the "Snow White" to highlight his teeth.  Lastly, I painted the entire base with "Americana "Mississippi Mud".
       I let the figure dry overnight and the next day I gave it a coat of Americana "DuraClear Matte" varnish.    Then, when  the varnish was dry, I used some white glue to flock the base.  Another overnight dry, and I sprayed it with Testor's "Dullcote".  When the "Dullcote" was dry, I went back and hit is eyes with a little Americana "DuraClear Gloss" varnish.


     I'm really happy with this big fellow.  For a simple figure I think he came out with a nice bit of character.