Monday, November 27, 2017

Galadanoth, Elf Sniper: Bones 3 Figure

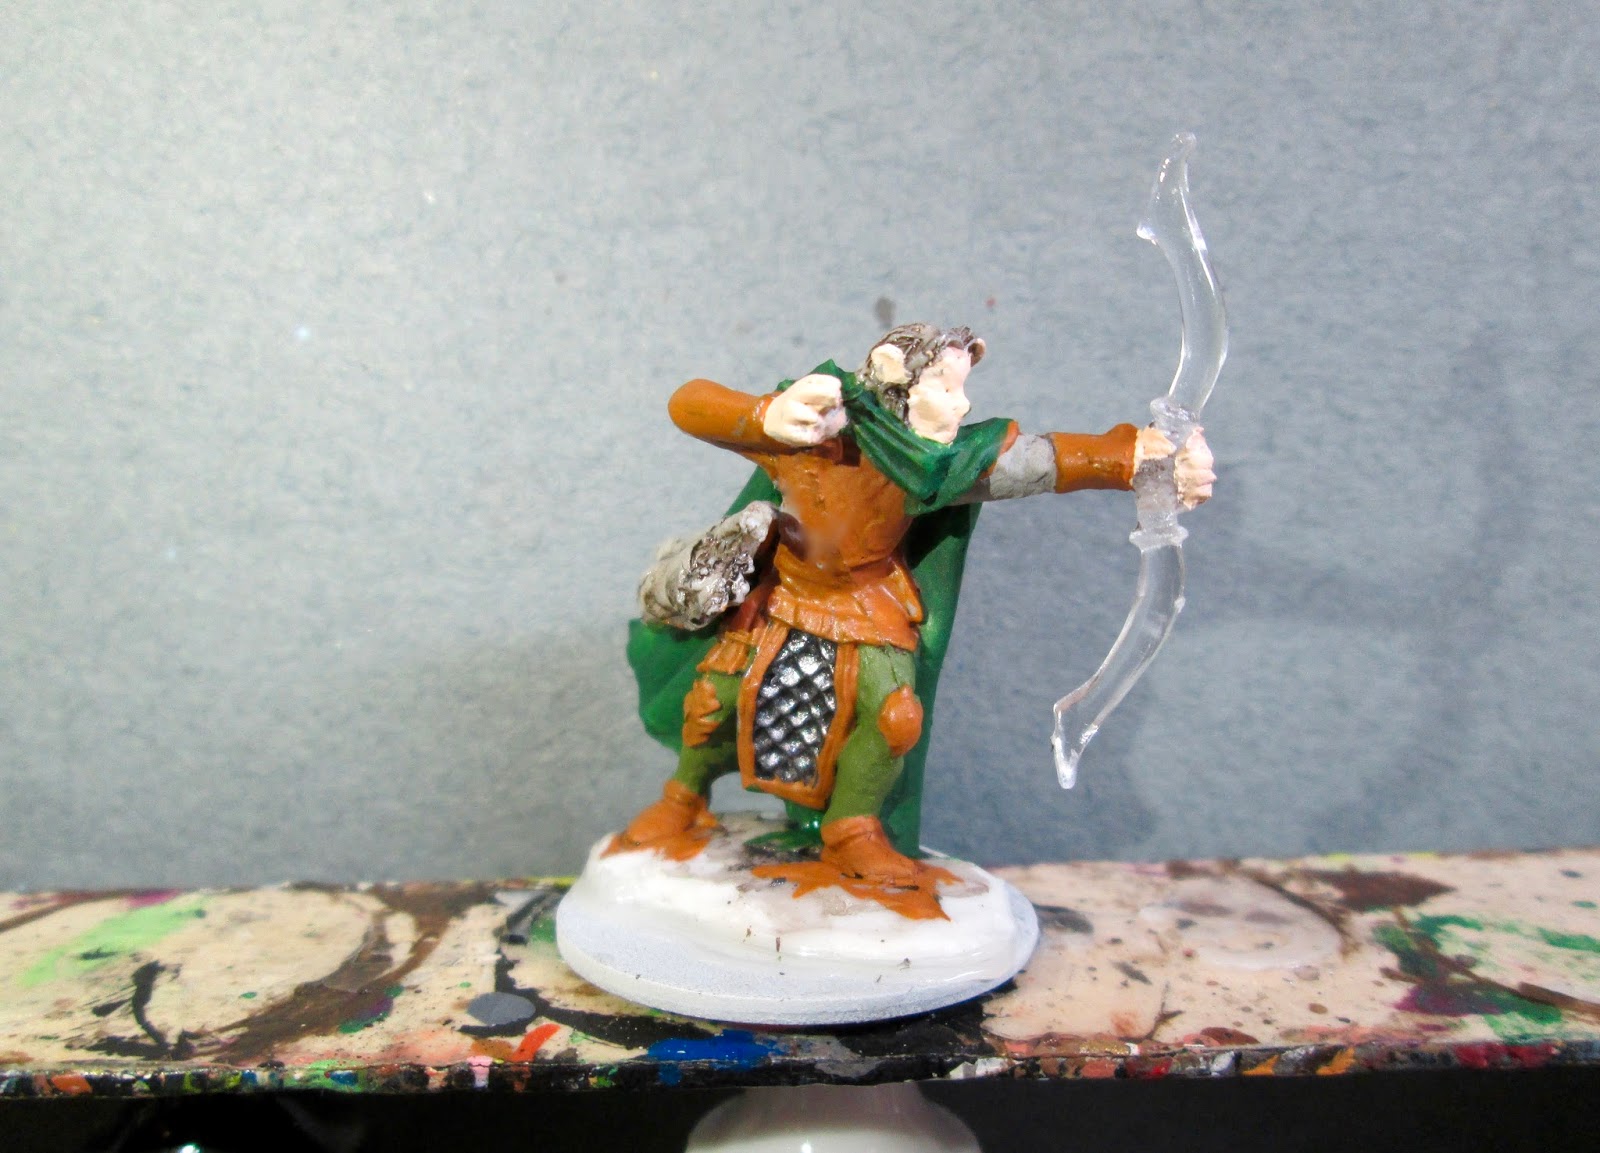
    This past week I painted the Galadanoth, Elf Sniper figure from the Bones 3 Core Set, to use as an Archer for my new Ghost Archipelago crew I'm currently assembling.
     A little while ago I had converted this figure to hold one of the clear weapons from the new clear weapons sprues that I also got in the Bones 3 Kickstarter.  You can see the conversion article here:  Weapon Conversions.  While I don't particularly need the figure to be wielding a magic bow at this point, I saw no reason to be switching the figure back to a standard bow.  Who knows, maybe I'll find a magic bow for him to use on one of our Ghost Archipelago expeditions.
      I couldn't remember if I already washed the figure before I did the conversion, but assumed I did.  So, I went ahead and glued the figure to a white-primed 1.5" fender washer with Aleene's Tacky glue, and then glued the washer-mounted figure to a tongue depressor with a couple drops of the Elmer's glue.
     I began by giving the entire model a wash with heavily thinned Reaper MSP "Brown Liner"; and when that was dry, painting his loin armor Black.  I then painted his face, ears, and hands with Crafter's Acrylic "Flesh".  When the Black was dry, I went back and drybrushed the armor scales with  Folk Art Metallics "Gunmetal Grey".  I then passed over them with a lighter drybrush of Ceramcoat "Metallic Silver"
     Next, I painted his leggings with Americana "Avocado", and then painted his chest and shoulder armor, wrist guards, knee guards, shoes, and the border around his loin armor, all with Citadel 'Snakebite Leather".  After that, I painted his shirt with Crafter's Acrylic "Storm Cloud Grey", and then did his cape with Reaper MSP, "Christmas Wreath". 
 I then painted the body of his quiver with Ceramcoat "Territorial Beige", and did the top and bottom edges with Anita's "Burnt Sienna".  I also used the "Burnt Sienna" to paint his dagger sheath, and his belt.  Next, I painted the  pole above the quiver with Folk Art "Teddy Bear Brown", and then metal point at the end with Accent "Mustard Seed".  after that, I painted the fletchings with Folk Art "Barnyard Red", and then went back and painted the metal point n the pole above the quiver with Ceramcoat "Bronze".
      I painted his hair with Americana "Bittersweet Chocolate", and then let the figure dry for a while.  When it was good and dry, I gave the entire a figure, except the loin armor, a wash with Agrax Earthshade" wash.   When the wash was dry, I painted his eyes, and then highlighted his skin with a mix of the base "Flash" and White.  I also highlighted the hair with Crafter's Edition "Spice Brown", and Americana "Sable Brown".
    Next, I highlighted his leggings with a mix of the original "Avocado" and some lighter Americana "Jade Green". I highlighted his shirt after that with some Americana "Dove Grey", and then did his chest and shoulder armor, wrist guards, knee guards, shoes, and the border around his loin armor with the "Mustard Seed".  I then did highlights on his cape with Folk Art "Hauser Green Medium".  After that, I highlighted the body of the quiver with Americana "Khaki Tan", the top and bottom of the quiver with Crafter's Acrylic "Orange Spice", and the fletchings with Reaper MSP "Holly Berry". I finished up the highlighting by painting the tip of the pole above the quiver with a little Ceramcoat 14K Gold".
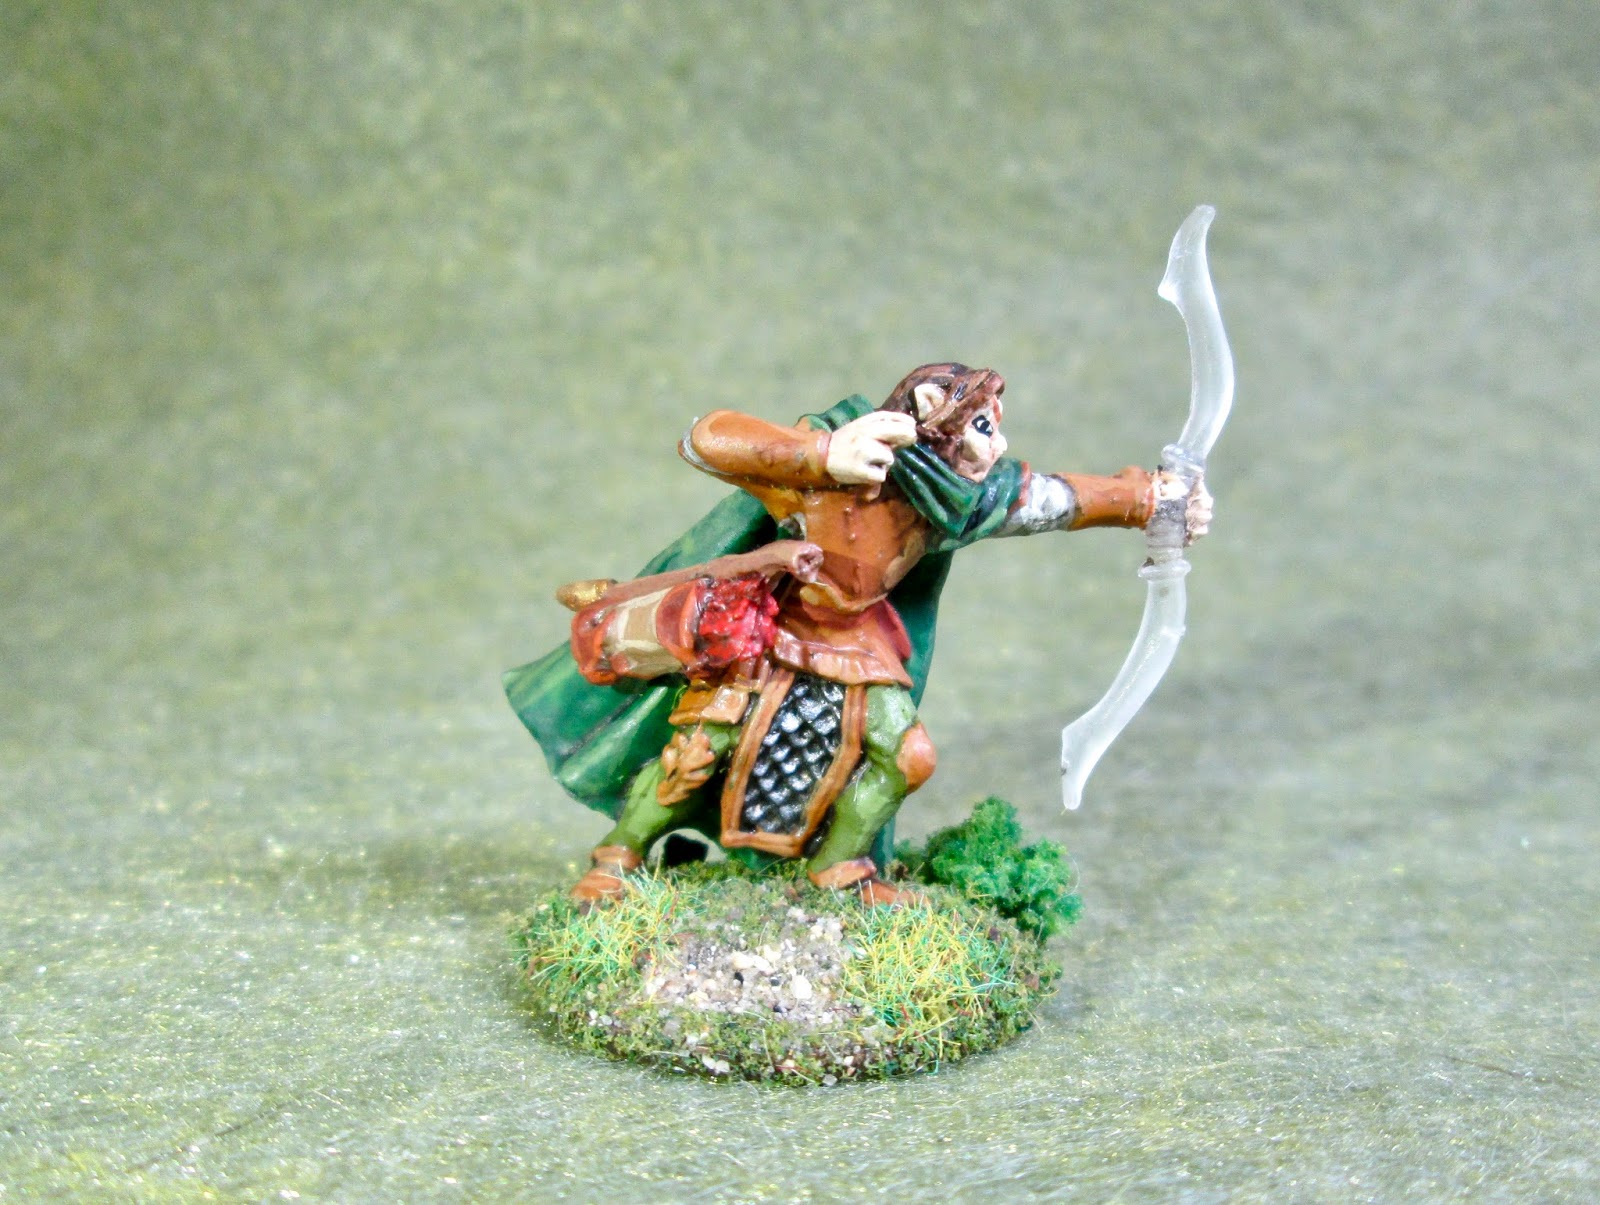
    I then painted the figures base and the washer with Ceramcoat "Walnut". I let the figure dry overnight and the next day I gave it a coat of Americana "DuraClear Matte" varnish.    Then, when  the varnish was dry, I used some white glue to flock the base.  Another overnight dry, and I sprayed it with Testor's Dullcote".

     I'm happy with how the figure turned out.  It's not the greatest casting, with some smooshiness in his face and a big mold line running directly across his chest and thigh, but for a gaming figure it's not too bad.  The bow fogged a little when I sprayed it, and I could clear it up with a coat of gloss varnish, but I think I like how it looks better this way.

Monday, November 20, 2017

Aaron the Conjuror: Bones 2 Figure

  This past week I painted up Aaron the Conjuror from the Bones 2 Core Set.   I have so many Bones characters now, (wizard especially because of Frostgrave), I thought I'd paint up some to sell on eBay.  So if you are interested, I'll put a link to the listing for this figure down at the bottom.
    I prepped the figure in the usual way; soaking it in a dish of water with a couple drops of dish-soap added, then giving it a light scrub with a soft toothbrush, and then rinsing and drying it.    I then glued the figure to a 1" Reaper plastic base with superglue, and then glued the base-mounted figure to a tongue depressor with a couple drops of the Elmer's glue.
      I began by giving the entire figure a wash with heavily thinned Reaper MSP "Grey Liner". When that was dry, I painted his robes with Crafter's Acrylic "African Violet", and the apron like piece with Americana "True Blue".  I then painted the tabard with Crafter's Acrylic "Cool Blue".
     I let everything fry for a while, and then I gave the purple and blues a wash with Iron Winds Metals "Dark Blue" ink.   When the ink was dry, I painted his face and hands with Reaper MSP "Tanned Shadow".  I then painted his belt, shoes, and dagger grip with Americana 'Raw Umber", and the string-like secondary belt with Ceramcoat "Territorial Beige".  After that I painted his book and scabbard with Apple Barrel "Burnt Sienna", and then his book-strap and pouch with Crafter's Edition "Spice Brown".
     I next painted his hair with Accent "Real Umber".  After that I painted his bracelets, belt buckles, and the metal fittings on his dagger with Accent "Mustard Seed", and when the "Mustard Seed" was dry, I painted over it with Ceramcoat "Bronze".  I let everything dry for a while, and then gave all the newly painted warm-toned parts a wash with Citadel "Agrax Earthshade" wash.  I then moved to the flame and painted it with Apple Barrel "Lemon Chiffon".
     I then painted his eyes, and added teeth with Crafter's Acrylic "Light Antique White. I also highlighted his skin with Reaper MSP "Tanned Skin", and Reaper MSP "Tanned Highlight". After that, I returned to the flame and gave it a wash with Iron Wind Metals "Yellow" ink.
      When it was dry, I drybrushed the flame with the "Lemon Chiffon", but felt the "Yellow" ink hadn't added enough contrast. So, I went over the areas where the faces are sculpted in the fire, this time with Iron Wind Metals "Orange" ink. That looked better, so when it was dry, I painted the eyes and the teeth in the faces with White.  I then painted the rest of the flame, working outward with Reaper MSP "Hearth Fire", Reaper MSP "Holly Berry", and Reaper MSPBones "Cinnamon Red"  Next, I returned to the figure, and highlighted his hair with Americana "Sable Brown".  I then drybrushed the top a little with the "Lemon Chiffon" to try a bit of OSL (object source lighting) caused by the flame on the top of his head.
     Next, I worked on highlighting his clothing.  I started with Anita's "Violet" for his robes, and used Reaper MSP Bones "Tropical Blue" for his apron like piece.  I then did his tabard with Reaper MSP "Frosty Blue", and followed with Reaper MSP "Sparkling Snow" on just the border.   I then worked on his accoutrement; highlighting his main belt, shoes and dagger grip with Americana "Mississippi Mud", and the string like belt with Folk Art "Butter Pecan".  The pouch I highlighted with Folk Art Teddy Bear Brown", and the book cover and scabbard I highlighted with Crafter's Acrylic "Orange Spice".  I wrapped up the highlighting by highlighting all the "Bronze" with Ceramcoat "14K Gold". And finished the painting by painting his integral base with Black.
        After the figure had overnight to dry, I used some white glue to glue a little sand to the base.  When this was dry, I painted the sand with the Black and, when dry,  drybrushed the base with some Americana "Zinc", followed by Crafter's Acrylic "Light Storm Cloud Grey", and lastly some Americana "Dove Grey".
      I let the figure dry overnight and the next day I gave him a coat of Americana "DuraClear Matte" varnish.  Another overnight dry, and I sprayed him with Testor's Dullcote".


     I'm really pleased with how he turned out.  I particularly like how the flame faces came out.   You can find his eBay listing here: Aaron the Conjuror

Monday, November 13, 2017

Giant Cobra: Bones 3 Figure

   This past week, I continued to work on the Bestiary for Ghost Archipelago, and painted the Giant Cobra from the Bones 3 original Core Set, to play the part of the Giant Snake.
      I prepped the figure in the usual way; soaking it in a dish of water with a couple drops of dish-soap added, then giving it a light scrub with a soft toothbrush, and then rinsing and drying it.    I then glued the figure to a black-primed 1.5" fender washer with Aleene's Tacky glue, and then glued the washer-mounted figure to a tongue depressor with a couple drops of the Elmer's glue.
     I began by painting the rocks on the base with Americana "Neutral Grey".  I then painted the ceramic jug on the base with Apple Barrel "Burnt Sienna", and the urn with Accent "Golden Oxide".  When these were dry, I gave the sculpted base details all a wash with Citadel "Nuln Oil" wash.  When the wash was dry, I painted the back scales of the snake with Americana "Terra Cotta".
     Next, I painted the belly scales with Americana "Jade Green".  After that, I painted a diamond pattern running down the back of the snake using Americana "Forest Green".  I then painted a pair of false eyes on the back and the underside of the snake's wide head section.  For this I used Crafter's Acrylic "Daffodil Yellow", and plain Black.

     I then painted the urn on he base with some Ceramcoat "Bronze".   After everything had a while to dry, I gave the snake itself, and the urn, a wash with Citadel "Agrax Earthshade" wash.   When this wash was dry, I highlighted the stones on the base with Folk Art "Porcelain White", the jug with a mix of the base "Burnt Sienna" and some Americana "Shading Flesh", and the urn with some Ceramcoat "Gold".
     Next, I highlighted the back scales of the snake with Reaper MSP "Hearth Fire", and the belly scales with Americana "Reindeer Moss Green".  I then highlighted the diamond pattern scales running down the back with Crafter's Acrylic "Holiday Green"; and after that, I highlighted the false eyes with Apple Barrel "Lemon Chiffon" for the "whites", and Citadel "The Fang " for the "pupils".  I then painted the real eyes Black and gave them small White highlight dots.
     I let the figure dry overnight and the next day I gave it a coat of Americana "DuraClear Matte" varnish.    Then, when  the varnish was dry, I used some white glue to flock the base.


     I'm pleased with how this guy turned out.  It was a simple paint job, but I think it turned out pretty well.

Tuesday, November 7, 2017

Lizardman with Club & Shield: Bones 3 Figure

   Sorry for being a day late, folks; but I was recovering from the Fall-In convention yesterday and getting my photos and blog reports from there sorted, and totally forgot about getting this posted. 

  This past week I started working on one of the Lizardmen with Club & Shield figures from the Bones 3 24 Bones Figure set as a test subject to establish a paint scheme for all 32 that I got from the Kickstarter. (Plus a few of the metal versions I've picked up along the way.)  So I  was looking for something that I could mass produce quickly and easily, and get done before I had to leave for Fall-In.
     I prepped the figure in the usual way; soaking it in a dish of water with a couple drops of dish-soap added, then giving it a light scrub with a soft toothbrush, and then rinsing and drying it.   When it was thoroughly dry I gave it a base coat color with Rustoleum Camouflage "Deep Forest Green"
      Then, when the base coat was dry, I glued the figure to a black-primed 1" fender washer with Aleene's Tacky glue, and then glued the washer-mounted figure to a tongue depressor with a couple drops of the Elmer's glue.
     I  began by drybrushing the whole figure, first with Americana "Avocado", and then with the lighter, Americana "Jade Green".  I then painted his shield and club with Americana "Raw Umber".
      Next, I painted his belts, scabbard, and javelin holder with Citadel "Snakebite Leather", and then painted his loincloth, sword grip, and the straps on his shield with Reaper MSP "Turkey Brown". After that I painted the javelins with Americana "Sable Brown", and the skull on his belt, and the bone handle on his sword with Americana "Antique White".
     I decided to also go ahead and paint his teeth with the Antique "White", as well as the little bone bracelet on his right arm.  I then painted his claws with Americana "Charcoal Grey", and then did the little bit of  armor on his loincloth with Ceramcoat "Bronze.  Next, I painted the tips of the javelin sticks with Reaper MSP "Ginger Cookie".
     I let the figure dry for a while, and then gave all the areas I had just painted in non-green colors a wash with Citadel "Agrax Earthshade" wash.  When the wash was dry, I drybrushed the turtle shell with Americana "Mississippi Mud", and drybrushed the club with Nicole's "Brown".
     Next, I painted some details on the turtle shell shield with Crafter's Acrylic "Bright Yellow", and then painted the obsidian shards in the club with Black.  I then went back and highlighted these shards with Citadel "The Fang".   I then highlighted the belts, scabbard, and quiver with Ceramcoat "Raw Sienna, and the skull, bone sword handle, and bone bracelet with Americana "Bleached Sand".  Next up were the teeth which I highlighted with Crafter's Acrylic "Light Antique White".  After that I painted the eyes with Accent "Golden Harvest",  and added Black slitted pupils.   I did highlights on the javelin's next, doing the shafts with Reaper MSP "Tanned Shadow", and the pointy parts of the sticks with Reaper MSP Ginger Cookie".  The loin cloth, sword grip and shield straps were the next parts I highlighted,  using Crafters Edition "Spice Brown".   Lastly, I went back and added some highlights to the bit of armor on the loincloth using the original "Bronze".
    I let the figure dry overnight and the next morning I gave it a coat of Americana "DuraClear Matte" varnish. When that was dry, I flocked the base. Another overnight dry, and I sprayed it with Testor's Dullcote".

     I'm generally happy with how this one turned out.  It's got some rough edges, but for a figure that is going to be used in a mass of similarly painted brothers, I think it will look okay.