Showing posts with label Winter. Show all posts

Monday, October 1, 2018

Gremlins: Bones 3 figures

   This past weekend was our club's 2-day regional gaming con, BARRAGE; so knowing I'd be involved in a lot of work for that, I picked something really easy, and selected half the Gremlins set from the Bones 3 Stoneskull Expansion.  
    To me, these guys looked very similar to the Pathfinder Goblins, that I had painted back in 2014 to be Snow Goblins.  So I thought I'd paint these the same way, to be Snow Goblin kids; and mount 2 to a base, then mix them in with the regular Snow Goblin force.
      I prepped the figures in the usual way; soaking them in a dish of water with a couple drops of dish-soap added, then giving them a light scrub with a soft toothbrush, and then rinsing and drying them.   I then glued the pair of figures to a white-primed 1" fender washer with Aleene's Tacky glue, and then placed them in my painting grip.
  I began by giving the figure a wash with Reaper MSP "Blue Liner"; and when that was dry, I painted both of the figures with  Reaper MSP "Frosty Blue".  When that was dry, I gave the figures a wash with Iron Wind Metals "Medium Blue" Ink.
     When the ink was dry, I painted the under tunic on the one on the left below with Crafter's Acrylic "Ornage Spice, his over shirt with Duncan "Olive Green", and his collar with Folk Art "Porcelain White".  The one on the right I painted with Reaper MSP "Olive Skin" for the under tunic, Americana "Light Cinnamon" for the backpack, and Apple Barrel "Apple Maple Syrup" for the collar.
     I then painted the teeth and the string on the left ones back with Americana "Light Antique White", the knife handles with Americana "Mississippi Mud", and the blades with Americana "Zinc".  Around the back, I painted the pouch on  the lefthand one with the Light Cinnamon".   Then, when everything was dry, I gave the clothes and wepaons a wash with Citadel "Agrax Earthshade"wash.   I was as careful as I could be not to let it run onto the blue skin, except I applied small amounts to the eye sockets and mouth.
    After the wash had had time to dry, I went back and added highlights.  I began by highlighting the skin with the original "Frosty Blue".  This allowed me to cover any mistakes where wash, or the drybrushed white had gotten onto the blue. Next, I added eyes with the "Antique White", and then added black pupils. I also used  Crafter's Acrylic "Light Antique White to highlight the teeth and the rope on the back.  Next, I painted the eyepatch with Ceramcoat "Black". 
     Up next, I highlighted the collar on the left one with the base "Maple Sugar Tan", and the backpack, as well as the pouch on the righthand one, with  Americana "Sable Brown".   I then highlighted the collar on the right one with Folk Art "Barn Wood", the shirt with Americana "Jade Green" and the under-tunic with Crafter's Acrylic "Pure Pumpkin".   I highlighted the knife handles with the base "Mississippi Mud", and then painted the blades with with Folk Art Metallics "Gunmetal Grey", and then highlighted them with Ceramcoat "Metallic Silver"
    Lastly, I painted the base with Ceramcoat "Snow White".
     I let them sit overnight, and the next morning I gave them a coat of Americana "DuraClear Matte" varnish.   Later that afternoon I flocked their bases, using Woodland Scenics snow flocking.  Another overnight dry, and I sprayed them with Testor's Dullcote".


Ma and Pa take the kids out for a little raiding trip!
     I'm happy with these little guys, and, as hoped, they proved to be an easy job to get painted up.

Monday, November 14, 2016

Boerogg Blackrime, Frost Giant Jarl: Figure 262 of 266 or, Just 4 Figures Remaining

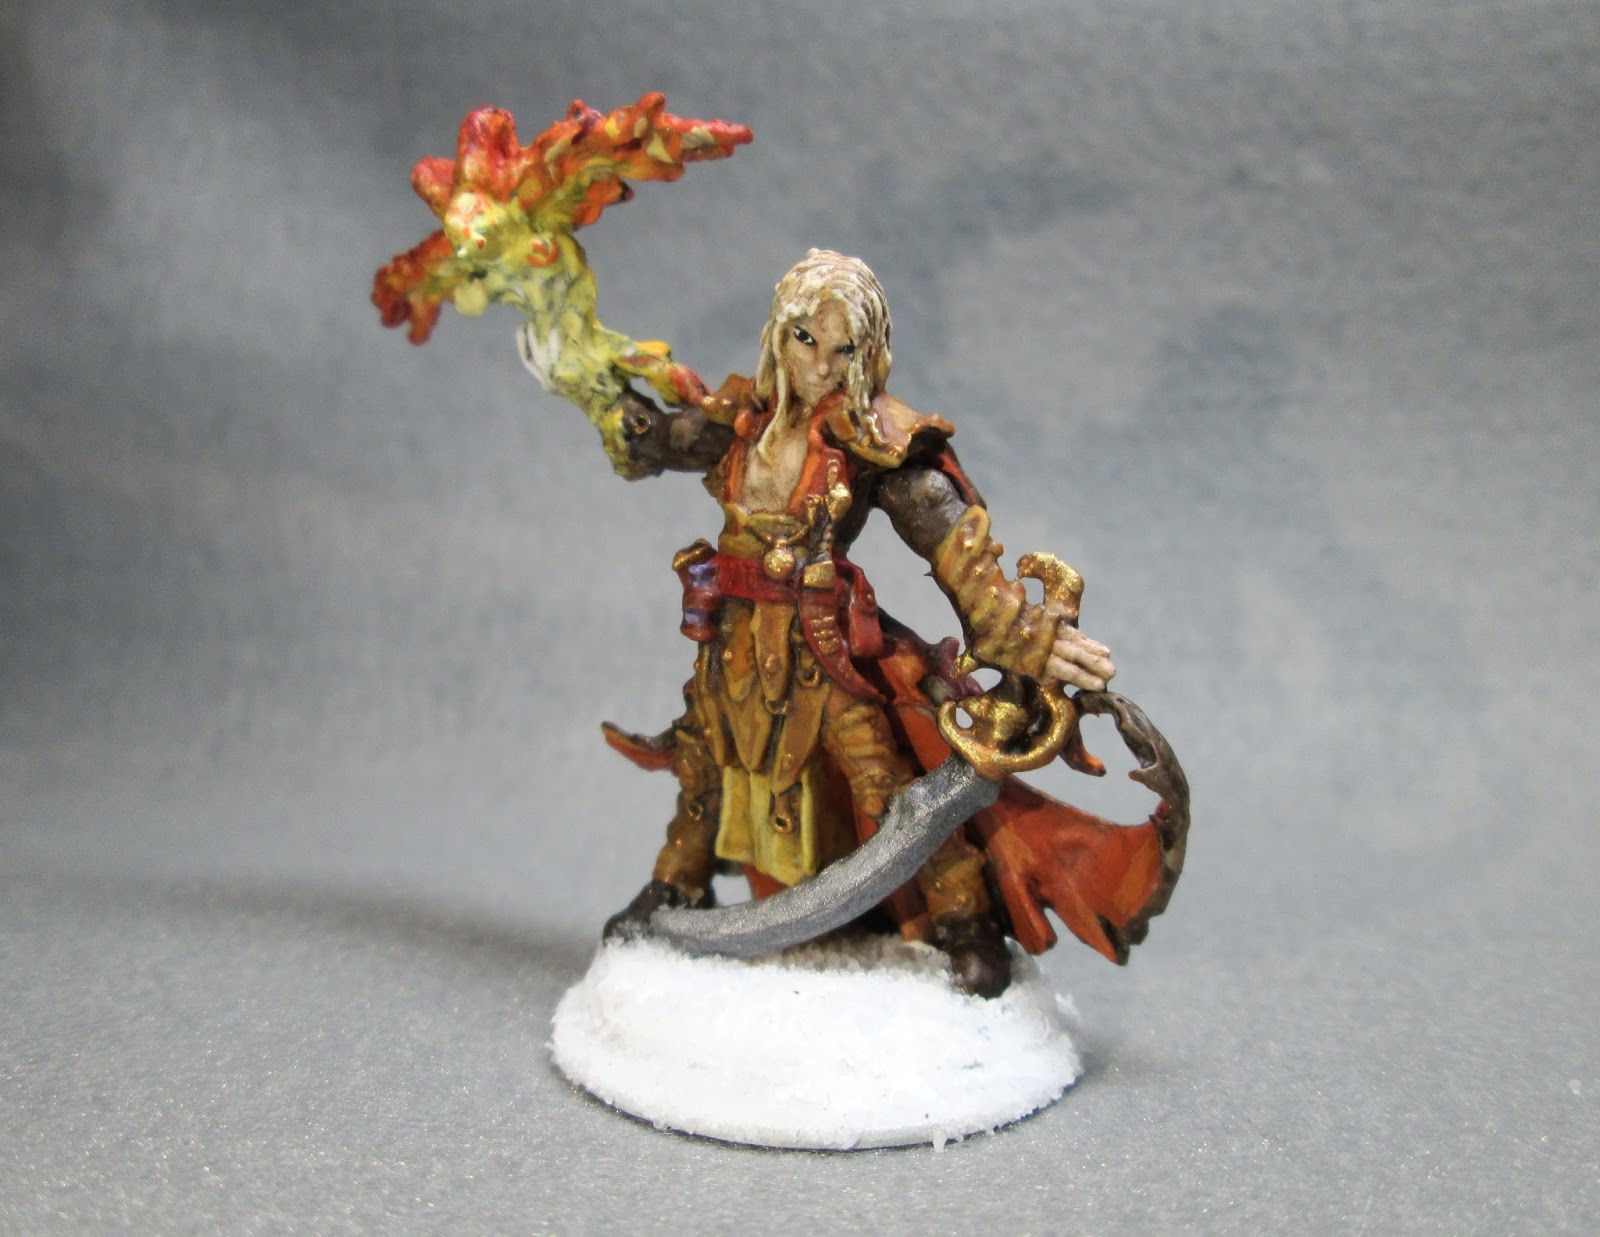
    Over the weekend I finished up Boerogg Blackrime, Frost Giant Jarl from the Ice Giant King and Queen add-on set.  I already completed the Ice Giant Queen almost two years ago. Interestingly enough, I painted her up at the half-way point in this project. She's been waiting a long time for her king! :)
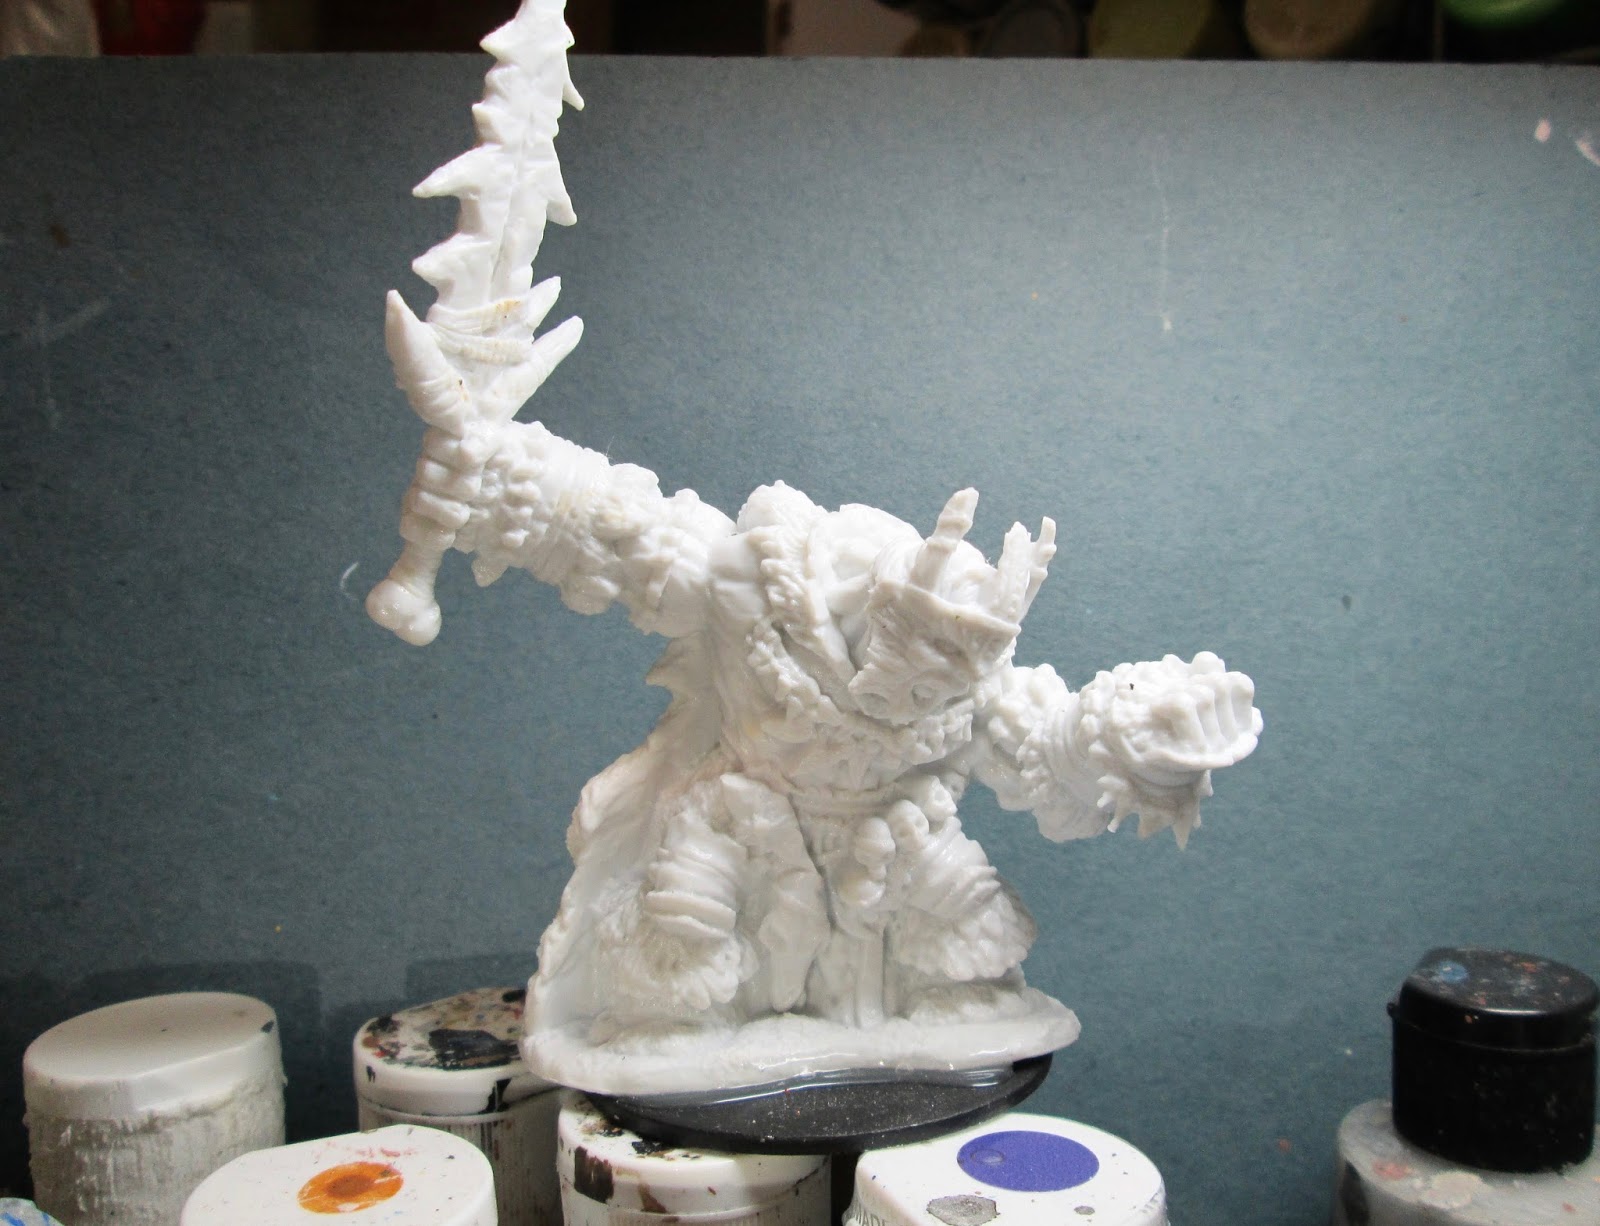
      I prepped this figure in the usual way; soaking all the parts (body, head, and hand) in water with a bit of dish soap added, giving a gentle scrub with an old soft toothbrush, then rinsing and drying.  I then used Gorilla Super Glue gel to glue the hand holding the weapon to the arm socket and the head on the body; and when dry, glued the figure to 2" black primed fender washer with Aleene's Tacky glue. The washer was large enough that I didn't feel it was necessary to take my usual step of gluing the washer to a tongue depressor for ease of handling.
     I began by giving the entire figure a wash with heavily thinned Reaper "Brown Liner" using a wet brush.  This was to help bring out the details so I could see them better.  (And, boy, are there a lot of details!) Then, when the Liner was dry, I painted his face, chest, arms, and hands with GW "Vermin Brown".  Next I painted his pants with Citadel "The Fang", and then painted his fur cape and the fur trim on his wrist guards, and the fur on his legging tops, with Americana "Dove Grey".
     Next, I painted the lining of the cape with Americana "Mississippi Mud", and then painted the leg armor, and wrist guards with Ceramcoat "Raw Sienna".  After that, I painted the boots with Americana "Bittersweet Chocolate".
      I then painted the loincloth (?) between his legs and the wrappings on the handle of his sword with Americana "Neutral Grey". After that I painted the blade of the sword and his necklace with Folk Art "Barn Wood"; and I painted all the skulls, his crown, and the handle of his sword with Americana "Buttermilk". Then I painted the rock (?) hanging from his belt, and some of the sharks teeth hanging from his necklace with Americana "Zinc".
     Next, I used Ceramcoat "Territorial Beige" to paint the ties around the rock(?) on his belt, and the arm bands on his upper arms.  I also used it to paint some of the ties holding the dangling things from his necklace and wrists. I then used Nicole's "Brown" to paint the wraps on the sword, and the bindings on all the skulls at his waist; and like before, I also used it to paint some of the ties holding the dangling things from his necklace and wrists.  After that I used Accent "Real Umber" to paint his belt, and the binding on his wrist guards. Then I painted the tooth (?) on his belt, and some of his dangles with Folk Art "Grey Green", and did more of the dangles with Apple Barrel "Rock Grey".   I worked a little on his face next, painting the inside of his mouth with  Americana "Shading Flesh, and his teeth with Americana 'Bleached Sand".
     At this point I used Crafter's Acrylic "Storm Cloud Grey" to paint any remaining dangles, or little adornment teeth that hadn't been painted yet.  I then painted some decorations on his wrist guards, leg armor, and crown using Ceramcoat "Denim Blue" and Folk Art "Barnyard Red".  I also did a little deisgn on the center crown upright using Black and White.  I painted the bindings on the other two crown uprights with Folk Art "Dark Brown".   Next, I painted the dangles along the tops of his boots with Folk Art "Cloudy Day", and then painted his fingernails with a mix of Americana "Terra Cotta", and the "Bittersweet Chocolate".  After that, I painted the rim on his crown with Ceramcoat "Bronze", and the studs on his belt with Folk Art Metallics "Gunmetal Grey".
     Then, when everything had a while to dry, I gave the entire figure a wash with Citadel "Agrax Earthshade" wash using a wet brush.  When the wash was dry, I painted his eyes, and then highlighted his tongue with the base "Shading Flesh", and his teeth with White.  Next, I painted his hair Black, and then highlighted it with "The Fang".  I then highlighted all his skin with the "Terra Cotta".
     Next, I drybrushed the fur on his cape, and the fur bordering his wrist guards, and tops of his leg armor with Crafter's Acrylic "Light Antique White".  I then drybrushed the fur on his boots with Crafters' Edition "Spice Brown". After that, I highlighted the leather armor on his legs and wrists with a mix of the "Raw Sienna" and Ceramcoat "Maple Sugar Tan". I then drybrushed the blade of his sword with Folk Art Platinum Grey", and followed up by  highlighted the lining of his cape, and the binding on his sword blade with Americana Sable Brown".   I next highlighted all the little cords and ties with Americana "Khaki Tan", and then did highlights on all the skulls, and the bones at his waist, his crown, and in his necklace with Americana "Bleached Sand".  While I had the "Bleached Sand" out I used it to do some lettering on the red ribbon hanging at his waist.   I then highlighted the rock tied at his waist, and some of the dangles hanging from his necklace and wrist with the "Rock Grey", and also highlighted the dangles on his boots with Crafter's Acrylic "Cool Blue".  I decided to also use this color to do a little highlighting around the top edge of his pants.  Lastly, I painted his base, and the washer with White.
       I let the figure sit overnight, and the next morning I gave it a coat of Ceramcoat "Matte Varnish".  Later that afternoon I flocked the base, using Woodland Scenics snow flocking, and added some dry grasses with a bit of unraveled twine, and a couple pieces of blue sea-glass.  The next day I gave him a coat of Testor's "Dullcote" spray varnish.


A shot of the Ice Giant King and Queen together.
        I'm happy to have this big fellow done, as he has to have been one of the most detailed and complicated figures that I did from the Bones 1 Kickstarter; certainly the most complicated one I had left to do.  It's all down hill from here. :)  Nonetheless, I'm quite happy with how he turned out, and think the two figures make a pretty good pair.

Figure 262 of 266: Complete

4 figures remaining.

Thursday, September 15, 2016

Ezren, Iconic Wizard: Figure 245 of 266

   This week I painted up Ezren, Icon Wizard, from the Iconics II Pathfinder Miniatures set.   Like Monday's figure, which I decided to turn into a Fire-themed Elementalist, this one I felt would serve as a good Elementalist too, but an Air-themed one.  He just had a very wind blown look about him, and I thought I could accent that by painting some wind designs on his clothing.
 I prepped the figure in the usual way; soaking it in a dish of water with a couple drops of dish- soap added, then giving it a light scrub with a soft toothbrush, and then rinsing and drying it.  I then glued the figure to a white-primed 1" fender washer with Aleene's Tacky glue, and then glued the washer-mounted figure to a tongue depressor with a couple drops of the Elmer's glue.
I began by giving the entire figure a wash with Reaper MSP "Blue Liner" using a wet brush.  When the Liner was dry, I painted his face and hands with Folk Art "Dark Brown".  I then painted his long sleeve under shirt with Crafter's Acrylic "Cool Blue", and then the short sleeve under shirt with Crafter's Acrylic "Navy Blue". Next, I painted the top tunic with Folk Art Cloudy Day".
     I then painted his boots, wrist guards, and crossbow bolt pouch with Americana "Zinc".  Next, I painted his leather armor pieces with Americana "Wedgewood Blue", and then the border of his tunic with Americana "True Blue". I followed that by painting his hair with Americana "Dove Grey".
     Next, I painted his staff with Folk Art "Barn Wood"; and then did the tubular case on his left, and the small pouch on his right with Crafter's Acrylic "Storm Cloud Grey".  I also painted the cross bow with Americana "Asphaltum", and the bolts and the crossbow string with Americana "Khaki Tan".   I painted some of the dangles from his belt with Folk Art "Metallic Blue Sapphire", and the then went back and repainted the sleeves of the long sleeve under shirt with Folk Art Pearl "Aqua Moire". I also overpainted the border of the tunic with Folk Art Extreme Glitter "Hologram".
     After everything had a while to dry, I gave the entire figure a wash with Citadel "Nuln Oil" wash using a wet brush".  When the wash was dry, I painted his eyes, and then highlighted his skin with a mix of the "Dark Brown", and Crafter's Acrylic "Flesh".
   I then highlighted the hair with White and then moved to highlighting his long sleeved shirt with the base "Aqua Moire", and the short sleeve shirt with the "True Blue".  Next, I highlighted his tunic with some of the base "Cloudy Day" mixed with some White.  After that, I used the White to paint various spiral wind symbols on his tunic.   I then highlighted his staff by drybrushing it with the base "Barn Wood".
Next, I painted all the belts and unpainted pouches with Black, and when dry, I highlighted them with Ctadel "The Fang".   After that, I highlighted his leather armor with some of the base W'edgewood Blue" mixed with a bit of the "Cool Blue", and then highlighted his boots, bolt pouch, and wrist guards with some of the "Storm Cloud Grey".  I highlighted the tube thing, and the the large pouch with some of the "Dove Grey", and the crossbow bolts with the base "Khaki Tan".  Next, I highlighted the sleeve and bottom borders of his tunic with some of the base "True Blue" mixed with some of the "Cool Blue".  When that was dry, I went back over it with some of the "Hologram" glitter paint.  I then painted the ends of the tube thing, the fittings on the crossbow, and the beer stein-looking object at his side with Ceramcoat "Metallic Pewter", and then highlighted these parts with Folk Art "Silver Sterling".   Lastly, I painted the figure's integral base with White.
    When everything had overnight to dry, I glued a couple pieces of light blue sea glass to his base.  After the glue dried, I drybrushed the glass lightly with White, and then gave the figure a coat of Ceramcoat "Matte Varnish".  The next day, I flocked the base with Woodland Scenics "Snow" flock and the next day I sprayed the figure with Testor's Dullcote.   When the Dullcote was dry, I went back and repainted the sea glass with Americana "DuraClear Gloss".

     I'm really happy how he turned out.  My hope was that he would read as "Air", and not as "Water". It was a risk with using so much blue; however I think it comes across as "Air" enough, so I'm satisfied.    Here are the two Elementalist together: Fire and Air.


Figure 245 of 266: Complete

Monday, September 12, 2016

Seltyiel, Iconic Magus: Figure 244 of 266

  Over the weekend I finished up the first of the Iconics II Pathfinder Miniatures set: Seltyiel, Iconic Magus.  I've slowly been trying to create a Wizard and Apprentice pair for each of the 10 schools of magic from the Frostgrave core rulebook, and one of the ones I haven't done yet is the Elementalist type.   I thought this guy might make a good fire-based Elementalist, so decided to go that direction with my painting.
         I prepped the figure in the usual way; soaking it in a dish of water with a couple drops of dish- soap added, then giving it a light scrub with a soft toothbrush, and then rinsing and drying it.  I then glued the figure to a white-primed 1" fender washer with Aleene's Tacky glue, and then glued the washer-mounted figure to a tongue depressor with a couple drops of the Elmer's glue.
    I began by giving the entire figure a wash with Reaper MSP "Brown Liner" using a wet brush.
   When the Liner wash was dry, I began painting by doing his skin with Crafter's Acrylic "Flesh".   Next, I painted his coat with Americana "Asphaltum", and then painted the lining with Crafter's Acrylic "Orange Spice".
     I then painted his waist hanging with Apple Barrel "Yellow", and then ll his armor bits with Citadel "Snakebite Leather".  Next, I painted his sash with Ceramcoat "Opaque Red"; and then did his dagger scabbard, side scabbard, pouch, and bottle holder all with Apple Barrel "Burnt Sienna".  I then painted the scabbard around back with Ceramcoat "Black Cherry", and his boots and weapon grips with Ceramcoat "Walnut".
     Next, I painted his hair with Apple Barrel "Apple Maple Syrup", and then painted the bottle at his waist with Crafter's Acrylic "Purple Passion".  I then painted all the little studs and buckles, the hilt of the sword, and the fittings on the scabbards, all with Accent "Mustard Seed".  I then went back and repainted all these with Ceramcoat "Bronze".
     After everything had a while to dry, I gave the entire figure a wash with Citadel "Agrax Earthshade" wash using a wet brush.  When the wash was dry, I painted his eyes; and then highlighted his skin with the base "Flesh", and then mixed in a little Crafter's Acrylic "Light Antique White" to do lighter highlights.    I then highlighted his hair with Americana "Buttermilk", and then used a little of the "Light Antique White".  After that, I highlighted his coat with a mix of Folk Art "Barn Wood" and the original "Asphaltum".
     Next, I highlighted the coat's lining with a mix of the base Orange Spice", and some Crafter;s Acrylic "Pure Pumpkin".  I then highlighted all the leather armor using a mix of the base "Snakebite Leather", and some of the Apple Maple Syrup" I had used on the hair.  I highlighted the sash with Americana "Cadmium Red", and the waist hanging with Crafter's Acrylic "Daffodil Yellow". Then I highlighted the little bottle with a mix of the base "purple Passion", and some Apple Barrel "Apple Lavender".    Next, I began work on the flaming bird spell effect in his hand by painting his hand and the bottom of the bird with Apple Barrel "Lemon Chiffon".  I tried to feather it down his forearm a little.
     Next, I used some of the "Daffodil Yellow" working out from the "Lemon Chiffon", both up the body of the bird, and along the edges of the "Lemon Chiffon" on his forearm. After that I used some of the "Yellow", working up the body of the bird and out across the underside of his wings; and then Americana "Tangerine", and then the "Orange Spice".  I followed this with some of the "Cadmium Red", and lastly along the tips of the wings and tops of the birds horns, some Ceramcoat "Black Cherry".  I then went back and added highlights to his fingers with plain "White".
      I then painted his sword blade with Americana "Zinc".  After that I went back and added highlights to the parts I had painted with the "Bronze", using Ceramcoat "14K Gold". And I followed up that by painting the sword blade with Folk Art Metallics "Gunmetal Grey".  I then highlighted the blade with Folk Art "Silver Sterling".   Lastly, I painted the figure's integral base with White.
    When everything had overnight to dry, I gave the figure a coat of Ceramcoat "Matte Varnish" early the next morning.  Midday, I flocked the white areas with Woodland Scenics "Snow" flock and the next day I sprayed the figure with Testor's Dullcote.

     I'm pleased with how he turned out, especially the flaming bird spell effect.

Figure 244 of 266: Complete

Thursday, September 1, 2016

Ape Demon as Frostgrave White Gorilla: Bones II Figure

     For a while I had been pondering what figure to use for the White Gorilla creature from the Frostgrave rules.   Then one day, while looking for something else, I spotted the Ape Demon figure from the Bones II Lesser Demons set, and I thought, "Why not?"  Maybe the White Gorillas of Frostgrave are the descendants of some bizarre experiment of a misguided wizard long ago who thought it would be a good idea to cross a bat with a gorilla. (Maybe so he could quickly run errands for him through the crowded city.  That's why he has the one big ear; (so he can hear his master call him home), and the big hands so he can carry the grocery shopping!) Over the centuries the wings have become flightless, but they still make the creature look fearsome. :)
    I prepped the figure in the usual way; soaking it in a dish of water with a couple drops of dish- soap added, then giving it a light scrub with a soft toothbrush, and then rinsing and drying it.  I then glued the figure to a white-primed 1,25" fender washer with Aleene's Tacky glue, and then glued the washer-mounted figure to a tongue depressor with a couple drops of the Elmer's glue.
      I began by painting his skin and the underside of the wings with a mix of Americana "Shading Flesh" and Folk Art "Barnyard Red".  I then painted his fur with Americana "Bleached Sand", and used that color to paint his teeth as well.  Next, I painted the talons on his wings with Americana "Zinc", and then painted his tongue with Crafter's Acrylic "African Violet".
      I let all the paint dry for a while and then gave the entire figure a wash with Citadel "Agrax Earthshade" wash using a wet brush".
     After the wash was dry, I worked on highlighting his fur, first drybrushing it with Crafter's Acrylic "Light Antique White", and then with plain White. I also used the "Light Antique White" to highlight his teeth.  Next I painted his eyes, and then highlighted his skin with the "Shading Flesh".   Then i did a quick highlight on the tip of his tongue using a mix of Apple Barrel "Apple Lavender" and the "African Violet".  I highlighted his talons with Folk Art "Rock Grey, and painted his finger nails with Folk Art "Platinum Grey".
   I decided I wanted to add a little something to the large bare spot on the front of the base, so I glued on a little bit of cork rubble and a little piece of gravel, and when the glue was dry I painted it with Americana "Zinc".  I then drybrushed it with Crafter's Acrylic "Storm Cloud Grey", and then the "Platinum Grey", and lastly some plain White.    I painted the figures integral base and the rest of the fender washer base white.
   When everything had overnight to dry, I gave the figure a coat of Ceramcoat "Matte Varnish" early the next morning.  Midday, I flocked the white areas with Woodland Scenics "Snow" flock and the next day I sprayed the figure with Testor's Dullcote.

     I really like how this fellow turned out.  And I think he fills the role of descendant of bizarre wizard's experiment just as well as he did as his intended use as a demon! :)

Thursday, August 11, 2016

Kalladrax: Bones I Dragon as Frostgrave Terrain Piece

   A while back I saw a thread on the Reaper Forum, where the poster was painting up his Kalladrax undead skeletal dragon to use as Frostgrave terrain; and I thought that it was a really cool idea, and I decided I wanted to do the same for my Frostgrave games as well.  So, I picked up a copy of Kalladrax on eBay and this past week I got started on the project.
   I prepped the figure in the usual way; soaking all the pieces in a large bowl of water with a couple drops of dish-soap added, then I gave them a light scrub with a soft toothbrush, and then rinsed and dried them.  I then glued the body, head, and legs together.  I also glued one of the tail sections to the spiked tail end.  The model comes with about 2' of tail in three sections, which I thought was way too long for my purposes; so I set the longest of the three sections aside to test painting schemes on.  Below you can see my experimentation.  I decided to go with the one on the left which was Anita's "Baby Blue", followed by a Citadel "Nuln Oil" shade wash. Then when the wash was dry, I drybrushed with Americana "Bleached Sand", Crafter's Acrylic "Light Antique White", and White.

      So I began by painting all the dragon's bones with Anita's "Baby Blue".
 I then gave everything a wash with Citadel "Nuln Oil" shade wash using a wet brush.
     I then began the drybrushing of the skeleton; first with the "Bleached Sand", then the "Light Antique White", and lastly plain White.
    I painted the dried and rotting wing remnants with Folk Art "Poppy Seed", and then painted the talons and tail spikes with Citadel "The Fang".  When everything was dry, I drybrushed the wings with Folk Art "Gray Green", and then with Folk Art "Celadon Green".  I then drybrushed the tail spikes and talons with Folk Art "Cloudy Day".

I used Black to paint the holes in the skull and in between the ribs.  I then painted the horns an claws with "The Fang", and drybrushed with "Cloudy Day".

    I painted the stonework on the base with DecoArt Traditions "Dark Grey", and then painted the head, and the border on the pillar behind the head, with Ceramcoat "Turquoise".   The treasure chest I painted with DecoArt Traditions "Raw Umber".  When that all was dry, I gave everything a wash with Citadel "Nuln Oil" shade using a wet brush.
  When the wash was dry, I drybrushed the ruins with  Crafter's Acrylic "Storm Cloud Grey", and then Folk Art "Platinum Grey", and lastly some of the "Light Antique White".   Next, I gave the "bronze" pieces a wash with some of the "Celadon Green" which I heavily thinned.  When this wash was dry, I lightly drybrushed those sections with Ceramcoat "Bronze".


     Lastly, I painted everything with White that hadn't been painted yet (That is, all the "snow" areas).  When that was dry, I brushed the White areas with Elmer's white glue, and applied Woodlands Scenic "Snow Flock".
     I was concerned about the whole weight of the dragon being supported on two spindly legs, so I drilled a hole in the top of the ruins and inserted a small section of acrylic rod to help support the dragon's belly.
 I then glued all the parts together using Gorilla Super Glue.  I applied a few Water Effects icicles to the piece before I realized that I hadn't given it its final spray of Dullcote.  I will probably apply some more icicles once I do that, but the weather has been too humid here to do a lot of spraying lately.
(As always, you can click on any photo to see it larger.)


     I'm really happy with how this piece came out.  I think it will be quite the show-stopper when used as the centerpiece on my Frostgrave table at upcoming conventions.