Monday, December 30, 2013

Well of Chaos: Figure 56 of 265

With all that was going on this holiday week, I knew I wouldn't  have time to paint a complicated figure, so I chose the Well of Chaos from the Dungeon Dressing set to work on.  I  began, as usual, with soaking the figure overnight in some water with a little dish soap added, and then rinsed it and let it dry.  I then glued it to a one and a quarter inch fender washer and primed it with Krylon Camouflage with Fusion Flat Black. I then glued it to a tongue depressor for ease of handling during painting.
I began by giving the fountain a heavy drybrushing with Folk Art "Dapple Gray".
I then drybrushed a little lighter with Folk Art "Gray Green".
Finally I added some drybrushed highlights with Folk Art "Celadon Green".  I wanted to make the fountain look like it was working, so I decided I would add a stream of water pouring from the spout just below the face and into the pool below.  So, I snipped about an inch of a fiber optic strand, from an old Christmas light cover I have, to use as the water stream. I then took the pointy end of an old drawing compass and made a small hole in the pool base of the fountain.
I then finished some minor additions to the painting. First, I added some algae or mossy patches around the basin with Americana "Leaf Green", then I added some water ripples in the basin by painting some stippled concentric circles with white paint around the hole I stuck in he basin's bottom.  Finally, I painted the base with Duncan's "Slate Gray". When this was done and had time to dry, I painted the whole thing in  Ceramcoat "Matte Varnish"; and then after it had time to dry, I sprayed it with Testors "Dullcote".  I now glued my section of fiber optic strand into place with super glue, and lastly I painted the bottom of the basin with Cermacoat "Gloss Varnish" to help with the illusion of water.
I'm pleased with how this quick project turned out.  I will make a nice scenic detail piece.

Figure 56 of 265: Complete.

Monday, December 23, 2013

Large Fire Elemental: Figure 55 of 265

This week I wrapped up a project that I have been working on for a while now; the Large Fire Elemental from the Fire it Up set. It also is marks my completetion of the Fire it Up set.   Ever since I saw the illuminated samples Reaper had on display at their booth at Historicon, I have been thinking about how to do this myself.  The one thing I didn't like about the ones I saw at  Historicon was the tealight bases, which to my tastes were too tall, and in the case of the Large Fire Elemental, too small in diameter for such a big figure.
    So, since last Summer I had been thinking about a way to solve the problems I had with the look of the tealight base.  I bought a pack of cheap dollar store tealights, and began to play around them.  The first step I tried was to remove the cover from one of the tealights. This was easily accomplished with the tip of a hobby knife blade inserted in between the base and cover of the light.  This solved the height problem, but not the base size problem.  So I began to ponder ways to expand the base. At first I wanted to use a metal washer, since all my other figures are mounted on washers, but I resigned myself to the fact there was just no way I could use one that I could think of, and still have access to the switch underneath the light.  So I next look at plastic bases.  I pulled out a large 2.5 inch base I had in my bits box and got the idea of cutting out a circle in the center for the tealight base to fit into.  By clipping off the three tiny pegs that act like feet on the bottom of the tealight, the tealight base was a perfect fit for under the large plastic base.
   The figure would still not be able to sit flush with the black plastic figure base, but instead would be elevated about a quarter of an inch above it.  I felt this was an acceptable amount, and I could build up a small mound with Milliput around the tealight base for the figure to 'sit' on.
I now set about working on my plan.  First, I did my usual prep to the figure of soaking it overnight in some dish soap and water.   Then, I cut a rough circle in the plastic base.  I only needed it large enough for the light itself, the battery compartment, and the switch mechanism to fit through. I then drilled a hole up into the underside of the figure.  I tried to go as far up as I could without risking poking though the figure.
The next step was to glue the base of the tealight up under the black plastic figure base.  I used E-6000 glue for this.
When dry, I then glued the figure over the light, to the top of the bulb-holder/battery compartment.  You'll notice in the photo below that I had to glue a little section of popsicle stick between the figure and the switch compartment, as without the light's outer housing the switch is not held firmly in place, and this bit of wood, would act as a cover to the switch holder, and prevent the switch from popping out.
I as now ready to build my Milliput mound around the tealight base to hide it, but I was concerned about getting the putty into the switch and other small openings in the tealight base.  To fix this I found a small plastic lid I had, and cut it down so it made a nice little housing around the switch.  I also glued some bits of cardstock around the tealight base to cover any small openings that the Milliput might get into.
My last step of construction was to build up a mound around the tealight base using Milliput, that would look like a rise in the ground the Elemental was standing on.
I masked the figure with a bit of masking tape and newspaper, and sprayed the base with flat black spray paint.  For the figure, I used the same paint scheme that I had used on the Medium Fire Elemental last week.   I began by giving the outer edges of the figure, the base, body, and upper arms, a drybrushing with Apple Barrel "Apple Maroon", and then just inside this, working my way towards the center, and down towards the bottom of the base, I gave it a dry brushing with GW "Blood Red"
Next I did the oranges, doing a drybrush with GW "Blazing Orange" first, again painting just inside the previous color. And then I  did a drybrush with Americana "Tangerine"
Now I moved to the yellows. I did a drybrush in the center of the body, around the bottom of the base, the face,  bottoms of the arms, and the center of the fireball hands, with GW "Golden Yellow. This was followed by a drybrushing with Apple barrel "Yellow"
 My final steps was to add heat highlights with Apple Barrel "Lemon Chiffon"  to the very bottom of the figure, the center of its "torso" , the face, and the hands.   Then I added a bit of white to the "Lemon Chiffon"" ,and did some small pinpoint highlights on the parts I mentioned above. I didn't like the fact that this figure had no face, so I gave it some eyes by painting on two smudgy black eye shapes, and then painting inside these with the "Lemon Chiffon" with some white highlights.  I also did a mount with a "Lemon Chiffon"and white mix. When all was dry I painted the figure with Ceramcoat "Matte Varnish", and then flocked the base.  I used a bit of dried coffee around the base of the Elemental  to represent singed grass, and when the flocking was dry I gave the immediate area around her feet a light drybrushing with black to make it look like burnt grass.  Finally, I gave the figure a coat of Testor's "Dullcote" spray paint.
The figure as it appears with the tealight turned off.

Photographed in a darkened room with the tealight turned on.

Photographed in a lit room with the tealight turned on.
Below is a short video of the figure to show you the flickering effect of the tealight.
I'm really pleased with how this figure turned out.  It was a fun project to complete, and makes a nice novelty figure on the table.

Figure 55 of 265: Complete

Monday, December 16, 2013

Medium Fire Elemental: Figure 54 of 265

This week I painted the Medium Fire Elemental from the Fire It Up set.  I did my usual prep of soaking it overnight in water with a little dish soap added, and then rinsing and drying.  I then glued it using Aleene's Mighty Tacky Glue  to a black-primed 1 inch fender washer. I then glued this to a tongue depressor with a couple drops of white glue.
I wanted this figure to appear as if the source of its heat was coming from its core, so I wanted it to be hottest and brightest in the center and darkest and coolest as you reached the outer edges.  To do this effect I had to think of the figure almost two dimensionally, and luckily the sculpt lends itself to that.  I began by giving the outer edges of the figure, the wings, body, and upper arms, a drybrushing with Apple Barrel "Apple Maroon", and then just inside this, working my way towards the center, I gave it a dry brushing with GW "Blood Red"
Next I did the oranges, doing a drybrush with GW "Blazing Orange" first, again painting just inside the previous color. And then I  did a drybrush with Americana "Tangerine"
Now I moved to the yellows. I did a drybrush in the center of the body, and the wings, and the bottoms of the arms with GW "Golden Yellow. This was followed by a drybrushing with Apple barrel "Yellow".
  My final steps was to add heat highlights with Apple Barrel "Lemon Chiffon" to her chest, stomach, the raised leg, her brow and nose.  I also put two dots of this color in her eyes to give them a focus. Then I added a bit of white to the "Lemon Chiffon"" ,and did some small pinpoint highlights on the parts I mentioned above.  When all was dry I painted the figure with Ceramcoat "Matte Varnish", and then flocked the base.  I used a bit of dried coffee around her feet  to represent singed grass, and when the flocking was dry I gave the immediate area around her feet a light drybrushing with black to make it look like burnt grass, as reader 'adeptgamer' suggested on my previous figure, the Hell Hound.  Finally, I gave the figure a coat of Testor's "Dullcote" spray paint.
All in all I'm very pleased with how this figure turned out.  I think I'm finally getting the hang of doing the shading for fire on these translucent figures, (and solid figures as well).  With my first attempts I was almost afraid to cover the translucency. I also was working under the false impression of fire being darker at he base and lighter at the edges. Which is how we paint most normal figures, with lighter highlights on the outer edges.

    Next up, for my Christmas special, I will do the large fire elemental....and this one will be electrified! :)
A preview:

  Stay tuned...

Figure 54 of 265: Complete

Monday, December 9, 2013

Hell Hound: Figure 53 of 265

This week I painted the Hell Hound from the 30 New Bones Set.  I began my prep as usual, soaking the figure overnight in some water with a bit of dish soap added.  I then gave it a light scrub,with an old soft toothbrush, rinsed it, and let it dry.  Afterwards, I primed it black with Krylon with Fusion Camouflage Flat Black.  When dry, I glued it with Aleene's Mighty Tacky glue to a 1.5 inch fender washer. I then glued the washer to a tongue depressor with a couple drops of white glue for a more stable, easy to hold work surface.
  My first step was to do a little research in my old D & D Monster Manual to see what color these things were supposed to be.They are described as being rust red to red brown with glowing red eyes and black sooty mouths.    So to begin, I painted the body of the dog with Folk Art "Barnyard Red"
   I then painted the horn like protuberances on its back and neck with Americana "Buttermilk" Afterwards, I gave the whole thing a wash with Winsor Newton "Peat Brown" ink diluted with some water. When dry, I went back and drybrushed the body with the "Barn Red" again, and then added a little of the "Buttermilk" to the red and gave it a lighter drybrushing to add some light highlights. I also gave the horns some highlighting with the "Buttemilk". I then painted the eyes with GW "Blood Red" and did light highlights on the cheeks below the eyes, and the brows above, to give the impression the eyes were glowing.
Next I started to work on the flames on the hound's back.  I began by painting them with Apple Barrel "Lemon Chiffon". I left a little black showing between them to give some separation and depth to them.
Next I painted them with Apple Barrel "Yellow", leaving some of the "Lemon Chiffon" showing at the base of the flames
I now did a layer of Americana "Tangerine", again leaving a bit of the two previous colors showing at the flames' bases.
I followed this with a bit of GW "Blazing Orange", at the ends of the flames.
And then some of the "Blood Red" on the very ends of the flames.
And finally, Apple Barrel "Apple Maroon" on the very tips of the flame tongues.
Finally, I painted the interior of the mouth, the teeth, and the claws with black, and then painted highlights on the teeth, tongue, and claws with GW "Shadow Grey", followed by some smaller, lighter, highlights with Apple Barrel "Apple Scotch Blue". I also went back and added a bit of highlighting with the "Tangerine" and "Yellow" to the horns on the back and neck of the hound, to give the impression of reflected light.  Then, after everything had had time to dry, I gave the figure a coat of Ceramcoat "Matte Varnish, and then flocked the base.  Afterwards, I sprayed it with Testor's "Dullcote".
I'm pleased with how this figure came out.   I enjoyed the practice doing effective flames.

Figure 53 of 265: Complete

Thursday, December 5, 2013

Spider Swarms: Figures 51 & 52 of 265

I did theses two spider swarms from the Vermin set as a quick project this week. I prepped these as usual, soaking them in water and dish soap first, then rinsing and drying.  I then primed them black with Krylon's Camouflage Flat Black with Fusion, as I planned to paint them mostly with drybrushing
These figures are a confusing mish-mash of legs and bodies, and I didn't really want to put the effort into figuring our which leg went with which body; so I did the whole bunch with a heavy drybrushing with GW "Shadow Grey". I then did a lighter drybrushing with Apple Barrel "Scotch Apple Blue".  Unfortunately I still couldn't really see individual spiders in the mass, so I tired painting some of the apparent 'ground' areas inbetween all the legs, with GW "Graveyard Earth" in hopes of providing some visual separation. 
After everything had dried, I painted the figures with Ceramcoat "Matte Varnish".  I let them sit over night, and the next day I carefully flocked them, which was a challenge with all the errant legs.  Then after that had a chance to dry, I sprayed the bases with Testor's "Dullcoat". 
I can't say as I'm really a fan of these pieces, as the sculpts are too jumbled in my opinion to be really effective.  But they're done now, and that's what counts. :)

Figures 51 & 52: Complete

Monday, December 2, 2013

Orc Sniper (Archer) and Orc Hunter (Spear): Figures 49 & 50 of 265

This week I complete the last two of the orcs from the 30 New Bones set: the Orc Sniper (Archer) and the Orc Hunter (Spear). With the completion of these two figures, I reach the happy milestone of having 50 Bones completed. On to the next 50! 
    After washing them in some dish soap and letting them dry, I spray primed them with Krylon Camouflage with Fusion "Flat Black". When this dried, I glued the pair onto black primed 1.25 inch fender washers using Aleene's Tacky glue.  I then glued them onto a tongue depressor, for ease of painting, using a couple drops of Elmer's white glue.
The first step I did in painting them was to give the figures a heavy drybrushing with Ceramcoat "Metallic Pewter".  I then drybrushed the fur garment on the Archer using  GW "Codex Grey" followed by GW "Fortress Grey". I knew there would be a little overlap of the fur color onto the chainmail since drybrushing isn't precise, but I did the best I could to keep the colors separate, knowing I would go back later and neaten the edges with a fine brush.
 Next I painted their Tunics: Accent "Mustard Seed" for the Archer, and Folk Art "Dapple Grey" for the Spear Orc. I did their skin with Aleene's "Deep Khaki".  Then, I did all he belts, wraps, straps, scabbard, and the quiver with Americana "Asphaltum".  The boots and pouch of the Archer, and the top and bottom of the quiver, I did with Ceramcoat Walnut; with the fur tops of the boots drybrushed with Americana "Khaki Tan".


     The spear's shaft, and the bow I painted with Crafters Edition "Spice Brown"  I then painted the spear tip, and the metal fittings of the bow with the "Metallic Pewter", and used the this color with a fine brush to also clean up the spots on the edges of the chainmail that got the fur or tunic paint on them. Lastly, the fletchings were given a drybrushing with the "Codex Grey", their teeth were painted with GW "Bubonic Brown", and the stitching on the scabbard, quiver and belt were painted Americana "Mississippi Mud".
   After all this had dried, I gave both figures a wash with GW "Devlan Mud" wash.  When the wash had dried, I added highlights to their skin using the original "Deep Khaki" mixed with a little Aleene's "Dusty Khaki. I also highlighted their tunics with the original colors. I then painted the eyes with  Americana "Buttermilk", and then I went back and added a black pupil in each eye. I also highlighted their teeth with the "Bubonic Brown".  Finally, I added some GW "Chainmail" highlights to the Orcs' spear, armor, and chainmail.
After everything had dried overnight, I gave the figures a coat of Ceramcoat "Matte Varnish" and, when dry, flocked their bases.  Another overnight dry, and I sprayed them with Testor's "Dullcote".
I think these fellows turned out very nicely.  I can take a break from orcs for a while now, until I get to the Orcapocalypse set.

Figures 49 and 50: Complete.

Wednesday, November 27, 2013

Callie, Female Rogue/Archer: Figure 48 of 265

As I mentioned in the battle report I did for my previous post, I needed an elf archer to complete a warband I was preparing for a Song of Blades and Heroes game last Saturday, so Thursday night I grabbed one of the remaining archer figures from the 30 New Bones set, got her ready, and painted her up Friday.  I had already soaked her in dishsoap and water previously, so I glued here to a black-primed 1" fender washer, and glued this to a tongue depressor with two drops of white glue. I let this dry for a couple hours, and then gave the figure a wash with some thinned black ink with a tiny bit of dish soap added to help it flowing into the recesses.  This has become my new favorite way to prepare Bones that I don't want to prime black, but leave their natural white.  It really helps outline everything sculpted on the figure.
   When considering a color scheme for this figure, I wanted to do something that wasn't the typical elf  dressed in green, yet, I wanted it to be something natural an outdoorsy looking.  So, inspired by the beautiful Fall colors we've had around here lately, I decided to try an autumnal theme for her outfit.
I began by painting her leggings with GW "Bubonic Brown", and the shin and knee guards with GW "Vermin Brown". Next I painted her tunic with Americana "Mississippi Mud", and her cloak with Folk-Art "Barnyard Red".
I then worked on her belts and her quiver.  These I painted in Crafter Edition"Spice Brown". The bow I painted with Americana "Buttermilk".   The two lines of stitching running down the quiver I painted with Apple Barrel "apple Maple Syrup" . The arrow shafts were done in Americana "Khaki Tan", and the fletchings were done in Apple Barrel "Yellow".  Her face I painted with GW "Elf Flesh".  The last parts of her outfit I did were her gloves and shoes.  The gloves I did with with Aleene's "Dusty Khaki", and the shoes with Folk Art "Dapple Gray". Finally I painted the metal parts of the bow, sword, and her quiver strap's buckle, as well as the pin holding her cloak, with Ceramcoat "Metallic Copper" Both the bow's and sword's grips were painted with DecoArt "Cinnamon Brown".
Lastly, I decided I wanted to do some sort of camouflage on her cloak, so it would look like she could easily blend into an Autumn woods.    I first went and randomly added small splotches to her cloak with GW "Blazing Orange", and then went back and added random tiny dots on or near the orange splotches with the Yellow I had used on the fletchings.  When everything had dried, I gave the whole figure a wash with thinned Winsor Newton Peat brown Ink.
When this had had time to try I went back and added highlights to everything with the base colors, and on some of the more prominently raised areas with the base color with a little bit of the "Buttermilk" mixed in to lighten it further. I also painted her lips with GW "Tanned Flesh", and then added a little "Elf Flesh" to it to do highlights.  After the figure had time to dry, I gave it a coat of Ceramcoat "Matte Varnish"; and when this was dry, I flocked the base. I wanted to carry the autumnal theme through to the base, so I glued some bits of old oregano I had to the base to represent fallen leaves, and actually painted a few of them orange, red, and yellow to look more Fall-like.  I also added some bits of orange flocking to the base. A bit of old twine made some nice dried grass.
Lastly, before I went to bed, I sprayed the figure with Testor's "Dullcote'
I'm very pleased with how this figure turned out, especially for a quick paint job.  Luckily, the figure is very simply dressed, and well sculpted, so painting it was an easy task.

Figure 48 of 265:  Complete

Monday, November 25, 2013

Bones Battle Report: SoBaH

My friend, Rob Dean, (who also bought into the first Reaper Bones Kickstarter), and I, have been plotting for a while now to get together for a game; to actually put some of our Bones on the table and play with them.  Rob had suggested "Song of Blades and Heroes" (SoBaH), a set of Fantasy skirmish rules he owned, that he had only played once before.  We finally made a date for this past Saturday, and we met at his house for a couple games of SoBaH. He lent me his copy of the rules to read the week before, and I prepared a pair of 300 point warbands to use: an Elf one, and a Medusa and Skeleton minions one.
   For the first game, I chose my Elf warband because it was small and had only a few Special Abilities. I figured it would be easy to handle for my first outing with the rules. Rob chose a warband consisting of 9 Orcs and an accompanying Troll.
Team Elf:  Sneak, Commander, Elite Archer, and Elite Archer
My Warband consisted of an Elf Commander, two Elite Elf Archers, and an Elf Sneak.    We played on a card table using some of Rob's beautiful terrain and two paper building groupings he had recently constructed.  Since he had set up the table before I arrived, I took the role of attacker, and chose which side I wished to enter from.
A look at the table as Rob moves one of his orcs.
 From the first turn, we immediately saw the difference in our two groups, and how important the Quality numbers were.  My Elves, with a Quality 2+, only lost their activation on a roll of two 1's on two d6,the bulk of Robs figures however had a Quality of 4+ which meant that they would be failing on rolls of 3 or less.  Both of us forgot the Free Move rule on the first couple turns, so Rob's figures entered rather strung out, and hesitantly.  My high quality Elves on the other hand, wasted no time dashing on to the field.  I was eager to take advantage of the disorganized enemy, and rushed my Sneak forward into a clump of woods on my right to try and Ambush the approaching Troll, and perhaps knock him down in time for my Commander to reach him.  Ah, the best laid plans..... On the next turn, my Sneak (Combat  3) burst froth from the woods, and ambushed the shocked Troll (Combat 4) . She only got two of her three activation dice, so was unable to do a Power Blow.   We each eagerly rattled the first dice of the game, and threw....   Troll : 6,  Sneak : 1 = dead Sneak. Oh, well, it might of worked.
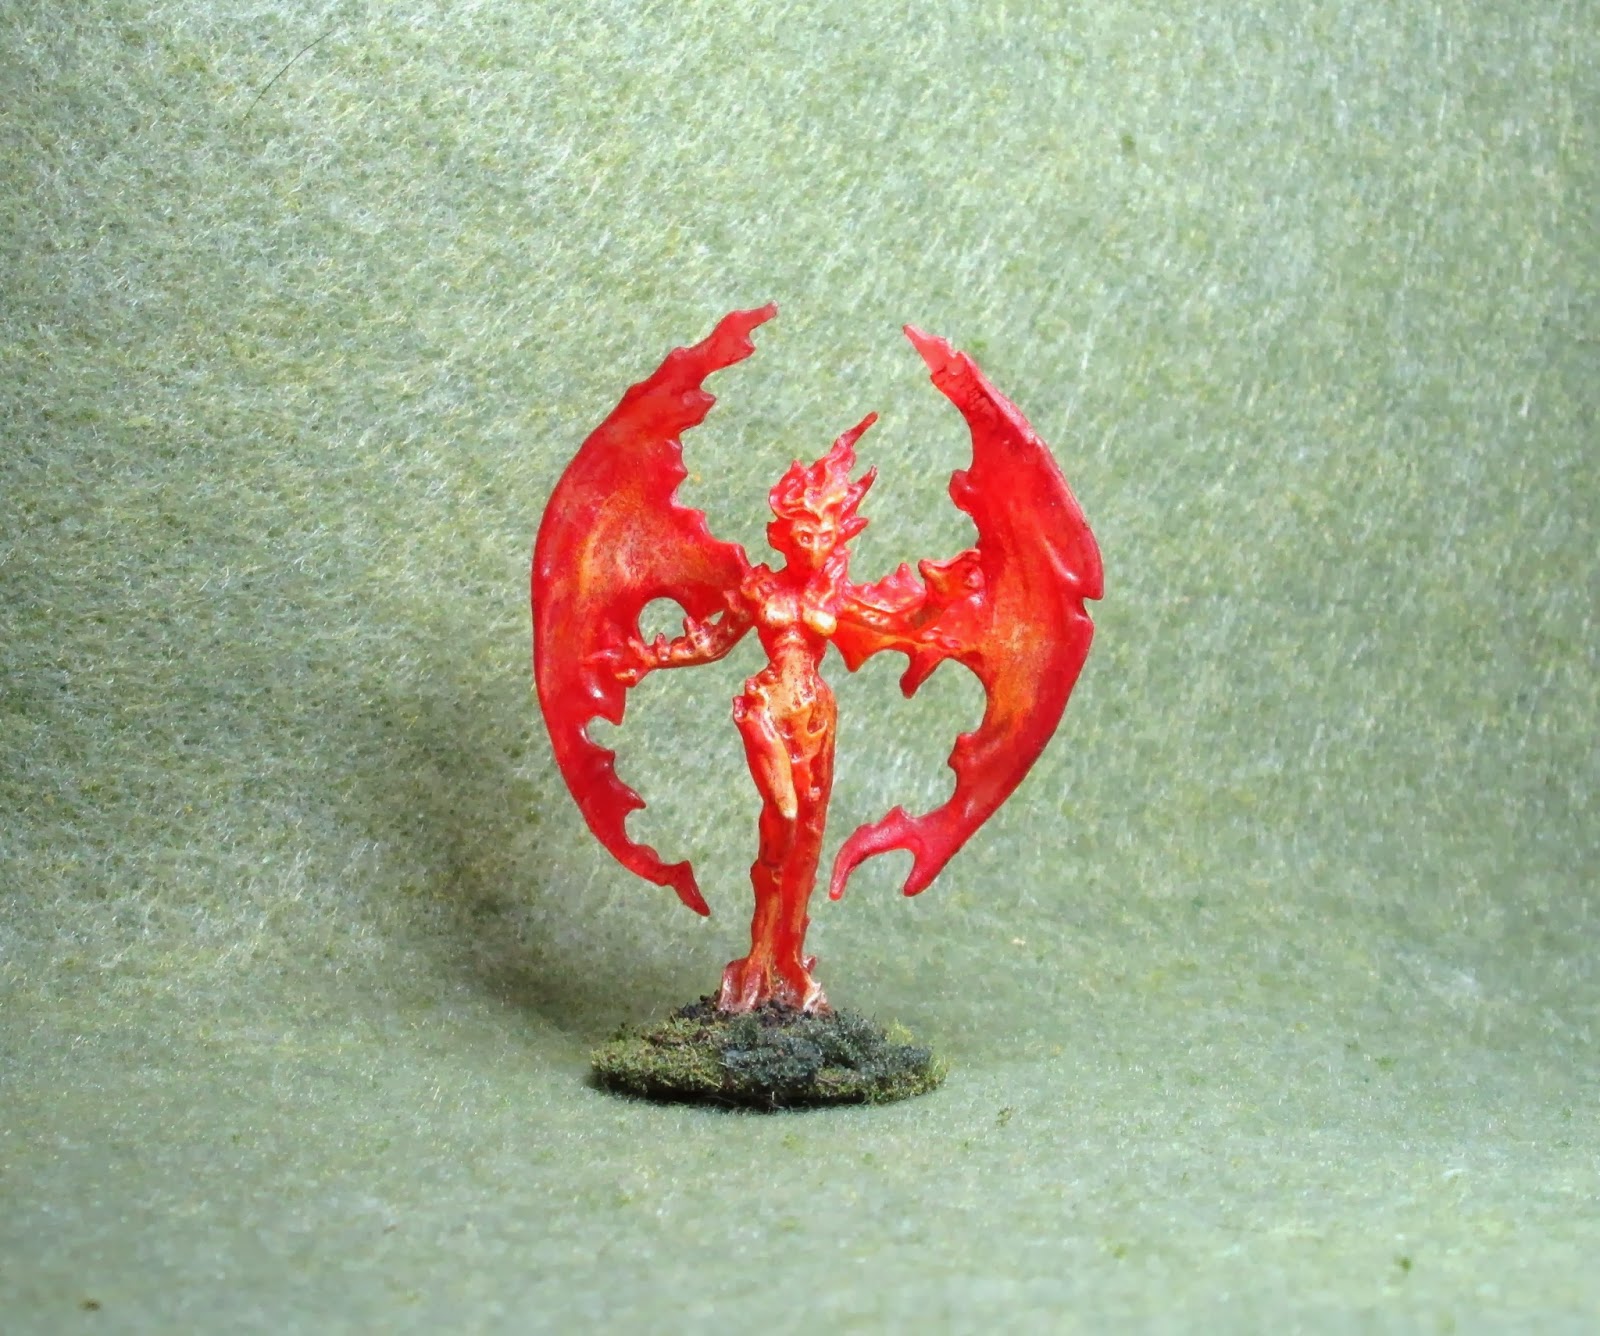
A stunningly bad, turn-ending, activation roll by "Red" the archer.  She also managed to break her bow string in both games.  This is how a figure gets a reputation.   She is a new Bones I painted up quickly Friday, to use in the game, as I needed a second Elf archer to complete my Warband.  Look for her painting guide article soon.  
Afterwards, my Commander rushed forth to engage the Troll, as my two Archers took up position on some nearby rocks to lend support.  The Commander performed valiantly, wounding the troll, and dispatching several orcs that ran up to aid it.  The Archers, likewise did their job of picking off stray orcs, and helping the Commander when ever he got a Recoil or a Fall.   In the end, with the troll wounded and several of the orcs fleeing the table when they hit the +50% casualty point and had to roll morale, the Elves were declared the winner.  The quality of the Elves won, as the Orcs were just never able to get any coordinated effort put together.  We both learned the importance in future Warbands of having someone with the Leader quality present if you have a lot of over 3+ Quality members in your party.
Another view of the battle, near the end.  The Commander is surrounded by dead orcs, and bow-less "Red" runs down the rocks to knife an orc archer that has fallen from one of her mate "Green's" arrows.  
We had time to squeeze in  a second game; so for this I switched over to my Medusa and Skeleton minions Warbands, and Rob switched to a slightly illegal (too many points of Personality figures) All-Human Warband.  He borrowed "Red" the archer to pose as a human archer to complete his line up.  We rotated the table 90 degrees so we each had a different side to enter on.
Team Medusa:  Skeleton  w/Hand Weapon, two Superior Skeletal Archers, Medusa herself, the second Skeleton w/Hand Weapon  and two Skeletons with Spears (I used the "Lionman Skeleton" stats from the rulebook to make them a little tougher than the basic swordsmen).
   To begin the game, I sent Medusa and her two skeleton archers and one spearman to the rocks occupied by my Elves in the previous game, while the other spearman and the two swordsmen went on a flanking march.  Things seemed to really be going my way as on my first turn of shooting, Medusa's Poison  and Shooting abilities, and a good roll from one of the Skeleton Archers dropped two of Rob's figures in the third turn.
Medusa and her Archer's take aim, as the Spearman stands guard at the base of the rocks.  Two enemy lay dead in the distance from their arrows...the only two they'd hit all day.
On the other flank things weren't going as well.  My warriors moved to engage the Human Magic User, only for one of them to get transfixed, as the Human's Steel Golem came trundling around the corner.  His metal might made short work of the trapped skeleton, and he moved on to engage the rest, as a couple of the Human warriors came to assist him.  Meanwhile, Medusa had lost her aim, and she and her minion archers were unable to hit anything else for the remainder of the game.  "Red" however, as I mentioned before, did manage to snap her second bowstring of the day.  As the Human Fighters and Golem made bone dust  of the flank attack, I quickly reached +50% casualties, so we called it a game, as it was getting to be time we both had to head to other engagements.
An aerial view of the battle.  On the right, the first skeleton stands transfixed on his white poker chip , as the Wizard shouts, "Kill, Rusty, kill!" to the Golem behind him.
  So not a bad first outing for my Bones.  And I really enjoyed my first exposure to the rules.  I can see there are lots of nuances to be explored.  Most of all, the games succeeded in giving me more impetus to paint my Bones to have more Warband options.
  For a look at the games from Rob's viewpoint, see his excellent blog: The Sharp End of the Brush