Showing posts with label Underwater. Show all posts

Monday, February 22, 2021

Gulper (Giant Catfish): Bones 4 Dreadmere Figure

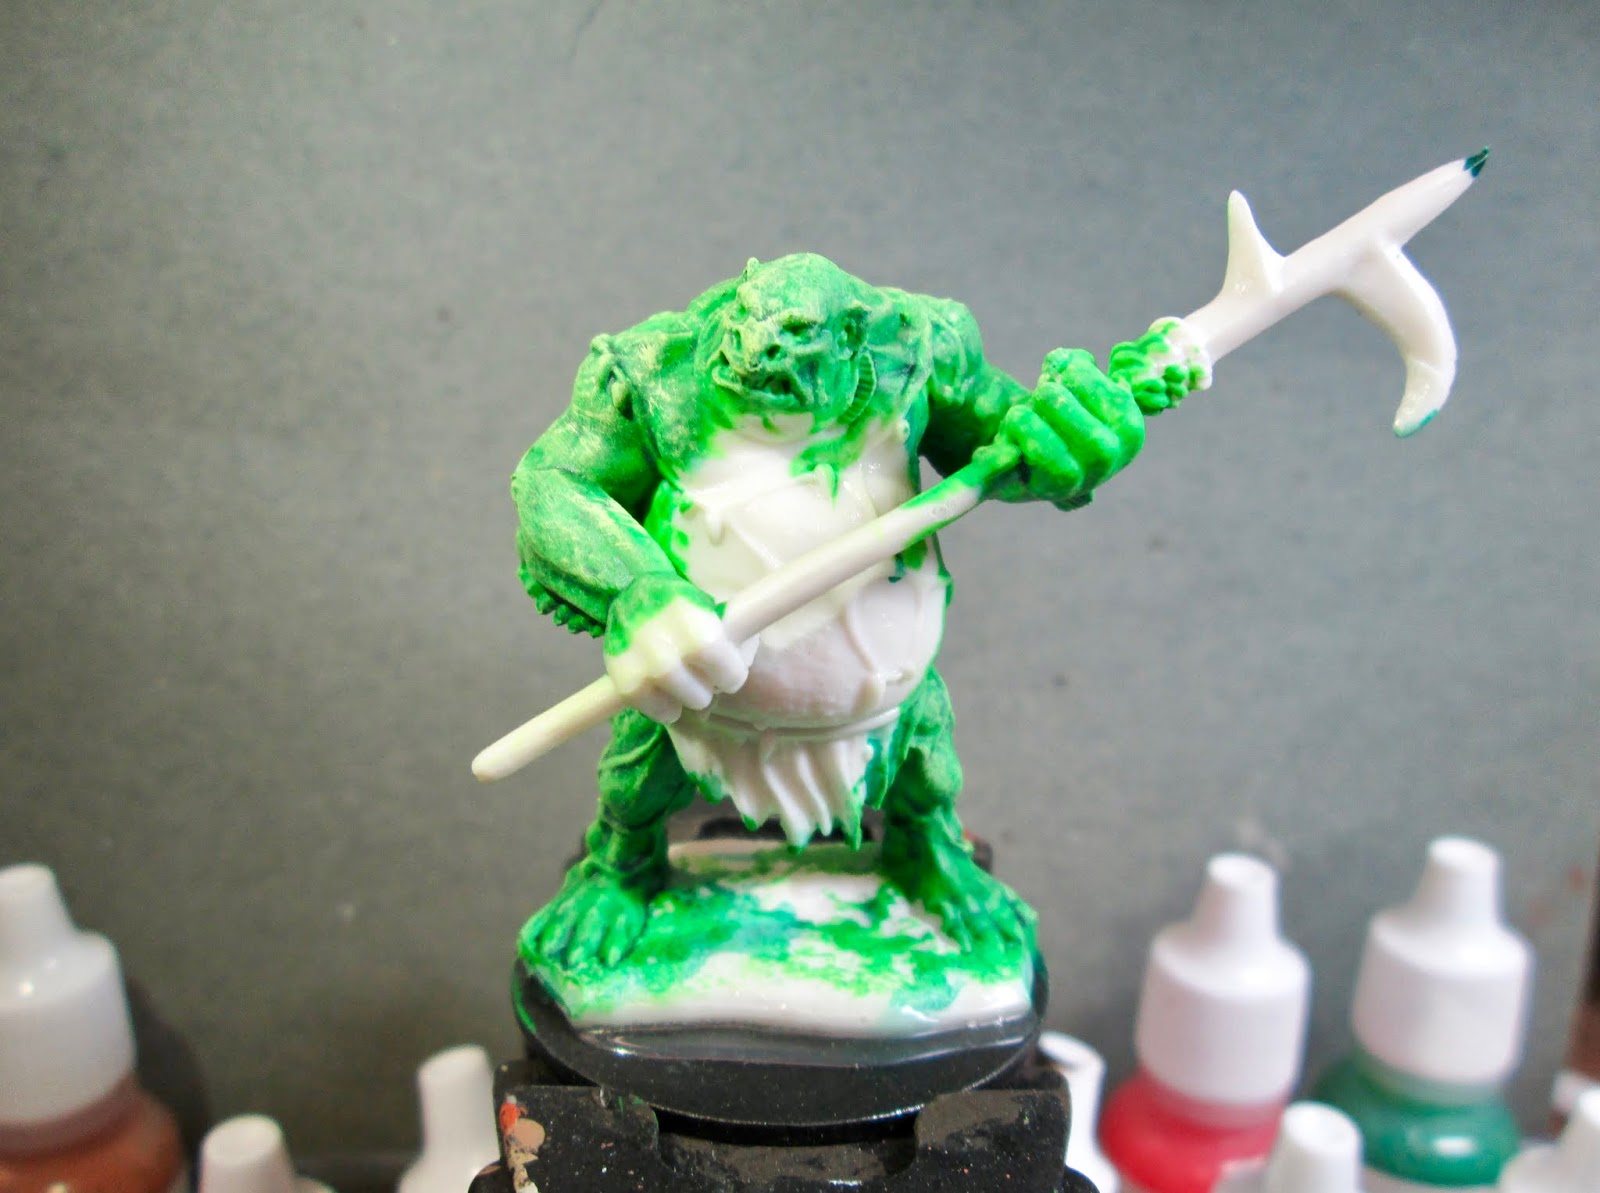
      This past week I painted the "Gulper" giant catfish figure from the Bones 4 Dreadmere Expansion set.  The figure is designed with a flat spot on its underside so you can glue it directly on a base if you want, but I decided I wanted mine to be swimming, so I grabbed a reaper flight stand I had and drilled a matching hole into the Gulper's belly. 
      I then prepped the figure in the usual way, soaking it in a dish of water with a couple drops of dish-soap added, and then gave it a light scrub with a soft toothbrush, and then rinsed and dried it.   Next, I stuck it onto the flight stand's peg, and put the peg in a pair of alligator clips for ease of holding.
When painting animals, I always like to look for real world inspiration, so I Googled images of "colorful catfish", and came upon the Redtail Catfish.  I thought it would be a fun pattern to paint, so I looked through a bunch of photos to get a sense for the coloration on this type of catfish.
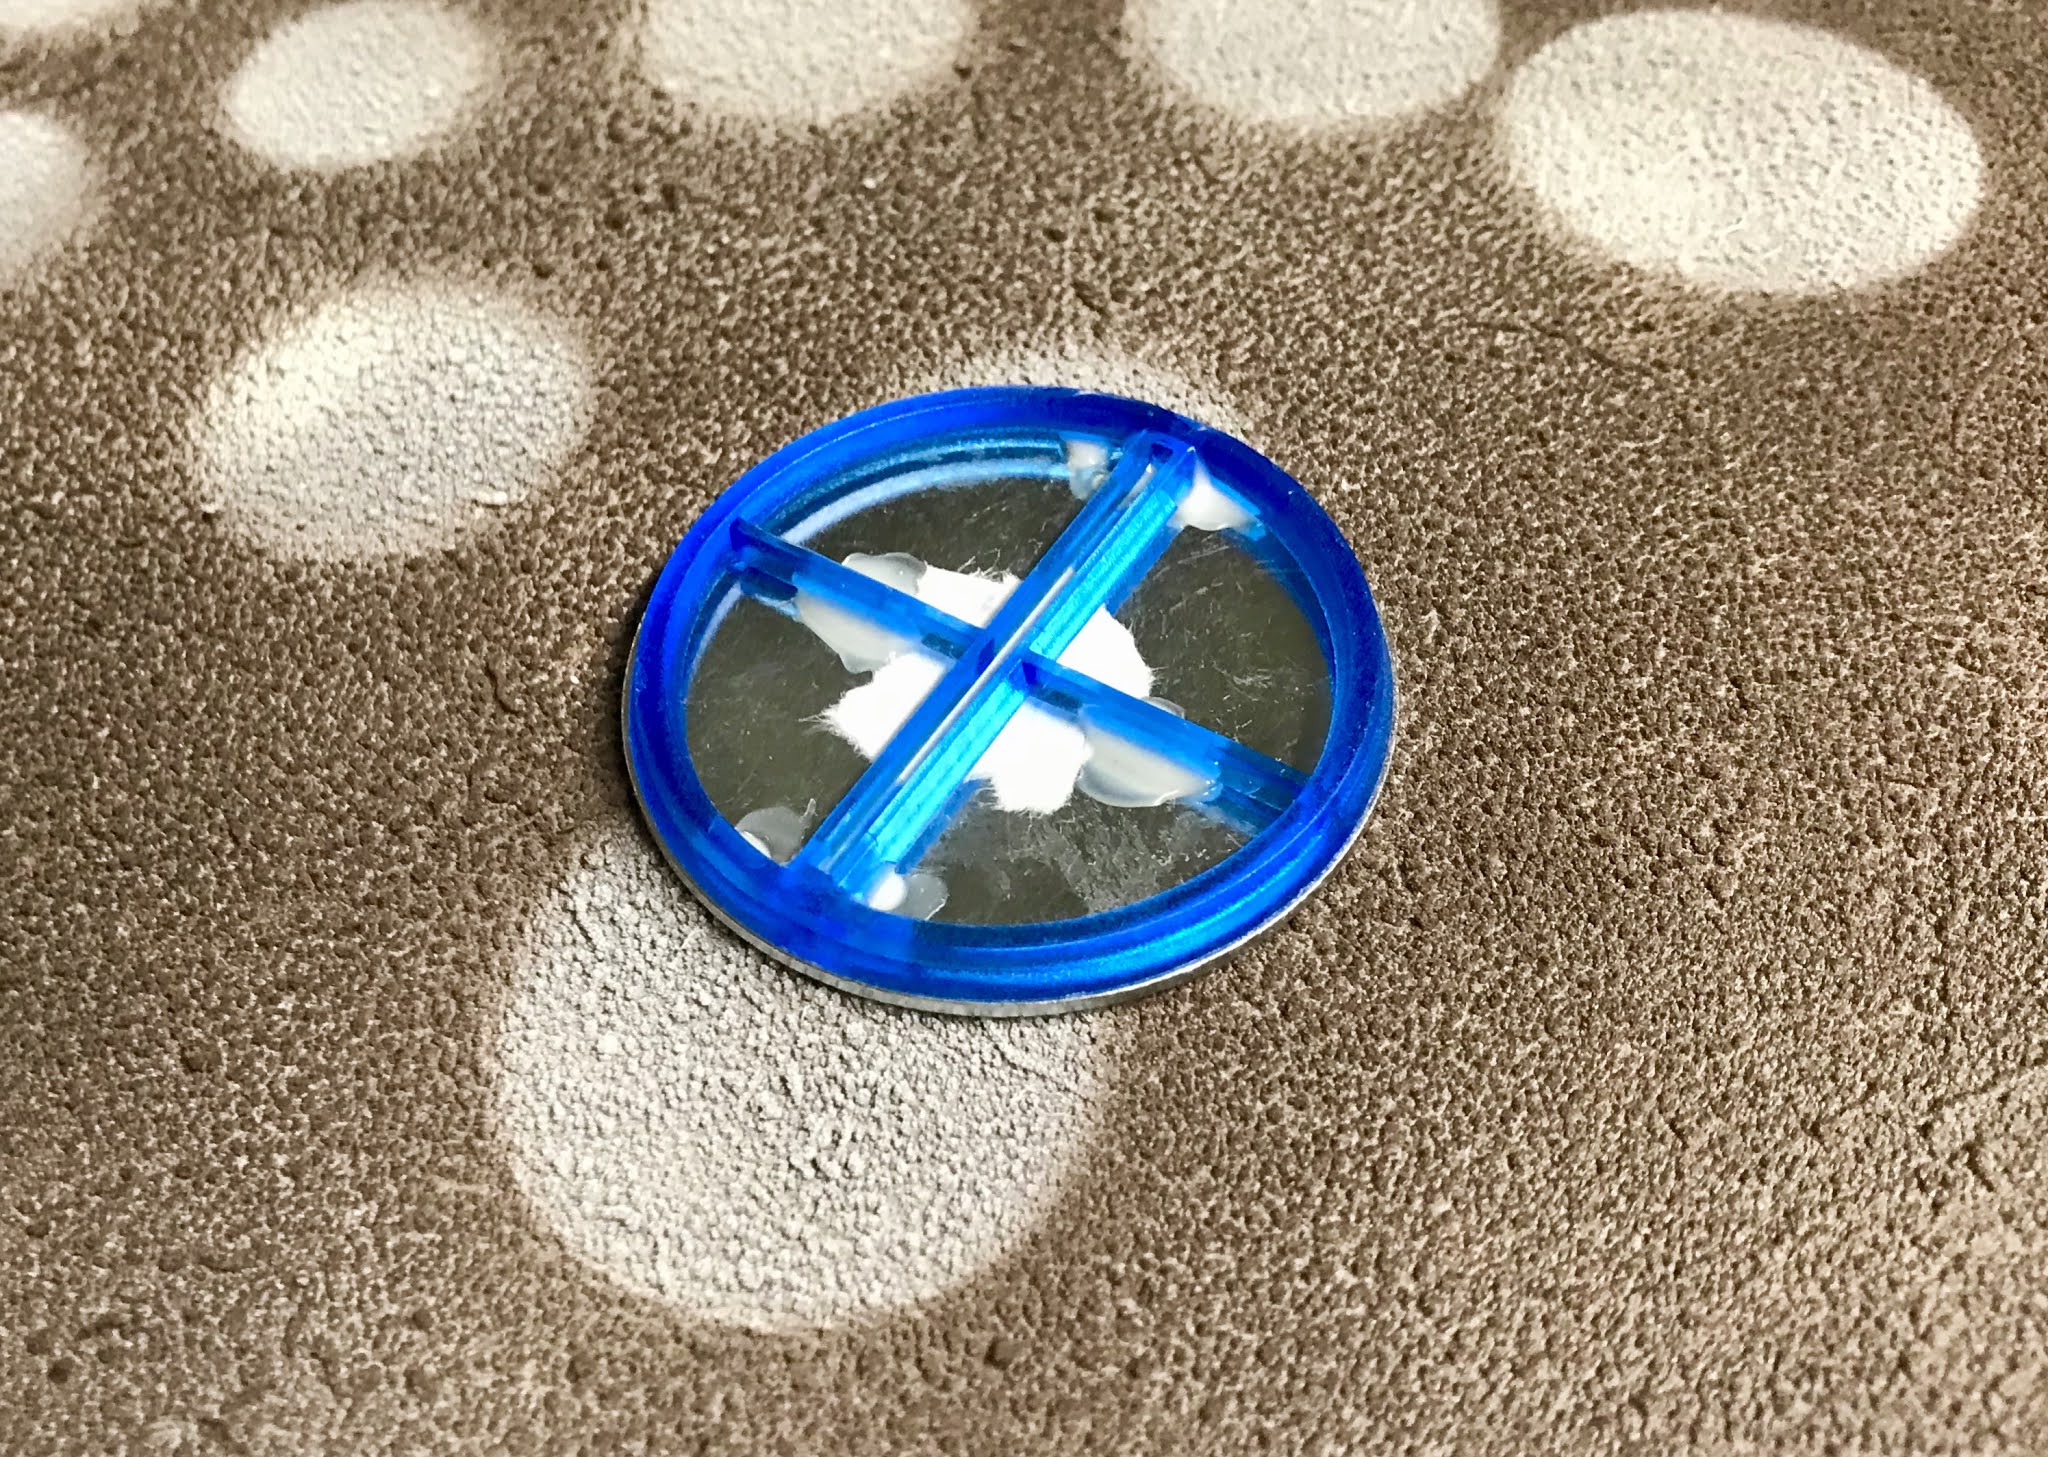
     Because the figure has a bit of weight to it, I glued the base of the flight stand to a 2" fender washer with some Aleene's Tacky glue.  When the glue was dry, I sprayed it brown.   
     To begin with, I painted the figure with Americana "Dove Grey".  I then painted on the darker pattern with a mix of Americana "Charcoal" and Aleene's "Deep Khaki".
     Next, I drybrushed the light areas with some Americana "Snow White", and then highlighted the darker parts with a mix of the "Charcoal Grey" with the lighter Aleene's "Dusty Khaki"  After that, I painted the dot pattern on his head with Ceramcoat "Black", mixed with a little of the "Charcoal Grey", and then painted the tail with Reaper MSP "Holly Berry".   After that, I painted the inside of the mouth with Folk Art "Milkshake", and then painted the eyes with the "Snow White" and added inner circles with the "Black"
     When the mouth was dry, I gave it a coat of Citadel "Nuln Oil" wash.  I then drybrushed the tail with some Crafter's Acrylic "Pure Pumpkin", and then used the "Pure Pumpkin" to paint the edges of the top and underside fins.   Next, I highlighted the fin edges, and parts of the tail with some Americana "Tangerine", followed by some spot highlights with Crafter's Acrylic "Bright Yellow". 
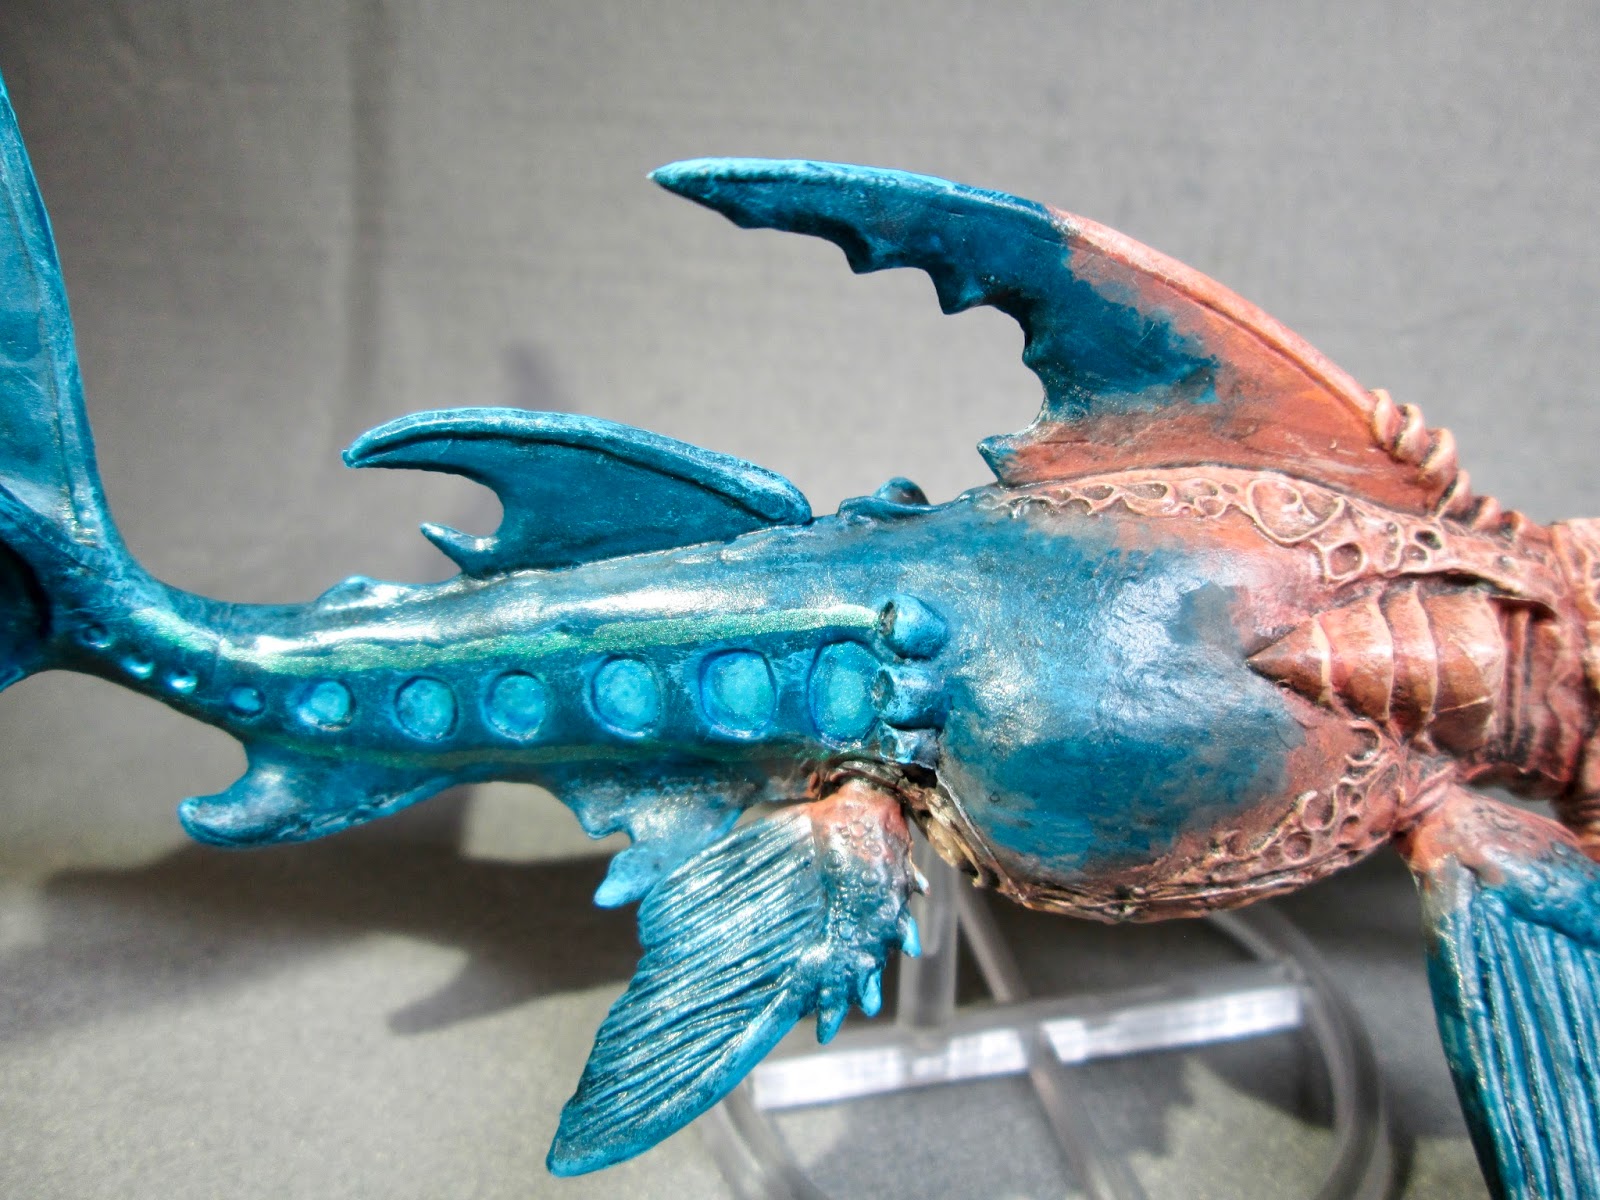
      I then painted the eels affixed to the Gulper's sides with Apple Barrel "Apple Black Green".  By this time the "Nuln Oil" wash was dry, so I highlighted the mouth with the base "Milkshake", and then a little of the "Milkshake with some Ceramcoat "White" added.   I then painted the teeth with Crafter's Acrylic "Light Antique White", and highlighted them with the "Snow White".    At this point I went back and painted the eels with the "Deep Khaki", leaving a thin edge of the "Apple Black Green" to serve as a shadow, and then highlighted with the "Dusty Khaki".  Lastly, I aded some tiny "Black" dot eyes. 
      I let the figure dry overnight and the next day I gave it a coat of Americana "DuraClear Matte" varnish.  I didn't shake the varnish a lot in hopes of getting more of a semi-gloss shine than a matte finish. I wasn't going to use my regular Dull Cote final spray on this, as I thought a slightly shiny fish would be better than a matte one.   I then used some white glue to glue some course sand all over the base.  When the sand was dry,  I made a water and white glue mix and painted that over the sand to help it stay in place; since I wasn't going to paint it or spray it.  Lastly, I added some tiny shells and plants.  


     I'm happy with how this turned out.   Doing creatures with irregular color patterns like this never look just right while I'm doing them, especially if in nature the dividing line is not sharp but made up of individual hairs or fur; but I think this doesn't look too bad when viewed at table distance or in photos.

Monday, July 2, 2018

Merrow (Aquatic Troll): Bones 3 Figure

    This past week I painted the Merrow figure from the Bones 3 Stoneskull Expansion set.   
    I prepped this figure in the usual way; soaking the parts in a dish of water with a couple drops of dish-soap added, then giving it a light scrub with a soft toothbrush, and then rinsing and drying it.  When dry, I glued his arms to his body, and when dry, I trimmed his base a little and then glued the figure to a black-primed 1.5" fender washer with Aleene's Tacky glue. I then placed the figure in my painting grip.
      As I looked at the figure, I decided I wanted to play up his aquatic nature, and thought it might be fun to paint him like a frog; and then I thought it might also be neat to do him in wild colors like a Poison Dart Frog.  Looking at pictures of colorful frogs, I decided in the end to copy the coloration of a Red-eyed Tree Frog.
     I began by painting his body, except his chest and stomach, with Americana "Festive Green".  When dry, I gave it a wash with Iron Wind Metals "Dark Green" ink.  When the ink was dry, I drybrushed him with some Crafter's Acrylic "Wild Green", and some Reaper MSP Bones "Dungeon Slime".
     Next, I painted his chest and belly with Americana "Bleached Sand", his hands and feet with Crafter's Acrylic "Pure Pumpkin, and his fins with Crafter's Acrylic "Tropical Blue".
     I then painted the netting draped over him with Ceramcoat "Territorial Beige", and his loincloth with Folk Art "Dapple Grey".  After that, I painted the shaft of his billhook with Americana "Mississippi Mud". 
      Next, I painted the roping on his weapon with Folk Art "Butter Pecan", and then I painted the little shells and baubles on his netting an assortment of about five different colors that I just grabbed randomly off on my table.     When everything was dry, I gave his feet and hands a wash with some Citadel "Reikland Fleshshade" wash.   When that wash was dry, I then gave a wash to his netting, loincloth, and billhook, with Citadel "Agrax Earthshade" wash.
     I then gave the fins on his arms and legs a wash with some Iron Wind Metals "Mid Blue" ink.  When all the washes were dry, I painted his eyes Reaper MSP "Holly Berry", and as I was doing it, realized I hadn't painted his teeth, so I did those with some Americana "Antique White, and when dry, gave them a wash with the "Agrax Earthshade".  When dry, I highlighted them with some Crafter's Acrylic "Light Antique White".
While I was using the "Light Antique White", I also used it to clean up some of the bigger wash stains on his belly, and do some general belly highlighting.   I realized I hadn't painted his claws, and so did those with some Americana "Terra Cotta".  When dry, I gave them  a wash with the Agrax Earthshade".  Next, I highlighted his hands and feet with Americana "Tangerine". I didn't feel it was light enough, so went back an touched it up with some of the "Tangerine" mixed with some Crafter's Acrylic "Daffodil Yellow". After that, I highlighted the claws with some Accent "Golden Oxide".   I then highlighted his fins with some Americana "Salem Blue", and his loin cloth with some of the original "Dapple Grey" mixed with some Americana "Jade Green".   Next, I highlighted the shaft of his billhook with Americana "Khaki Tan", and the rope binding with some Reaper MSP "Olive Skin Highlight".  I painted the metal part of the weapon with some Americana "Zinc", and when dry, went over it with some Folk Art Metallics "Gunmetal Grey".  When that was dry, I gave it a wash with some Citadel "Nuln Oil wash; and when that dried, I did a few highlights with Ceramcoat "Metallic Silver". 
    Lastly, I painted the figure's integral base with the "Bittersweet Chocolate".
     I let the figure dry overnight and the next day I gave it a coat of Americana "DuraClear Matte" varnish.    Then, when  the varnish was dry, I used some white glue to flock the base.  Another overnight dry, and I sprayed it with Testor's Dullcote".  After the Dullcote was dry, I applied a little watered-down Woodland Scenics "Water Effects" to the edge of the base, to give a slight swamp effect.


    I'm really happy with this fellow, and in my opinion I think the non-traditional color scheme looks kind of cool.

Monday, October 30, 2017

Sea Hag, Painted as Ghost Archipelago "Swamp Zombie": Bone 2 Figure

     This past week I painted the Sea Hag figure from the Bones 2 Under the Sea set to represent a "Swamp Zombie" for the Ghost Archipelago rules.
   I prepped the figure in the usual way; soaking it in a dish of water with a couple drops of dish-soap added, then giving it a light scrub with a soft toothbrush, and then rinsing and drying it.    I then glued the figure to a black-primed 1." fender washer with Aleene's Tacky glue, and then glued the washer-mounted figure to a tongue depressor with a couple drops of the Elmer's glue.
      Right before starting to paint this figure, I noticed it had a tiny octopus on it's left shoulder; so I trimmed off the oct's main body, with the hope I could paint the remaining legs to look like part of the figure's ragged clothing. In fact, I took the photo below before I noticed the octopus sitting there.
      I began by painting all the exposed skin with Americana "Reindeer Moss Green".  Next, I painted the remains of the dress with Crafter's Acrylic "Forest Green", and then the hag's hair with Apple Barrel "Apple Black Green".
     Next, I painted dried blood splatter here and there with Ceramcoat "Black Cherry".  I let everything dry for a while and then gave the figure a wash with Citadel "Agrax Earthsahde" wash.   When the wash was dry, I painted the eyes with Crafter's Acrylic "Light Antique White", and then highlighted the skin with Some Ameircana "Jade Green" mixed with some of the "Light Antique White.
     I then drybrushed the hair with Crafter's Acrylic "Holiday Green", and highlighted the clothing with Crafter's Acrylic "Citrus Green".  After that I added fresher looking blood  to all the spatter areas using Reaper MSP "Holly Berry". I decided at that point that I wanted more variation in the stuff draped all over her, so some of it might look like swamp vegetation, so I gave some of the more stringy parts of what she's wearing a wash with some Citadel "Dark Green" ink.
     Lastly, I painted the figure's integral base with Ceramcoat "Walnut".
     I let the figure dry overnight and the next morning I gave it a coat of Americana "DuraClear Matte" varnish. When that was dry, I flocked the base. Another overnight dry, and I sprayed it with Testor's Dullcote".  When the Dullcote was dry, I went back and painted the hair and some of the hanging material with some Americana "DuraClear Gloss" Varnish.
     I'm pleased with the results on this figure.  It certainly looks like the kind of zombie one would expect to crawl out of a swamp in my opinion! 

Monday, May 22, 2017

Goroloth: Bones 2 Sea Monster

     This week I painted up the Goroloth figure from the Bones 2, Expansion Set #1, add-on set.  In looking at the figure, I decided I wanted to paint it like some crazy wizard decided to cross an Octopus with a Shark.  (Crazy you say?! Behold the glory of my Sharktopus! Who's crazy now, I ask!!  Muuwahahahaha!)  :)
     I prepped the figure in the usual way; soaking the pieces over night in a dish of water with a couple drops of dish-soap added, then giving them a light scrub with a soft toothbrush, and then rinsing and drying them.   I then assembled the model using Gorilla superglue. When the superglue was set, I tested the fit of the mounting hole in the model with a spare Reaper CAV flight stand I had, and was very happy to see it fit perfectly.
     I began by painting the front of the "Sharktopus" with Americana "Shading Flesh", an the rear of the figure with Americana "Wedgewood Blue".  I then made a mix of the two paints and carefully blended the front and back colors together.
    Next, I painted the underside of the tentacles with Americana "Mocha".  I let everything dry for a while, then gave the entire figure a wash with Citadel "Nuln Oil" wash using a wet brush.
     I then drybrushed the front part of the figure with first a Reaper Free Sample color that was a nice Salmon hue, and followed that with some Folk Art "Almond Parfait".  I then drybrushed the back of the model with Crafter's Acrylic "Tropical Blue".
     I then painted two lines running down the tail, one above and one below the circle indents, using Folk Art "Metallic Emerald Green".  After that, I painted the circle indents themselves with Folk Art Pearl "Aqua Moire".  I then moved to the eyes, painting them a mix of Crafter's Acrylic "Orange Spice" and Ceramcoat "14K Gold".  Next, I drybrushed the underside of the tentacles with Crafter's Acrylic "Light Antique White".  I then went back and gave the circle indents a wash with some Iron Wind Metals "Medium Blue" ink using a wet brush.  I then returned to the eyes, and painted White pupils, and then gave them Black centers.   When the ink wash was dry in the circles, I repainted the center of them with the base "Aqua Moire".
    I let the figure dry overnight, and the next day I gave it a coat of Americana "DuraClear Matte" varnish.    Since this has a slight sheen to it, rather than being true matte, I decided to go with just this as my final coat.  I did however go back and paint the eyes with Americana "DuraClear Gloss" Varnish to give them an extra shine.


Thursday, August 27, 2015

Another Sharkman (Desert Version): Bones II Figure

  I also completed another Sharkman figure this week, from the Bones II Core Set "Under the Sea" group.   For those who missed the first Sharkman I   painted you can see it here.  Like the first one I did, this figure was slanted off to one side.   So I used the same fix;  putting something under the foot on the tilted side to bring the figure back up into alignment.  Also, like the first, there were gaps where the arms were attached to the body that  needed to be filled.
      As with the first Sharkman,  the figure was easy to pry from its base with a little help from a hobby knife. And with some two-part epoxy putty I made a small boulder for the Sharkman's right foot to sit on, and filed the space under the left foot where it's peg no longer fit directly into it's mounting hole.  I also filled the small gaps at his shoulders.
   Backtracking a little,  I prepped the figure in the usual way; soaking it in a dish of water with a couple drops of dish-soap added, then giving it a light scrub with a soft toothbrush, and then rinsing and drying.  I then glued the figure's separate base to a 2" black-primed fender washer with Aleene's Tacky glue.  Once the figure's base was firmly glued to the washer, I then added my new boulder foot rest.  The 2" washer was big enough to just hand hold, so I didn't glue it to a tongue depressor.
     I wanted to do something a little different with this second one.  The first Sharkman I painted just like a normal shark would look: so this one I wanted to do more as a creature who had adapted to life on dry land. Perhaps a desert world where all the oceans had dried up.  In keeping with that, I wanted to do this one in more a brown scheme like he had evolved to blend in with the surrounding rocks and landscape.   For fun, I thought I would keep a little bit of his ancestor's grey coloring in his tail.
     I began by painting his upper body with Americana "Mississippi Mud".  I then painted his tail  with Crafters Acrylic "Storm Cloud Grey". Next, I mixed some of these two colors together and worked on blending them on his body, so the color change from the brown body to the grey tail appeared natural.  I then took some of the "Storm Cloud Grey" and added some spots gradually extending from the tail on to the body.  I also added some spots to the top of the fin.  I then painted his undersides with Crafters Edition "Taupe".  His open mouth I painted with Crafters Acrylic "Cherry Blossom Pink".
   Next I painted his claws (both feet and hands) with Folk Art "Milkshake", and his teeth with Americana "Buttermilk".  I painted his sharktooth weapon with Folk Art "Porcelain White" on the pointy part and a Folk Art "Dark Grey" base.
  I then painted the wooden parts of his arm guards with Folk Art "Bar Wood", the wrap around his wrist with FolkArt "Barnyard Red" and the chains and handle of his weapon with Cermacoat "Walnut".  I fished off the chain and the weapon handle with my usual rust effects, using an old frazzled small brush and stippling Crafters Edition "Spice Brown" over the chains.   Next, I did the same, but to a lesser extent with Accent "Golden Oxide".  Lastly, I drybrushed them with Ceramcoat "Metallic Pewter".
       I then painted all the shells and other baubles hanging on his wrist guards with an assortment of yellows, grays, and blues I grabbed haphazardly off my painting table.    I also painted the rock he's standing on with GW  "Khemri Brown".
 Then, I drybrushed the rock he's standing on with first the "Golden Oxide", followed by the "Buttermilk".   When all the paint had a few hours to dry, I gave the entire figure a wash with GW "Agrax Earthshade" wash using a wet brush.
  After the wash was dry, I drybrushed the Sharkman's upper body with the base "Mississippi Mud" and then painted highlight details with the lighter Americana "Khaki".  I highlighted the underside body with the base "Taupe".  His mouth I highlighted with the base "Cherry Blossom Pink", and his teeth I highlighted with the base "Buttermilk" first, and then some Crafters Acrylic "Light Antique White".  His claws I highlighted with the base "Milkshake".  His eyes I painted Black and then added a tiny pinpoint White dot to each. 
   His sharktooth weapon I drybrushed with  the base "Porcelain White" on the pointy part, and the base "Dark Grey" on the bottom.  His wood wrist guards I drybrushed with the base "Barn Wood". The wrist under-wraps I highlighted with the base "Barnyard Red", and the baubles were all highlighted in their base colors as well.  
       After the figure had the afternoon to dry, I gave it a coat of Ceramcoat "Matte Varnish" in the evening.  The next morning I brushed white glue all over the the base and dipped it in a sand mixture.   When the sand mixture was dry, I painted it with Cermacoat "Walnut".  When the "Walnut" was dry, I drybrushed it with the same colors I had used on the rock: "Khemri Brown" "Golden Oxide" and "Buttermilk".  I then glued on a couple clumps of dried grasses.   Later that afternoon I sprayed the figure with Testor's Dullcote. 
   I like how this guy turned out.  I think he has a good alternative look to the previous one I painted.

Thursday, August 20, 2015

Sharkman: Bones II Figure

    I also completed the Sharkman figure this week from the Bones II Core Set "Under the Sea" group.  I didn't like this figure at first because it is sculpted oddly, so that the whole body of the Sharkman is slanted off to one side.  I have looked at a couple of these figures, and they all seem to share this quality.  It doesn't seem to be a typical Bones bent leg problem, but actually the way the figure is constructed.  I decided that putting something under the foot on the tilted side might help bring the figure back up into alignment.  Also, there were gaps where the arms were attached to the body that would need to be filled.  I sometimes think it would be better for Reaper to supply figures like this unassembled so the hobbyist could put them together with more care than the Chinese factory worker does.
  The figure was easy to pry from its base with a little help from a hobby knife. And with some two-part epoxy putty I made a small boulder for the Sharkman's right foot to sit on, and filed the space under the left foot where it's peg no longer fit directly into it's mounting hole.  I also filled the small gaps at his shoulders.
     Backtracking a little,  I prepped the figure in the usual way; soaking it in a dish of water with a couple drops of dish-soap added, then giving it a light scrub with a soft toothbrush, and then rinsing and drying.  I then glued the figure's separate base to a 2" black-primed fender washer with Aleene's Tacky glue.  Once the figure's base was firmly glued to the washer, I then added my new boulder foot rest.  The 2" washer was big enough to just hand hold, so I didn't glue it to a tongue depressor.
     I began by painting his upper body with Crafters Acrylic "Storm Cloud Grey", and his undersides with White.  His open mouth I painted with Crafters Acrylic "Cherry Blossom Pink".
     Next I painted his claws (both feet and hands) with Folk Art "Platinum Grey", and his teeth with Americana "Buttermilk".  I painted his sharktooth weapon with a Black pointy part and a Folk Art "Barn Wood" base.
     I then painted the wooden parts of his arm guards with Americana "Mississippi Mud", the wrap around his wrist with Crafter Acrylic "Forest Green" and the chains and handle of his weapon with Cermacoat "Walnut".  I also painted the rock he's standing on with Americana "Asphaltium".
     I fished off the chain and the weapon handle with my usual rust effects, using an old frazzled small brush and stippling Crafters Edition "Spice Brown" over the chains.   Next, I did the same, but to a lesser extent with Accent "Golden Oxide".  Lastly, I drybrushed them with Ceramcoat "Metallic Pewter".
     I then painted all the shells and other baubles hanging on his wrist guards with an assortment of yellows, grays, and blues I grabbed haphazardly off my painting table. Then, I drybrushed the rock he's standing on with first Americana "Sable Brown", followed by Americana "Khaki".   When all the paint had a few hours to dry, I gave the entire figure a wash with diluted Black in with a little drop of dish soap added.
      After the ink wash was dry, I drybrushed the Sharkman's upper body with the base "Storm Cloud Grey" and then painted highlight details with the lighter "Platinum Grey".  I highlighted the underside body with the base White.  His mouth I highlighted with the base "Cherry Blossom Pink", and his teeth I highlighted with the base "Buttermilk" first, and then some Crafters Acrylic "Light Antique White".  His claws I highlighted with Americana "Dove Grey".  His eyes I painted Black and then added a tiny pinpoint White dot to each.
   His sharktooth weapon I drybrushed with  Apple Barrel "Apple Scotch Blue" on the pointy part, and the base "Barn Wood" on the bottom.  His wood wrist guards I drybrushed with the base "Mississippi Mud", and then mixed a little of the "Mississippi Mud" with some Folk Art "Milkshake" and did lighter highlights. The wrist under-wraps I highlighted with the base "Forest Green", and the baubles were all highlighted in their base colors as well.   Lastly, I painted the base with the "Walnut", being careful to leave the sculpted rock exposed.
       After the figure had the afternoon to dry, I gave it a coat of Ceramcoat "Matte Varnish" in the evening.  The next morning I flocked the base, using mainly a sand mixture, and later that afternoon I sprayed the figure with Testor's Dullcote.
    I'm pleased with how Mr Sharkman turned out.  And I think the base turned out suitably so that he won't look too out of place either on land or an underwater setting.  I may go back and hit the eyes with a little gloss varnish as I think they look a little flat and not beady enough.