Showing posts with label Ghost. Show all posts

Monday, September 13, 2021

Ghost of the Dwarf King and Everliving Flames: Bones 5 Encounter Figures

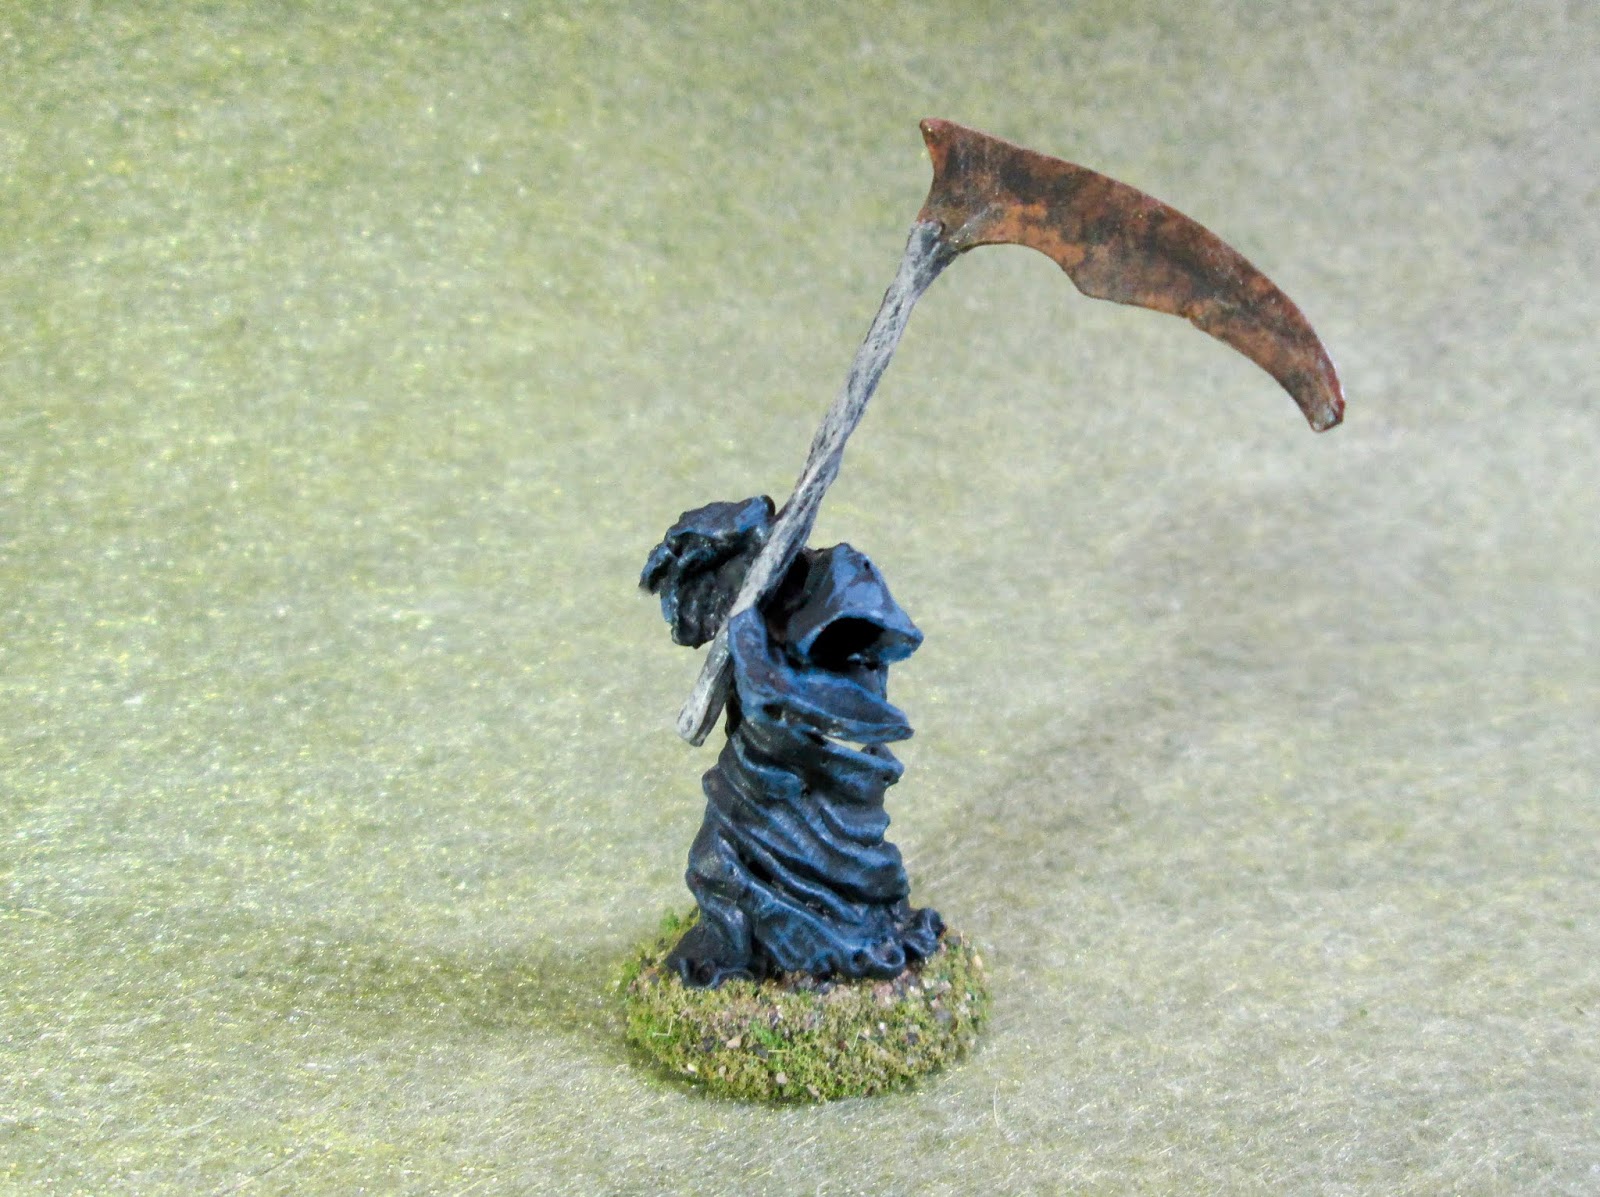
      This past week I painted the "Ghost of the Dwarf King Durman the Mad", and two of the "Everliving Flame" pieces, from the Bones 5 The Dwarf King's Crypt Encounter set.  The set only comes with one of the Everliving Flame terrain pieces, but I ordered two of the Encounters as I wanted pairs of a number of the set's scenery items, as well as a bunch of the Dwarf Zombies that came with it.
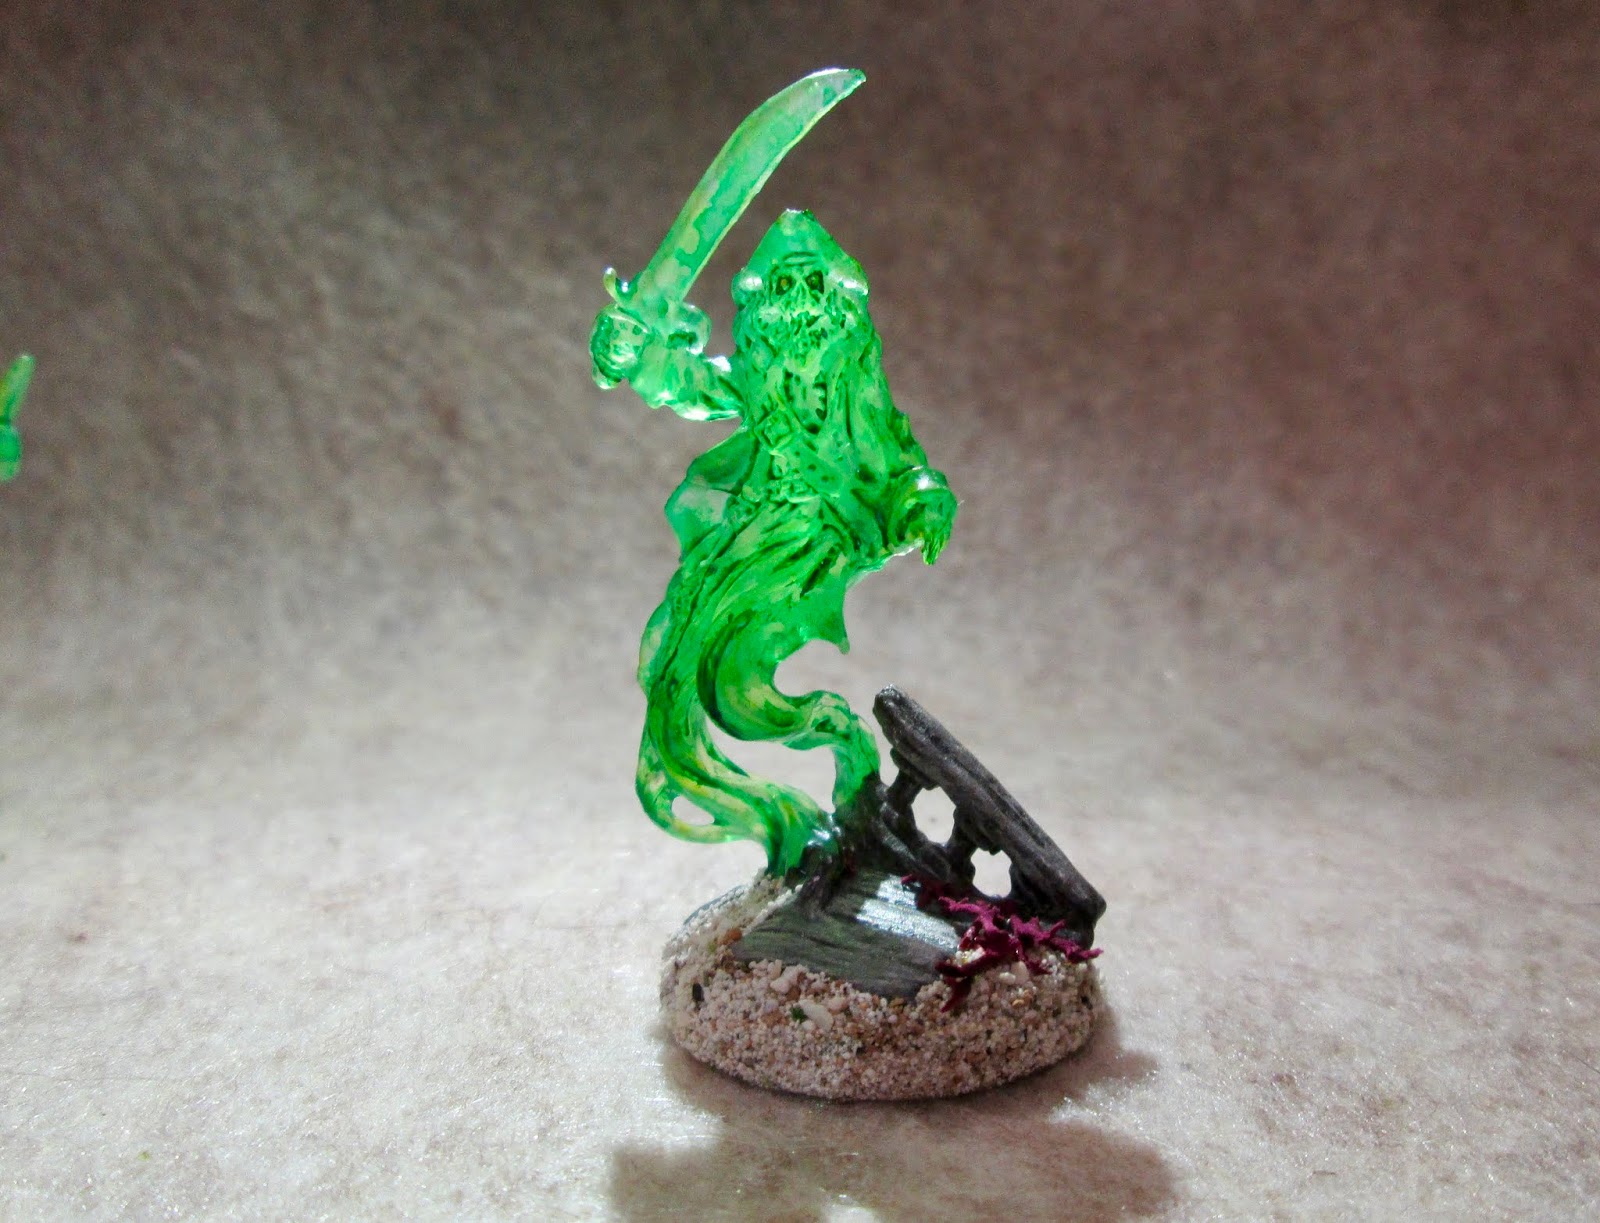
     As you can tell from my past entries, I've really had a lot of fun experimenting with all the translucent figures that came in this Kickstarter.  This gave me an excuse to start working on the excellent Dwarf Kings Crypt set.  I was interested to see what I could do with the King's ghost which had been cast in blue.
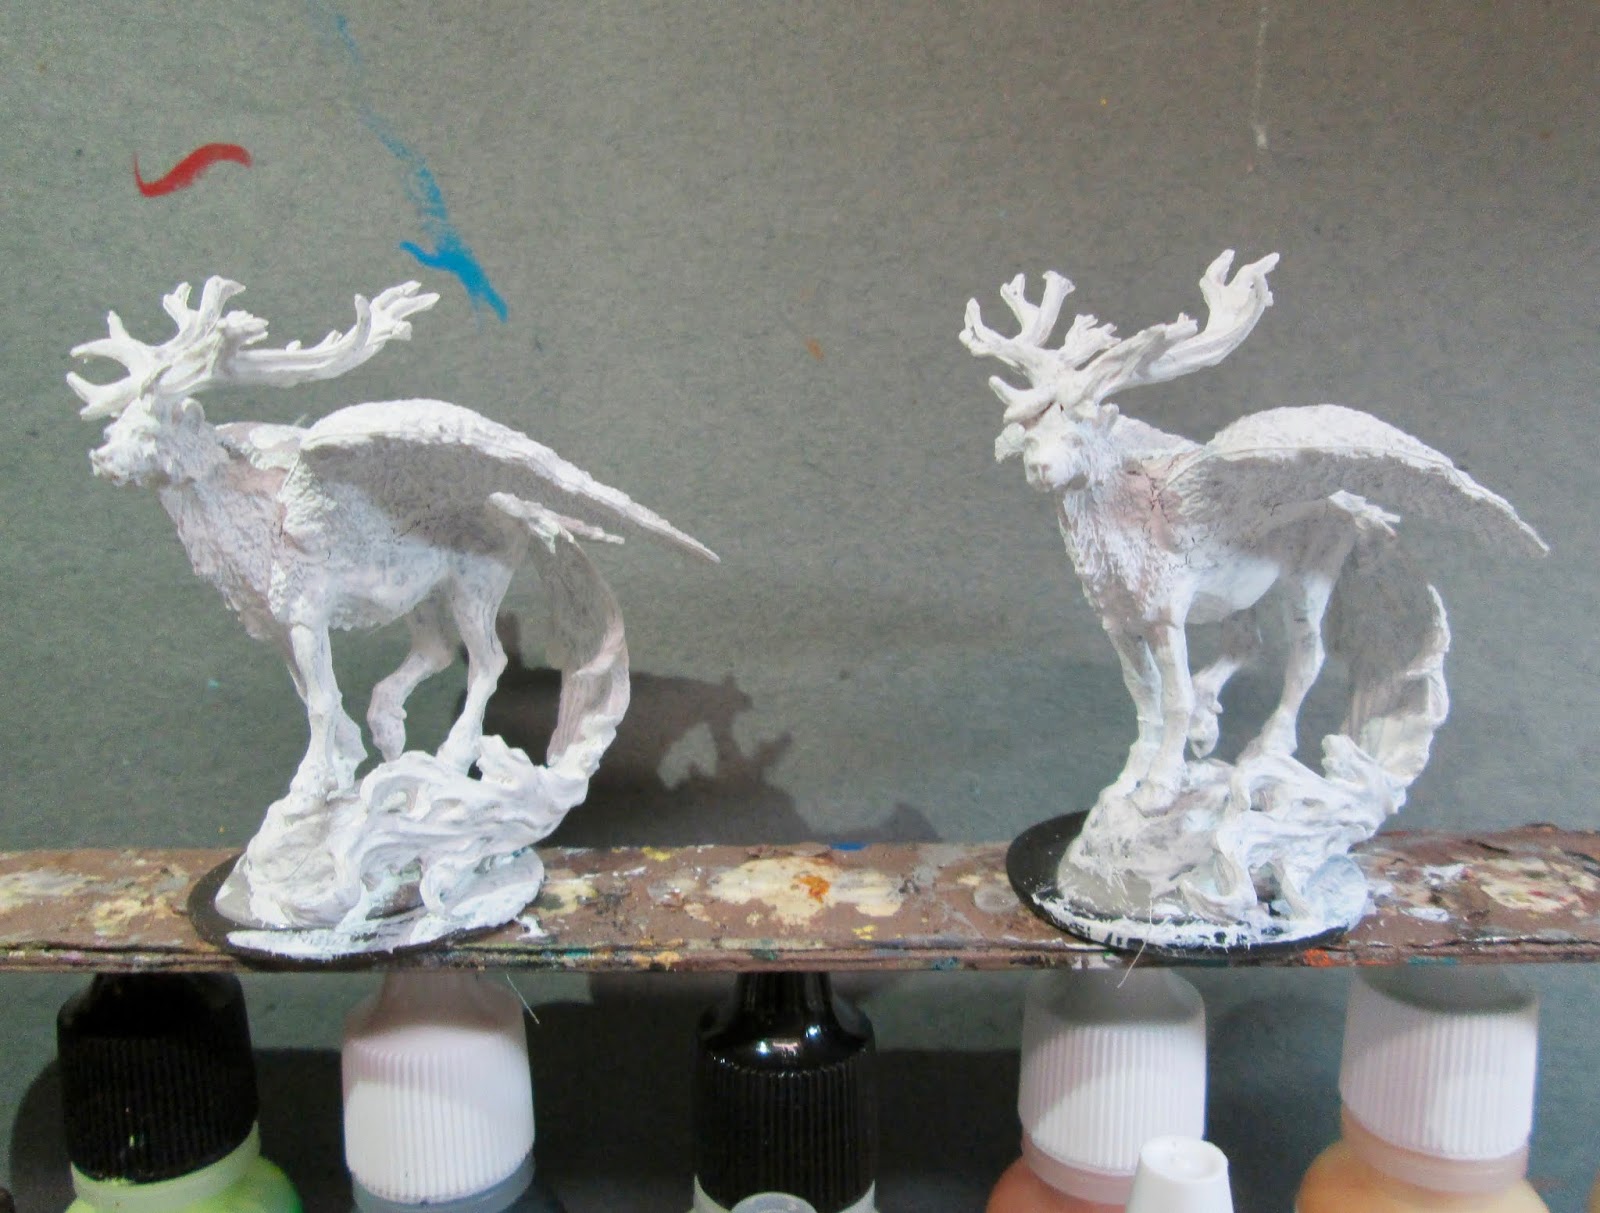
         I prepped the figures in the usual way, soaking them in a dish of water with a couple drops of dish-soap added, then giving them a light scrub with a soft toothbrush, and then rinsing and drying them.  I then glued the Dwarf King and the Flames to 1" primed metal washers, using Aleene's Tacky for the King, and some Gorilla Super Glue Gel glue for the Flames.  I then put the King into my painting grip, and glued the Flames to a tongue depressor with a couple drops of Elmer's School Glue.

          I started with the King, and began by painting the entire figure completely with Americana "DuraClear Matte" varnish.  Then, when the varnish was dry, I painted the figure completely again using thinned Citadel Contrast "Ultramarine Blue" to help provide some shadows in the recesses.
     When the "Ultramarine Blue was dry, I drybrushed the body with, first Citadel Dry "Hellion Green", and then Folk Art "Celadon Green", careful to avoid the weapon and the wisps coming from his left hand.  I then drybrushed the weapon, and the wisps in his left hand, using Crafter's Acrylic "Daffodil Yellow", and then Apple Barrel "Lemon Chiffon".  After that, I painted his eyes with Tamiya Color "Clear Red".  When dry, I added pupils with Reaper MSP "Holly Berry", and highlight dots with the "Lemon Chiffon".  Lastly, I painted his open mouth with Contrast "Black Templar".
     
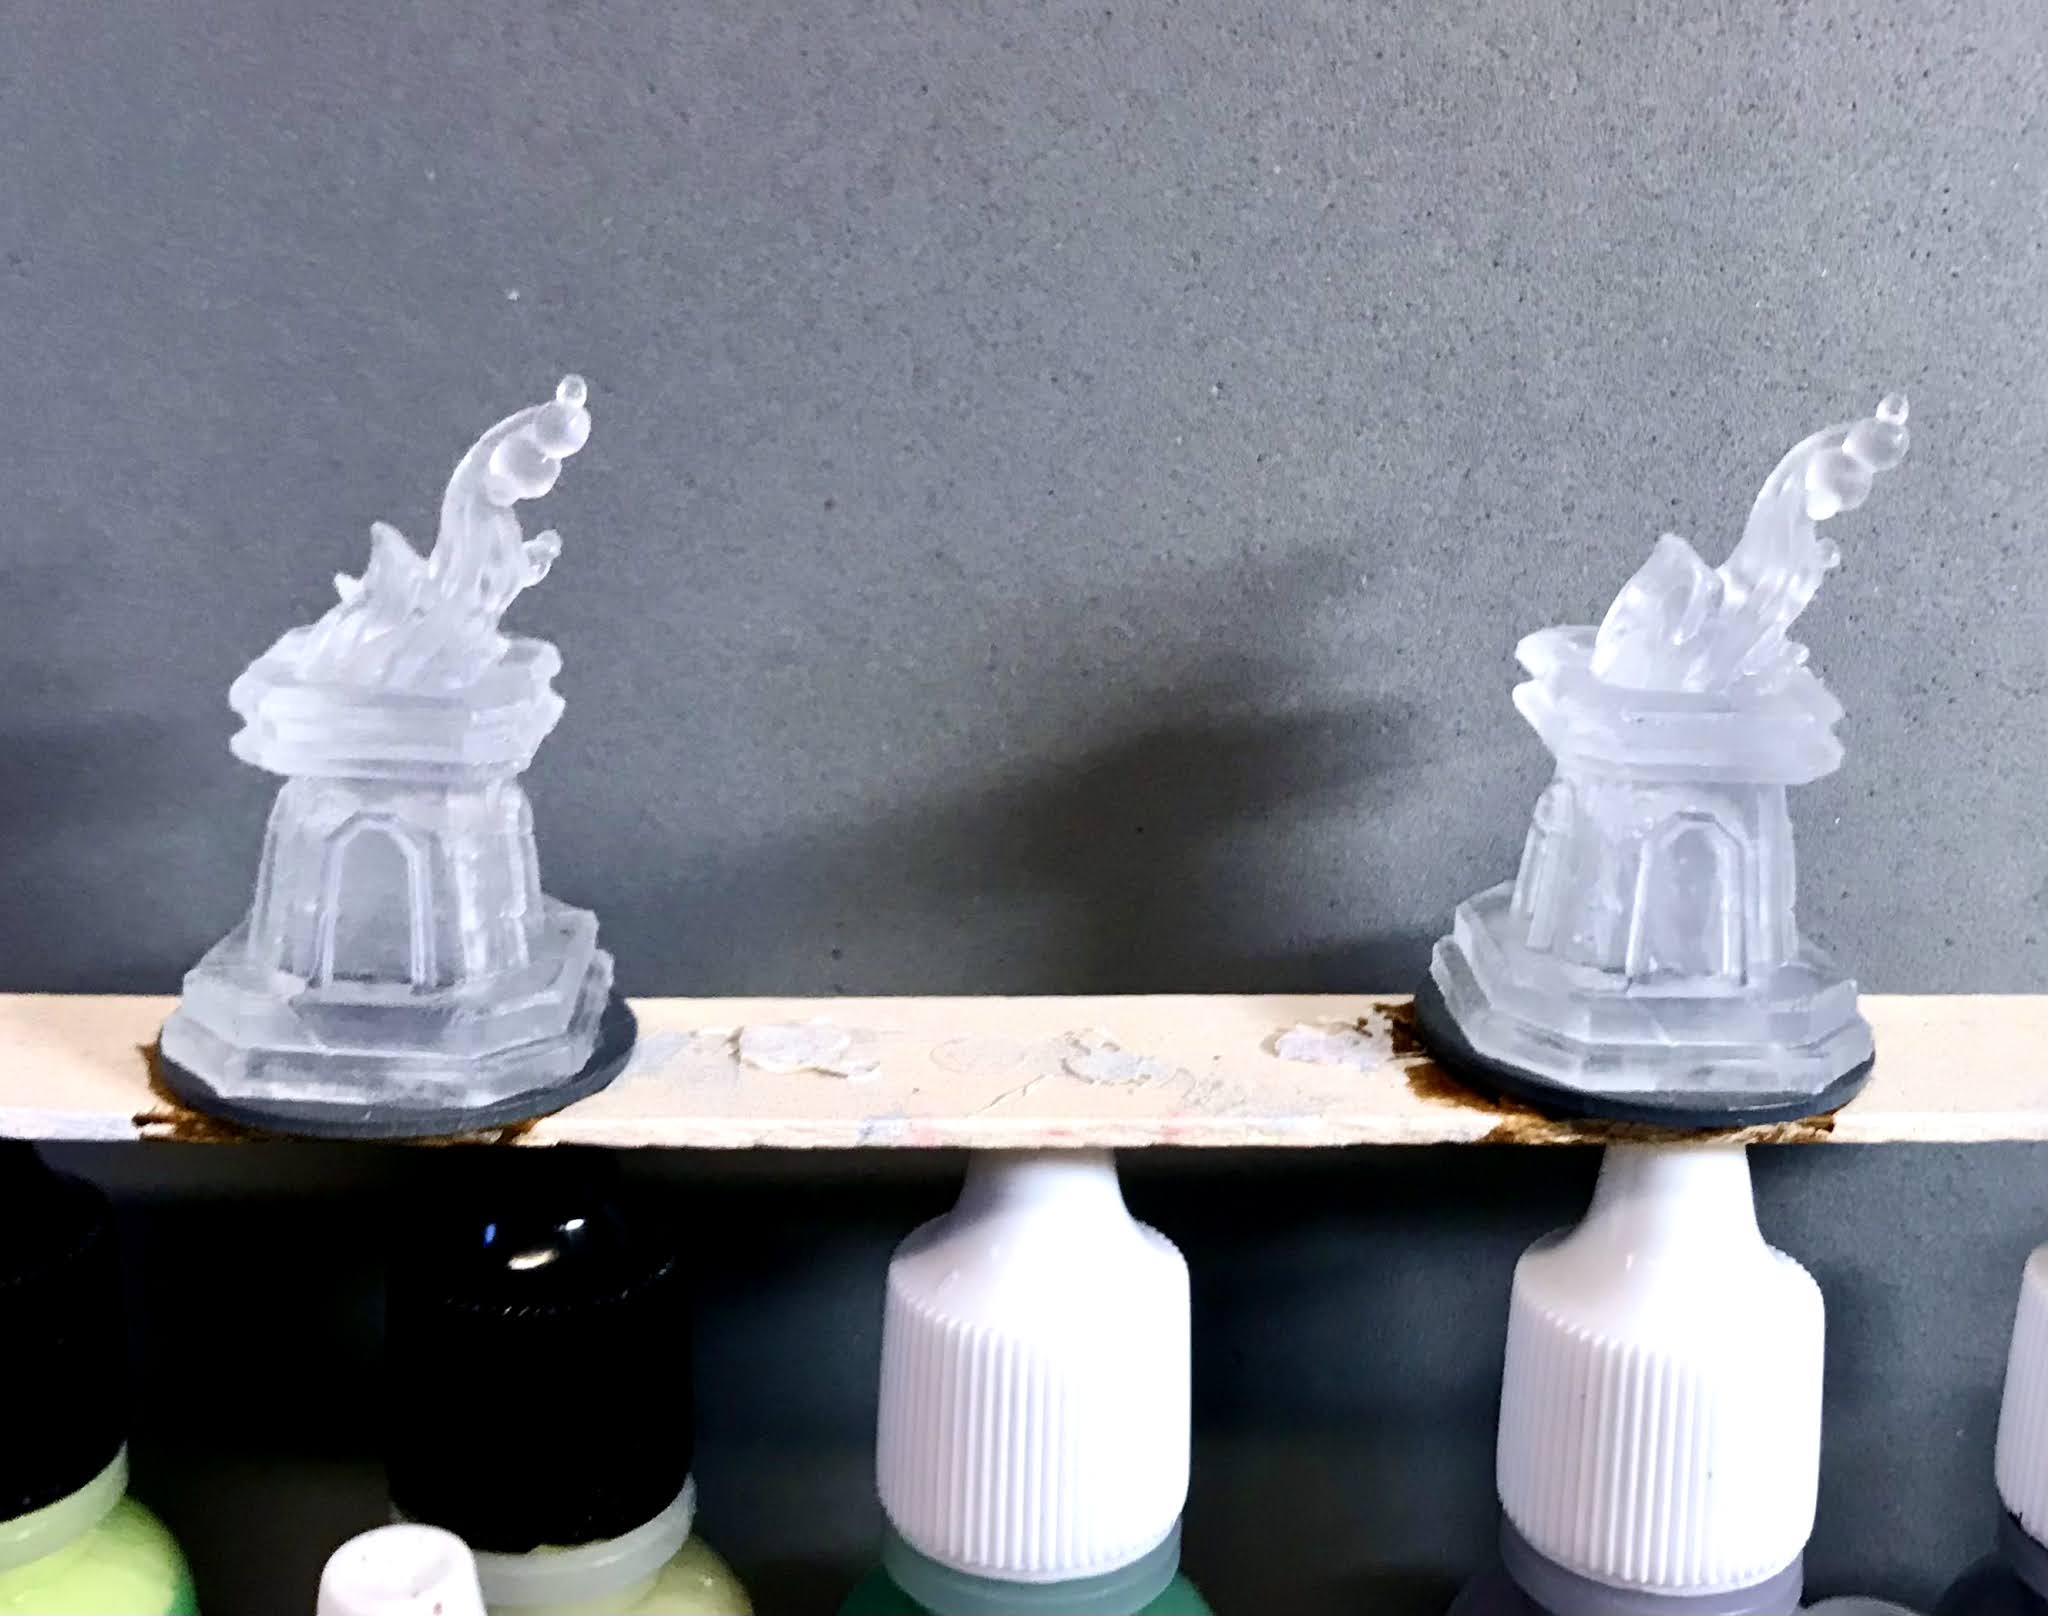
     Next, I turned to the Eternal Flames. Like the Dwarf King,  I began by painting both the figures completely with Americana "DuraClear Matte" varnish.   When dry, I started on the flames, and painted the bottoms with Citadel Contrast "Iyanden Yellow", and then painted the midsections with Citadel Contrast "Gryph-Hound Orange". After that, I painted the tops of the flames with Citadel Contrast "Blood Angels Red", and then a tiny bit of Citadel Contrast "Black Templar" at the very tips.  
      I was really pleased with the flames until I painted the bases with Ceramcoat "Charcoal". Making the bases dark and opaque cut off a lot of the light that had helped brighten the translucent flames. 
     So, I decided I would need to paint the bases of the flames with regular acrylic paint to brighten them, and blend it with the more translucent Contrast paint as it went up.  So, I painted some areas with Reaper MSP "Hearth Glow, and then added some Crafter's Acrylic "Daffodil Yellow", and a little Apple Barrel "Lemon Chiffon".  I then added some dots of the "Lemon Chiffon" near the top to try and look like floating sparks. I then put a little of the "Black Templar" around the base of the flame to blend the bottom with the base of the braziers. 
     I then worked on highlighting the braziers, drybrushing with, first, Americana "Zinc", then, Crafter's Acrylic "Storm Cloud Grey", and then a bit of Americana "Grey Sky".   After that, I tried to do a bit of an OSL (object source lighting) effect by drybrushing the tops of the braziers, as well as the bottom where the flames leaned over the edge, with Crafter's Acrylic "Pure Pumpkin", Crafter's Acrylic "Bright Yellow", and the "Daffodil Yellow". I lastly used a bit of Reaper MSP "Holly Berry"  

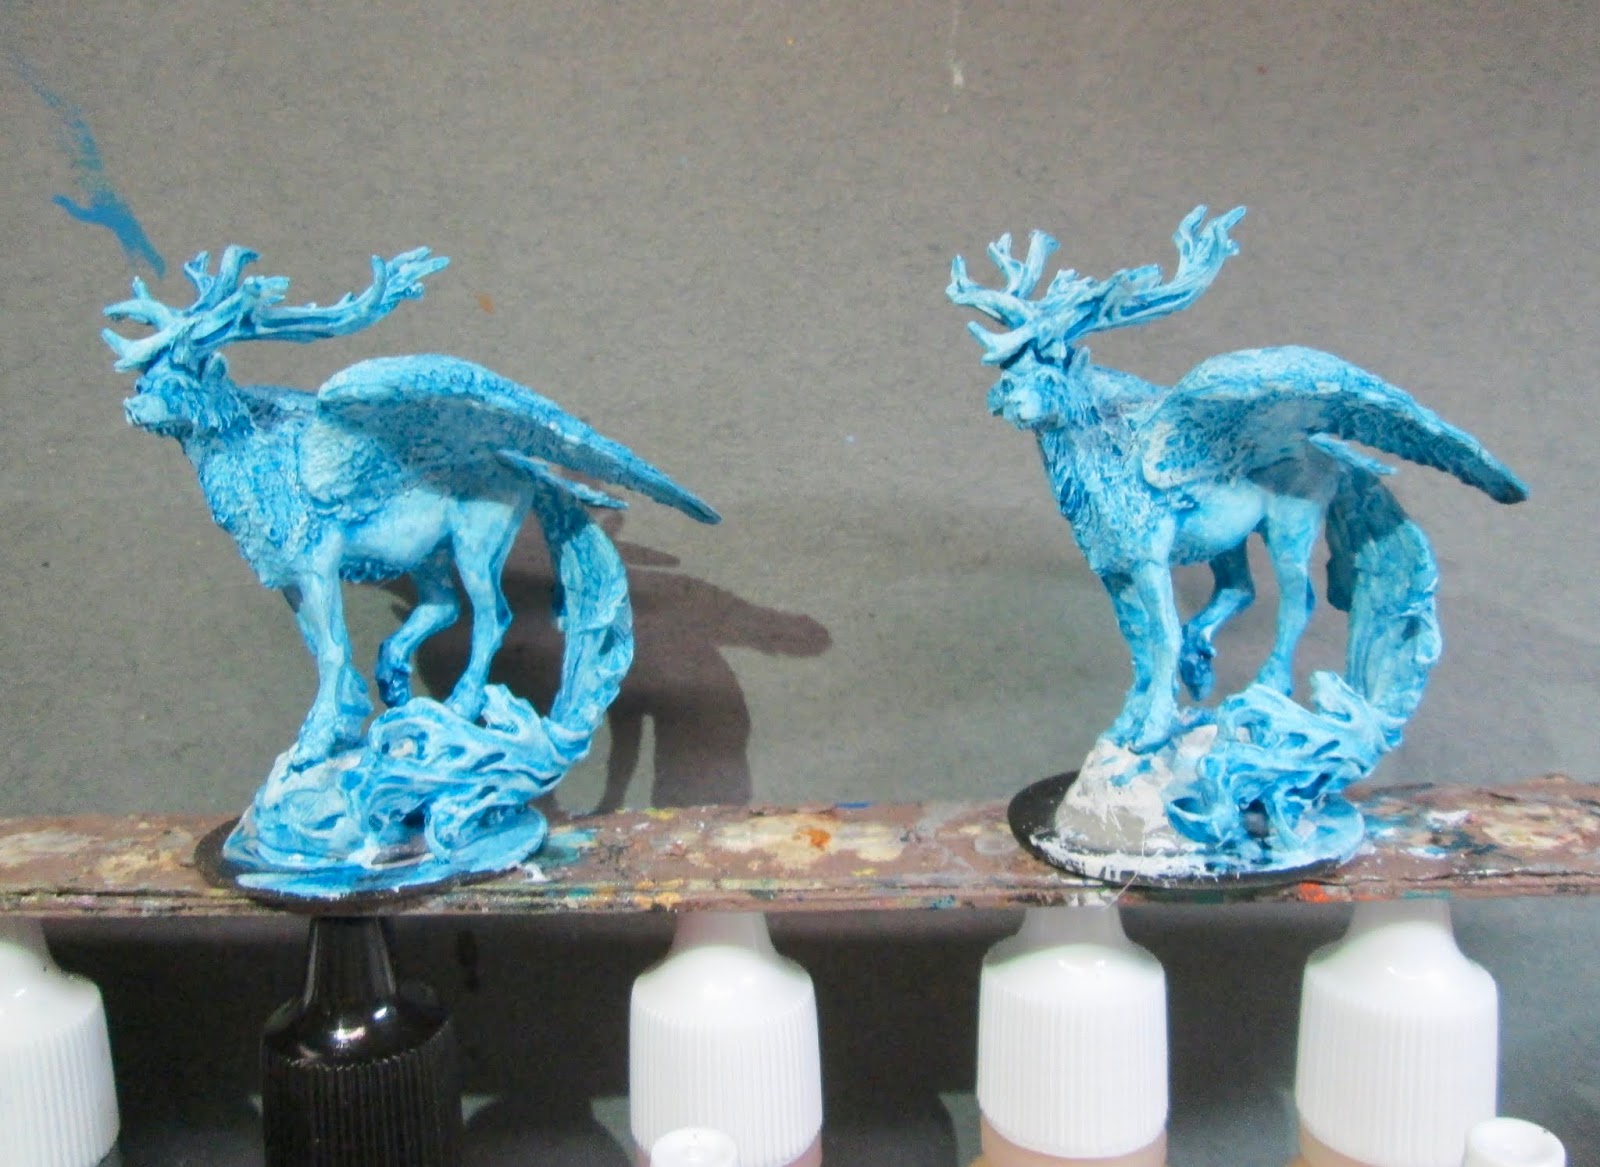
    When everything was dry, I used some white glue to glue some sand onto the base of the Dwarf King.  When this was dry I  painted it with the "Black Templar".  When that was dry,  I drybrushed the edges of the base with some of the Crafter's Acrylic "Tropical Blue", and then I blended in some Crafter's Acrylic "Cool Blue" closer to the figure, to again try a little OSL effect to make it look like the ghost was glowing.
      I let all the figures dry overnight and the next day I gave them a coat of Americana "DuraClear Matte" varnish.     


     I'm generally pleased with these figures.  I think the translucence helps give them a unique look.  The OSL I feel is not my best, but works okay.  I probably should have spent more time with it, but was eager to get these figures finished up.

Monday, February 3, 2020

Spirit Beast: Bones 4 Dreadmere Figure

     This past week I painted a pair of the Spirit Beasts from the Bones 4 Dreadmere Expansion.  There was something about this figure that made me think of the Patronuses in the Harry Potter books and movies (And, yes, that is the proper plural; I looked it up!)  So, I decided to try for that glowing white/blue appearance that is the key feature of their appearance.
         I prepped the figures in the usual way, soaking the parts in a dish of water with a couple drops of dish-soap added, then giving them a light scrub with a soft toothbrush, and then rinsing and drying them. I then assembled the figures with Gorilla Superglue gel.   After that, I glued them to 1.25" black-primed fender washers with Aleene's Tacky glue.  I then glued the washers onto a tongue depressor with a couple drops of Elmer's white glue.
   I was going to try these with my new Citadel Contrast Paint, as I thought that would be ideal to give them their blue shadows.  So, I began by prepping them by painting them entirely with Americana "Snow White".
     I then made a mix of some of the Citadel Contrast "Tallasar Blue", and some of the blue-tinged Citadel Contrast "Space Wolves Grey". I thinned this mix with a couple drops of water, and then applied it to the entire figures
     When the Contrast coat was dry, I drybrushed the figures with some of the "Snow White", and then went back and painted further highlights directly with a brush using the "Snow White".
Next, I painted the rocks they are standing on with Americana "Charcoal"; and when dry, gave them a light drybrushing with some Crafter's Acrylic "Storm Cloud Grey".  After that, I drybrushed them with some Crafter's Acrylic "Cool Blue", and then added a few "Snow White" highlights.  Lastly, I painted the bases with Americana "Mississippi Mud".
     I let all the figures dry overnight and the next day I gave them a coat of Americana "DuraClear Matte" varnish.    Then, when  the varnish was dry, I used some white glue to flock the bases.  Another overnight dry, and I sprayed them with Testor's "Dullcote".  


    The shot below, using the camera's flash, helps improve the "glowing" effect I think. :)
    Not too bad, but not quite as glowy as I would like.  Still I think it gets the idea of "Spirit Beast" across well enough.
   

Monday, May 27, 2019

Ghost Pirates: Bones 4 Figures

   This past week I worked on the Ghost Pirates set from the Bones 4 Core Set.   The Core Set came with 5 of these figures, and I ordered a second set so I would have a unit of 10 for larger games. I painted the second 5 the exact same way that I painted the first 5, so did not include progress shots of them; but I did include them in the group photos at the end.
   I prepped the figures in the usual way; soaking them in a dish of water with a couple drops of dish-soap added and then rinsing and drying.   I then glued each one to an unprimed 1" fender washer, with Aleene's Tacky glue.  I then glued the figures to a number of tongue depressors with a couple drops of the Elmer's glue each.
 
       I began by painting the washers with Americana "Metal Primer".  I then painted the figures completely with Americana "DuraClear Matte" varnish; as I  planned to use ink on them, and the matte varnish gives the ink something to hold on to better than the bare plastic.  When the matte varnish was dry, I applied a heavily thinned wash of Citadel "Green" Ink to the figures, trying to keep it just on the pirates themselves and not on the "scenery" pieces on the bases.

Note, I added a coat of un-thinned "Green" ink to the bottles the righthand pirate is carrying to give them a green glass look.
      When the ink was was dry, I painted their eyes with tiny dots of Americana "Margarita", and then painted the bases with Americana "Bittersweet Chocolate".

     Next, I drybrushed the scenic bases with a 50-50 mix of Americana "Neutral Grey" and Americana "Mississippi Mud".  This was followed with a lighter drybrushing using Folk Art "Barn Wood", and a last highlight drybrushing with Americana "Dove Grey".  I then painted the skulls on the bases with, first, Americana "Khaki Tan", and then drybrushed with Crafter's Acrylic "Light Antique White".  Lastly, I painted the rest of the base and washer with the Mississippi Mud".
    I let the figures dry overnight and the next day I gave them a coat of Americana "DuraClear Matte" varnish.    Then, when  the varnish was dry, I used some white glue to apply a fine sand mixture to the bases.  I decided not to spray varnish these as I have had some issues in the past with the translucent figures getting a little tacky after a while; so I'm just going to go with the brush on matte varnish. I did put a little Americana "DuraClear Gloss" varnish on the bottles the drinking pirate is holding to make them look like glass.
This is the original five I painted as shown above.

These are the original five as well.

And here's the whole crew.


     I'm really happy with these.  They turned out just as I had hoped.    The translucents are always a challenge to strike the right balance between keeping the translucency and applying shadow and highlight, and I think I hit a happy balance here.

Monday, January 7, 2019

Wraith: Bones 3 Figure

   Happy 2019, everybody!   This past week I painted the Wraith figure from the Bones 3 Core Set.  I had selected this figure a couple weeks ago,  with some kind of idea in my head to paint it as Father Time, in order to post for New Year's Eve. But I simply didn't have time to work on it.  It's just as well, I think, since in retrospect it's not a very good Father Time figure.
       I prepped the figure in the usual way; soaking it in a dish of water with a couple drops of dish-soap added, then giving it a light scrub with a soft toothbrush, and then rinsing and drying it.   I then glued the figure to a black-primed 1" fender washer with Aleene's Tacky glue, and then placed the figure in my painting grip.
     I began by painting the figure, including it's integral base,  with Ceramcoat "Black", and when that was dry, I went over the figure with Reaper MSP "Coal Black".  When that was dry, I drybrushed the figure with Citadel "The Fang"
     I then fully painted the scythe handle with the "Black", and then, when dry, drybrushed it with Americana "Neutral Grey", followed by Folk Art "Barn Wood".  I then painted the blade with Americana "Asphaltum".
     Next, I splotched the blade with fist, Americana "Light Cinnamon", and then Americana "Terra Cotta".   I  painted the  base with Americana "Bittersweet Chocolate".
     I let the figure dry overnight and the next day I gave it a coat of Americana "DuraClear Matte" varnish.    Then, when  the varnish was dry, I used some white glue to flock the base.  Another overnight dry, and I sprayed it with Testor's Dullcote".
Oops!  I see in the photo where I missed a bit of Black deep in a fold.


     It was a very simple figure, perfect for a busy week.  And generally I am pleased with it. 

   And to think Bones 4 could be here in a month or so! I'm going to be very interested to try the new Bones Black figures.  And my backlog of Bones will grow exponentially!

Thursday, February 15, 2018

Shadow Painted as a Ghost Archipelago Souldweller

   I thought I'd throw in a bonus Thursday figure since it ended up being a really quick one to complete.    I just finished painting up one of the Reaper purple translucent "Shadow" figures to represent a Souldweller from the Ghost Archipelago rules.  This figure was originally released as part of the Bones 2, Expansion 2, set; though I got mine via a regular order from Reaper.   A Souldweller is an immaterial demon, described in the rules as a human form made up of black smoke.  I thought the translucent figure would be perfect for representing this.
     I prepped the figure in the usual way; soaking it in a dish of water with a couple drops of dish-soap added, then giving it a light scrub with a soft toothbrush, and then rinsing and drying it.    I then glued the figure to a black-primed 1" fender washer with Aleene's Tacky glue.   And, when the glue was dry,  I put it in my Citadel painting grip.
      I began by giving the enitre figure a coating of Black ink.
     Then when the ink was dry, I lightly drybrushed the figure with a 50/50 mix of Crafter's Acrylic "Storm Cloud Grey" and Apple Barrel "Apple Lavender". Next, I painted it's eyes with Reaper MSP "Holly Berry", and then added pupils with Reaper MSP "Golden Glow". 
     Lastly, I painted the figure's base with Ceramcoat "Walnut".
     I let the figure dry overnight and the next day I gave it a coat of Americana "DuraClear Matte" varnish.    Then, when  the varnish was dry, I used some white glue to flock the base.  Another overnight dry, and I sprayed it with Testor's Dullcote".

I really like how this turned out.   It's probably too "material" looking to truly look like a demon made of smoke, but I think it comes as near as you can, and still use a solid figure.  It might not look smokey, but it does sure looks spooky, in my opinion!

Monday, June 9, 2014

Nightspectre: Figure 100 of 265

 This week I am happy to announce that I completed my 100th figure from the first Bones Kickstarter: the Nightspectre, from the Haunts set!  This milestone also marks the completion of the Haunts set, and so it gets added to my list of completed sets over on the right-hand column of this blog.  Onward to the next 165 figures!
   I  prepped this figure in the usual way; soaking it in a dish of water with a couple drops of dish soap added, then giving it a light scrub with a soft toothbrush, and then rinsing and drying.  I then glued the figure to a 2" black-primed fender washer with Aleene's Tacky glue.
With all the other figures from the Haunts set, I had fallen back on the obvious step of applying a wash of green ink to the figure, or some a part of it, to give some shading to the translucent green plastic.   This time I thought I'd try something different, and so I  gave the whole figure a wash with some thinned Iron Wind Metals purple ink to begin with.  After the ink had dried, I very carefully painted the skeletons in the vapor cloud with black paint
When the black paint had dried, I painted the skeletons' bones with Americana "Buttermilk".
I then went back and applied heavy highlights to the skeletons with white paint. I then painted the base of the figure black to cover the green translucent plastic that I was going to apply flock over.  After the figure had overnight to dry, I painted the whole thing with Cermacoat "Matte Varnish"; and when this was dry, I flocked the base.  The following day, I sprayed the figure with Testor's "Dullcote".
  I'm very pleased with how this turned out.  I actually think the purple ink over the green translucent Bones material looks kind of cool.
  I will be taking a break from posting anything next week, as my wife and I move to a new house this week, so I will be without a painting table for several days.  I'll see you back here on the 23rd when I will post figure 101, and we will be marking the 1 year anniversary week for this blog. :)

Figure 100 of 265: Complete

Monday, June 2, 2014

Ghostly Summons: Figure 99 of 265

   This week I painted the Ghostly Summons translucent figure from the Haunts set.  I'm very excited to be one away from my 100 figure milestone, so be sure to tune in next Monday as I reach that goal.
        I began my preparation of this figure in the usual way; soaking it in a dish of water with a couple drops of dish soap added, then giving it a light scrub with a soft toothbrush, and then rinsing and drying.  I then glued the figure to a 1.5" black-primed fender washer with Aleene's Tacky glue, and glued the washer to a tongue depressor with a couple drops of Elmer's White Glue.
I began by giving the whole figure a wash with GW "Dark Green" Ink, thinned down and with a pin head sized drop of dish soap added.
I then started to work on the flames.  I mixed some white into some Americana "Olive Green" and drybrushed the very bottom where the flames meet the stone base.  I then used the "Olive Green" straight up and dry brushed higher up on the flames.
Then, before that first color had time to completely dry, I switched over to Americana "Leaf Green" and drybrushed even further up onto the flames. Lastly, I switched over to Accent "Forest Green" and drybrushed the flames at the very top where they blend into the feet of the ghosts.
I now painted the summoning stone circle with Folk Art "Medium Gray". And painted the ghosts' eyes with Apple Barrel "Yellow".
When the stone circle was dry, I gave it a wash with thinned black ink to help bring out the runes carved in it.  When the ink was dry I drybrushed the stone, careful not to get any on the flames, with a lighter gray called Duncan "Slate Grey". I also painted the metal washer base with the "Medium Gray". I then went back and drybrushed the stone again, lightly with the "Olive Green" to give the impression of reflected light from he flames.
   After everything had overnight to dry, I gave it a coat of Ceramcoat "Matte Varnish", and when this had had a day to dry, gave the figure a spray with Testor's "Dullcote"
   I'm still not a fan of the translucents as they really frustrate my natural tendencies to want to do shading and highlights.  The shading with ink is fine, but highlights just end up looking like opaque patches from some angles.  Nonetheless, I am pleased with how this figure turned out.

Figure 99 of 265: Complete