Monday, April 30, 2018

Durgam Deepmug, Dwarf Hero: Bones 3 Figure, Converted to Frostgrave Thug

    This past week, I painted the Durgam Deepmug figure from the Bones 3 Dwarves set.  A while back I had converted three of the figures from this set to fill out an all-Dwarf warband I was making for Frostgrave.  This is the third and final of the three conversions I had to complete.  The other two, can be seen here: Hagar, Dwarven Hero, and here: Durok, Dwarf Ranger.
     Durgam Deepmug is the figure on the far right of the above and below photos.  He was a simple conversion; I merely removed the front of the weapon in his left hand, and hallowed out his fist a little to make it look like it was simply clenched.  I actually left the back handle end of the weapon, shortening it a little; figuring I would paint it to resemble a map case or such hanging from his belt.
      I had prepped this figure in the usual way back before I did the conversions; soaking it in a dish of water with a couple drops of dish-soap added, then giving it a light scrub with a soft toothbrush, and then rinsing and drying it.    I now glued the figure to a black-primed 1" fender washer with Aleene's Tacky glue, and then placed the figure in my painting grip.
      I began by painting all the armor Black.  Then, when the Black was dry, I drybrushed the armor with  Folk Art Metallics "Gunmetal Grey", and then passed over it with a lighter drybrush of Ceramcoat "Metallic Silver".  After that, I painted his face with Americana Shading Flesh.
     Next, I panted his pants with Accent "Forest Green", and his shirt with Accent "Mustard Seed". I then painted his his beard with Folk Art "Teddy Bear Brown", and his belts and straps with Americana "Bittersweet Chocolate".
     While I had the "Bittersweet Chocolate" open, I flipped the figure around and used it to paint his backpack.  I also decided to use it for his boots and gauntlets.  I then continued working on his back, painting his blanket roll with Folk Art "Dapple Grey", his sack with Americana "Sable Brown", the rope with Folk Art "Butter Pecan", and the "map case" (cut down removed weapon handle) with Aleene's "Deep Khaki".
     I then gave his face a wash with some Citadel "Reikland Fleshshade" wash.  When that was dry, I gave his beard, and everything on him that wasn't armor, a wash with Citadel Agrax Earthshade"wash.  When this wash coat was dry, I painted his eyes, and then highlighted his head with the "Shading Flesh" mixed with some Apple barrel "Apple Flesh".  I then highlighted his beard with the "Sable Brown".
    After that, I worked on highlighting his clothing; doing his shirt with Accent "Golden Harvest", and his pants with Crafter's Acrylic "Holiday Green".  I then highlighted his belts, straps, backpack, and gauntlets with Crafter's Edition "Spice Brown"; and painted his sword with Americana "Zinc". 
     Next, I worked on highlighting the stuff on his back; doing his blanket roll with the base "Dapple Grey", his sack with Americana "Khaki Tan", the rope with Americana "Antique White", and the "map case" with a mix of the base "Deep Khaki" and some Aleene's "Dusty Khaki".
     I next worked on the metal parts, painting the sword and touching up the armor with the"Gunmetal Grey".  I also painted his beard ornament with Americana "Bronze".  After that, I went back and gave the runes on his sword a wash with Citadel "Nuln Oil" wash.  When that wash was dry, I did highlights on the sword and armor with the "Metallic Silver", and highlights on the beard ornament with some Americana 14K Gold".
     Lastly, I painted the figure's base with Black.
    When the Black was dry, I used some white glue to glue a little black course sand onto the base.  When this was dry I drybrushed the bases with some of the Americana "Neutral Grey", and then some Duncan "Slate Grey", and lastly some Folk Art "Platinum Grey".
      I let the figure dry overnight and the next day I gave him a coat of Americana "DuraClear Matte" varnish.  Another overnight dry, and I sprayed it with Testor's Dullcote".


   Well, I'm happy with this guy, though in reality he is a bit over-armored for a Thug.  But he'll do just fine.  There just aren't a lot of non-armored Dwarf Warrior figures out there.

Monday, April 23, 2018

Halfling Cook: Bones 3 Figure

     This past week I painted the Halfling Cook from the Bones 3 Townsfolk set. 
     I prepped the figure in the usual way; soaking it in a dish of water with a couple drops of dish-soap added, then giving it a light scrub with a soft toothbrush, and then rinsing and drying it.    I then glued the figure to a black-primed 7/8" fender washer with Aleene's Tacky glue.   And, when the glue was dry,  I put it in my Citadel painting grip.
      I began by painting his head, arms, and feet with Americana "Shading Flesh".   I then painted his shirt with Accent "Mustard Seed", his pants with Accent "Real Umber", and his vest with Ceramcoat "Black Cherry".
     Next, I painted his apron and hat with Americana "Dove Grey".  I then did his hair with Crafter's Edition "Spice Brown", and his spoon with Ceramcoat "Territorial Beige".  After everything had a while to dry, I went back and went over his head and feet with a wash of Citadel "Reikland Fleshshade" wash.
    When that wash was dry, I then gave a wash to all his clothing and the spoon with Citadel "Agrax Earthshade" wash.   After I let this second wash I dry, I painted his eyes, and then highlighted his skin areas with a mix of the "Shading Flesh", and some Crafter's Acrylic "Flesh".    Afterwards, I highlighted his hair with Americana "Sable Brown", and the spoon with Americana "Khaki Tan".
     Next, I highlighted his hat and apron with a mix of the "Dove Grey", and Americana "Snow White".   I then highlighted his shirt with a mix of the base "Mustard Seed", and some Crafter's Acrylic "Bright Yellow",and then did the highlights on his vest with some Reaper MSP "Holly Berry".  I followed that with highlighting his pants with Folk Art "Teddy Bear Brown". 
    I then worked on the pot, painting it first Americana "Black", and then painting the soup with Folk Art "Porcelain White".  When the "Porcelain White" was dry, I gave it a wash with some Citadel "Nuln Oil" wash.  When the wash was dry, I added a few highlight dots to the soup with the base "Porcelain White".    I then highlighted the pot with some Americana "Zinc". I finished up by painting the base with Americana "Mississippi Mud".
       I let the figure sit all day, and that evening I gave it a coat of Americana "DuraClear Matte" varnish.  The next afternoon I gave the figure a coat of Testor's "Dullcote" spray varnish.

   A fun little figure; nothing to get excited about, but I'm pleased with how he came out. 

Monday, April 16, 2018

Elven Blacksmith: Bones 3 Figure

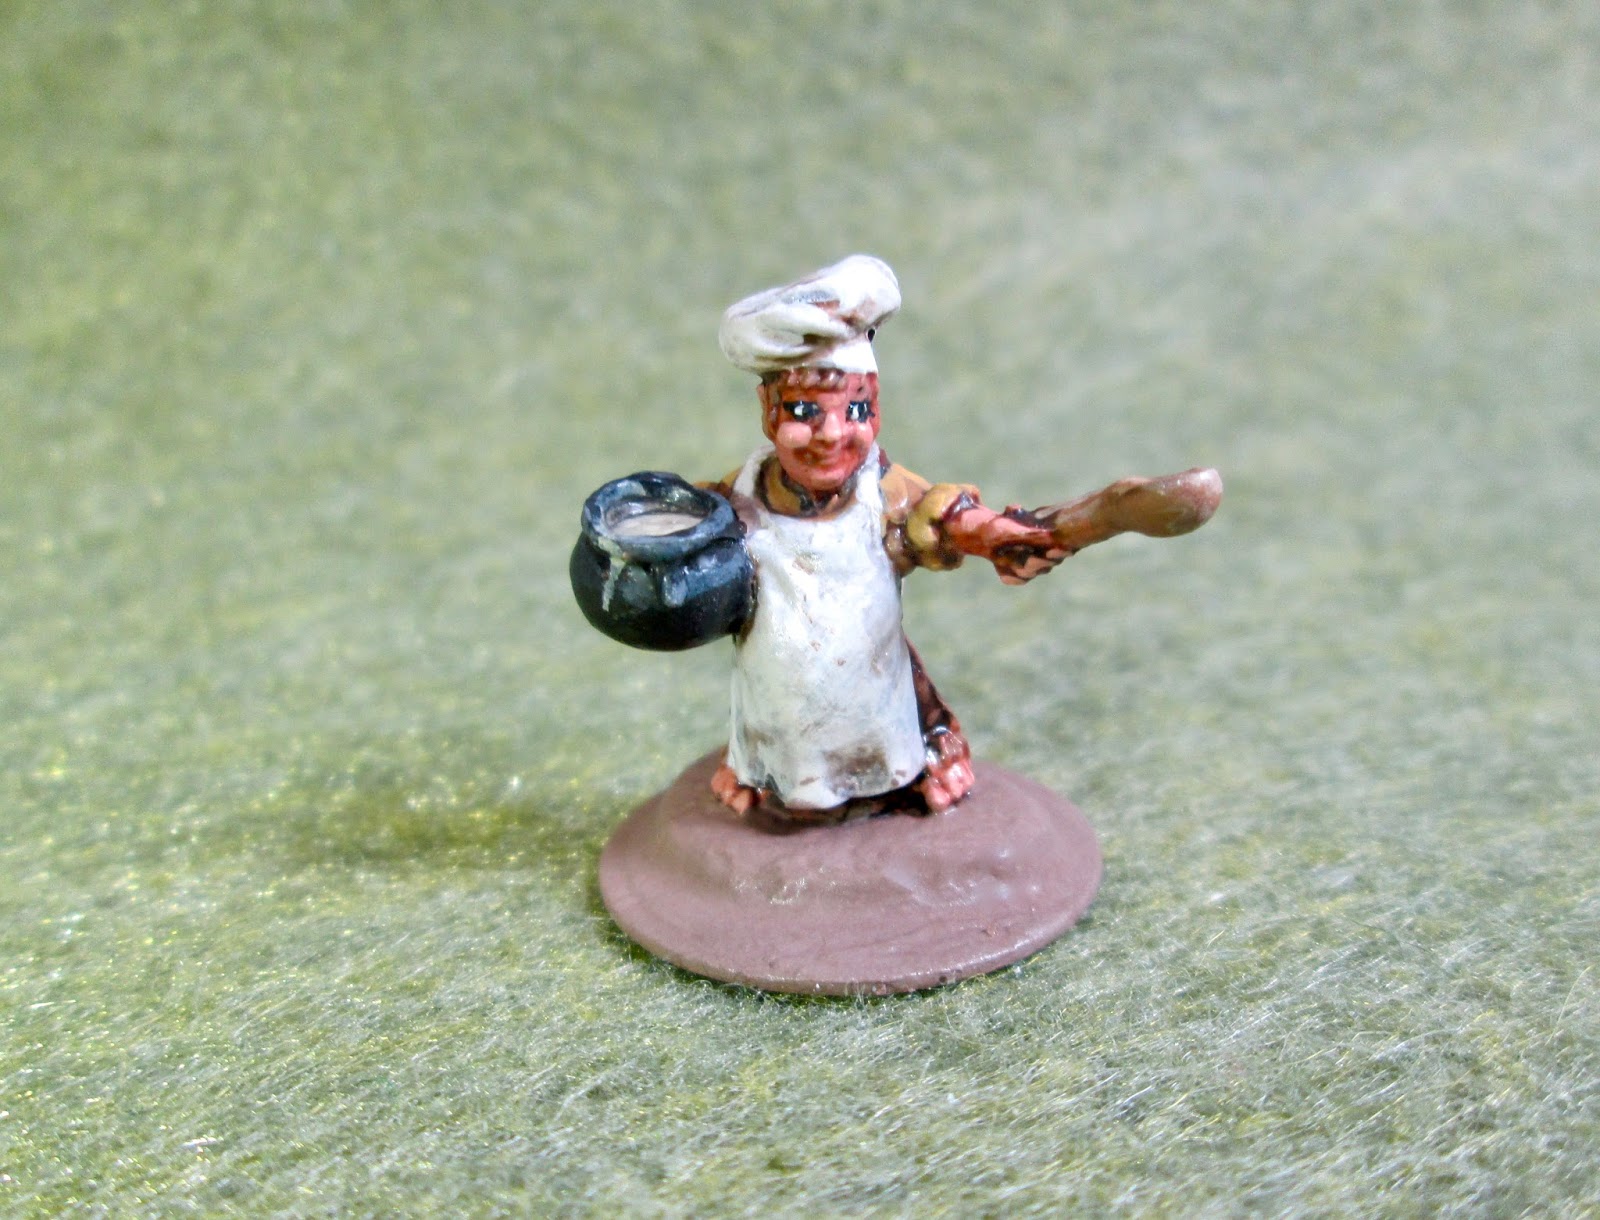
    This past week I returned to working on the Townsfolk set from Bones 3, and painted the Elven Blacksmith.
      I prepped the figure in the usual way; soaking it in a dish of water with a couple drops of dish-soap added, then giving it a light scrub with a soft toothbrush, and then rinsing and drying it.    I then glued the figure to a black-primed 1" fender washer with Aleene's Tacky glue.   And, when the glue was dry,  I put it in my Citadel painting grip.
     I began by painting her skin with Apple Barrel "Flesh",  When it was dry, I gave it a wash with some Citadel "Reikland Fleshshade" wash.  When that was dry, I painted her leggings with Americana "Zinc", and her skirt with Crafter's Acrylic "Storm Cloud Grey".  I then painted her top, and the borders on the skirt, with Crafter's Acrylic "Navy Blue".
    Next, I painted her apron, and her eye wrap, with Folk Art "Platinum Grey", and her gloves with Crafter's Edition "Taupe".  I then painted the handle of her hammer with Ceramcoat "Territorial Beige", and her hair with Accent "Golden Harvest". After that, I painted the bark of the tree trunk with Americana "Charcoal Grey", and the interior of the trunk with Reaper MSP "Ginger Cookie".
     I let everything dry for a while, and then gave the tree trunk, her hair, the gloves, and the hammer handle, a wash with Citadel "Agrax Earthsahde" wash.  When the wash was dry, I then gave her leggings, skirt, apron, and top all a wash with Citadel "Nuln Oil" wash.  When that was dry, I worked on highlighting her hair, drybrushing it first with Americana "Moon Yellow", and then Apple Barrel "Lemon Chiffon".  I then touched it with a few Americana "White" highlights.
     Next, I painted in her eye and mouth, and then highlighted her skin with the base "Flesh" and the "Flesh" mixed with a little Americana "White".  I then highlighted her leggings with the "Storm Cloud Grey", and highlighted her skirt with a mix of the base "Storm Cloud Grey and some of the "Platinum Grey".  After that, I highlighted her apron, and her eye wrap, with a mix of the "Platinum Grey" and the "White".    I then highlighted the border on her skirt with Americana "True Blue", and afterwards, used the "True Blue" to paint the decorations on her apron. When I was finished, I went back and highlighted those decorations with some of the "True Blue" mixed with a little Crafter's Edition "Tropical Blue".
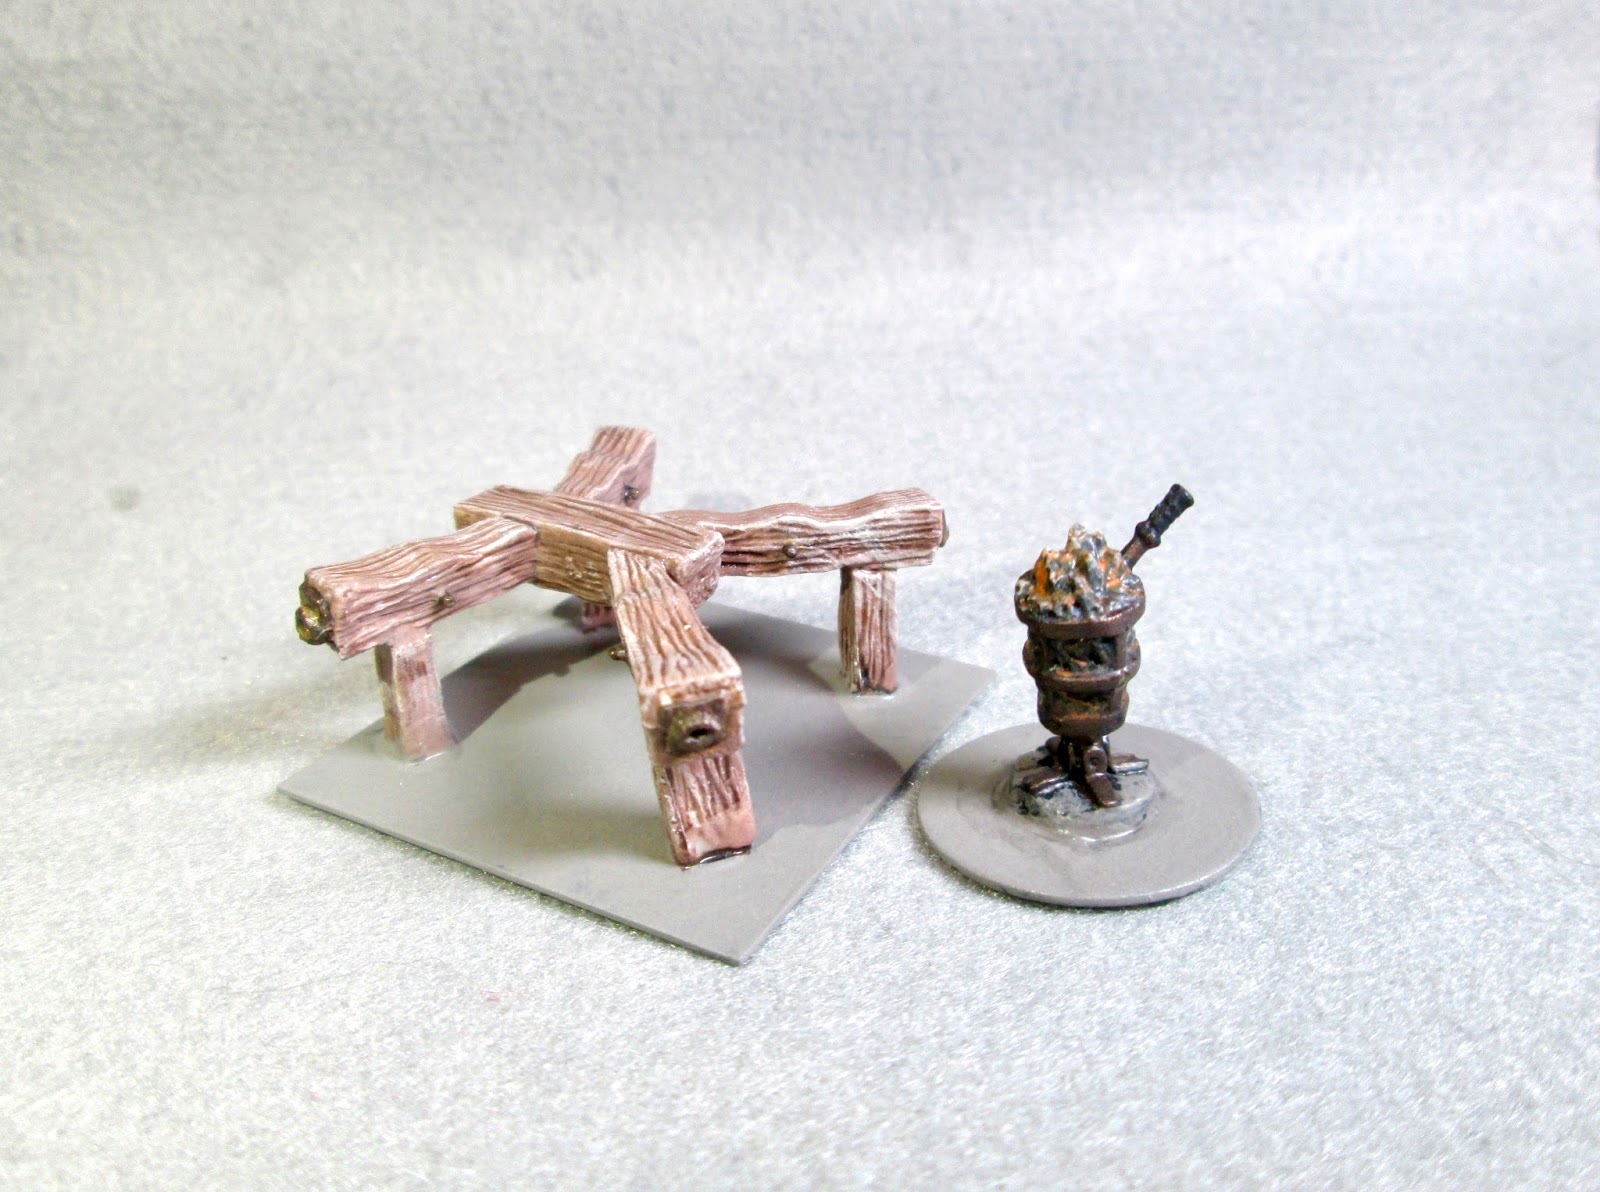
    Next, I painted her boots with Americana "Black".  I then drybrushed the tree trunk with, first, "Americana "Neutral Grey", and then with Folk Art Barn Wood".   After that, I painted the anvil and the head of the hammer with Reaper MSP "Scorched Metal", and I painted the sword with Accent "Princely Pewter.   I followed that with painting the vine on the trunk with Reaper MSP "Christmas Wreath".
     After the new colors had time to dry,I gave the hammer head, anvil, and sword all a wash with the "Nuln Oil".  I then drybrushed the anvil and hammer head with Folk Art Brushed Metal "Brushed Bronze", and then painted the scrolling on them with Ceramcoat "Wedding Gold".  After that, I worked on making the sword look like it was still a little molten by layering on Reaper MSP Bones "Cinnamon Red", Reaper MSP "Holly Berry", Reaper MSP "Hearth Fire", and Reaper MSP Golden Glow"  I had to keep doing it several times and in different thinnesses until I got a look I was happy with.
     When I was happy with the sword, I moved on to the vine.  I thought I'd try something a little different, so I first tried doing the  highlights with Folk Art Color Shift "Green Flash", but I felt it was too drastic of a color difference from the base "Christmas Wreath". So I went back and tempered it with Crafter's Acrylic "Wild Green".
      When I was done painting the figure, I used some white glue to glue some fine brown sand to the base.  When the sand was dry, I painted it with a coat of Americana "Raw Umber". When this was dry, I drybrushed the sand with the "Territorial Beige", and then with some Folk Art "Butter Pecan"; lastly I drybrushed it with a little Crafter's Acrylic "Light Antique White".
      I let the figure dry overnight and the next day I gave it a coat of Americana "DuraClear Matte" varnish.  When dry, I glued on some bits of grass tufts.   Another overnight dry, and I sprayed it with Testor's Dullcote".

     I'm really happy how she turned out!     Particularly the sword and the anvil.  I messed up her face a little on her left cheek; but given her missing eye, I figure she is a retired warrior, so a scar on her cheek looks fine to me.

Monday, April 9, 2018

Torture Equipment- The Rack: Bones 3 Figure

   It was another busy week this past week, so I selected the last piece from the Bones 3 Torture Chamber set to paint.
      I prepped the pieces of the figure in the usual way; soaking them in a dish of water with a couple drops of dish-soap added, then giving them a light scrub with a soft toothbrush, and then rinsing and drying them.    I then assembled the rack with Gorilla superglue gel.  When the glue had set, I glued the rack to a pair of primed 1"x 1" steel bases with Aleene's Tacky glue (I would have just used a 2" x 1", but I didn't have one.), and then glued the mounted figure to a tongue depressor with a couple drops of Elmer's glue.
      I began by painting the whole thing with Americana "Neutral Grey".  When that dried, I gave the whole piece a wash with Citadel "Agrax Earthshade" wash. 
      When the wash was dry, I drybrushed the whole thing with Folk Art "Barn Wood".   Next, I painted the ropes with Folk Art "Porcelain White", and the metal fittings with Reaper MSP "Scorched Metal".
     I let everything dry for a bit again, and then gave the rope and the metal bits a wash with Citadel "Nuln Oil" wash.  When the wash was dry, I highlighted the rope with the base "Porcelain White", and I highlighted the metal with Folk Art Metallics "Gunmetal Grey".  After that I dabbed on some Winsor Newton"Peat Brown" Ink here and there on the table to look like assorted stains.  I also put a little of the "Nuln Oil" on the wheel spokes to look like stains from constant hand contact.  Lastly, I painted the base with the "NeutralGrey".
     I let the figure dry overnight and the next day I gave it a coat of Americana "DuraClear Matte" varnish.    Then, another overnight dry, and I sprayed it with Testor's Dullcote".


     I'm really happy with this one.  I think the aged wood looks just right, and the  addition of the staining adds a nice touch of authenticity.

Monday, April 2, 2018

Torture Equipment- X-Rack and Hot Iron Brazier: Bones 3 Fgures

     This past week, because I was getting over a cold, and it was Easter weekend, I selected something relatively easy and quick to paint; the X-rack and Hot Iron from the Bones 3 Torture Chamber set.
      I prepped the figures in the usual way; soaking them in a dish of water with a couple drops of dish-soap added and then rinsing and drying.   I then glued the X-rack to a primed 1.5" square steel base with Aleene's Tacky glue, and the Hot Iron brazier to a 7/8" black-primed fender washer.  I then glued the figures to a tongue depressor with a couple drops of the Elmer's glue.
      I began by painting the Brazier Ceramcoat "Black", and the  X-rack with Americana "Mississippi Mud".   I then drybrushed the Brazier with Folk Art "Medium Grey" followed by Crafter's Acrylic "Storm Cloud Grey".    I moved then back to the X-rack, and gave it a wash with Citadel "Agrax Earthshade" wash.  When I was done applying the wash, I went back to the Brazier, and gave the coals a light wash with some thinned Iron Wind Metals "Orange" Ink to hopefully make them look like they had a heat glow.
      When the "Orange" ink and the "Agrax Earthshade"  wash were dry, I drybrushed the X-rack with some Folk Art "Barn Wood".  I then painted the Brazier itself , and the little bit of the poker sticking out, along with the fittings on the X-rack, with Reaper MSP "Scorched Metal".  After the "Scorched Metal" had time to dry,  I applied a little Citadel "Nuln Oil" wash to the "Scorched Metal". When that was dry, I hit the fittings on the X-rack with some thinned Accent "Golden Oxide" to try to give them a little rusty appearance.  Lastly, I painted the bases with Americana "Neutral Grey", then when it was dry, I gave the carved rocks under the Brazier a little dab with some of the "Nuln Oil" to help accent the crevices between them.
        I let the pieces dry overnight and the next day I gave them a coat of Americana "DuraClear Matte" varnish.    Then, another overnight dry, and I sprayed them with Testor's Dullcote". 

        Well, they're very nice.  Nothing exciting; but they're done, and thats a good thing.