Showing posts with label Mech. Show all posts

Monday, August 14, 2017

Wild West Wizard of Oz Tin Man: Bones 3 Figure

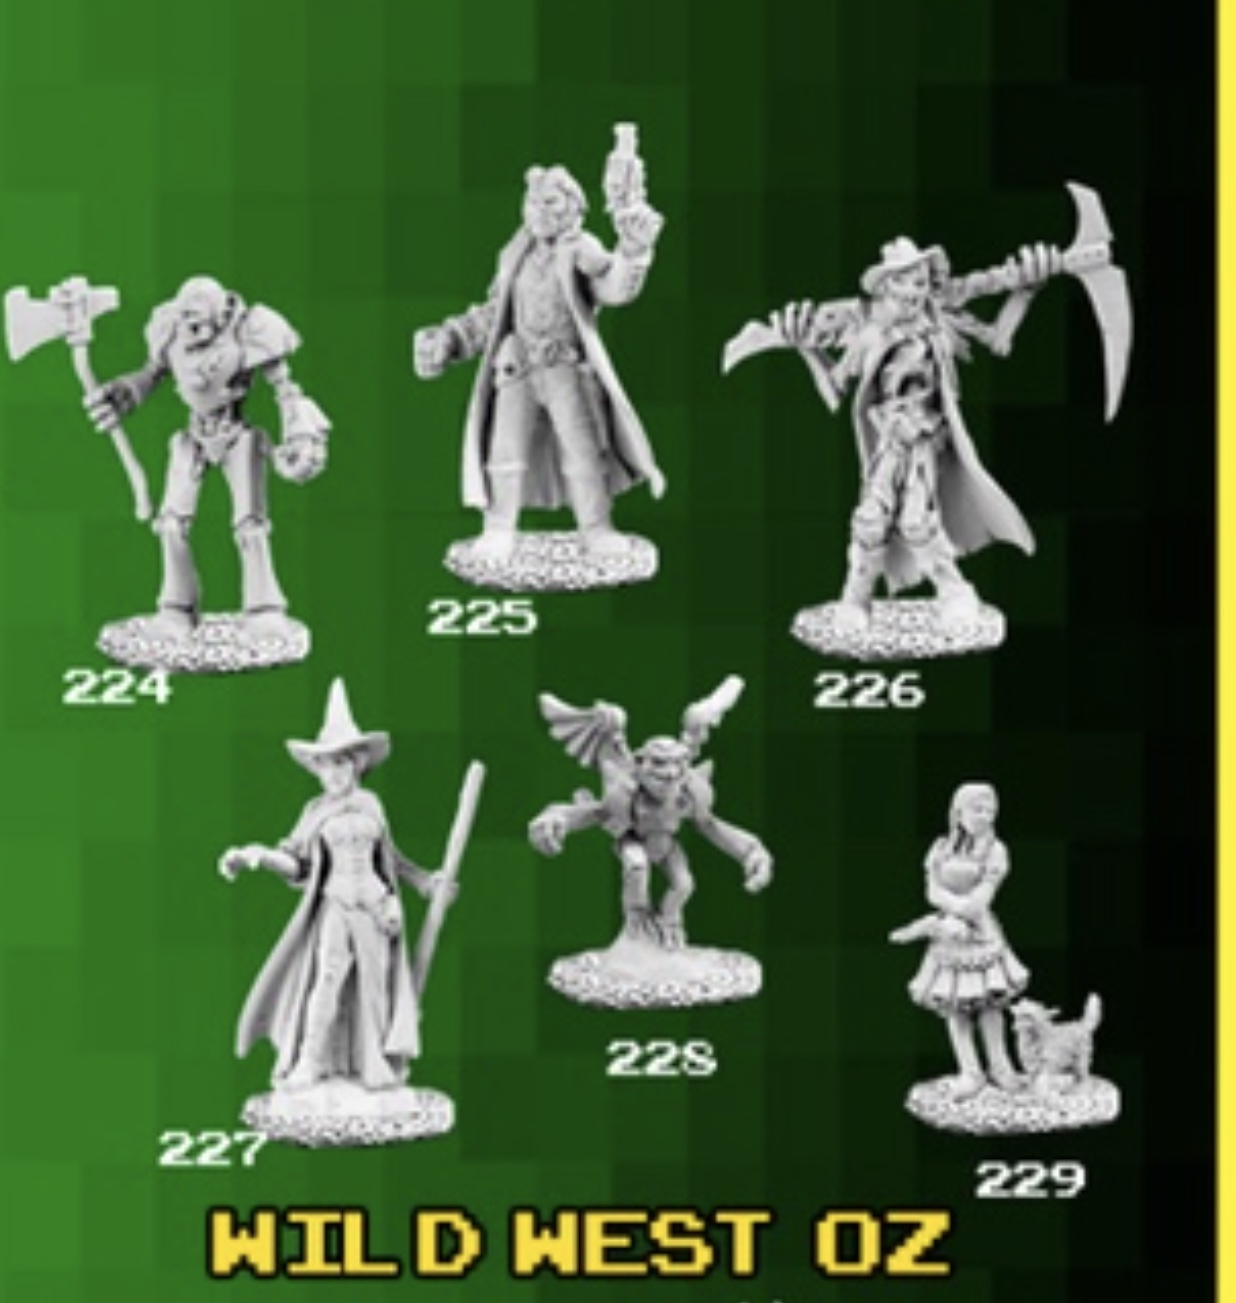
     This past week I started the Bones 3 Wild West Wizard of Oz set and did the Tin Man mini.  I don't know what particularly makes this set Wild West; it seems to me it would fit in in any kind of Steampunk, VSF, Pulp, or Post-Apocalyptic setting.
     These figures were actually cast in the newer grey Bones material, and are a bit stiffer than normal Bones.
       I prepped the figure in the usual way; soaking it in a dish of water with a couple drops of dish-soap added, then giving it a light scrub with a soft toothbrush, and then rinsing and drying it.    I then glued the figure to a black-primed 1" fender washer with Aleene's Tacky glue, and then glued the washer-mounted figure to a tongue depressor with a couple drops of the Elmer's glue.
      I began by painting the entire figure, and his base, with Black.   When the Black was dry, I drybrushed the figure with  Folk Art Metallics "Gunmetal Grey".  I then passed over it with a lighter drybrush of Ceramcoat "Metallic Silver"
     I applied a little Iron Wind Metals "Medium Blue" Ink to the eye sockets, and then that was dry, I pianted the eyes with Crafter's Acrylic "Tropical Blue".  I then did pupils with Crater's Acrylic "Cool Blue", and then added White dots in the center  of the pupils.
     Next, I painted his pendant and the chain it is on, as well as some of the rods in his abdomen with Ceramcoat "Bronze".  I then painted the pendant with Ceramcoat "Opaque Red", and did a shadow on it with Ceramcoat "BlackCherry", and a highlight with Crafter's Acrylic "Tutti Frutti".  I finished the pendant by doing small White highlight dots on it.
     I then went back and highlighted the "Bronze" pendant, chain and rods, with Ceramcoat "14K Gold", and after that I went back and did more specific highlights on his armor with the "Metallic Silver".
     When I was done painting the figure, I used some white glue to glue a mixture I made of some fine brown sand, and courser black sand to the base.  When this was dry, I drybrushed the sand and the figure's own base with Ceramcoat "Territorial Beige", and then with some Americana "Antique White".  When dry, I glued on some bits of grass tufts.
      I let the figure dry overnight and the next day I gave him a coat of Americana "DuraClear Matte" varnish.  Another overnight dry, and I sprayed it with Testor's Dullcote".

     I'm really pleased with how this figure turned out, particularly the glowing blue eyes.  Next up, I will be working on the Scarecrow.

Thursday, June 2, 2016

Bones CAV SO: Simba Quadruped Mech

  This week I painted up one of the Simba quadruped mech figures that I got from the CAV: SO Kickstarter.
   I prepped the figure by soaking all the parts for a few hours in a bowl with a little bit of dish-soap added, and then scrubbed them with a soft toothbrush and let them dry.  I then assembled the model with Gorilla Superglue.
   I then sprayed the model with Krylon Camouflage with Fusion   .  This left the model a little tacky, which surprised me as I had used the Krylon Camouflage with Fusion "Flat Black" before without issue.   I then glued the model to a steel base.  When the glue was dry, I painted some of the conduits on top of the vehicle, and the corrugated panels on the sides with Americana "Neutral Grey".  I then gave the entire piece a wash with GW "Agrax Earthshade" wash using a wet brush.
   When the wash was dry, I drybrushed the entire vehicle with Americana "Bleached Sand".  I then painted the bridge windows with  Folk Art "Settlers Blue" on the top, and Americana "Raw Umber" on the bottom.   Then I added some small White highlights.  I painted one of the small sensor/gun tubes on top with Americana "Terra Cotta".  The large gun/sensor I painted the inside of with Nicole's "Neon Green", and when dry, gave it a wash with Iron Wind Metals "Dark Green" Ink, thinned with a little water.  When this was dry, I mixed a little White with the "Neon Green" and painted the center of the green circle.  I painted the open barrels of the other gun/sensors with Black.  While I had the Black out, I thinned some and used it to paint the vents running along the back deck.
     After the vehicle had overnight to dry,  I gave it a coat of Ceramcoat "Matte Varnish" early the next morning.   When the varnish was dry, I covered the base with white glue and dunked it in a sand and gravel mixture.  When the sand was dry, I painted it with the "Raw Umber", and then when that was dry, I drybrushed it with Americana "Territorial Beige", followed by Folk Art "Butter Pecan", and lastly Americana "Bleached Sand".
  The next day I sprayed the piece with Testor's Dullcote.  


   I'm pleased with how this turned out.  The paint job was pretty simple, but I think all the sculpted details on the vehicle really help bring it to life.