This week, amidst the hustle and bustle of getting ready for Historicon, I completed the Medusa figure from the Original 30 BONES set.
For prep, I washed in dish soap, and then spray-primed it with Krylon Camouflage Flat Black with Fusion. Afterwards I glued it to a black primed fender washer.
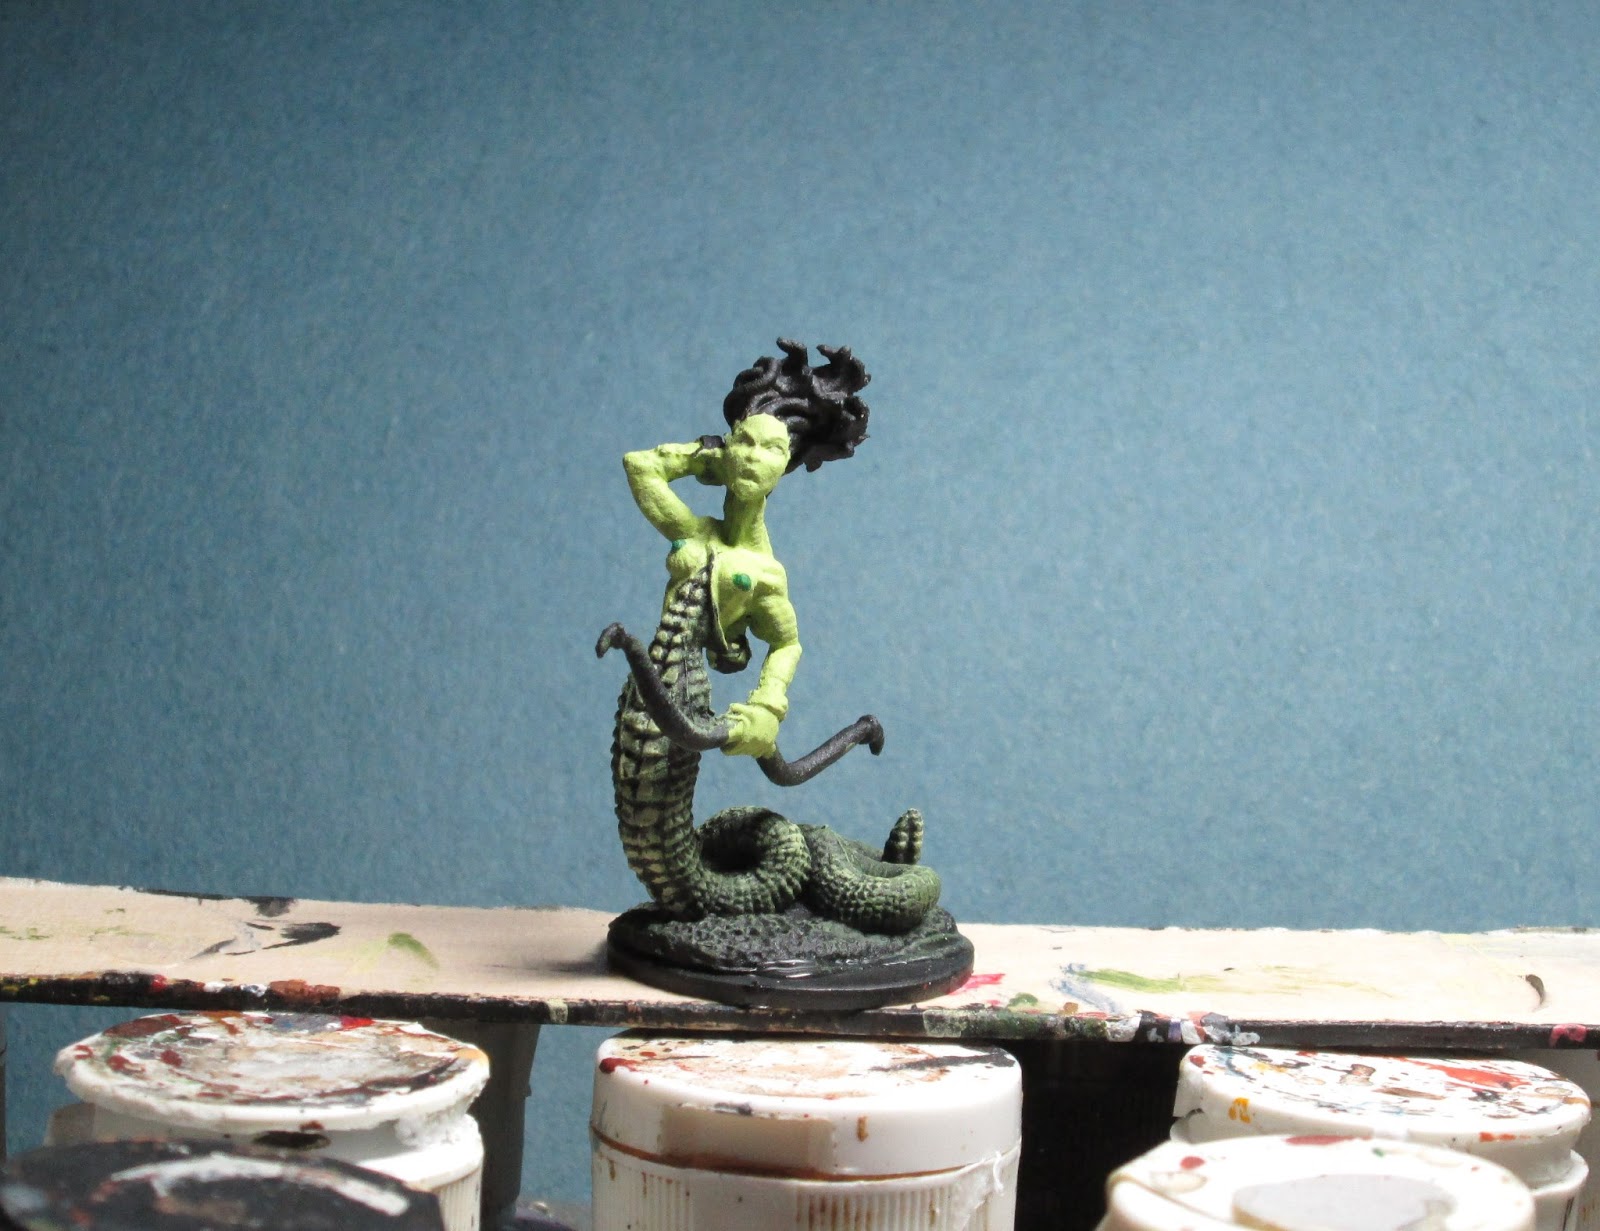
I began by giving a heavy drybrush to the whole body with Accent 'Forest Green'. I then drybrushed the scale parts with Duncan 'Olive Green' followed by Americana 'Jade Green', going heavier with the 'Jade Green' on the rattle at the end of the tail, and the scales running down her front. I went back with a fine brush and touched up the scales further with the 'Jade Green', so they were clearly defined.
Next I painted the flesh Americana 'Olive Green' and the nipples, Americana 'Leaf Green.' When done and dry, I gave the whole body a wash with GW 'Dark Green' Ink. When the ink was dry I went back and added highlights with the original colors.
I next worked on the hair, drybrushing it first with, Folk Art 'barnyard Red', and then a lighter drybrush with Americana 'Cadmium Red'. I then went back with a fine brush and added more brush applied highlights on the hair, making sure the color came down even with the head. Finally I added just a couple small highlights with GW 'Blazing Orange'.
I then painted the bow with GW 'Terracotta', and the quiver with Accent 'Mustard Seed'. This was followed up with GW 'Blood Red' on the arrow feathers, and GW 'Brazen Brass' on the bow fittings. The bracelets were painted Ceramcoat '4K Gold'. Then when all these bits were dry I gave them all a wash with GW 'Devlan Mud' Wash, and then went back and added highlights with the original colors. The eyes were painted Apple barrel 'Yellow' with black slit pupils. And I put a drop of 'Devlan Mud' wash in the mouth opening
I finished with a coat of Ceramcoat 'Matte Varnish', and then flocked the base. Afterwards, I sprayed it with Testor's Dullcoat. All in all, a nice 'Monster' figure. I'm very pleased with how the red snake hair turned out.
Figure 8 of 264: Complete


The upper body green is a lot brighter than I would have chosen, but you've made it look very nice. I'll probably incorporate some of this into my paint job too. I'm thinking about using this model as a cult leader for my Snakeman cult in Kulten (cult vs cult rules based on Strange Aeons).
ReplyDeleteAt 8 of 264 you're officially at 3.03% of your models complete!
Thanks guys!
ReplyDeleteOnly 3.03 percent? It seems so small!
I don't think it's so bad, you've only been at it for a couple of weeks! Squads of figures that can all be painted together like the zombies, kobolds and skeletons will be nice bumps to your stats. Spread those out among your painting and it'll always keep that number climbing!
DeleteFailed my save vs. Petrification! Great work!
ReplyDeleteHi Chris,
ReplyDeleteNow that you have had some time to look back, do you still like the ("spray-primed it with Krylon Camouflage Flat Black with Fusion") Krylon paint for priming?
Thanks! :)
J
Mostly "No", but a little "Yes". :).
DeleteI had always used primer on metal minis, so when I got my first Bones it just didn't feel right to paint them without any primer at all. Then, when it started becoming harder to find the Krylon Fusion Flat Black primer in my area, I was forced to start painting the Bones without any primer. I was pleasantly surprised at the results I was getting! The one downside I experienced was it was hard to see the details on the pure white figures under my bright painting light. I then read about using Reaper's brush-on Liners as primers on Bones, and tried that. I now use them as my go-to primer for my Bones figures.
That all being said, I still sometime use the Krylon Fusion spray paints, and some Army Painter primers to paint my Bones CAV sci-fi models because it is a way to give them a quick base coat in a nice military green, brown, or tan color.
Hi Chris,
ReplyDeleteThanks, I'll look for that product. I do not live near a good Hobby Store for some things, so I might have to experiment a bit. I think for now, I'll just give them a go with painting directly on the white.
JR
Just be sure to wash the Bones with some liquid dish soap, rinse and dry, before painting directly on them.
DeleteI ordered my Reaper Liners directly from Reaper. I've been using them since last July. Here's the first figure I used some on: http://allbonesabout.blogspot.com/2016/07/mystic-theurge-bones-ii-figure.html
I also experimented with ink a little bit between the Krylon and the Liner.
I also encourage you to read this article on preparing Bones for painting: http://forum.reapermini.com/index.php?/topic/48669-bones-the-first-coat-is-the-difference/
Excellent, thx!
ReplyDelete