This past week I worked on the Brain in a Jar figure from the Bones 3
Stoneskull Expansion. This was one of the figures that most draw me to this expansion set, as I saw uses for it in everything from Fantasy, to Victorian Sci-Fi, to Pulp, to regular Sci-Fi.
It also reminded me very much of my own Brain-in-a-thing creation I had done several years ago with
my "They Saved Hitlers Brain" project.
I prepped this figures in the usual way; soaking the parts in a dish of water with a couple drops of dish-soap added, then giving them a light scrub with a soft toothbrush, and then rinsing and drying them.
I was first concerned that the figure's three legs might sag under its own weight, I took a black primed 2" fender washer on which I had glued a piece of card over the center hole before priming, and glued a small section of sprue from one of the clear weapons sets to the center with a little Aleene's Tacky glue. This would act as a support for the center of the figure. I then glued the three legs to the washer with the Tacky glue. I then used Gorilla superglue to glue the brain to the top piece and the clear chamber bottom to the leg piece.
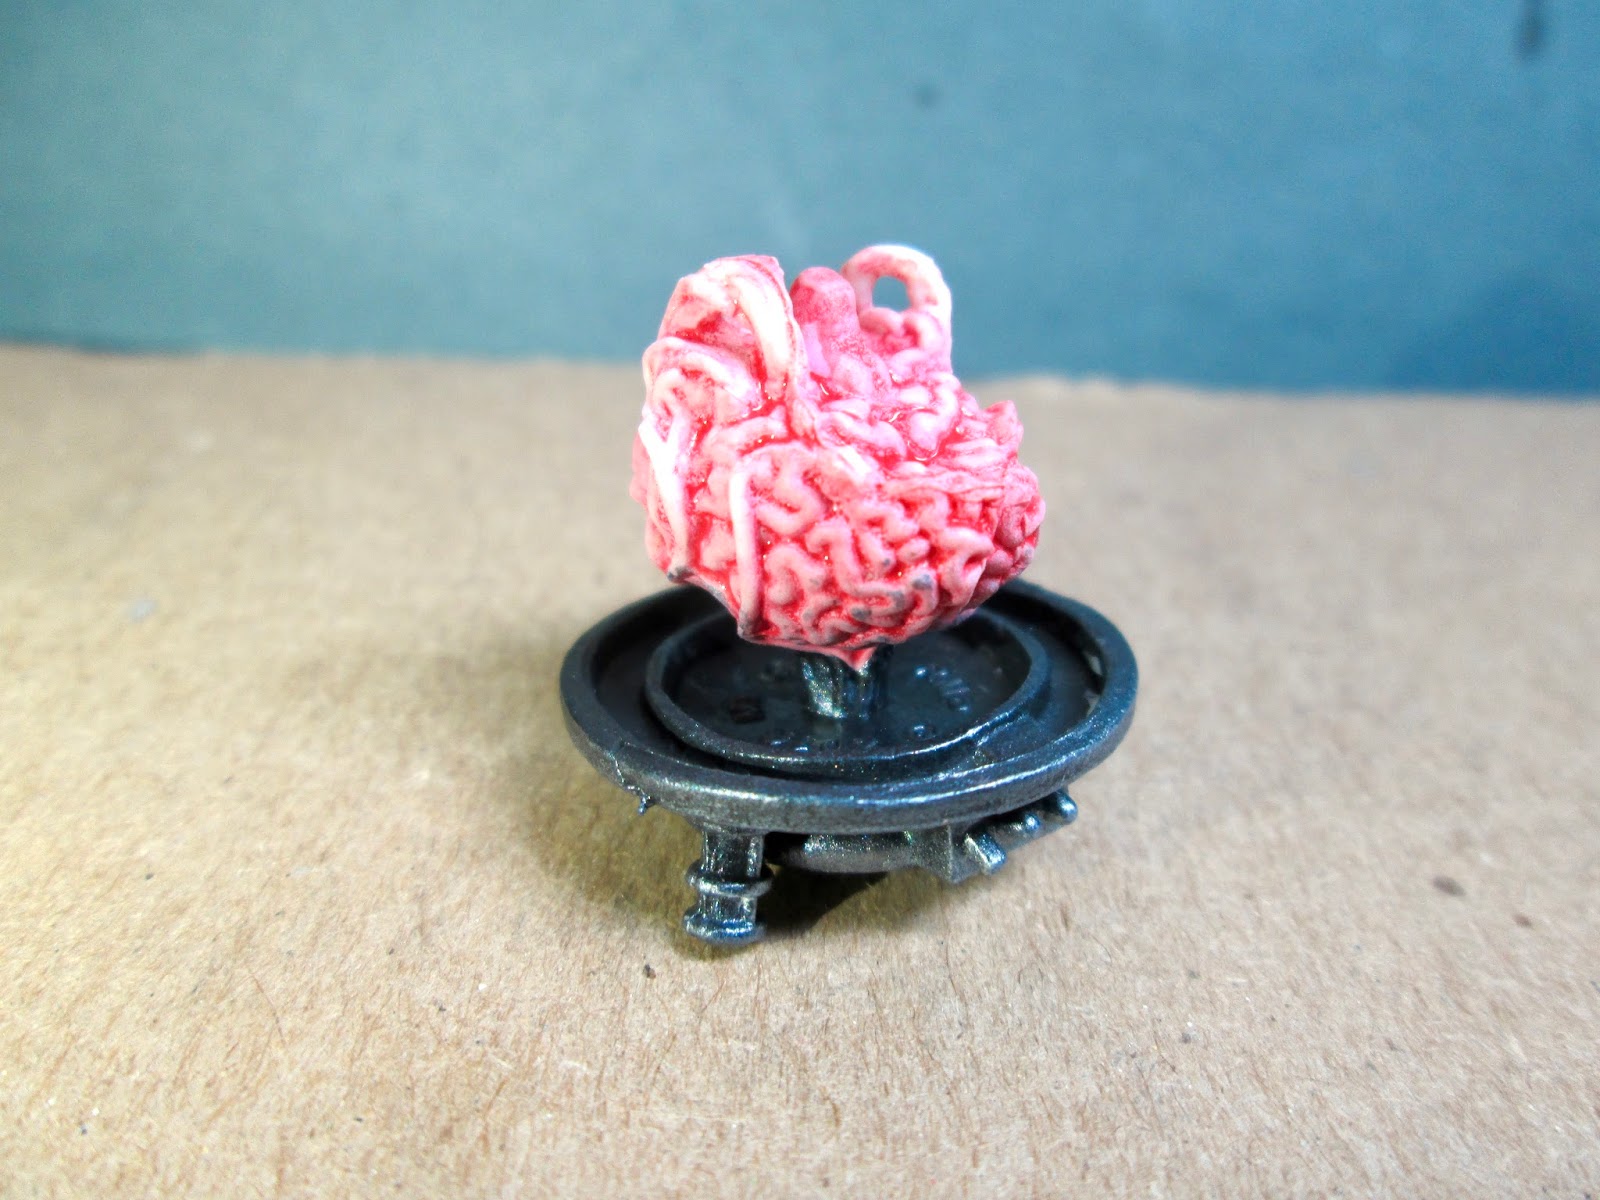
I began by painting the bottom and top all Black, and when they were dry, I drybrushed them with Folk Art Metallics "Gunmetal Grey". Next, I passed over the pieces with a lighter drybrush of Ceramcoat "Metallic Silver". I then noticed the bad mold line running across the top of the chamber (visible in the below photo), and so took my hobby knife and trimmed it off; then did my best to repaint the section and blend it in.

I first painted the small circular shape behind the crosshatch on the front panel. It looked like the mouthpiece of a speaker to me so I painted it Black and did some Americana "Neutral Grey" highlights on it. I then painted the little light in the upper right corner of the panel with Crafter's Acrylic "Deep Red", and then added highlights with Reaper MSP "Holly Berry" and Crafter's Acrylic "Daffodil Yellow". I also used the "Holly Berry" to some reflected light effects along the edges by the little light. Next I painted all the little ovals running around the edge of the base with Ceramcoat "Bronze", and then added Ceramcoat "14K Gold" highlights.
Next, I painted the brain with Crafter's Acrylic Cherry Blossom Pink", and when dry gave it a thinned wash with some Iron Wind Metals "Red" ink.
When the ink was dry, I drybrushed the brain with some Folk Art "Milkshake". I then painted all the cables attached to the brain with Black. I then went back and paint the front ones with Ceramcoat "Copper, and the rest I simple added some Citadel "The Fang" highlights too.
Next, I flipped the top over, and painted the little panels in the lights on each side with Reaper MSP Bones "Dungeon Slime". When it was dry, I gave the lights, and a small area around the base of the lights, a wash with some thinned Iron Wind Metals "Mid Green" ink. When it was dry, I went back and added a central highlight to each panel with, first, the "Dungeon Slime", and then a little White. Next, I lightly drybrushed an area around the lights with Nicole's "Neon Green" to look like reflected light.
Lastly, I painted the washer base with Americana "Neutral Grey".
I let the parts dry overnight and the next day I gave the top of the jar, and the base of the walker a coat of Americana "DuraClear Matte" varnish. Another overnight dry, and I sprayed the two pieces with Testor's Dullcote". When the Dullcote was dry, I glued the pieces together with the clear cylinder using Gorilla Superglue.
I'm happy with how the model looks in general, but I wish I had been more careful making sure everything was straight and aligned before doing any gluing. The legs are a bit more wonky than I would have liked (though in all honesty getting all three legs straight while steaming and reseting would have been a miracle. This would have been a good candidate for the stiffer grey Bones material.) , and the brain is a little tilted. The saving grace is that when it's on the table and in a game things like that won't be really noticed.


Looks great! Especially the lights.
ReplyDeleteThanks, xredmenacex! I'm by no means an expert at Object Source Lighting yet, but enjoy experimenting with it.
DeleteWow! Great work, and somehow I have not seen the figure before, so that is an added bonus.
ReplyDeleteThanks, Lasgunpacker! It looks like they still have some of the Stoneskull Expansions avialable in the Reaper online store if you absolutely have to have one now. :)
DeleteThat really does look fantastic! Well done!
ReplyDeleteThank you, David!
Delete