Monday, September 30, 2013

Painting the Bones Rust Monster: Figure 36 of 265

This week I painted the Bones Rust Monster from the Original 30 Bones Set. As way of preparing to paint this figure, I got out my old 70's era D&D Monster Manual  to read a little about these monsters, to see if there was any kind of description as to coloring.  Unfortunately, there was not, but I did learn that they were rather un-aggressive beasts who dwell in deep dark subterranean places, going about their business of finding metal to munch on.  So, as I pondered what colors to paint my Rust Monster, the idea came in my mind of the pale pigment-less animals that you find in dark areas where the sun doesn't shine; and so I decided to give this look a try, as it would be something a little different.
   I began as usual, by washing the figure in some dish-washing soap, and then gluing it to a black primed 1" fender washer.  I then glued the washer to half a tongue depressor with a drop of white glue.
(Click on any photo to view it larger.)
As far as color, the name of the beast lead me to think in terms of reddish-brown. So to begin with I gave the whole thing a wash with Iron Wind Metals' "Chestnut Brown" Ink.  I used the ink full strength without water to dilute it. I had some issue with the ink beading on the Bones material, so I had to go back and apply more ink in the areas where it hadn't stuck the first time.  Eventually I got the whole thing covered
When the ink had dried I gave the figure a drybrushing with Folk Art "Almond Parfait" paint. I then added some White  to the "Almond Parfait" ,and gave a light highlighting drybrush to the figure with this mixture.
I then painted the claws with GW "Fortress Grey"  and the monster's "mouth" with GW "Tanned Flesh".  I then wanted to add some sort of decoration to the plain bland body.  As I was looking at the tail I noticed how it kind of looked like a face, and this gave me  the idea of adding a pair of "false eyes" camouflage to the tail.  After all, inhabiting dungeons with much meaner, hungrier, beasts, the Rust Monster probably developed some sort of survival tricks; and what better in dim dungeon light, then a pair of "false eyes" on your tail to confuse attackers as you run away.  So I painted two dark brown spots on the tail with Accent "Real Umber", and likewise, I painted the monster's eyes with the same color. I then added "pupils" to the false eyes by painting two white dots in the center of the dark spots. For the real eyes, I decided I actually wanted the brown dots to be the pupils, so I added a rim around them with GW "Blood Red".   I then added a tiny white fleck to the pupils to give them a shiny look.
    I then gave a wash of GW "Devlan Mud" wash to the claws and mouth.  When this had dried, I added some highlights with the original colors. I then painted the base with Americana "Mississippi Mud"
I let the figure and base dry overnight, then I painted the whole thing with Ceramcoat "Matte Varnish".  When this had had time to dry, I sprayed the figure with Testor's "Dullcoat."
Overall I'm pleased with how it looks.  It definitely came out looking strange, like something you'd find under a rock,(if not something like a boiled shrimp).  :)

Figure 36 of 265; Complete

Monday, September 23, 2013

Mimic in Treasure Chest Form: Figure 35 of 265

This week I painted the Mimic figure that is disguised as a treasure chest. I began by soaking the figure in some dish soap to remove the mold release agent, and then rinsed it well.  Next, I trimmed a little off the bottom back of its monopod foot, as the figure leaned too far forward in my opinion, and I wanted it to stand more upright. Next, I tried to trim the flash from the figure's teeth as best I could.  I then glued it to a black primed 1 inch fender washer, and mounted it on half a tongue depressor, for ease of painting, with a drop of white glue.
  Remember, you can click any photo to see it larger.
 I began by giving the chest a coat of very thinned Americana "Asphaltum" paint, so it would act more as a stain than an opaque coating.  When dry, I painted the parts of the figure that were beginning to reveal themselves as the monster with Aleene's "Deep Khaki" paint.
Next I painted the gums and tongue with GW "Tanned Flesh", then the teeth with Americana "Buttermilk, and finally the bottom of the chest's interior with Ceramcoat "14k Gold".  I then painted the hinges and handles with Ceramcoat "Bronze", and lastly the claws with GW "Fortress Gray".
After everything had dried, I gave the whole figure a wash with GW "Devlan Mud" wash. When this dried I went back and added highlights to the teeth with, first, the "Buttermilk" again, and then plain white with a bit of the "Buttermilk" mixed in.  The tongue and gums I highlighted with just the "Tanned Flesh"  The monster bits I highlighted with Aleene's "Dusty Khaki". And, the claws were highlighted with Americana "Dove Grey".  The metals I highlighted with just their base colors. Finally, I add two eyes with GW "Blood Red", giving each a little white highlight.
Lastly, I painted the washer with Americana "Mississippi Mud", which is a nice neutral grayish-tan; so it wouldn't look too out of place in a dungeon, tavern, or outdoors (breaking the 'habitat' rules, I know, but why limit my imagination :) ).
When all was thoroughly dry, I gave everything a coat of Ceramcoat "Matte Varnish" and left it to dry overnight.  I then sprayed it with Testor's "Dullcoat". 
I included this shot as it gives a nice view of the claws emerging from the chest's handle, which I think is a nice little touch on this neat sculpt.
I'm very pleased with this figure. My only complaint is the mold line running across the top teeth, making it very problematic to trim flash from them, and you can still see hints of it on the finished product. But overall, a very satisfactory monster, and easy to paint.

Figure 35 of 265: Complete

Wednesday, September 11, 2013

Painting Arthrand Nightblade, Elf Ranger: Figure 34 of 265

My apologies for taking so long to post a figure, but it has turned out to be a very busy month for me, and I have got very little painting done.  I finished the Elf Ranger figure from the Original 30 Bones set  this past weekend.  I began with soaking the figure in some dish soap overnight, and then giving it a scrub with an old toothbrush and then rinsing. When dry, I glued it to a 1" black-primed fender washer, then glued the washer to half a tongue depressor with a drop of Elmer's glue.
I began by painting black just the little bit of armor showing in the slit of his clothing. I then drybrushed this with Ceramcoat "14k Gold". I then painted his outfit Duncan "Olive Green" and his cape and hood with Folk Art "Poppy Seed". I then painted in some shadows in the folds of  his clothing by adding some of the "Poppy Seed" to the "Olive Green", I did the dame with his cape by adding a little black to the "Poppy Seed". I then went back and painted highlights on the raised areas by adding Americana "Jade Green" (which is a very light green)to the two base colors.
Next I painted all the belts, scabbards, forearm guard, and quiver with Accent "Mustard Seed".  The detail straps on the quiver and scabbards I painted with Apple Barrel "Burnt Sienna". I then painted the bow and the arrow shafts with Accent "Raw Umber", the grip on the bow with DecoArt "Forest Green", and the arrow fletchings with Aleene's "Dusty Khaki".  Next I painted his leggings with the "Jade Green" and his boots with Folk Art "Butter Pecan". Lastly I painted his face and hands with GW "Elf Flesh", and his hair with Americana "Sable Brown". I then did all the metal bits with Cermacoat Bronze.  When everything had dried, I gave everything but his clothes a wash with Windsor Newton "Peat Brown" ink, being very careful not to let any get on his clothing.
  When everything had dried overnight, I painted the figure with Ceramcoat "Matte Varnish", and when dry, I flocked the base.  Afterwards, I sprayed the finished model with Testor's "Dullcoat."
I'm pleased with the figure, and it was relatively easy to paint. 

Figure 34 of 265: Complete

Monday, September 2, 2013

My Last Bones Kicktstarter Figure Arrives

Yesterday in the mail, a year and a week after the Kickstarter ended, I was pleased to find the last of my Reaper Kickstarter Bones had arrived.  When I first got my box from Reaper, it was missing the Frost Giant King from the add-on Frost Giants set I had ordered. I had immediately sent Reaper a note explaining the situation, and they had replied that all corrections would be made after they had shipped all the original Kickstarter orders. So, at last they had sent my missing figure. I was also happy to see that they had included a free sample of their Master Series Paint!  Unfortunately, all it has is a label that says "Sample" on both sides, and not actually what color it is.... some sort of pinkish-peachish it looks like.
Anyway, sorry for the long delay in getting a finished figure posted... it's been a busy week again, and the holiday weekend this week hasn't helped, as we've been busy doing family stuff.  Here is a sneak peak of the figure currently in progress: Arthrand Nightblade, Elf Ranger. Hopefully, I'll have him done by Thursday...though next Monday is more probable.
 
Figure 34 of 265: In progress

Monday, August 26, 2013

Painting the Skeleton Warrior Spearmen: Figures 32 & 33

Last week I finished up the two skeleton spearmen warriors from the Undead Horde Set.  I began by priming the figures with Krylon Camouflage with Fusion Flat Black spray paint, and then glued them to  black-primed fender washers.
To start, I gave both a heavy drybrushing with GW "Bleached Bone".
I then gave them a  lighter drybrushing with plain white paint, then when dry, I gave them a light wash with GW "Devlan Mud" wash. Afterwards, I went over them again with a light drybrush of the plain white.
  This was followed with painting the spear shafts with Americana "Mississippi Mud", and one shield with GW "Blood Red", and the other with plain black. I then added decorations to the shields with plain white.
I then gave the spear shafts a drybrushing with Folk Art "Barn Wood" and painted the back of the shields, rims, and hubs with Ceramcoat "Bronze". The spear points I painted with Ceramcoat "Metallic Pewter". The straps on the shields were next, with Americana "Charcoal Grey". Then I painted some splotches on the spear points with Duncan Aged Metal "Iron", and the strap rivets with the "Bronze". Lastly, I gave the straps and the spear points a wash with the "Devlan Mud" wash. 
   When everything had dried, I gave he figures a coat with Ceramcoat "Matte Varnish", and then flocked the bases.  Afterwards, I sprayed them with Testor's "Dullcoat".
Overall I'm pleased with them. They were nice simple figures to paint.

Figures 32 & 33: Complete

Thursday, August 22, 2013

A Bit About My Bones Basing Basics

I had a question from a reader about what I used to base my figures, so I thought I would take the time today to tell a bit about my basing technique. As I have mentioned in my posts before, I like to glue all my figures onto a fender washer that has been primed with flat black spray paint.  I usually use the cheap .96 cent flat black from Walmart for this. I like to us fender washers, because I line my storage boxes with magnetic sheeting, and these washers help the figures stay in place when transporting my figure boxes.  I use various sizes of fender washers, and tend to pick the size that fits the inherent figure base best.
  So, after I am finished painting a figure, I paint it with a brush on matte varnish by Ceramcoat.  This helps protect the figure's paintjob while I'm flocking it's base.  To flock the base I used a mixture of three different Woodland Scenics Turf products.  I mix roughly equal parts of these into an old metal lunchbox that I use for my basing
To adhere this turf mix to the bases, I mix cheap brown craft paint with elmers glue at about a ratio of two parts paint to one part glue.  I keep this mixture in an old plastic 35mm film container that has a nice airtight seal.
I also have a number of household items that I sometimes use in my basing. Shown below are some of these: Cheap Oregano (which makes nice scattered fallen leaves), coarse sand, dried coffee grounds (which make nice dirt), and dried tea (which makes nice dirt or dead vegetation).
 I also cut short lengths of undyed rope to make tall grasses, and use a bag of chamomile I have for dried or dead grass.
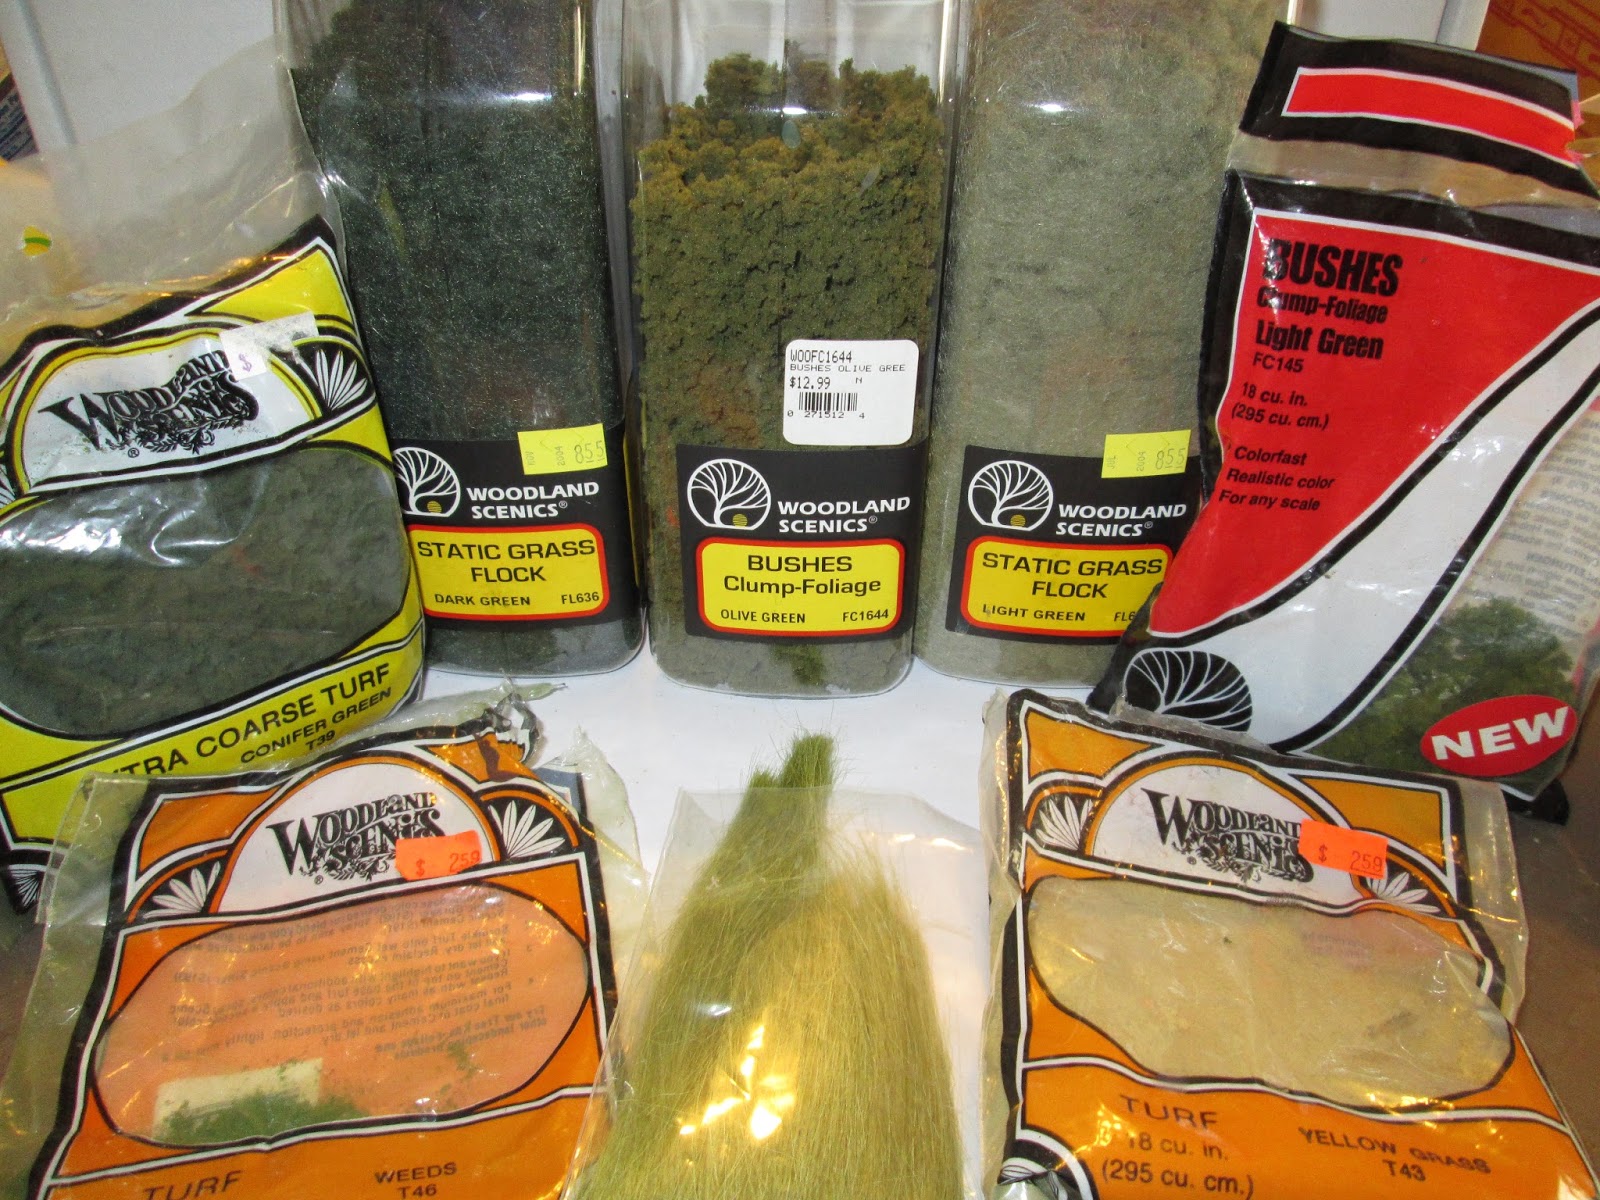
 Of course, I have also gathered a number of Woodland Scenics products over the years, including Clump foliage, static grass, long grass, and various shades of fine turf.
And I have a number of different small stones I sometimes glue on bases. Shown below are: gray kitty litter, decorative gravel, and brown aquarium gravel
Also, handy is various plastic foliage, which can sometimes be glued on to bases, though I usually use this for larger scenery projects.
So, on to the actual basing.  To begin with, I paint the base with my glue and paint mixture, being careful not to paint up over the figure's feet.
Then I add any odd scatter I  want to include on the base.  Here, in the photo, I'm sprinkling some coffee grounds onto the wet paint, to make it look like loose soil on the base.
Then i dunk the whole thing in my turf mixture and gently swirl it around a bit, so I make sure all the base is covered.  I then let it sit in here for a few hours to let everything dry.
Afterwards I take the figure out, and gently tap the base to remove any loose turf.  Then I use white glue to glue on any decorative elements I choose.  Here in the photo, I'm gluing on a bit of dark green clump foliage to make a little bush or weed.
And here's the finished basing project show below. (And a sneak peak at one of Monday's figures) I now will let the glue dry for a few hours, and then will spray the whole thing with Testor's Dullcoat to help seal the figure's paint and the flocking onto the base.

Monday, August 19, 2013

Flesh Golem and Clay Colem: Figures 30 & 31 of 265

Over the weekend I finished up  the second two figures from the Golems set, making this the first set for me to have completed. (Yay!)  I began by soaking both figures in water with dish soap in it, and then rinsing them, and gluing them to black primed fender washers. The Flesh Golem had some really bad flash along his arms and shoulders, which I tried to remove the best I could, but the many crevices of his muscles made this difficult.
    At first I started to paint the Flesh Golem with the same color I do my zombies with, but rethought that, as I didn't want him to look like just another zombie.  So instead of the green rotting flesh look, I decided to go with the bluish-pinkish-grayish  rotting flesh look. I wasn't sure how exactly I wanted to do this, as I didn't want him to end up looking purple.  So, as a trial, I painted one arm with Apple Barrel "Flesh" and the other with a mix of the "Flesh" and Duncan "Slate Blue".  Then over the pure flesh one I did a wash with Iron Wind Metals "Dark Blue' ink, and over the other arm I did a wash of the "Dark Blue" ink mixed with GW "Badab Black" wash. In the end, this second arm, was the one I liked best, so I painted his complete torso with a mix of the "Flesh' and "Slate Blue".
       Meanwhile, I had thought about what color I wanted the Clay Golem to be; and decided that when I think of clay I think of a grayish-tanish color.  So I thought I would try to give him that look.  So, I began by painting him entirely with Folk Art "Milkshake", which is a very neutral flesh color. I also decided I wasn't going to paint his little Speedo a separate color, as the whole idea of a Golem putting on a little pair of briefs just seemed silly to me; so I just assumed them to be a result of the modesty of his creator, and an inherent part of his body.
I then gave the entire Flesh Golem a wash with an even mix of  the"Dark Blue" ink and "Badab Black" wash.
And I gave the Clay Golem a wash with GW "Devlan Mud" wash.
When this had dried I felt that it was too brown, and made the 'clay' look too flesh like, so I went over it with a wash of the "Bedab Black" which helped grey it up a bit. When this was dry, I gave the whole body a quick drybrushing with Folk Art "Platinum Grey". To finish I added black dot pupils.
  I then did some drybrushing on the Flesh Golem's skin with a mix of the original colors again, then I went over the scar areas carefully and lightly with some of the "Milkshake" color to give them that whitish scar look. I then went and painted the pants on the Flesh Golem. I wanted a color that would contrast nicely with the bluish skin, so I chose GW "Vermin Brown", and I painted the rope holding up the pants with Folk Art "Barn Wood" Then I gave the pants and rope a wash with Windsor Newton "Peat Brown" ink.
  I then went back an did some highlighting on the rope and pants.  I painted his eyes with Americana "Buttermilk, and then gave then added black pupils.  His teeth and finger & toe nails I did with the "Platinum Grey"  His nipples I did with a little bit of black added to the original skin color.  When everything had dried, I gave both figures a coat of Ceramcoat "Matte Varnish", and then I flocked the bases.  I let them sit overnght, then sprayed them with Testor's "Dull Coat" the next morning.
     I'm pleased with how these turned out. I think the bluish-pinkish-grayish skin color really turned out looking effective. And the color for the Clay Golem, while not clearly shouting 'clay', I think still comes across as something other than skin.

Figures 30 & 31: Complete