This past week I worked on the Ghost Pirates set from the Bones 4
Core Set. The
Core Set came with 5 of these figures, and I ordered a second set so I would have a unit of 10 for larger games. I painted the second 5 the exact same way that I painted the first 5, so did not include progress shots of them; but I did include them in the group photos at the end.
I prepped the figures in the usual way; soaking them in a dish of water with a couple drops of dish-soap added and then rinsing and drying. I then glued each one to an unprimed 1" fender washer, with Aleene's Tacky glue. I then glued the figures to a number of tongue depressors with a couple drops of the Elmer's glue each.
I began by painting the washers with Americana "Metal Primer". I then painted the figures completely with Americana "DuraClear Matte" varnish; as I planned to use ink on them, and the matte varnish gives the ink something to hold on to better than the bare plastic. When the matte varnish was dry, I applied a heavily thinned wash of Citadel "Green" Ink to the figures, trying to keep it just on the pirates themselves and not on the "scenery" pieces on the bases.
 |
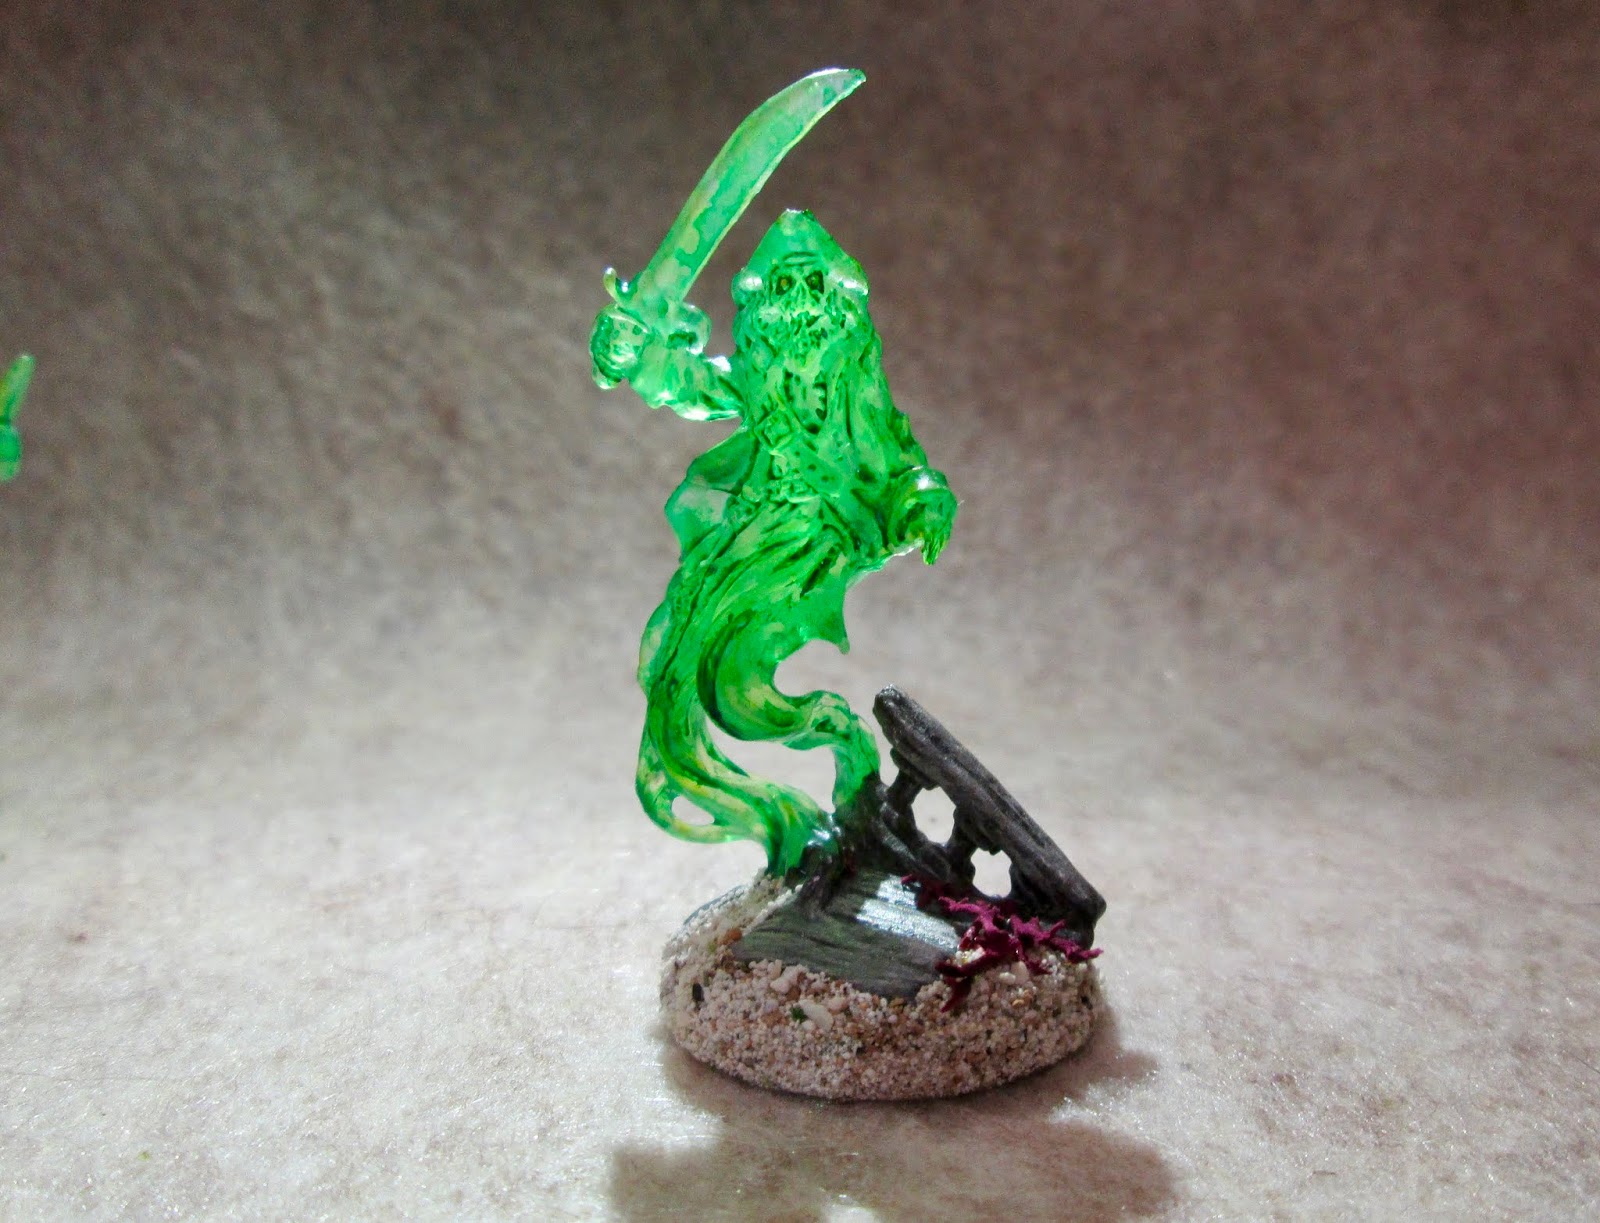
| Note, I added a coat of un-thinned "Green" ink to the bottles the righthand pirate is carrying to give them a green glass look. |
When the ink was was dry, I painted their eyes with tiny dots of Americana "Margarita", and then painted the bases with Americana "Bittersweet Chocolate".
Next, I drybrushed the scenic bases with a 50-50 mix of Americana "Neutral Grey" and Americana "Mississippi Mud". This was followed with a lighter drybrushing using Folk Art "Barn Wood", and a last highlight drybrushing with Americana "Dove Grey". I then painted the skulls on the bases with, first, Americana "Khaki Tan", and then drybrushed with Crafter's Acrylic "Light Antique White". Lastly, I painted the rest of the base and washer with the Mississippi Mud".
I let the figures dry overnight and the next day I gave them a coat of Americana "DuraClear Matte" varnish. Then, when the varnish was dry, I used some white glue to apply a fine sand mixture to the bases. I decided not to spray varnish these as I have had some issues in the past with the translucent figures getting a little tacky after a while; so I'm just going to go with the brush on matte varnish. I did put a little Americana "DuraClear Gloss" varnish on the bottles the drinking pirate is holding to make them look like glass.
 |
| This is the original five I painted as shown above. |
 |
| These are the original five as well. |
 |
| And here's the whole crew. |
I'm really happy with these. They turned out just as I had hoped. The translucents are always a challenge to strike the right balance between keeping the translucency and applying shadow and highlight, and I think I hit a happy balance here.


Stunning work.
ReplyDeleteI've just done the translucent spirit from an earlier Bones and I wish i'd read your tip about a coat of clear varnish before the ink wash.
Finally got my Bones 4, so I might try these pirates soon.
Thank you, misterc!
DeleteIt's a relatively new trick for me too. I wish I could go back and redo a bunch of my translucents now.
Congrats on getting your Bones 4! Enjoy diving in to the Bonesy goodness! :)
These turned out well, and I suspect they look even better in hand, since they seem hard to photograph!
ReplyDeleteThe new Contrast paints from GW might be useful for translucent figures since they are effectively thick ink.
Thanks! Yes, they're so hard to get right; though I did try to make these so they would look relatively good in person and photographs. One of the reason there's really no highlighting to speak of, as it usually needs to be opaque to look good in person...
DeleteI've heard about the new GW paints and will be interested to see what reviews they gets and how they looks on minis.
Excellent work! Do you thin your craft paints, and if so what do you use to combat the hydrophobic nature of the Bones plastic? I've heard a thin base coat of unthinned craft paint works well, but I'm afraid of obscuring details.
ReplyDeleteThank you, Hagdorm!
DeleteNo, I generally don't thin my craft paints. I just never did from when I started painting figures decades ago, and haven't seen a reason to change. I wouldn't apply a thin coat of any paint to translucents, as paint by its nature is opaque. Neither do I apply a paint base coat on regular minis. I have used Inks and Reaper Liners for base coats in the past, as it helped me see the details on the pure white Bones, but now that they've gone to the grey plastic I've stopped doing that. The details on the grey are much more visible. I've never seen a problem with obscuring detail with craft paint. I know everyone frets about it, but unless you're dunking your minis directly in it, one regular coat of any paint isn't going to dry that thick. Perhaps if your layering on 3 or 4 coats it will build up; but since most of my work is base coat, shading wash, and then highlights, I'm just not applying that much paint.