Thursday, March 19, 2015

Blue Translucent Crystal Outcropping from Bones II

     I continued to work on the translucent Blue set from Bones II this past week, doing the big crystal outcropping.  My plan was to do this just like the Ice Golem from last week.
       I prepped this figure in the usual way; soaking it in a dish of water with a couple drops of dish- soap added, then giving it a light scrub with a soft toothbrush, and then rinsing and drying.  I then glued the figure to a 1.5" black-primed fender washer with Aleene's Tacky glue. The washer was big enough to hold, comfortably, so I didn't glue it to a tongue depressor like I usually do.
    I began by  giving the crystals a heavy wash with Iron Wind Metals "Dark Blue" ink with a pin point of dish soap added to help it flow into the crevices. I used a brush I had dipped in water, to help thin the ink slightly.  Then, when the ink was good and dry, I drybrushed the figure lightly with Americana "Salem Blue", and then went  over that with a drybrushing of plain white.
     Lastly, I painted the base white; then after everything had had time to dry, I gave the figure a coat of Cermacoat "Matte Varnish".   When this was good and dry, I gave the base a coat of Elmer's white glue and flocked it with Woodland Scenics "Snow" Flock.  I didn't spray with the usual Testor's "Dullcoat", as I liked the slight sheen left over from the Ceramcoat "Matte Varnish" (Which is not 100% Matte.)
   I think it turned out pretty good.  I'm thinking it might be neat if this turned into the Golem as some unsuspecting adventurer is passing by. :)

Monday, March 16, 2015

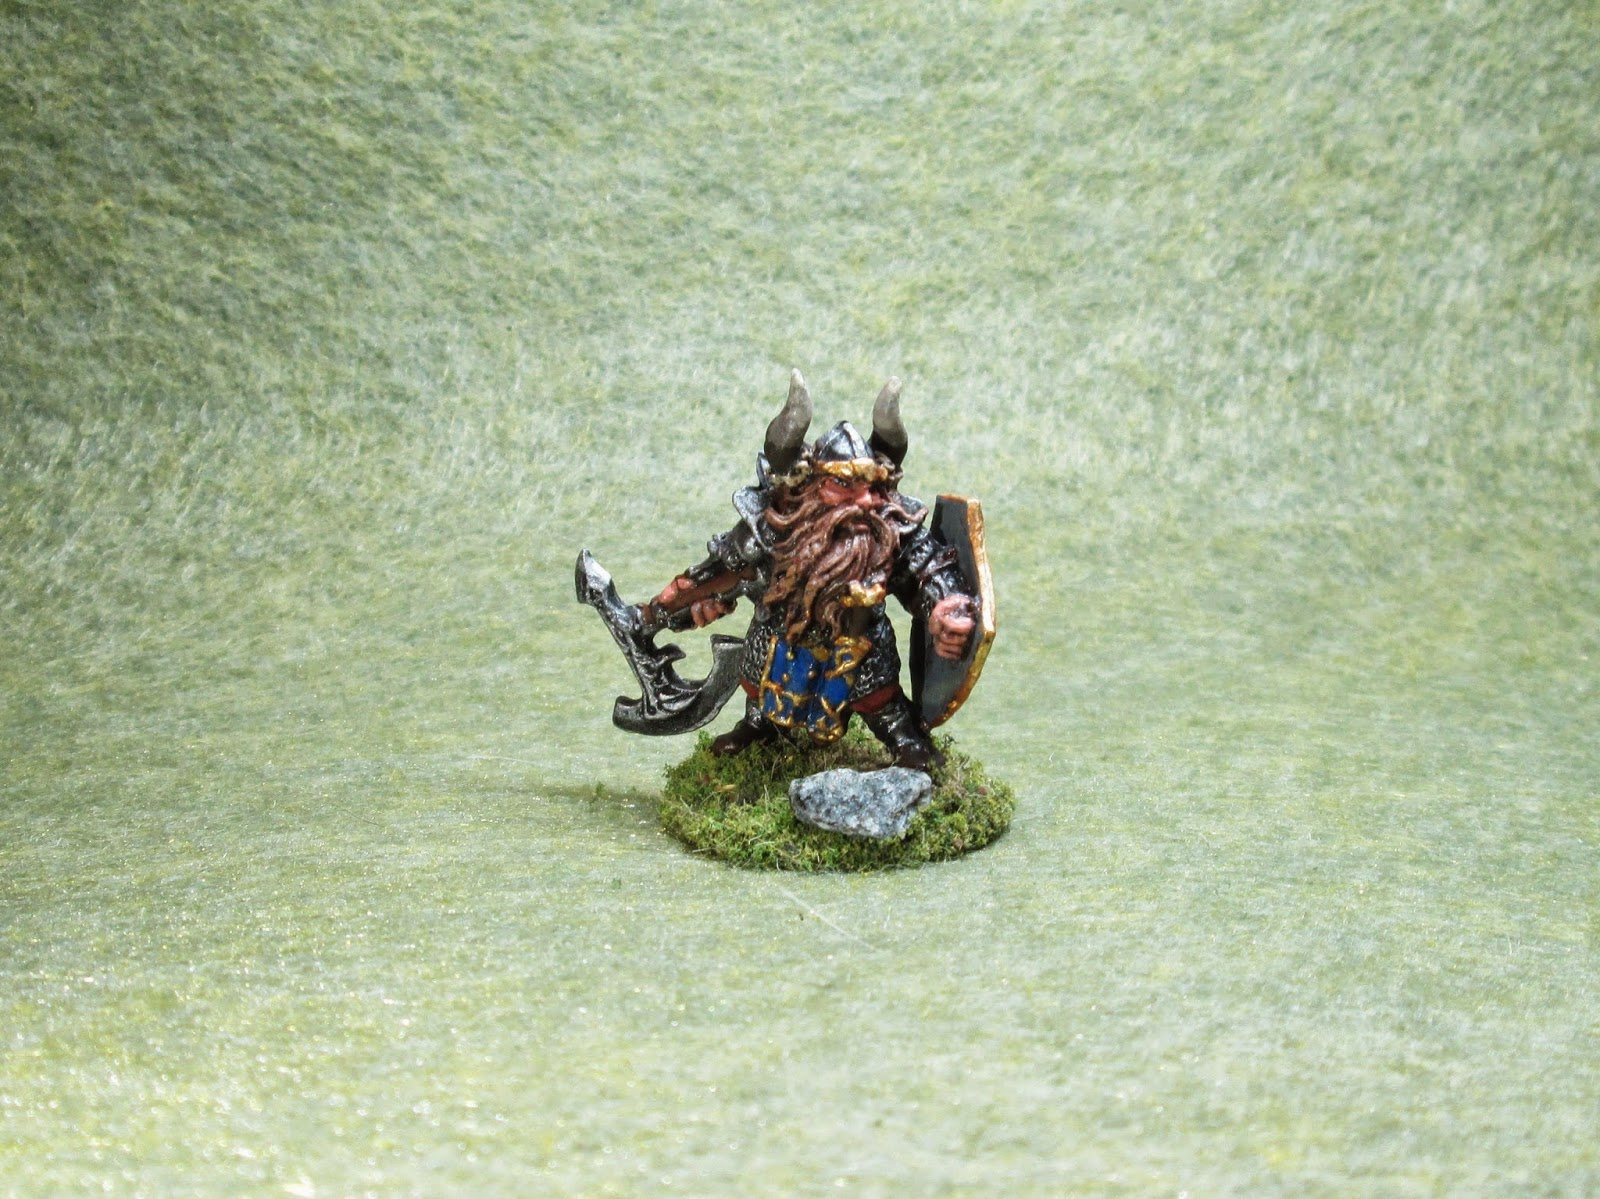
Dain Deepaxe, Dwarf Fighter: Figure 141 of 265

     This week I wrapped up the Dwarves Set by painting Dain Deepaxe.  The Dwarves now join the list of completed sets over in the right-hand column.  This was a rather straightforward figure to paint, and didn't really pose any real challenges.
     I prepped this figure in the usual way; soaking it in a dish of water with a couple drops of dish- soap added, then giving it a light scrub with a soft toothbrush, and then rinsing and drying.  I then glued the figure to a 1" black-primed fender washer with Aleene's Tacky glue, and glued the washer to a tongue depressor with a couple drops of Elmer's White Glue.
      I began by painting the figure with black, and when dry, gave it a heavy drybrushing of Ceramcoat "Metallic Pewter". I then went over this with a lighter drybrushing of Folk Art "Silver Sterling".
     Next, I painted his face and and hands with Americana "Shading Flesh", his pants with Anita's "Burnt Sienna"; and his loin hanging, scabbard and shield with Americana "True Blue".
   The back of his shield I painted with Americana "Zinc", the handle of his ax I painted Americana "Sable Brown", and the grips on his sword and hammer and the straps on his shield I painted Accent "Real Umber"  His boots, and his backpack I painted with Americana "Asphaltum".
 I did the little pouch on his back with GW Snakebite Leather", and the blanket roll with Folk Art "Settlers Blue".  His beard I painted  with "Crafter's Edition "Spice Brown". I painted the base of the horns with Americana "Charcoal Grey" and then blended that with Americana "Buttermilk" to paint the middle, and lastly painted the points with plain "Buttermilk". The fur around the base of the horns, and the rope tying the blanket roll, I painted with Americana "Khaki Tan"
        After everything had a while to dry, I gave the figure a wash with GW "Agrax Earthshade" wash.
     When the wash was good and dry, I worked on his face; painting in his eyes with black sockets, white whites, and black pupils.  I then did highlights on his face and hands with the base "Shading Flesh". Likewise, I did highlights on his beard, pants, blanket roll, pouch, loin hanging, and scabbard all with the base colors.   I also did some further lighter highlights on his beard with the "Sable Brown".
   Next I worked on the metallics, painting the decorations on his loin hanging, scabbard, shield, sword hilt, helmet, beer stein, and beads in his beard with Ceramcoat "Bronze". I then went back over these and added highlights with Ceramcoat "14K Gold".  I then did final highlights on his armor and weapons with the "Silver Sterling".
     I let the figure sit all day, and that evening I gave it a coat of Ceramcoat "Matte Varnish".  The next morning  I flocked the base, and that afternoon I gave the figure a coat of Testor's "Dullcote" spray varnish.
     I like how this little guy turned out.  I think there's some nice character to the sculpt.
     Next, I will be working on completing the Townsfolk set.  And, tune in Thursday for another figure from Bones II.

Figure 141 of 265: Complete

Friday, March 13, 2015

Dwarven Forge City Builder and Sewer Kickstarter

I just wanted to take a moment and let my readers know about the new Dwarven Forge City Builder Kickstarter.   It is introducing a neat new product from Dwarven Forge for creating modular city buildings.   While a little on the pricey side, I really like the "building block' nature of the components, and think it will be a lot of fun to play around with, besides being really beautifully crafted like everyone has come to expect from Dwarven Forge.
    I've gone in for the Hamlet set and a couple of the extra roof packs so far. I think this will be great for games with my growing collection of Bones figures.   I'm interested to see just how far this one can go, knowing the success of past Dwarven Forge Kickstarters.
   And, just last night they added several sets of great looking Sewers to the Kickstarter!  

  To check it out for yourself, visit their Kickstarter Page.

Thursday, March 12, 2015

Crystal Golem from Bones II

     I had time this week to finish up the Crystal Golem figure from the Bones II Blue Translucent Set. I wanted to paint him up like some kind of Ice Golem to use with my ever growing collection of winter themed figures.
      I prepped this figure in the usual way; soaking it in a dish of water with a couple drops of dish- soap added, then giving it a light scrub with a soft toothbrush, and then rinsing and drying.  I then glued the figure to a 1.5" black-primed fender washer with Aleene's Tacky glue. The washer was big enough to hold, comfortably, so I didn't glue it to a tongue depressor like I usually do.
  First, I gave the figure a heavy wash with Iron Wind Metals "Dark Blue" ink with a pin point of dish soap added to help it flow into the crevices. I used a brush I had dipped in water, to help thin the ink slightly.
  When the ink was good and dry, I drybrushed the figure lightly with Americana "Salem Blue", and then went  over that with a drybrushing of plain white.
      Lastly, I added two white dots for eyes, and painted the entire base white.   After everything had had time to dry, I gave the figure a coat of Cermacoat "Matte Varnish".   When this was good and dry, I mixed a little white paint and Elmer's white glue together, and painted some patches on his shoulders and back.  While it was still wet, I sprinkled it with Woodland Scenics "Snow Flock".  I then gave the base a coat of Elmer's white glue and flocked it with the "Snow Flock as well. I finished up by adding a little clump of unfrayed twine to be some winter grasses.  I didn't spray with the usual Testor's "Dullcoat", as I liked the slight sheen left over from the Ceramcoat "Matte Varnish" (Which is not 100% Matte.)
    I'm really pleased with how this figure turned out.

Monday, March 9, 2015

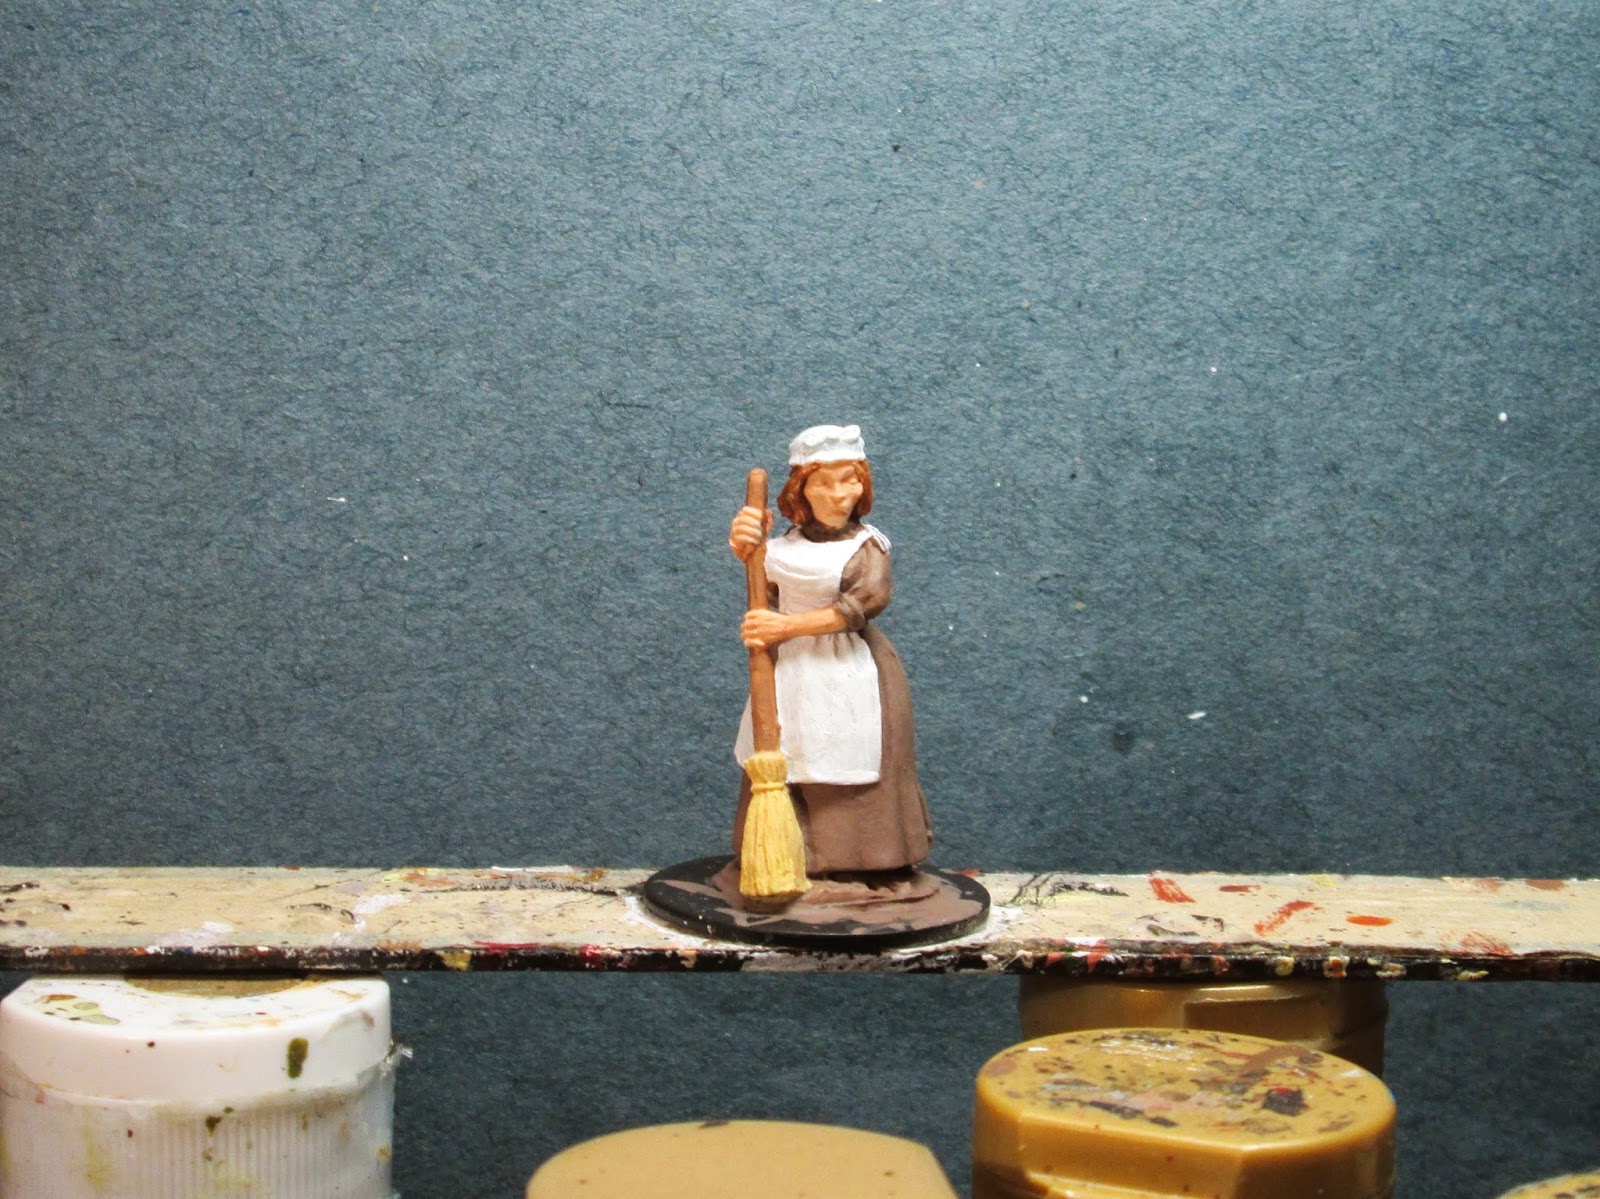
Townsfolk Grandmother: Figure 140 of 265

This week I took a break from working on the Dwarves Set, and did this Grandmother figure from the Townsfolk Set, because with the Cold Wars game convention this past weekend I knew my painting time would be limited.    I didn't know she was a Grandmother when I painted her, as I usually don't look up the figure's names on the Reaper site until after I've painted them.  So, I painted her as a younger woman.  I don't think anything particular about her says she is an older person.
      I prepped this figure in the usual way; soaking it in a dish of water with a couple drops of dish- soap added, then giving it a light scrub with a soft toothbrush, and then rinsing and drying.  I then glued the figure to a 1" black-primed fender washer with Aleene's Tacky glue, and glued the washer to a tongue depressor with a couple drops of Elmer's White Glue.
     I began by painting her dress with Americana "Mississippi Mud", and her apron and hat with White.  I then painted her face and arms with Apple Barrel "Apple Flesh".
Next, I painted her hair with Crafters Edition "Spice Brown", then did the broom stick with Americana "Sable Brown", and the head of the broom with Americana "Moon Yellow".
     When all that had a good long time to dry, I gave the entire figure a wash with GW "Agrax Earthshade" wash.
     When the ink was good and dry, I did her eyes; painting the sockets black, then adding the whites, then doing black pupils.  Then I painted her lips with Americana "Shading Flesh". I did highlights on the face with the base "Apple Flesh", and then added a little white and did some lighter facial highlights. Next, I did highlights on the apron and cap with the base White, and the dress with the "Mississippi Mud."  Lastly, I highlighted the broom stick with the "Sable Brown", and the bristles with the "Moon Yellow".  I finished up by painting the base GW "Khemri Brown".
        The next morning I gave the figure a coat of  Ceramcoat "Mate Varnish".  The following day, I sprayed the figure with "Testor's Dullcote".
     I'm generally pleased with how this simple figure turned out.  She will make a good villager or tavern employee.

Figure 140 of 265: Complete

Thursday, March 5, 2015

Happy Day! My Bones II Box Arrived!

     Just wanted to let you all know that my Bones II box arrived this past Tuesday. Perhaps the closest an adult can get to that childhood Christmas-morning feeling. :)
      All components were present and accounted for:
Expansion Set 1 x1
Dragons Don't Share x1
Mashaaf, Great Old One x1
Water Elementals x1
2013 Core Set x1
    I must say that the packaging this year was very impressive, and a step up from last year's million little bags.   And, I think the "Dragons Don't Share" box is really beautifully designed. The "Thank You" note from all the Reaper employees was a nice touch too.
The big reveal as the box s opened.
     So, my plan for these is to work on them in a much more casual manner than I have been doing with the Bones I figures.   I am probably going to sort through these and not keep every single one like I did with Bones I. (Granted I did trade one of the Bones I figures to a friend. So not technically "every single one", but you get my point.)   I may try to post Bones II figures on the occasional Thursday, and still plug away at my usual Monday Bones I postings.
Everything laid out.

Monday, March 2, 2015

Bailey Silverbell, Female Dwarf: Figure 139 of 265

     This week I did another figure from the Dwarves Set: Bailey Silverbell.  In looking at this figure, I felt she looked like she had the hooded cloak, and lighter armor, of some sort of a thief class character. I was also feeling like I wanted to do something more colorful after last week's all gray exercise; so I formed in my mind an image of a Dwarf heroine dressed all in red.  Kind of like a Crimson Avenger type of thing. :)   As soon as I hit on this idea, it also dawned on me that there was something rather Little-Red-Riding-Hood-esque about the figure, so I felt even more confident in my painting plan.
      I prepped this figure in the usual way; soaking it in a dish of water with a couple drops of dish- soap added, then giving it a light scrub with a soft toothbrush, and then rinsing and drying.  I then glued the figure to a 1" black-primed fender washer with Aleene's Tacky glue, and glued the washer to a tongue depressor with a couple drops of Elmer's White Glue.
     I began painting by giving her a wash with thinned black ink with a tiny pin-point drop of dishsoap added to help it flow into the crevices and help show the sculpting outlines.
     After the ink was good and dry, I painted her outfit with Folk Art "Burgundy". I then painted her cloak with Americana "Cranberry Wine", and her armor with Anita's "Burnt Sienna".
     Next, I painted her leggings, gloves, and belts with Ceramcoat "Raw Sienna". Her boots I painted Folk Art "Barn Red", and her crossbow I painted GW "Vermin Brown".
     I then painted her face with Americana "Shading Flesh", and her hair with Americana "Burnt Orange".  The grip of her sword I painted with Accent "Real Umber".   I then moved to the metals; painting the sword blade, and the crossbow fittings, with Ceramcoat "Metallic Pewter; and her sword hilt, and buckle, with Ceramcoat "Bronze".
   Then, after everything had had plenty of time to dry, I gave the whole figure a wash with Winsor-Newton "Peat Brown" ink.
     After the ink had dried thoroughly, I went about adding the highlights. First, I painted her eyes; doing black sockets, then the whites, then black pupils.  I then did highlights on her face, first with the base "Shading Flesh", then I mixed in some Apple Barrel"Apple Flesh" to do some lighter highlights.  I then mixed some "Shading Flesh" with some of the "Burgundy, and painted her lips. I added a little white, and did lip highlights.  I used the base "Burnt Orange" to highlight her hair, and then a bit of the "Raw Sienna" to do lighter hair highlights.
     Next I used the base "Burgundy to highlight her outfit, then mixed some white in do do lighter highlights.  I then used the "Burgundy" to highlight the cloak. I used the base Raw Sienna to highlight her leggings, belts, and gloves; and the base "Burnt Sienna" to highlight her armor.   I did highlights on her boots with the base "Barnyard Red".
      I now worked on finishing up the metals, first highlighting the parts I had painted "Bronze" with Cermacoat "14K Gold"; and then doing  highlights on the sword blade and metal crossbow parts with Folk Art "Silver Sterling". Lastly, I painted her white integral base with the Americana "Mississippi Mud".
     I let the figure sit overnight, and the next morning I gave it a coat of Ceramcoat "Matte Varnish".  Later that afternoon I flocked the base.   The next day I sprayed the figure with Testor's Dullcote. 
     I really like how this figure came out.  I think the color choice makes what is an ordinary figure look a little more special.

Figure 139 of 265: Complete