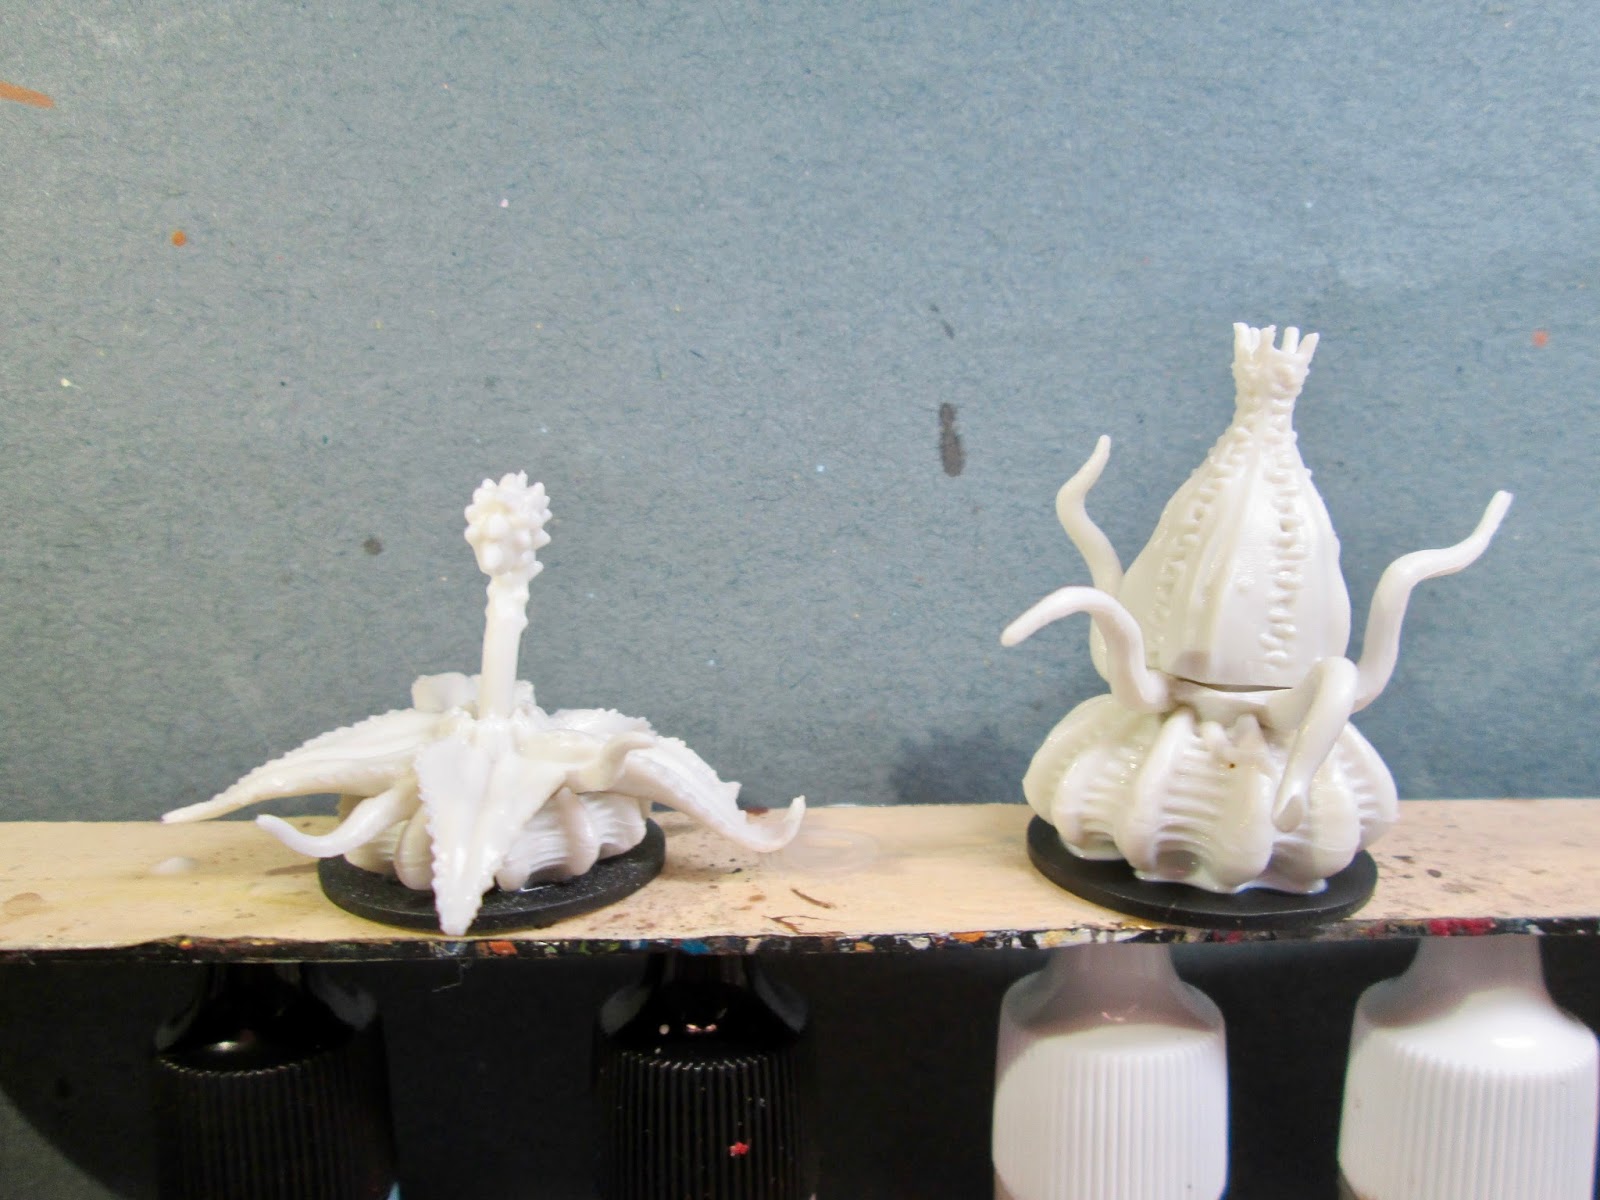
This past week I began work on my new Bones 3 stuff, and to start painting I chose the pair of Death Star Lilies from the Stoneskull Expansion set: something not too complex, yet colorful, and fun to work on.
I prepped these figures in the usual way; soaking them in a dish of water with a couple drops of dish-soap added, then giving them a light scrub with a soft toothbrush, and then rinsing and drying them. I then glued the figures to black-primed 1" fender washers with Aleene's Tacky glue, and then glued the washer-mounted figures to a tongue depressor with a couple drops of the Elmer's glue under each washer.
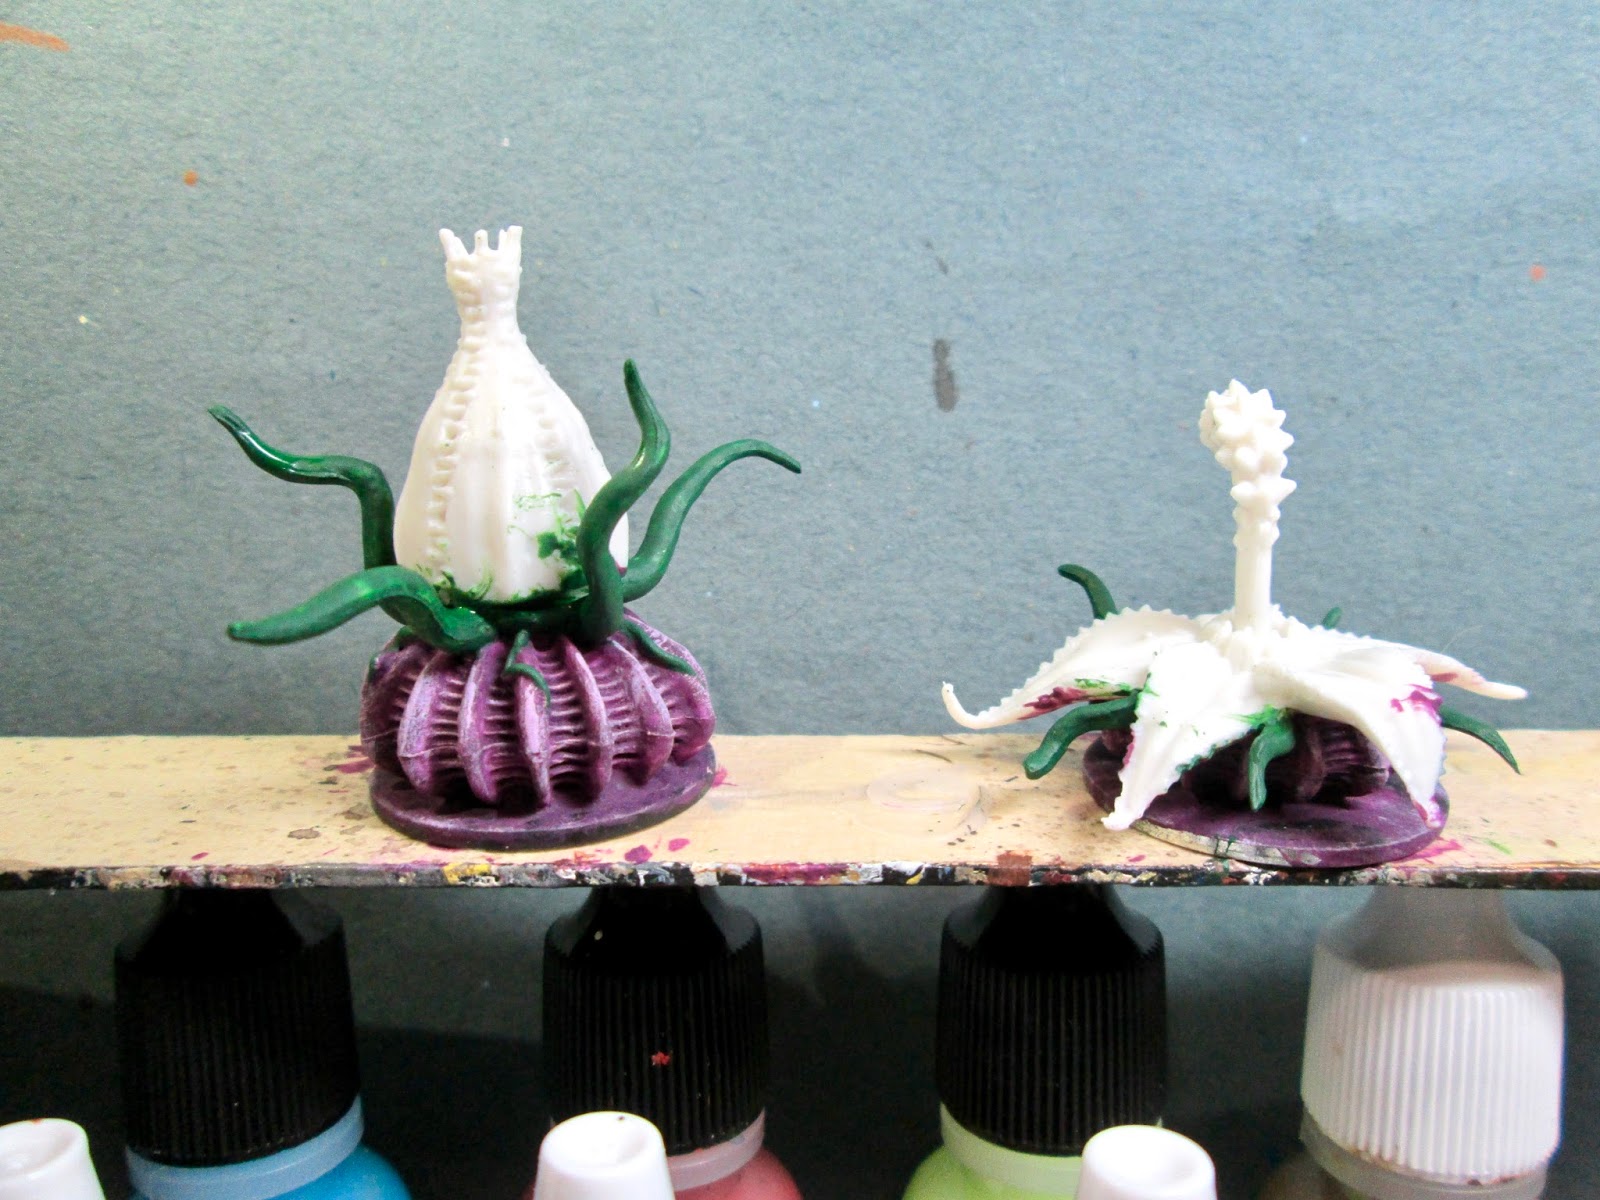
I began by painting the bottom potions of the plants with Crafter's Acrylic "African Violet". When dry, I drybrushed the ridges and spines with Apple Barrel "Apple Lavender". I then painted all the tentacles with Reaper MSP "Christmas Wreath".
Next, I painted the petals, (the outside of the petals specifically on the opened lily), with Crafter's Acrylic "Daffodil Yellow". I then painted the edges of the petals with Reaper MSP "Holly Berry". After the "Holly Berry" had a while to dry, I ran some Citadel "Agrax Earthshade" wash down the seams between the petals on the closed lily. When the wash was dry, I highlighted the petals with Apple Barrel "Lemon Chiffon", and some plain "White". I then used the White to paint all the little teeth running down the edges of the petals. After that, I highlighted the tentacles with Crafter's Acrylic "Wild Green".
I then worked on finishing the open lily. I begn by painting the inside of the petals with Americana "Margarita". After that, I fixed up the petal edges with the "Holly Berry", and also used this color to paint the central circle of the plant, and the pistil. While the "Holly Berry" was still wet, I blended it with Crafter's Acrylic "Tutti Frutti" to paint the end of the pistil.
I let everything dry for awhile, and then once again, I ran some "Agrax Earthshade" wash down the edges of the petals, and also applied some to the central circle where the bases of the petals met. When this wash was dry, I highlighted the central circle at the base of the pistil with some Crafter's Acrylic "Pure Pumpkin", and the bumps on the pistil with some Crafter's Acrylic "Cherry Blossom Pink" I then highlighted the inside of the open petals with some of the "Margarita" mixed with some White. I then painted all the little teeth along the edges of the petals with White.
Lastly, I painted the washers with some Ceramcoat "Walnut".
I let the figures dry overnight and the next morning I gave them a coat of Americana "DuraClear Matte" varnish. When that was dry, I flocked their bases. Another overnight dry, and I sprayed them with Testor's Dullcote".
I'm quite pleased with how these plants came out. I think they have the right blend of joyous color and sinister intent.


Alien clove of garlic and a worm ascending from an apple skin!
ReplyDeleteThese look great. I always enjoy killer plant creatures for some reason. 😊
ReplyDeleteThanks!
DeleteThose are quite good, and could certain be useful for an alien deathworld/underdark sort of setting.
ReplyDeleteThanks, Lasgunpacker. Yes, I agree they're very multi-purpose. I'm sure these will see use in sci-fi, pulp, fantasy, and maybe even underwater games. :)
Delete