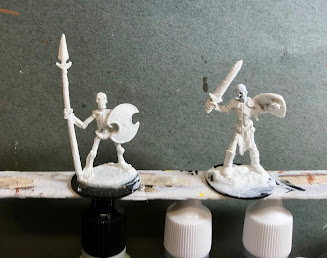
I had prepped the figures in the usual way, soaking the parts in a dish of water with a couple drops of dish-soap added, then giving them a light scrub with a soft toothbrush, and then rinsing and drying them. I then had glued them to 1" black-primed fender washers with Aleene's Tacky glue. I now glued the washers onto a tongue depressor with a couple drops of Elmer's white glue.
Since I planned to use some Citadel Contrast Paint on these, I started off by giving them a base coat of Ceramcoat "White".
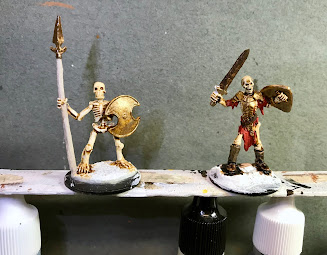
When the base coat was dry, I gave them a coat of Citadel Contrast "Skeletal Horde". When that was dry, I went over their armor and shields and shield straps with Citadel Contrast "Snakebite Leather". After that, I did the boots with Citadel Contrast "Wyldwood", and the spear shaft with Folk Art "Barn Wood.
Next, I painted the tunic on the righthand one using Reaper MSP Bones "Cinnamon Red", and then I painted the spear point, sword blade, and belt with Americana "Asphaltum". After that I painted the armor, shields, and sword grip with Folk Art Brushed Metal "Brushed Bronze".
I then went over the shields and armor with some thinned Americana "Sea Breeze" to give a verdigris look. When it was dry, I added some splotches to the left shield with Crafters Acrylic "Bright Yellow", and the right shield with Americana 'True Blue, to represent the remains of old paint on the shields. I let the figures dry for a while, and then went over everything but the skeletal bones themselves with a coat of Citadel "Agrax Earthshade" wash. I then filled the eye holes and mouths with some Citadel "Nuln Oil" wash to help define them better.
When the washes were dry, I drybrushed the spear shaft with some Americana "Bleached Sand", and then hit the bones of the skeletons with a light drybrush of some Crafter's Acrylic "Light Antique White". I then applied some splotchy rust to the spearpoint and sword blade with some accent "Golden Oxide", and then did highlights on the righthand skeleton's tunic with some Crafter's Acrylic "Orange Spice". After that, I went over the paint remands on the shields again; using Crafter's Acrylic "Daffodil Yellow" for the one on the left, and Americana "Wedgewood Blue" for the righthand one. I then painted on the remnants of some decorations, using Ceramcoat "Black"on the left, and Americana "Snow White" on the right. Lastly, I painted the bases with Americana "Mississippi Mud".
I let the skellies dry overnight and the next day I gave them a coat of Americana "DuraClear Matte" varnish. Then, when the varnish was dry, I used some white glue to flock the bases. Another overnight dry, and I sprayed them with Testor's "Dullcote".
Not great, but good enough for the tabletop and I'm happy to finally get them finished and ready for action.


Nice job with the banged-up paint jobs on the shields!
ReplyDeleteThank you, Marc! I like painting beat up and battered stuff as I find it takes less precision and skill than painting things that are supposed to be new. :D
Delete