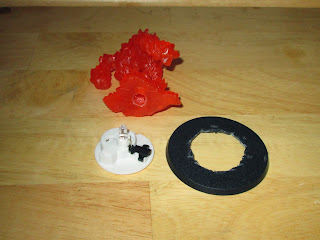
I wanted this figure to appear as if the source of its heat was coming from its core, so I wanted it to be hottest and brightest in the center and darkest and coolest as you reached the outer edges. To do this effect I had to think of the figure almost two dimensionally, and luckily the sculpt lends itself to that. I began by giving the outer edges of the figure, the wings, body, and upper arms, a drybrushing with Apple Barrel "Apple Maroon", and then just inside this, working my way towards the center, I gave it a dry brushing with GW "Blood Red"
Next I did the oranges, doing a drybrush with GW "Blazing Orange" first, again painting just inside the previous color. And then I did a drybrush with Americana "Tangerine"
Now I moved to the yellows. I did a drybrush in the center of the body, and the wings, and the bottoms of the arms with GW "Golden Yellow. This was followed by a drybrushing with Apple barrel "Yellow".My final steps was to add heat highlights with Apple Barrel "Lemon Chiffon" to her chest, stomach, the raised leg, her brow and nose. I also put two dots of this color in her eyes to give them a focus. Then I added a bit of white to the "Lemon Chiffon"" ,and did some small pinpoint highlights on the parts I mentioned above. When all was dry I painted the figure with Ceramcoat "Matte Varnish", and then flocked the base. I used a bit of dried coffee around her feet to represent singed grass, and when the flocking was dry I gave the immediate area around her feet a light drybrushing with black to make it look like burnt grass, as reader 'adeptgamer' suggested on my previous figure, the Hell Hound. Finally, I gave the figure a coat of Testor's "Dullcote" spray paint.
All in all I'm very pleased with how this figure turned out. I think I'm finally getting the hang of doing the shading for fire on these translucent figures, (and solid figures as well). With my first attempts I was almost afraid to cover the translucency. I also was working under the false impression of fire being darker at he base and lighter at the edges. Which is how we paint most normal figures, with lighter highlights on the outer edges.
Next up, for my Christmas special, I will do the large fire elemental....and this one will be electrified! :)
A preview:
Stay tuned...
Figure 54 of 265: Complete


A very nice, subtle effect.
ReplyDeleteThanks! Unfortunately, I'm finding these translucents hard to photograph. The actual mini looks better in person with more highlights and shadows and color gradations. The photo came out looking rather flat.
DeleteThe translucent s are cool, but not, at the same time. You've done some good justice here though :)
ReplyDeleteThank you. I agree with your assessment, I go back and forth liking and hating them (at least with the fire ones. I haven't tried the ghost ones yet.) Perhaps a different casting color for the fire would have been better.
DeleteNice! I think I've said this before, but I'm going to have to swipe some of your techniques. :)
ReplyDeleteThanks! Feel free to swipe away! :)
DeleteThanks! Hmmm, under. Maybe. I know I don't like the current way I do it.
ReplyDeleteI just realized that nowhere in your prep phase you talk about cutting out mold lines. Does that mean that they are absent from the bones minis?
ReplyDeleteThey are absent from many but not all of the Bones minis. That being said, I am not particularly fussy about minor mold lines showing, as I feel at average table viewing distances they are hardly noticeable. Also, I find them a pain and a half to carve off the Bones when they are there, so I often don't mess with them, or just give them a cursory clean-up. When I have done it, I generally just forget about mentioning it in my write-ups.
Delete