And now another week has gone by without getting any painting done. A multi-day weekend visit from the in-laws put a wrench in my painting plans for this week. :(
As of now the horizon looks clear, so I am very hopeful for next Monday. Until them keep your fingers crossed!
I will paint once again!
Monday, July 28, 2014

Monday, July 14, 2014
Two Week Break
Due to frantic painting of figures for my Historicon games, I was unable to complete a figure last week. And due to Historicon being this week I will not have a figure for next Monday either. I'm sorry for the unintended break in production. Hopefully, I'll be back here on the 28th with the next figure to post. See you all then.
Monday, July 7, 2014
Horace Action: Figure 102 of 265
This week, I took a break from painting fantasy, and painted the Horace Action figure from the Zombie Hunters set.
I prepped this figure in the usual way; soaking it in a dish of water with a couple drops of dish soap added, then giving it a light scrub with a soft toothbrush, and then rinsing and drying. I then glued the figure to a 7/8th inch black-primed fender washer with Aleene's Tacky glue. I then glued the washer to a tongue depressor with a couple drops of Elmer's White Glue
 I began painting, by doing all the skin with Apple Barrel "Apple Flesh". When this was dry, I went back over the skin areas with Americana "Asphaltum".
 Next, I painted the pants and the hair with plain black.
 When the black was dry, I went back over it, drybrushing it with Duncan "Slate Blue" to give it highlights. I then painted the shirt with Folk Art "Metallic Blue Sapphire".
 When the shirt was dry, I went over it and added highlights to the raised areas and edges with Folk Art "Pearl Aqua Moire". I then painted the belt buckle and necklace with Ceramcoat "14K Gold", and the pistol with Ceramcoat "Metallic Pewter"
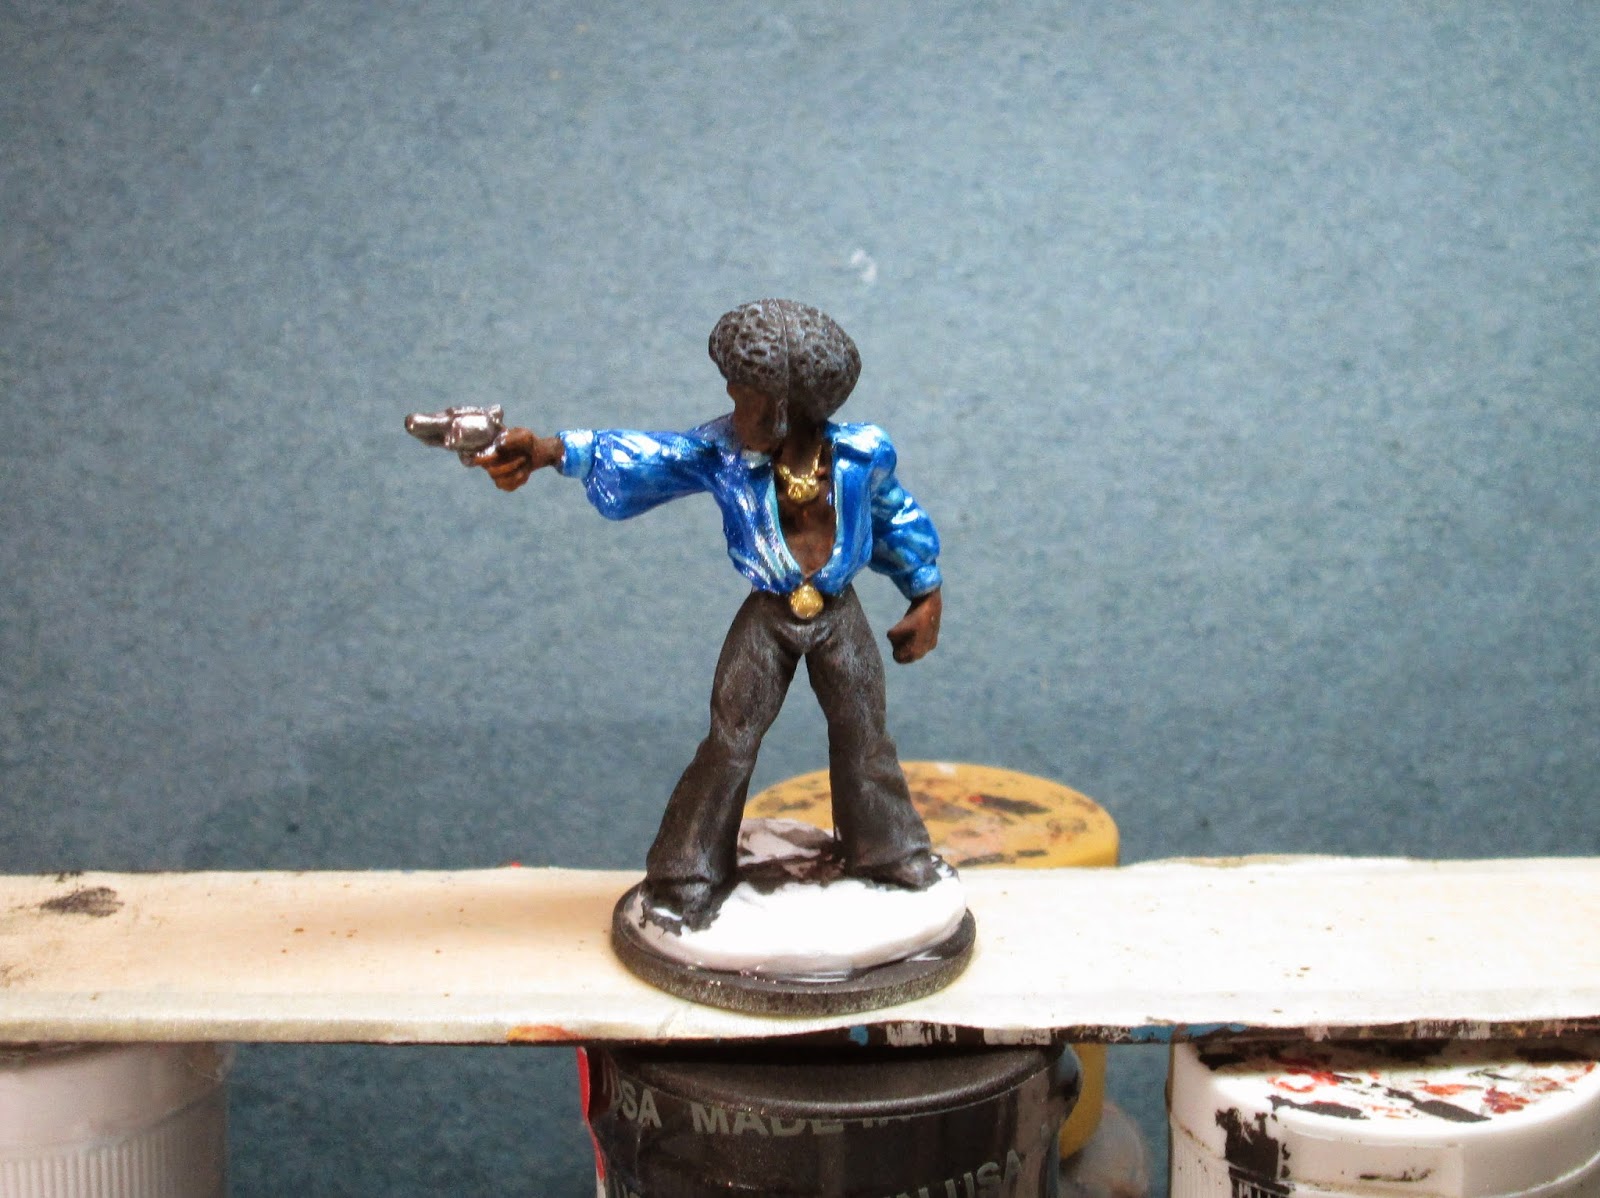 I wrapped up the figure by doing the eyes white with black pupils, and added some highlights to the raised areas of the skin with some of the "Asphaltum" with a little of the "Apple Flesh" mixed in. Lastly, I painted the figure's white base with the "Asphaltum" to make it less visible when flocked. I let the figure sit overnight, and then gave it a coat of Ceramcoat "Matte Varnish". The next morning I flocked the base, and later that afternoon I gave it a spray coat of Testor's "Dullcote".
 I pleased with how this figure turned out. I had envisioned doing a satin shirt effect when I first contemplated the figure, and I think it came out really well.
Figure 102 of 265: Complete
I prepped this figure in the usual way; soaking it in a dish of water with a couple drops of dish soap added, then giving it a light scrub with a soft toothbrush, and then rinsing and drying. I then glued the figure to a 7/8th inch black-primed fender washer with Aleene's Tacky glue. I then glued the washer to a tongue depressor with a couple drops of Elmer's White Glue
Figure 102 of 265: Complete
Monday, June 30, 2014
Sarcophagus: Figure 101 of 265
I finally got back to painting this week, but knew I wouldn't have a lot of spare time to do it as we're still unpacking boxes from our recent move; so I chose the Sarcophagus figure from the Dungeon Dressing set to work on as I embark on my second hundred figures from the Kickstarter. The completion of the figure also marks the wrapping up of the Dungeon Dressing set, and so it goes on the list of completed sets over in the right-hand column of this blog.
I prepped this figure in the usual way; soaking it in a dish of water with a couple drops of dish soap added, then giving it a light scrub with a soft toothbrush, and then rinsing and drying. I then glued the figure to a 1"x 2" black-primed steel base with Aleene's Tacky glue. I also glued the lid on the sarcophagus down, since I store my figures in boxes lined with magnetic sheeting, and I didn't want the lid bouncing around loose in the box knocking other figures over during transport.
 I decided I would try to do something a little different than just boring gray stone; so I hit upon the idea of doing the piece as pink marble, inspired by the multiple rose carvings on the Sarcophagus. And, since I had had some success doing white, and green marble on the Stone Golem, and black marble on the Altar of Evil, I thought trying pink would be a nice challenge. So, I looked up some Google images of pink marble, and with that inspiration in my head started to paint.
I began by giving the whole piece a coat of Apple Barrel "Apple Light Pink". I then went back over the Sarcophagus and added a speckled pattern with Americana "Shading Flesh".
 Next, I added thin striations across the whole thing with first black, and then white paint.
 Lastly, I gave the piece a wash with GW "Devlan Mud Wash", and then went back and added some highlights with the original "Apple Light Pink". My final step was to paint the base with Folk Art "Medium Gray". I let the Sarcophagus dry overnight and the next day gave it a coat of Ceramcoat "Matte Varnish." The following day I sprayed it with Testor's "Dullcote."
 In general I'm pleased with the piece, though I think the striations came out a little heavy handed, or perhaps too numerous. I will say the effect looks better at a distance than the close-up photo does.
Figure 101 of 265: Complete
I prepped this figure in the usual way; soaking it in a dish of water with a couple drops of dish soap added, then giving it a light scrub with a soft toothbrush, and then rinsing and drying. I then glued the figure to a 1"x 2" black-primed steel base with Aleene's Tacky glue. I also glued the lid on the sarcophagus down, since I store my figures in boxes lined with magnetic sheeting, and I didn't want the lid bouncing around loose in the box knocking other figures over during transport.
I began by giving the whole piece a coat of Apple Barrel "Apple Light Pink". I then went back over the Sarcophagus and added a speckled pattern with Americana "Shading Flesh".
Figure 101 of 265: Complete
Monday, June 23, 2014
Painting Table Update
Just wanted to let you all know that things are taking a little longer than expected, and I only just got a space cleared and my table for painting set up this morning. I still have to find which boxes have the paints, and the miniatures I had prepped in them. My goal now is to be back on track this week, and have a finished Bones figure for posting next Monday, so tune in again then. :)
 |
| Edward supervises the set-up of the painting table. |
Monday, June 9, 2014
Nightspectre: Figure 100 of 265
This week I am happy to announce that I completed my 100th figure from the first Bones Kickstarter: the Nightspectre, from the Haunts set! This milestone also marks the completion of the Haunts set, and so it gets added to my list of completed sets over on the right-hand column of this blog. Onward to the next 165 figures!
I prepped this figure in the usual way; soaking it in a dish of water with a couple drops of dish soap added, then giving it a light scrub with a soft toothbrush, and then rinsing and drying. I then glued the figure to a 2" black-primed fender washer with Aleene's Tacky glue.
 With all the other figures from the Haunts set, I had fallen back on the obvious step of applying a wash of green ink to the figure, or some a part of it, to give some shading to the translucent green plastic. This time I thought I'd try something different, and so I gave the whole figure a wash with some thinned Iron Wind Metals purple ink to begin with. After the ink had dried, I very carefully painted the skeletons in the vapor cloud with black paint
 When the black paint had dried, I painted the skeletons' bones with Americana "Buttermilk".
 I then went back and applied heavy highlights to the skeletons with white paint. I then painted the base of the figure black to cover the green translucent plastic that I was going to apply flock over. After the figure had overnight to dry, I painted the whole thing with Cermacoat "Matte Varnish"; and when this was dry, I flocked the base. The following day, I sprayed the figure with Testor's "Dullcote".
 I'm very pleased with how this turned out. I actually think the purple ink over the green translucent Bones material looks kind of cool.
I will be taking a break from posting anything next week, as my wife and I move to a new house this week, so I will be without a painting table for several days. I'll see you back here on the 23rd when I will post figure 101, and we will be marking the 1 year anniversary week for this blog. :)
Figure 100 of 265: Complete
I prepped this figure in the usual way; soaking it in a dish of water with a couple drops of dish soap added, then giving it a light scrub with a soft toothbrush, and then rinsing and drying. I then glued the figure to a 2" black-primed fender washer with Aleene's Tacky glue.
I will be taking a break from posting anything next week, as my wife and I move to a new house this week, so I will be without a painting table for several days. I'll see you back here on the 23rd when I will post figure 101, and we will be marking the 1 year anniversary week for this blog. :)
Figure 100 of 265: Complete
Monday, June 2, 2014
Ghostly Summons: Figure 99 of 265
This week I painted the Ghostly Summons translucent figure from the Haunts set. I'm very excited to be one away from my 100 figure milestone, so be sure to tune in next Monday as I reach that goal.
I began my preparation of this figure in the usual way; soaking it in a dish of water with a couple drops of dish soap added, then giving it a light scrub with a soft toothbrush, and then rinsing and drying. I then glued the figure to a 1.5" black-primed fender washer with Aleene's Tacky glue, and glued the washer to a tongue depressor with a couple drops of Elmer's White Glue.
 I began by giving the whole figure a wash with GW "Dark Green" Ink, thinned down and with a pin head sized drop of dish soap added.
 I then started to work on the flames. I mixed some white into some Americana "Olive Green" and drybrushed the very bottom where the flames meet the stone base. I then used the "Olive Green" straight up and dry brushed higher up on the flames.
 Then, before that first color had time to completely dry, I switched over to Americana "Leaf Green" and drybrushed even further up onto the flames. Lastly, I switched over to Accent "Forest Green" and drybrushed the flames at the very top where they blend into the feet of the ghosts.
 I now painted the summoning stone circle with Folk Art "Medium Gray". And painted the ghosts' eyes with Apple Barrel "Yellow".

 I'm still not a fan of the translucents as they really frustrate my natural tendencies to want to do shading and highlights. The shading with ink is fine, but highlights just end up looking like opaque patches from some angles. Nonetheless, I am pleased with how this figure turned out.
Figure 99 of 265: Complete
I began my preparation of this figure in the usual way; soaking it in a dish of water with a couple drops of dish soap added, then giving it a light scrub with a soft toothbrush, and then rinsing and drying. I then glued the figure to a 1.5" black-primed fender washer with Aleene's Tacky glue, and glued the washer to a tongue depressor with a couple drops of Elmer's White Glue.
When the stone circle was dry, I gave it a wash with thinned black ink to help bring out the runes carved in it. When the ink was dry I drybrushed the stone, careful not to get any on the flames, with a lighter gray called Duncan "Slate Grey". I also painted the metal washer base with the "Medium Gray". I then went back and drybrushed the stone again, lightly with the "Olive Green" to give the impression of reflected light from he flames.
After everything had overnight to dry, I gave it a coat of Ceramcoat "Matte Varnish", and when this had had a day to dry, gave the figure a spray with Testor's "Dullcote"
Figure 99 of 265: Complete
Subscribe to:
Posts (Atom)