I started with the ones that came from the Bones 2 Kickstarter in the Swamp Things set, and ordered a couple more packs from Reaper.
I prepped these figures in the usual way; soaking it in a dish of water with a couple drops of dish-soap added, then giving them a light scrub with a soft toothbrush, and then rinsing and drying them.
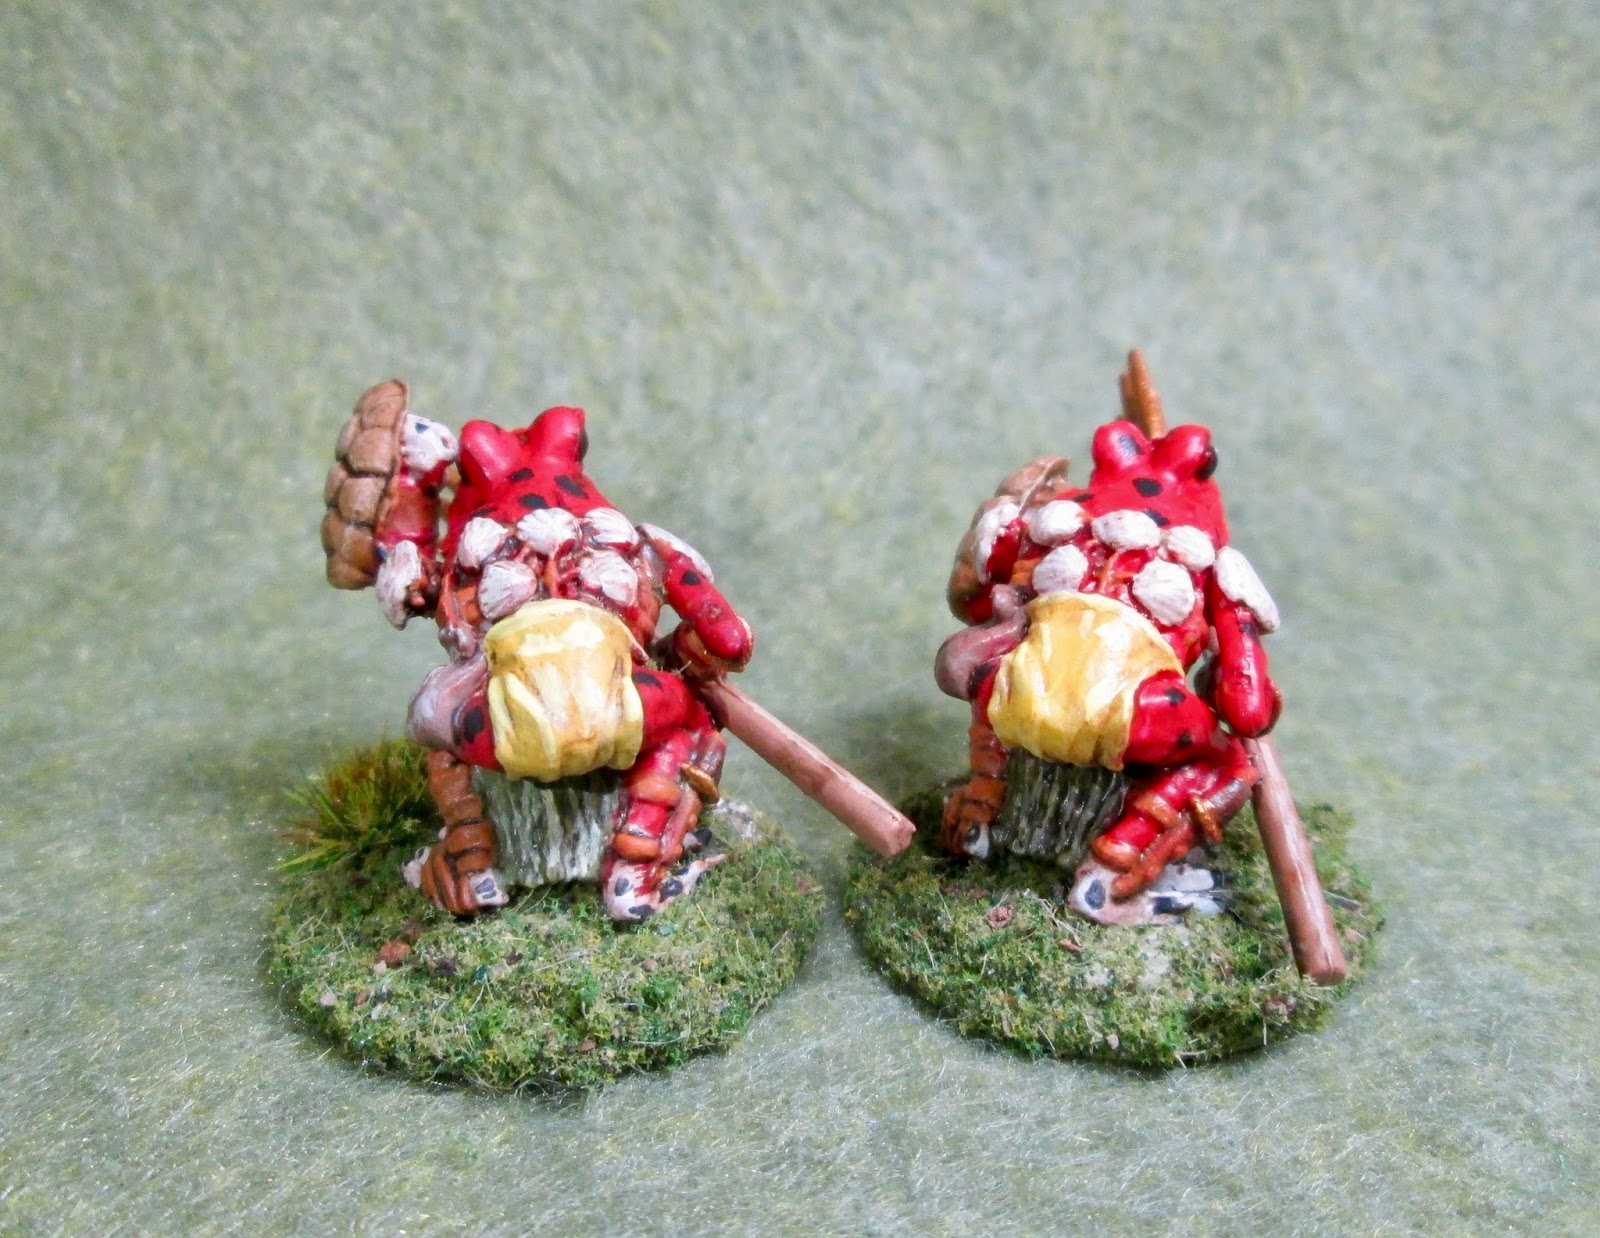
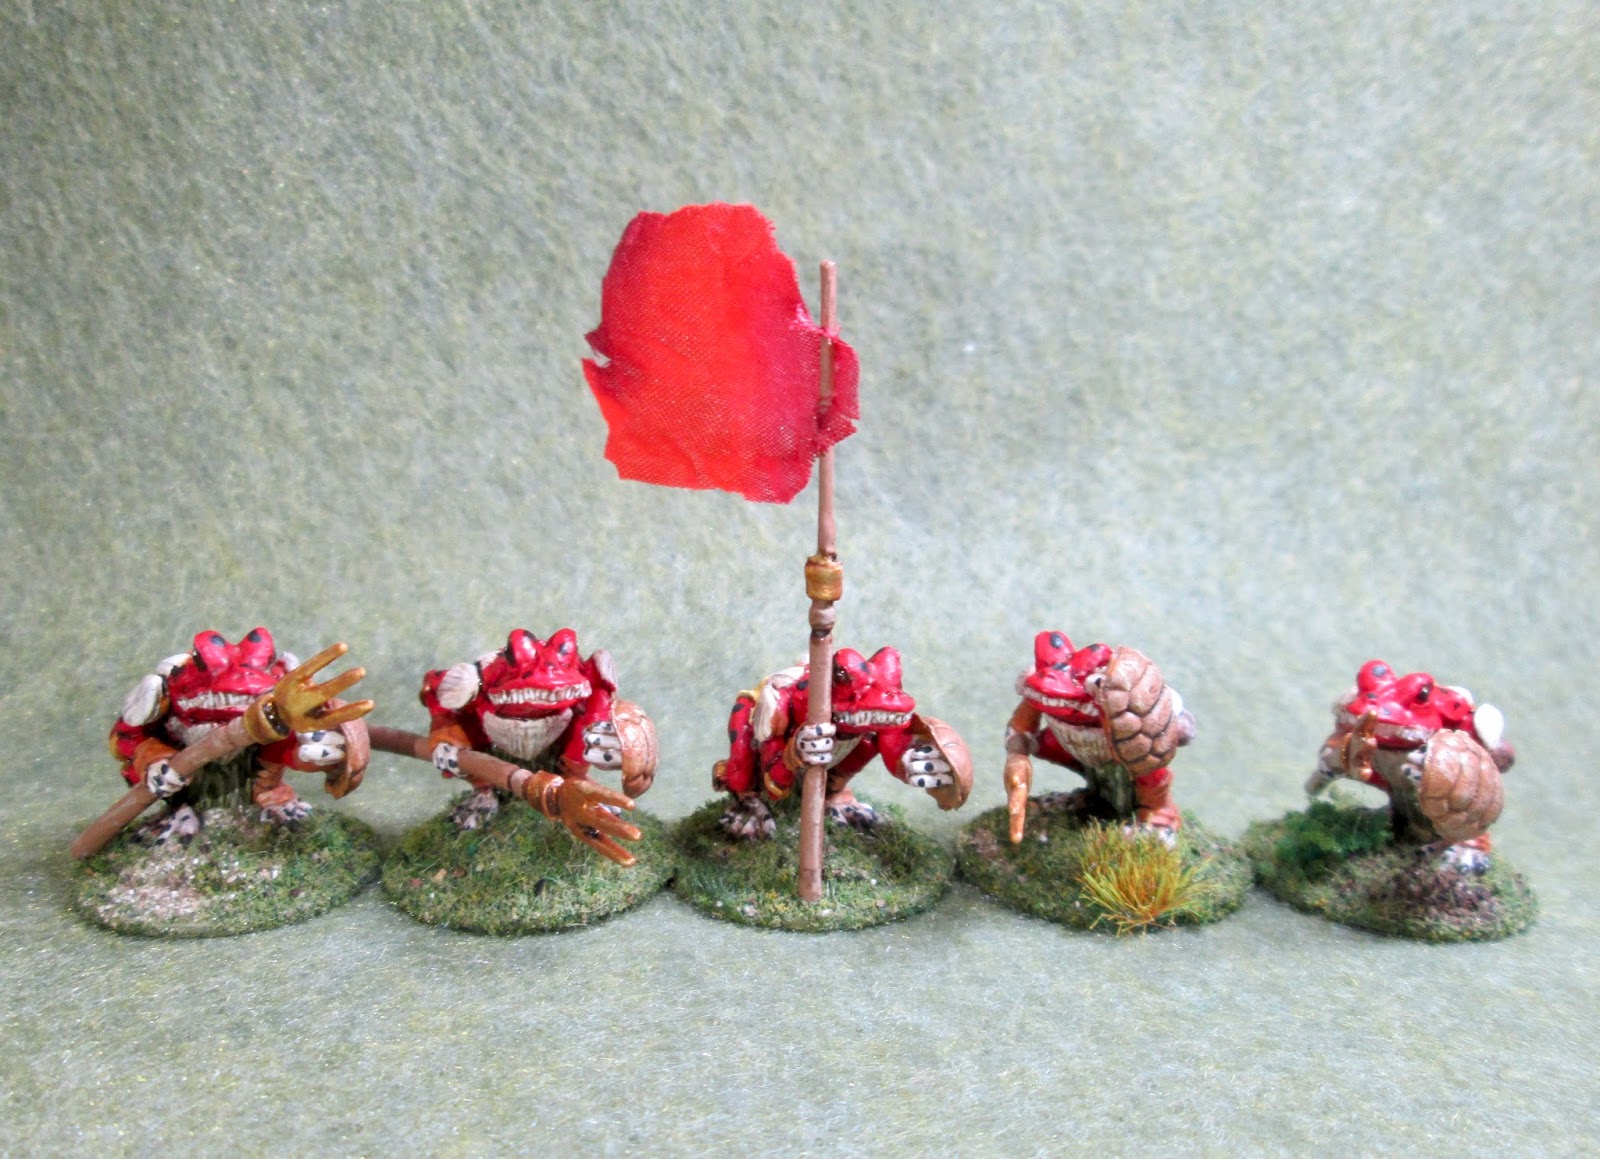
My plan was to do some conversions on two of the basic models to turn one into a standard bearer and another into a unit leader. I began with the trident-armed ones; and took one and removed it's weapon arm, and cut off the top of the trident. I then drilled a hole n the cut end, and glued in a section of paperclip wire to make a pole for a standard to fly from. I then re-glued the arm to the body so the standard pole sat vertically. (See center frog in the picture below)
I then glued the 5 trident-armed style figures (including the converted standard bear one, to black-primed 1" fender washers with Aleene's Tacky glue, and then glued the washer-mounted figures to a 2 tongue depressors with a couple drops of the Elmer's glue under each washer.
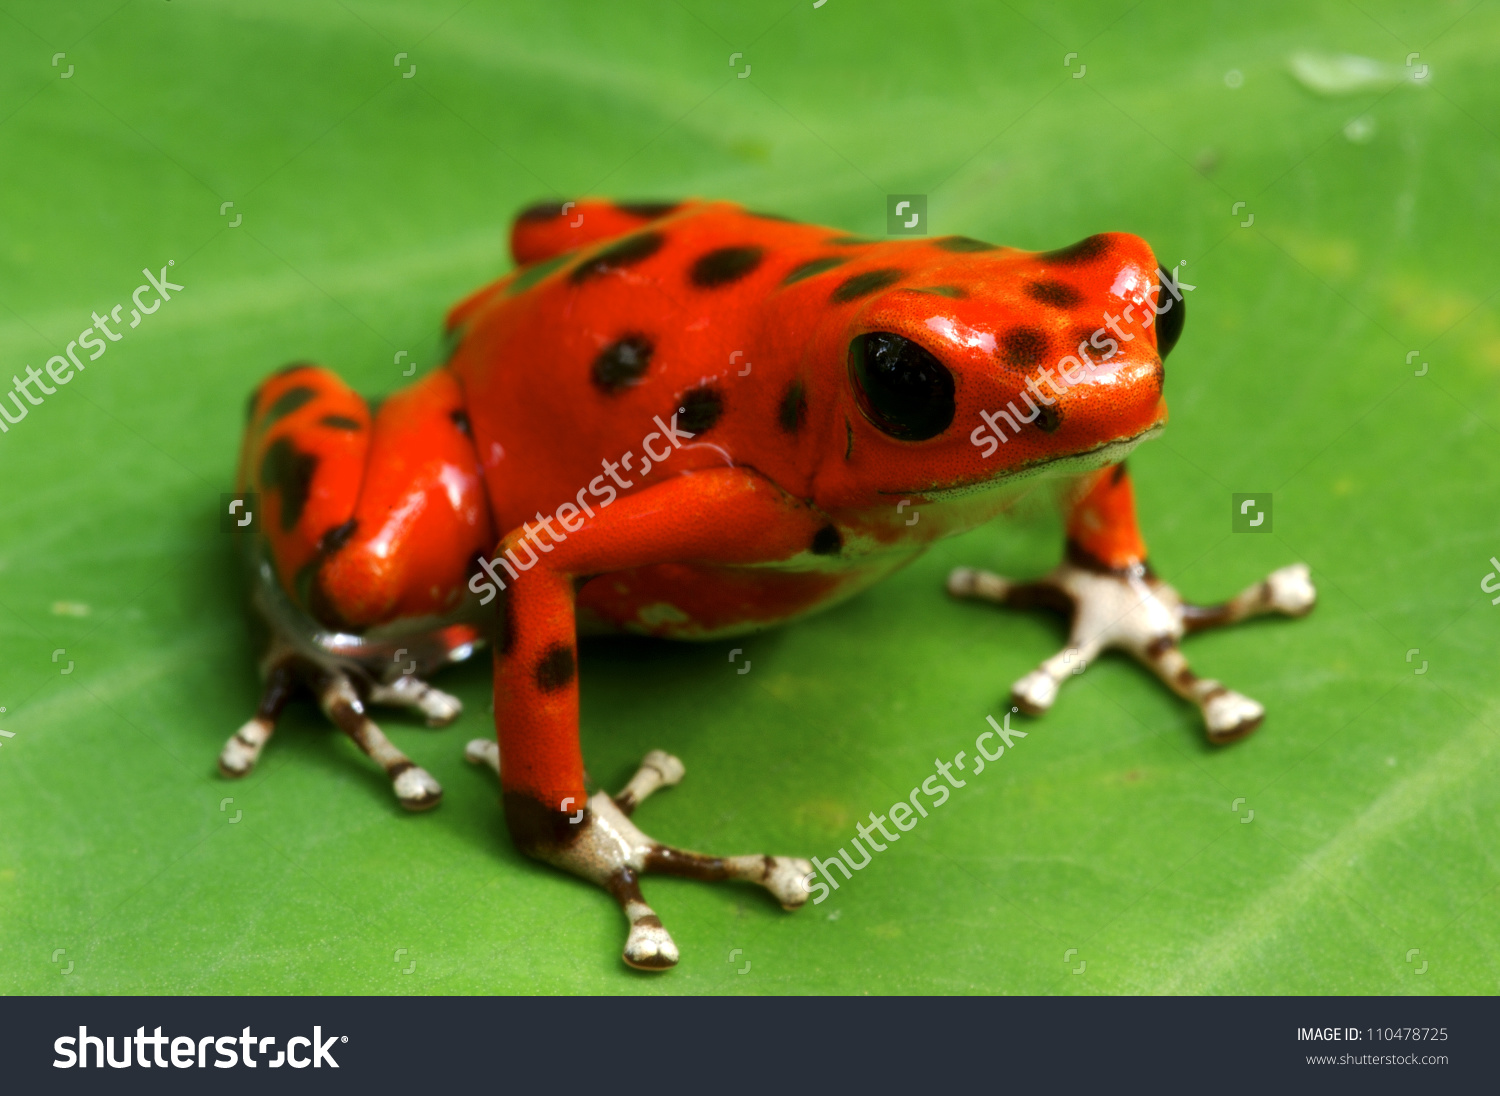
My plan was to try and make them look like this kind of Strawberry Poison Dart frog:


When the wash was dry, I painted the eyes with Accent "Real Umber", and then gave them Black pupils. I then highlighted the skin with the base "Opaque Red", and the hands and feet with Crafter's Acrylic "Light Antique White". I then painted the spots on their skin with Black. Next, I highlighted their teeth with White, and then highlighted the shell armor with the base "Bleached Sand". After that, I highlighted their loin cloth with Crafter's Acrylic "Daffodil Yellow", and the grass skirt with Americana "Reindeer Moss Green". I then drybrushed the shields with Apple Barrel "Apple Maple Syrup", and then painted highlights on all the straps wit Reaper MSP "Pumpkin Orange". I moved to their trident next, highlighting the shaft with Americana "Khaki Tan", and the trident head with the base "Bronze". Lastly, I highlighted their pouches with Americana "Barn Wood", and then painted their integral bases with Ceramcoat "Walnut".
I let the figures dry overnight and the next day I gave them a coat of Folk Art "Satin Varnish". When dry, I flocked the bases. Another overnight dry, and I sprayed them with Testor's Dullcote". When the Dullcote was dry, I went back and painted their eyes with Americana "DuraClear Gloss" varnish.

Lookin' good!
ReplyDeleteThis color scheme works great, and the sheen seals the deal. Do you have any recommendations on a durable top coat, by chance? I typically carry mine minis tumbled together with others in a bag, and that's started to wear paint of the high points on some. Wish I know what they used on the Wizards ones, since those are darn near impermeable.
ReplyDeleteThanks for the comments, Horn of the Mark! I like to use a double layer of varnish to protect my minis; the first a brush on craft-store variety (I'm currently using Folk Art "Satin Varnish"), followed by a spray coat of Testor's "Dullcote" matte varnish. My biggest recommendation to you however is to stop carrying your minis in a bag! :) There are many mini carrying solutions that help protect the paint jobs; everything from reused egg cartons to expensive cut foam hard-shell carrying cases.
DeleteI believe the Wizards ones use a baked on finish to the paint, which effectively melts it onto the figure.