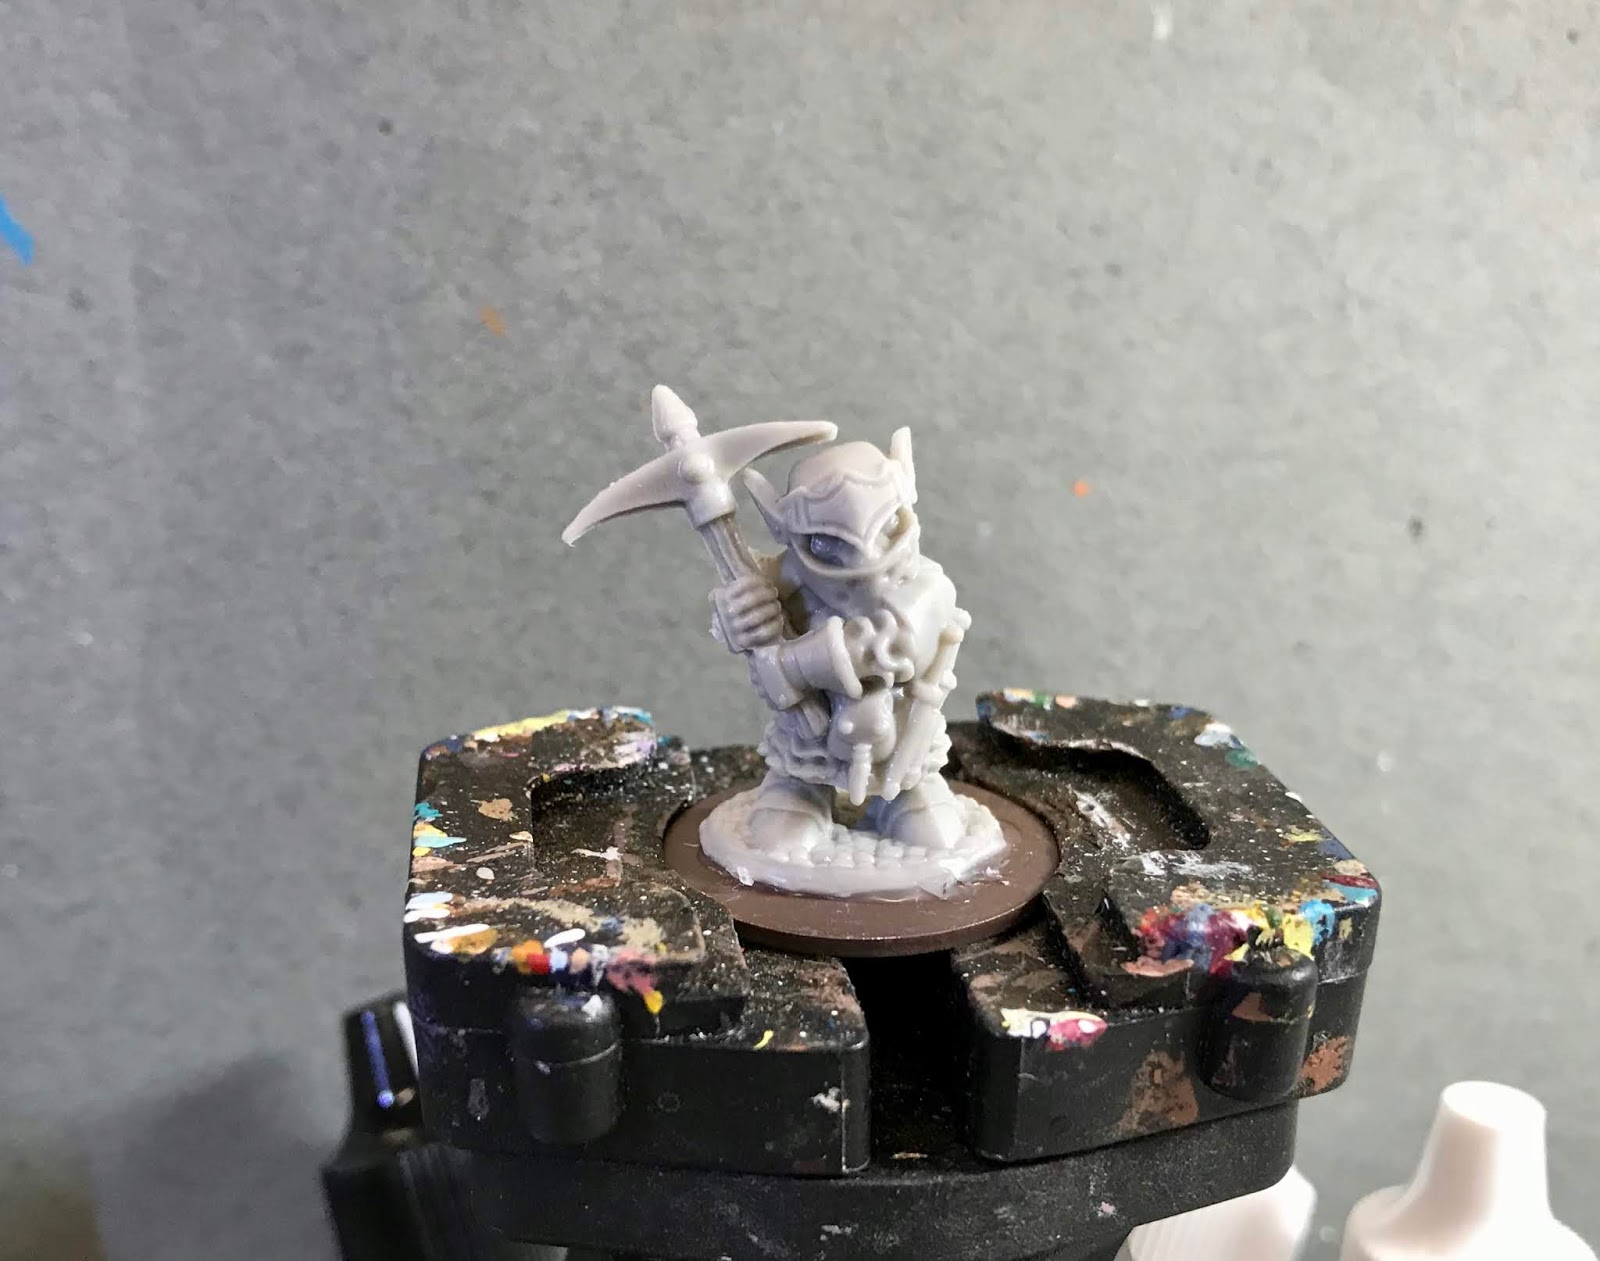
I continued to work on the the Bones 4 Darkreach Expansion his past week, and painted the "Deep Gnome Warrior".
I prepped the figure in the usual way, soaking it in a dish of water with a couple drops of dish-soap added, then giving it a light scrub with a soft toothbrush, and then rinsing and drying it. I then glued the figure to a brown-primed 7/8" fender washer with Aleene's Tacky glue, and then placed the figure in my painting grip.
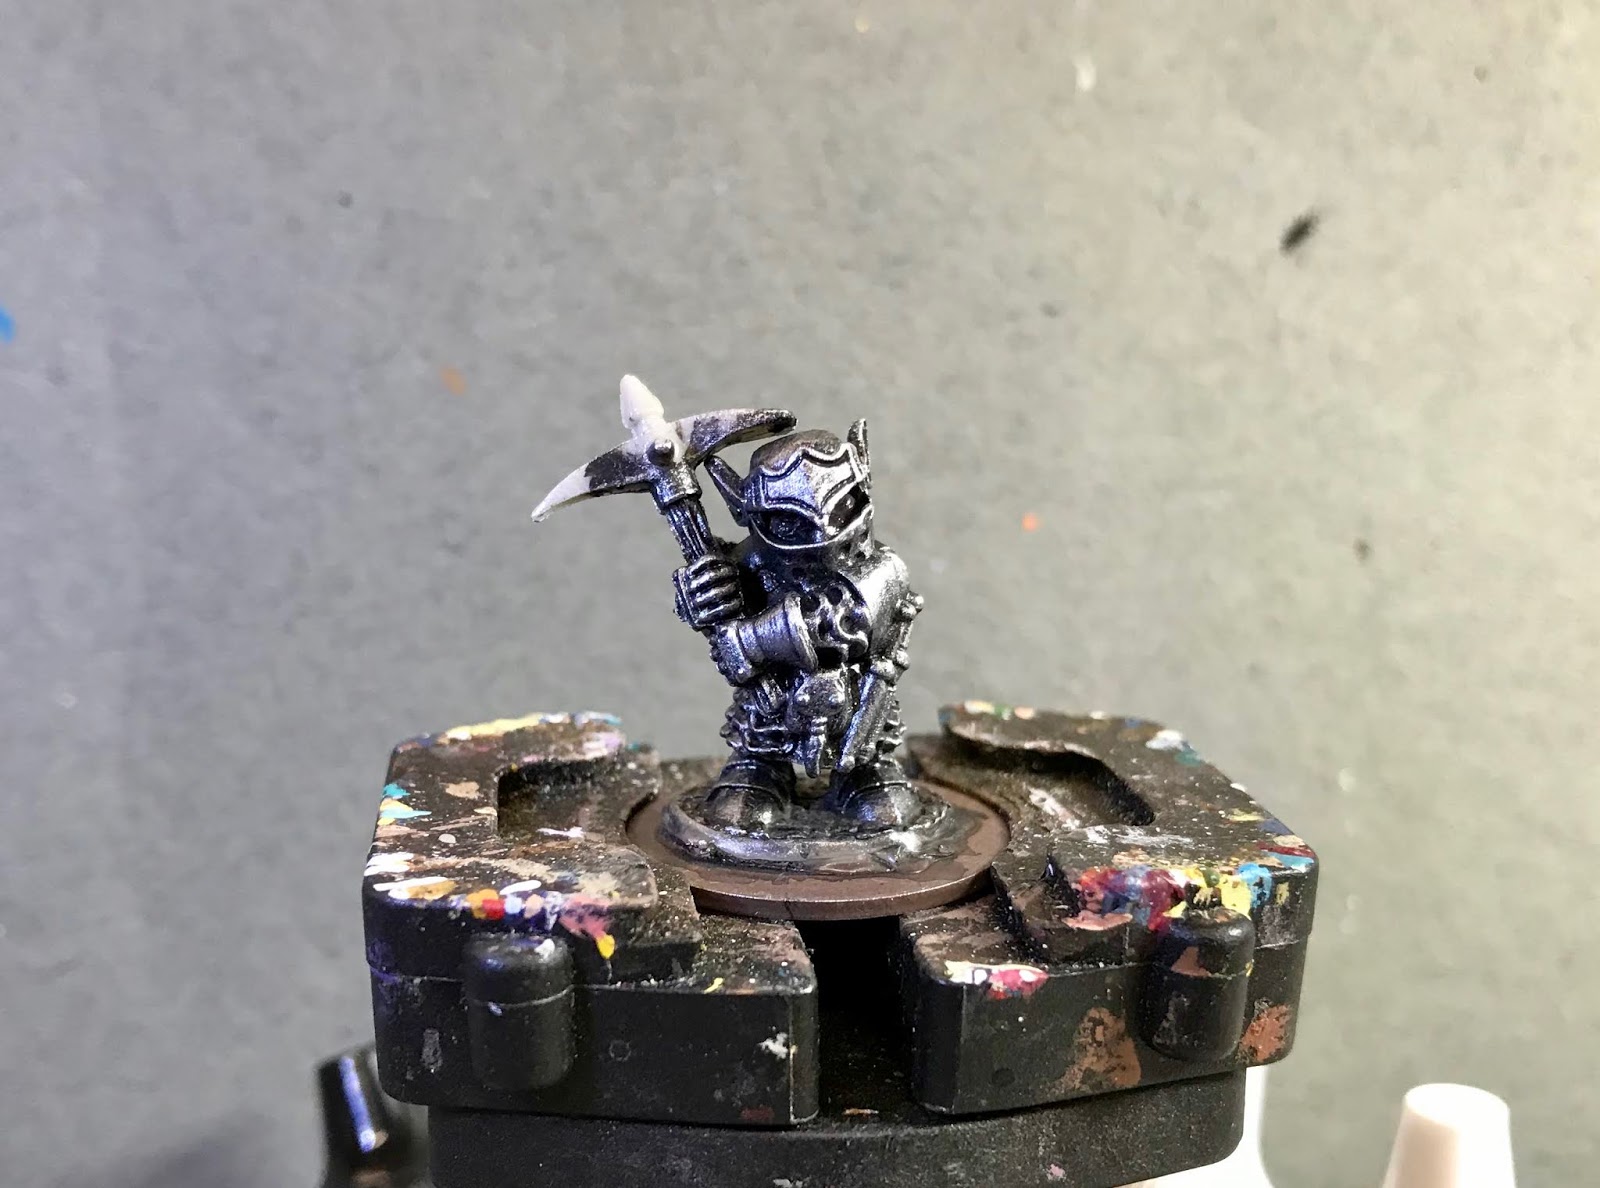
I began by painting the figure entirely with Ceramcoat "Black". When the Black was dry, I drybrushed the figure with Folk Art Metallics "Gunmetal Grey". I then drybrushed the gnome with some Ceramcoat "Metallic Silver, and then passed over it with a lighter drybrush of Citadel "Mithril Silver".
I then painted his ears, and the area of his face within the visor with Americana "Sable Brown" and then his axe handle with Crafter's Acrylic "Cinnamon Brown". After that, I painted his gauntlets and belt with Americana "Charcoal Grey", his pouch with Americana "Terra Cotta", and his scabbards with Apple Barrel "Burnt Sienna".

Next, I painted the bit of cloth in the opening in the back of his chain mail armor with Ceramcoat "Territorial Beige", his boots with Americana "Asphaltum", and the little tassel on his pouch with Americana "Grey Sky". I let the figure dry for a while, and then I gave his face and ears a coat of Citadel "Reikland Fleshshade" wash. After that wash was dry, I gave his axe handle, gauntlets, pouch, belt, scabbards, fabric in the opening in his armor, tassel, and boots all a coat of Citadel "Agrax Earthshade" wash. After this second coat of wash was dry, I painted his eyes, and then highlighted his skin with, first, the base "Sable Brown", and then a bit of the "Sable Brown" with some Americana "Fawn" mixed in. I also painted the axe head with Ceramcoat "Metallic Pewter".

I then highlighted the axe handle by drybrushing it with some Americana "Mississippi Mud", and I highlighted the gauntlets and his boots with Nicole's "Brown". After that, I highlighed the pouch with a mix of the base "Terra Cotta", and some Ceramcoat "Maple Sugar Tan", and the tassel with some Americana "Snow White". Next, I highlighted the scabbards with some Crafter's Acrylic "Orange Spice", and the fabric in the opening in his chain mail with the base "Territorial Beige" mixed with a little of the "Fawn". I then went around and did spot highlights on the armor and weapons with the "Mithril Silver". Lastly, I painted the entire base with Americana "Mississippi Mud".
I let the figure dry overnight and the next day I gave it a coat of Americana "DuraClear Matte" varnish. I then used some white glue to glue some fine sand to the base. When the sand was dry, I painted it with a coat of the "Charcoal Grey". When this was dry, I drybrushed the sand with the "Mississippi Mud", and then with some Apple Barrel "Rock Grey"; lastly I drybrushed it with a little Americana "Dove Grey".
Another overnight dry, and I sprayed the figure with Testor's Dullcote".
This was a fun little figure to paint. Doing the eyes within the visor was a real challenge, but I think it really adds to this figure to have him peering out of his helmet. These gnome sculpts have a lot of character and I look forward to working on the rest of the set.


Im curious. Each post you hand brush on the Americana DuraClear Matte Varnish then also spray with Testors Dullcote. Why do you do this?
ReplyDeleteDouble T- There are a couple reasons I do this. I prefer the brush on varnish because I feel it does a better job of covering the entire figure than the spray does. But I find the brush on varnish doesn't usually dry with a matte enough finish for my tastes, so I apply the Dullcote to help make the finish as matte as possible. Also, applying two coats of varnish gives me added protection for my figures. Especially I think the brush on goes on a little thicker and gives better protection than the spray on varnish does. So the spray on just adds another extra layer of safety. :)
DeleteI see what you are talking about. Darn it.
DeleteI picked some up after I found it being recommended to fix bones minis when they end up getting tacky. It worked for that, but yeah, its more glossy than "Ultra Matte" would lead to you to believe.
Not what I wanted to come home from work to :(
however yeah, the minis do seem to feel more durable to my fingertips as you mentioned.
oh well. live and learn!
I have found you really need to vigorously shake the bottle of brush-on varnish to get the best "matte" results out of it. It is basically gloss varnish with tiny particles in it the dull the surface. The better those particles are distributed, the better the matte effect will be.
DeleteIt still won't be perfectly "matte" but it will give the best results.
Visors are always tricky but the miniature came out great!
ReplyDeleteThanks, XE!
Delete