Monday, August 27, 2018

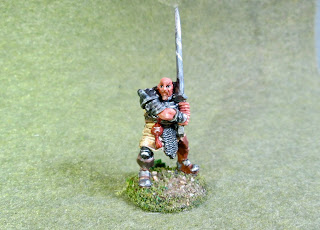
Rogan, Half-Orc Rogue: Bones 2 Figure

     This past week, continuing to try and do simpler figures for limited time reasons, I painted Rogan, Half-Orc Rogue, from the Bones 2 Heroes I set.
  I prepped the figure in the usual way; soaking it in a dish of water with a couple drops of dish-soap added, then giving it a light scrub with a soft toothbrush, and then rinsing and drying it.   I then glued the figure to a black-primed 1" fender washer with Aleene's Tacky glue, and then placed the figure in my painting grip.
  I began by giving the figure a wash with Reaper MSP "Grey Liner"; and when that was dry, I painted his face and arms with a mix of Americana "Shading Flesh" and Americana "Avocado". (I believe half-orcs should retain some of the pinkish coloration from their human parent, and not be all green.)  I then painted his pants with Americana "Neutral Grey", and his tunic with Americana "Mississippi Mud". When the tunic was dry, I gave it a border with Reaper MSP Bones "Cinnamon Red".
      Next, I painted his boot tops with Americana "Light Cinnamon", and the bag tucked in his belt with Americana "Khaki Tan".  I then painted his belt, sheaths, and dagger grips, with Americana "Bittersweet Chocolate", and his fangs with Americana "Antique White".   After that,  I gave his skin a wash with Citadel "Reikland Fleshshade".  When it was dry, I gave his clothing and accoutrements all a wash with Citadel "Agrax Earthshade" wash.
     When the washes were dry, I painted his eyes, and highlighted his teeth with CraFter's Acrylic "Light Antique White".  I then highlighted his skin with a mix of Americana "Reindeer Moss" and Crafter's Acrylic "Flesh".     Next, I painted his cape, gauntlets, and boots all with Ceramcoat "Black".    While the cape was drying, I highlighted his pants with Crafter's Acrylic "Storm Cloud Grey".  Next, I highlighted his tunic with Ceramcoat "Territorial Beige", and his boot tops with the "Mississippi Mud".  I then highlighted his belt and scabbards with Folk Art "Teddy Bear Brown", and the bag stuck in his belt with the "Antique White".  After that, I highlighted the cape with Americana "Zinc, and while I had it open, I also used the "Zinc" to base paint the weapons and all the but that were going to be painted as metal.  I then went back to the cape and did lighter highlights with some of the "Zinc mixed a bit of the "Storm Cloud Grey".    
    Next, I went back and went over the weapons and metal bits, including all the little stud in his tunic, with Folk Art Metallics "Gunmetal Grey", and then highlighted it all with Ceramcoat "Metallic Silver".   
     Lastly, I painted the figure's integral base with the "Bittersweet Chocolate".
     I let the figure dry overnight and the next day I gave it a coat of Americana "DuraClear Matte" varnish.    Then, when  the varnish was dry, I used some white glue to flock the base.  Another overnight dry, and I sprayed it with Testor's Dullcote".


     I'm happy with how this fellow turned out.  I wish his skin had been a little more towards the pinker side of the skin spectrum, but it was hard balance to get just perfect. 

Monday, August 20, 2018

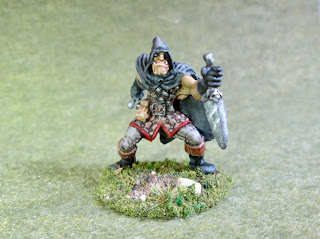
Bandit Enforcer: Bones 3 Figure

     It was another busy project week for me so, knowing my time would be limited, I picked a relatively easy figure to work on: Bandit Enforcer, from the Bones 3 Stoneskull Expansion, Part 3.
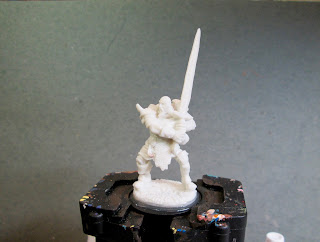
     I prepped this figure in the usual way; soaking it in a dish of water with a couple drops of dish-soap added, then giving it a light scrub with a soft toothbrush, and then rinsing and drying it.   I then glued the figure to a black-primed 1" fender washer with Aleene's Tacky glue, and then placed the figure in my painting grip.
  I began by painting his armor with Ceramcoat "Black".  When dry, I drybrushed the armor with  Folk Art Metallics "Gunmetal Grey".  I then painted his skin with Americana "Shading Flesh".
     I then painted his tunic with Apple Barrel "Apple Maple Syrup", and his boots with Americana "Light Cinnamon".  After that, I painted the turn down on his right boot, his belt, the sword grip, and his wrist strap on his left wrist, all with Americana "Bittersweet Chocolate".
     Next, I painted his rear pouch with Americana "Mississippi Mud", and his sword, mug, and boot armor all with Americana Zinc.  I then painted his canteen(?) with Anita's "Burnt Sienna", and the cord and fringe around it with "Reaper MSP Bones "Cinnamon Red".  After that, I painted the armor on his left thigh with Americana "Terra Cotta".  I then painted his hair Crafter's Acrylic "Cinnamon Brown", and tried to decide what the lines were on the left side of his face.  I figured they might be a miscast ear and earrings? However, I thought they looked more like a scar with stitches and the remnant of a sliced off ear, so went with that.  I painted a line on the side with the "Cinnamon Red", and then painted the "stitches" with the "Chocolate Brown". 
      I then went back and painted over the "Zinc" with the "Gunmetal Grey".  After that, I  gave his face, arms, and hands a wash of Citadel "Reikland Fleshshade" wash.   When that wash was dry, I then gave a wash to he rest of him with Citadel "Agrax Earthshade" wash.  When the washes were dry, I painted his eyes, and then highlighted his face with a mix of the "Shading Flesh" and some Crafter's Acrylic "Flesh".  I then highlighted his hair using Americana "Sable Brown".
     Next, I highlighted his tunic with Americana "Antique White", and then highlighted the leather armor on his left thigh with a mix of the "Apple Maple Syrup" and some Accent "Golden Oxide".   I then highlighted his boots, and the pouch around back with Americana "Khaki Tan", and highlighted his right boot top, belt, and wrist guard with Folk Art "Teddy Bear Brown". After that I highlighted the cord on the canteen with Crafter's Acrylic "Orange Spice", and the canteen itself with some of the "Orange Spice" mixed with the base "Burnt Sienna".  I wrapped up the highlighting by doing all the metal with some Ceramcoat Metallic Silver".
     Lastly, I painted the figure's integral base with the "Bittersweet Chocolate".
     I let the figure dry overnight and the next day I gave it a coat of Americana "DuraClear Matte" varnish.    Then, when  the varnish was dry, I used some white glue to flock the base.  Another overnight dry, and I sprayed it with Testor's Dullcote".

     Well, not my greatest, but there he is.  You can tell he was a rush job, but certainly good enough for tabletop use. :)

Monday, August 13, 2018

Count Lorenth: Bones 2 Figure

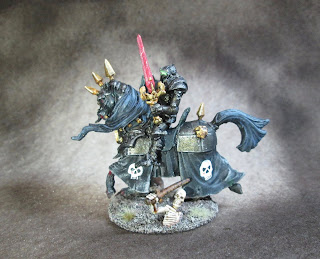
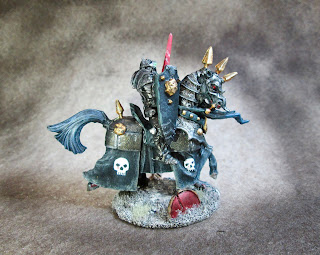
     Back in June I painted the Count Lorenth figure from the Bones 2 Expansion Set 2, to enter in the Reaper Facebook Page's Summer Painting Contest.  I had to enter anonymously, so I wasn't able to identify myself as the painter until after the contest was over.  The contest ended last week, so I can now post this article.  I didn't fare too well with my game table style up against really top notch display painters, garnering only 22 votes; but it was fun to take part.
    While I didn't personally get the Expansion Set 2 during the Bones 2 Kickstarter, I was able to pick up this figure in a trade a while back.
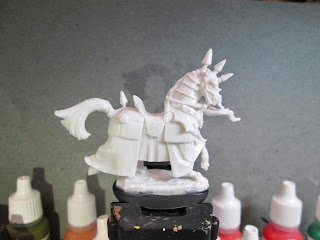
        The figure comes with the rider already attached, so the first thing I did was pry him off his mount to make painting easier.  I forgot to take a photo of the figure before I disassembled it, so here is one from the Reaper store.
I then prepped both pieces in the usual way, soaking them in a dish of water with a couple drops of dish-soap added, then giving them a light scrub with a soft toothbrush, and then rinsing and drying them.    I then trimmed the horse's base and glued it to a black-primed 1.25" fender washer with Aleene's Tacky glue.   And, when the glue was dry,  I put it in my Citadel painting grip.
     I began by painting the entire figure with Ceramcoat "Black".  I then drybrushed the caparison with Americana "Neutral Grey", followed by a lighter drybrushing of Folk Art "Platinum Gray".  Next, I drybrushed the main and tail with Citadel "The Fang", and after that I drybrushed the body of the horse where it could be seen, with Folk Art "Barn Wood".
     I then painted the barding with Folk Art Color Shift "Black Flash", and the saddle and reins with Reaper MSP "Coal Black".  After that, I painted the decorative metal parts with Ceramcoat "Bronze".
     Next, I applied a wash to the barding, and decorative Bronze medallions on the horses rump, and the decorative chest piece, using some Citadel Nuln Oil wash."  Then, when the wash was dry, I highlighted the barding with some of the "Black Flash" mixed with a little Ceramcoat "Metallic Silver", and highlighted the decorative bits I had painted Bronze with some Ceramcoat "Wedding Gold".  I then highlighted the saddle and reins with some Apple Barrel "Apple Black Green".   After that, I free-handed some blank skulls on each side of the caparison using Ceramcoat "White".
     I then finished painting the faces on the skulls, and then I painted the horse's hooves with Americana "Charcoal Grey".  After that, I painted the horses eyes, and some dripping gore on his nostrils and hooves with Ceramcoat "Cherry Brown", and then highlighted the eyes and gore with some Ceramcoat "Opaque Red".  I also used the "Opaque Red" to paint a tear on each skull, and lastly, painted the figure's base with some Americana "Raw Umber".
       I let the figure dry overnight and the next day I gave it a coat of Americana "DuraClear Matte" varnish. 
     I wanted to decorate the base somehow, so I tossed about some ideas in my head, and decided on having some undead skeletons emerging from the ground in the wake of their evil lord.   So after scrounging around a little, I found an extra copy of the Skeleton Warrior Sword figure I had, and proceeded to chop him up into some useable pieces.    I glued his upper torso to one side of the base, and half his shield to the other side, using the Aleene's Tacky glue.  While the glue was still wet, I sprinkled a little sand over it.  Then when the Tacky glue was dry, I covered the rest of the base with white glue, and covered it in a course sand mixture.

      When all the glue was dry, I painted the skeleton with Americana "Antique White", and the front of the shield with the "Black Cherry".  Next, I painted  the back of the shield with Americana "Mississippi Mud", and then the sword and the rim of the shield with Ceramcoat "Walnut".   When all the paint was dry, I gave the skeleton and shield a wash with the "Nuln Oil" wash.  When that was dry, I went over it again with some Citadel "Agrax Earthshade" wash.
         When the wash was dry, I painted the skeleton with Americana "Bleached Sand".  I then "rusted" the sword, and shield rim and hub, by splotching it with Crafter's Edition "Spice Brown", and then Accent "Golden Oxide".  I then painted the sand base with the Walnut", followed by drybrushes with Americana "Mississippi mud", and then Folk Art "Barn Word", and lastly some of the "Bleached Sand". 
     I let the base dry overnight and the next day I glued on some bits of grass tufts.   Another overnight dry, and I sprayed the horse and base with Testor's Dullcote".

      Next, I worked on the knight.   I put him in an alligator clip to make holding him easier.
    Much like the horse's barding,  I began by painting the whole knight with Black, and then painted his armor with the Color Shift "Black Flash".  When dry, I gave the armor a wash with the "Nuln Oil, and then when the wash was dry, drybrushed it with some of the "Black Flash" mixed with a little of the "Metallic Silver"
      Next, I re painted the shield Black.  I then worked on the visor, which I hoped to make look like it was glowing.  I first painted it with White, and then painted it with Nicole's"Neon Green"., and lightly drybrushed some of the "Neon Green on the surrounding armor.  I then painted a thin strip on the inside of the open visor with the White again, slightly thinned.
     Next, I painted the decorations on the shield, and the hilt of the sword with the "Bronze".  I then painted the blade of the sword with Reaper MSP Bones "Cinnamon Red", and went dry, went over it with a mix of the "Cinnimon Red" and some Folk Art Color Shift "Red Flash".  I wasn't happy with the outcome, so I tried panting over it again with some Folk Art Metallic "Bright Red".  I liked that better.  When it was dry, I did some light highlights across the blade with the "Metallic Silver".  I then highlighted the decorative bits on the shield and the hilt, that I had originally painted Bronze, with some of the  "Wedding Gold".  I then highlighted the edges of the shield with some Apple Barrel "Apple Black Green".
      An overnight dry, and I sprayed the figure with Testor's Dullcote".   I then glued the two pieces together, and it was done.


I'm pretty happy with the way he turned out, even if he isn't competition worthy.  If I have ever have an undead horde that needs a general, I have my man. :)

Monday, August 6, 2018

Ingrid, Female Viking: Bones 2 Figure

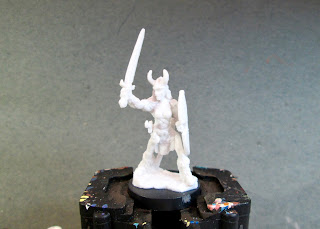
 A couple weeks ago I started painting Ingrid, Female Viking, from the Bones 2, Heroes I set; and this week I finally finished her.   I don't have a need for this figure, so I thought I'd just paint her up to put on eBay, and help bring a little money back into the hobby fund.
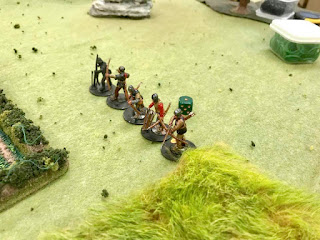
      Also, before I get into Bones painting today, I wanted to update folks on another of the projects I mentioned in last Monday's post: the Perry plastic  War of the Roses figures.   To help add the pressure to that project, I volunteered to run a playtest with the figures at last Friday's club meeting, and attempted to get all 40 figures done in about 6 days.  Well, I did pretty good in my goal, and got 28 of them done in time for the game!  They aren't up to the standard you usually see here, but they are good for a tabletop standard.   So, I'm not worried now that I will have all of them ready by the end of September.

What I can accomplish working only 25-30 minutes per figure.

     Anyhow, back to Bones!
      I began working on Ingrid by prepping this figure in the usual way; soaking it in a dish of water with a couple drops of dish-soap added, then giving it a light scrub with a soft toothbrush, and then rinsing and drying it.  When dry, I glued the figure to a 1" Reaper plastic base with Gorilla Superglue. I then placed the figure in my painting grip.
        I began by giving the figure a wash with Reaper MSP "Brown Liner"; and when that was dry, I painted her armor with Ceramcoat "Black".  When dry, I drybrushed the armor with  Folk Art Metallics "Gunmetal Grey".  I then painted her skin with Reaper MSP "Tanned Skin".
     Next, I gave her skin a wash with Citadel "Reikland Fleshshade".  When it was dry, I painted the fur part of her boots and her forearm guards with Americana "Bittersweet Chocolate", and the leather parts of her armor and belts with Crafter's Edition "Spice Brown". I then painted the wood back of her shield with Folk Art "Teddy Bear Brown", and her pouch with Americana "Khaki Tan".  After that, I painted her hair with Anita's "Burnt Sienna".
    I then painted her helmet, dagger sheath,  and the non-furry part of her boots with Crafter's acrylic "Cinnamon Brown", and the horns on her hemet with Folk Art "Porcelain White".  After that, I painted her shield and sword scabbard with Ceramcoat "Black Cherry", and then painted all the metal bits that weren't armor, with Americana "Zinc".
      When everything was dry, I gave a wash to her clothes, shield, hair, and weapons; being careful to avoid her skin and armor, using Citadel "Agrax Earthshade" wash.   When the wash was dry, I painted her eyes and lips, and then highlighted her skin with  Reaper MSP "Tanned Highlight".  After that, I highlighted her hair with Americana "Terra Cotta", then Accent "Golden Oxide", then Ceramcoat "Maple Sugar Tan". I then painted the studs on her leather neck piece, using the "Gunmetal Grey".  When that was dry, I gave it a little wash with some Citadel "Nuln Oil" wash to help the studs stand out.
     When the "Nuln Oil" was dry, I highlighted all the leather bits with Americana "Sable Brown".  I then highlighted the fur part of the boots and the forearm guard fur with with Americana "Mississippi Mud", and then highlighted her shoes, dagger sheath,  and the non metallic parts of her helmet, with Ceramcoat "Territorial Beige". Next, I highlighted the pouch with Americana "Antique White",and the shield with Reaper MSP Bones "Cinnamon Red".
     I then went back and repainted all the parts I had painted with the "Zinc", and all the little studs on her straps and shield, using the "Gunmetal Grey".  When dry, I went back again, and highlighted all the metal, including her armor, with Ceramcoat "Metallic Silver".  After that, I painted the circular medallion on her sword and dagger hilts with Ceramcoat "Bronze", and then went back and highlighted them with Ceramcoat "Wedding Gold".
     I then debated how to decorate the shield, and decided I wanted to do something feminine, to contrast with her barbarian nature.  So, I thought about what would be within my abilities to paint, and I decided on a stylized rose, as it would go well with the dark red shield I thought.  So I did a Google image search for "Rose Graphic" and got some inspiration for how to proceed.  I began by painting the petals with Crafter's Acrylic "Tutti Frutti", and then painted the leaves with Americana "Forest Green" .  I then went back and highlighted the petals with Crafter's acrylic "Cherry Blossom Pink" and highlighted the leaves with Crafter's Acrylic "Wild Green". 
     Lastly, I painted the figure's integral base with the "Black".
     I let the figure dry overnight and the next day I gave it a coat of Americana "DuraClear Matte" varnish.  When the varnish was dry,  I used some white glue to glue a little sand to the base.  When this was dry, I painted the sand with the Black and, when dry,  drybrushed the base with some Americana "Zinc", followed by Crafter's Acrylic "Light Storm Cloud Grey", and lastly some Americana "Dove Grey".
     Then, another overnight dry, and I sprayed it with Testor's Dullcote".


I'm really happy with how the figure turned out, particularly the shield.  You can find her eBay listing here: Ingrid, Female Viking