Monday, December 14, 2020

No Figures For the Rest of 2020

   I just wanted to let folks know, that with the holidays squarely upon us now, I will not be posting any more Bones painting projects today, and the two weeks following.  Things have just gotten really busy, and I haven't found enough time to paint in order to get stuff completed.  The plan is to have my next post ready for Monday January 4th.    
     See you all in 2021, and please have a safe and happy holiday!


Monday, December 7, 2020

Maggotcrown Axeman: Bones 4 Dreadmere Figure

   This past week I painted a set of 4 of the "Maggotcrown Axemen" figures as my final step in building a 12 man unit of the Maggotcrown soldiers from the Dreadmere Expansion.   This completes the unit, and I have included a photo of the whole group together at the end of this post. 
    Here is the painting article for the Swordsmen, and here is the one for the Spearmen.
     I prepped the figures in the usual way, soaking them in a dish of water with a couple drops of dish-soap added, then giving them a light scrub with a soft toothbrush, and then rinsing and drying them.  I then glued all 4 figures to 1" brown-primed fender washers with Aleene's Tacky glue.  I then glued the washers onto a tongue depressor with a couple drops of Elmer's white glue.
     I was very pleased with the results of using Citadel Contrast "Black Templar" paint on the previous 8 Maggotcrown soldiers as the base for drybrushing their armor, instead of my usual solid black basecoat, so I began by giving the Axemen all complete coats of Ceramcoat "White" to act as a base primer coat for the Contrast paint, like I did on the Swordsmen.   I then painted the armor, axe heads, and shield backs and skulls with Citadel Contrast "Black Templar".
  When the "Black Templar was dry, I drybrushed the armor and swords with Folk Art Metallics "Gunmetal Grey", followed with a drybrushing of Ceramcoat "Metallic Silver", and lastly a light drybrush with some Citadel "Mithril Silver".   After that, I painted the tunics with Reaper MSP Pathfinder "Urgathoa Red", and I repainted their chins with the "White".
Next, I painted the tabards, and the eyes on the shield skulls with Ceramcoat "Black"; and then painted the belts, gloves, and shield straps with Reaper MSP "Coal Black".  After that, I painted the exposed parts of their faces with Citadel Contrast "Gulliman Flesh", and then did the faces of their shields with Reaper MSP "Fresh Blood".  At this point  I went back over the chainmail with some Citadel "Nuln Oil" wash  to help it pop.    And, while I had the "Nuln Oil" out, I decided I also wanted to define the edges of the tabard, belts, and tunic, a little better, so I traced along the edges where the tabard and belts met the tunic using the wash.
     After that, I painted the inside of the shields with some Ceramcoat "Metallic Pewter".  I then painted the skulls on the shields with Americana "Snow White", and then the axe handles with Americana "Charcoal Grey".
     Next, I highlighted the tunics with a mix of the base "Urgathoa Red" mixed with Reaper MSP Bones "Cinnamon Red". I then highlighted the tabards with Ceramcoat "Charcoal" followed with Americana "Zinc"; and followed that with highlighting the belts and gloves with Citadel "The Fang".  After highlighting those parts, I highlighted the shields using Reaper MSP Holly Berry" and some Reaper MSP "Hearth Fire".  Lastly,  I did some highlights on the axe handles with Americana "Mississippi Mud", and the shoulder skulls and helmets with Reaper MSP "Sparkling Snow".  I then painted the bases with the "Mississippi Mud".
     I let the Axemen dry overnight and the next day I gave them a coat of Americana "DuraClear Matte" varnish.    Then, when  the varnish was dry, I used some white glue to flock the bases.  Another overnight dry, and I sprayed them with Testor's "Dullcote". 

    And here's a look at the whole unit.  I'm really happy with how these guys turned out.  They have a nice sinister menace about them; perfect for keeping the peace in some backwater village on orders from the .corrupt ruler. 


Monday, November 30, 2020

Giant Leeches: Bones 4 Dreadmere Figures

   This past week I painted the pair of "Giant Leech" figures from the Bones 4 Dreadmere Expansion.   I took a break from the Maggotcrown soldiers this week, since with Thanksgiving and the official start of Christmas decorating, I knew painting time would be limited. 
       I prepped the figures in the usual way, soaking them in a dish of water with a couple drops of dish-soap added, then giving them a light scrub with a soft toothbrush, and then rinsing and drying them.  I then glued both figures to 1" brown-primed fender washers with Aleene's Tacky glue.  Then before gluing them to a painting stick, I used some white glue to glue some fine sand to the base.  When the sand was dry, I then glued the washers onto a tongue depressor with a couple drops of Elmer's white glue.
     I began by painting both leeches entirely with Vallejo "USA Olive Drab".  When that was dry, I gave both a coat of Citadel "Agrax Earthshade" wash.
   When the wash was dry, I drybrushed the bodies with Aleene's "Deep Khaki", followed by a lighter drybrushing on the top surfaces using Aleene's "Dusty Khaki".   I then painted the mouths with a 50/50 mix of Crafter's Acrylic "Tutti Fruitti" and Americana "Shading Flesh". 
    Next, I painted the teeth with Americana "Bleached Sand", and when the mouth was dry, I gave the teeth and mouths a coat of Citadel "Nuln Oil" wash.  When dry, I highlighted the folds in the moth with Apple Barrel "Apple Lt Pink", and highlighted the teeth with Ceramcoat "White".  After that, I painted the eye dots with Ceramcoat "Black", and then went back and gave each one a highlight dot with the "White".   
      I then painted the bases with a coat of Americana "Charcoal Grey". When this was dry, I drybrushed the bases with, first, Ceramcoat "Territorial Beige", then Americana "Khaki Tan", and lastly, Americana "Bleached Sand".  As I was drybrushing, I noticed the one on the left actually had a partial skeleton molded on it's base.  So, I hit it directly with a heavier drybrushing of the "Bleached Sand", I then gave it a little coat of the "Nuln Oil" to help darked the recesses, and afterwards went over it again with a light drybrush of Ceramcoat "White". 
       I let the Leeches dry overnight and the next day I gave them a coat of Americana "DuraClear Matte" varnish.    Another overnight dry, and I sprayed them with Testor's "Dullcote"


     Simple figures and quick simple paint jobs; but I'm pleased with how they turned out.   And they were just the thing for a busy week. 

Monday, November 23, 2020

Maggotcrown Spearman: Bones 4 Dreadmere Figure

     This past week I painted a set of 4 of the "Maggotcrown Spearman" figures as my next step in building a 12 man unit of the Maggotcrown soldiers from the Dreadmere Expansion.   I had my original Maggotcrown soldier figures from the Kickstarter, and expanded my unit through trades and direct purchases from Reaper. Last week I painted the four Swordsman figures.
       I prepped the figures in the usual way, soaking them in a dish of water with a couple drops of dish-soap added, then giving them a light scrub with a soft toothbrush, and then rinsing and drying them.   I wanted one of the Spearmen to be the Sergeant of the unit;  so I cut the top half of his spear off, drilled out his hand, and then cut down a halberd from one of the Bones 3 weapon sprues and glued it in place into the hole in his hand.  I then glued all 4 figures to 1" brown-primed fender washers with Aleene's Tacky glue.  I then glued the washers onto a tongue depressor with a couple drops of Elmer's white glue.
    I was very pleased with the results of using Citadel Contrast "Black Templar" paint on the previous four Maggotcrown soldiers as the base for drybrushing their armor, instead of my usual solid black basecoat, so I began by giving the Spearmen all complete coats of Ceramcoat "White" to act as a base primer coat for the Contrast paint, like I did on the Swordsmen.   I then painted the armor and shields with Citadel Contrast "Black Templar".
      When the "Black Templar was dry, I drybrushed the armor and swords with Folk Art Metallics "Gunmetal Grey", followed with a drybrushing of Ceramcoat "Metallic Silver", and lastly a light drybrush with some Citadel "Mithril Silver".   After that, I painted the tunics with Reaper MSP Pathfinder "Urgathoa Red", and I repainted their chins with the "White".
 Next, I painted the tabards, and the eyes on the shield skulls with Ceramcoat "Black"; and then painted the belts, gloves, and shield straps with Reaper MSP "Coal Black".  After that, I painted the exposed parts of their faces with Citadel Contrast "Gulliman Flesh", and then did the faces of their shields with Reaper MSP "Fresh Blood".  I decided at that point that the chainmail was drybrushed too heavily and had lost its detail, so I went back over it with some Citadel "Nuln Oil" wash.  
     While I had the "Nuln Oil" out, I decided I also wanted to define the edges of the tabard, belts, and tunic, a little better, so I traced along the edges where the tabard and belts met the tunic using the wash.  After that, I painted the inside of the shields with some Ceramcoat "Metallic Pewter".  I then painted the skulls on the shields with Americana "Snow White", and the spear shafts with Americana "Charcoal Grey".
      Next, I highlighted the tunics with a mix of the base "Urgathoa Red" mixed with Reaper MSP Bones "Cinnamon Red". I then highlighted the tabards with Ceramcoat "Charcoal" followed with Americana "Zinc"; and followed that with highlighting the belts and gloves with Citadel "The Fang".  After highlighting those parts, I highlighted the shields using Reaper MSP Holly Berry" and some Reaper MSP "Hearth Fire".  Lastly,  I did some highlights on the spear shafts with Americana "Mississippi Mud", and the shoulder skulls and helmets with Reaper MSP "Sparkling Snow".  I then painted the bases with the "Mississippi Mud".
     I let the Spearmen dry overnight and the next day I gave them a coat of Americana "DuraClear Matte" varnish.    Then, when  the varnish was dry, I used some white glue to flock the bases.  Another overnight dry, and I sprayed them with Testor's "Dullcote". 


     Like the Swordsmen, I'm happy with these guys; and now am really looking forward to seeing the completed unit.  Hopefully I will be able to wrap these guys up in the next week or two now that the Holidays are almost upon us, and free painting time will become scarcer. 

Monday, November 16, 2020

Dreadmere Mercenary with Beer Mug: Bones 4 Dreadmere Figure

     This past week I took a break from painting my Maggotcrown unit, and painted the "Dreadmere Mercenary with Beer Mug" from the Bones 4 Dreadmere Expansion.    In driving around the past weeks, I was inspired by the beautiful autumnal colors I was seeing; so I thought I'd take that mix of oranges, reds, yellows, and greens as inspirations for my color palette for this figure.
      I prepped the figure in the usual way, soaking it in a dish of water with a couple drops of dish-soap added, then giving it a light scrub with a soft toothbrush, and then rinsing and drying it.  I then glued the figure to a brown-primed 1" fender washer with Aleene's Tacky glue, and then placed the figure in my painting grip.
     I began by painting his face and hands with Reaper MSP "Bronzed Skin",  I then painted his pants with Apple Barrel "Burnt Sienna", and his tunic with Crafter's Acrylic "Orange Spice".   After that, I painted his waist piece with Accent "Mustard Seed". 
     Next, I painted his boots with Accent "Real Umber", and his boot tops with Reaper MSP "Olive Skin". After that, I painted his belts with Americana "Light Cinnamon", and his coat with Crafter's Acrylic "Forest Green". 
     I then painted his hair with Americana "Charcoal Grey", and his mug and sword fittings with Americana "Zinc".  I then went back and repainted his mug with Accent "Princely Pewter", and the sword fittings and belt buckles with Folk Art Metallics "Gunmetal Grey".   I let the figure dry for a while, and then gave his face and hands a coat of Citadel "Reikland Fleshshade" wash. When that was dry, I gave the mug a coat of Citadel "Nuln Oil" wash, and then gave his body and hair a coat with Citadel "Agrax Earthshade" wash. 
    When the wash was dry, I highlighted his face and hands with the base "Bronzed Skin", and Reaper MSP Bronzed Highlight". After that, I highlighted his hair with Americana "Mississippi Mud", and a little Reaper MSP "Graveyard Bone".  I then highlighted his tunic with Reaper MSP "Hallowed Orange". 
     Next, I highlighted the wrap around his waist with Apple Barrel "Apple Maple Sugar", and then highlighted his pants with a mix of the base "Burnt Sienna" and some Americana "Shading Flesh".  I then highlighted his boot tops with Reaper MSP "Olive Skin Highlight", and the rest of the boot was highlighted with Folk Art "Teddy Bear Brown". After that, I highlighted his belts with Reaper MSP "Tanned Shadow", and then did the highlighting on his coat using a mix of the base "Forest Green" mixed with some Americana "Jade Green".
     It was then time for the metallics, and I highlighted his sword fittings, belt buckles, and coat clasp with Ceramcoat "Metallic Silver". I followed those with highlighting the beer mug with Ceramcoat "Metallic Pewter and Nicole's "Metallic Silver".  Lastly, I painted the figure's base with Americana "Mississippi Mud".
      I let the figure dry overnight and the next day I gave it a coat of Americana "DuraClear Matte" varnish. I then used some white glue to glue some fine sand to the base.  When the sand was dry, I painted it with a coat of Americana "Charcoal Grey". When this was dry, I drybrushed the sand with the "Mississippi Mud", and then with some Apple Barrel "Rock Grey"; lastly I drybrushed it with a little Americana "Dove Grey".
      Another overnight dry, and I sprayed the figure with Testor's Dullcote".

     I'm really happy with this guy.  A simple figure, but like I mentioned before, I sometimes find the simple ones the most fun to work on.

Monday, November 9, 2020

Maggotcrown Swordsman: Bones 4 Dreadmere Figure

      This past week I painted a set of 4 of the "Maggotcrown Swordsman" figures as a first step in building a 12 man unit of the Maggotcrown soldiers from the Dreadmere Expansion.   I had my original Maggotcrown soldier figures from the Kickstarter, and expanded my unit through trades and direct purchases from Reaper.
       I prepped the figures in the usual way, soaking them in a dish of water with a couple drops of dish-soap added, then giving them a light scrub with a soft toothbrush, and then rinsing and drying them.   I wanted one of the Swordsmen to be the leader of the unit,  so I cut his sword arm at the elbow and repositioned it, and then sculpted him a helmet crest using some greenstuff.  I then glued them all to 1" brown-primed fender washers with Aleene's Tacky glue.  I then glued the washers onto a tongue depressor with a couple drops of Elmer's white glue.
     I wanted to try some Citadel Contrast "Black Templar" paint on these as the base for drybrushing their armor, instead of my usual solid black basecoat, so I began by giving them all complete coats of Ceramcoat "White" to act as a base primer coat for the Contrast paint.   I then painted the armor and shields with Citadel Contrast "Black Templar".
     When the "Black Templar was dry, I drybrushed the armor and swords with Folk Art Metallics "Gunmetal Grey", followed with a drybrushing of Ceramcoat "Metallic Silver", and lastly a light drybrush with some Citadel "Mithril Silver".   After that, I painted the tunics with Reaper MSP Pathfinder "Urgathoa Red".
     Next, I painted the tabards, and the eyes on the shield skulls with Ceramcoat "Black"; and then painted the belts, gloves, and shield straps with Reaper MSP "Coal Black".  After that, I painted the exposed parts of their faces with Citadel Contrast "Gulliman Flesh", and then did the faces of their shields, and the leader's crest with Reaper MSP "Fresh Blood".  I decided at that point that the chainmail was drybrushed too heavily and had lost its detail, so I went back over it with some Citadel "Nuln Oil" wash.  
    While I had the "Nuln Oil" out, I decided I also wanted to define the edges of the tabard, belts, and tunic, a little better, so I traced along the edges where the tabard and belts met the tunic using the wash.  After that, I painted the inside of the shields with some Ceramcoat "Metallic Pewter".  I then painted the skulls on the shields with Americana "Snow White".
     Next, I highlighted the tunics with a mix of the base "Urgathoa Red" mixed with Reaper MSP Bones "Cinnamon Red". I then highlighted the tabards with Ceramcoat "Charcoal" followed with Americana "Zinc"; and followed that with highlighting the belts, gloves and shield straps with Citadel "The Fang".  After highlighting those parts, I highlighted the shields and the officer's crest using Reaper MSP Holly Berry", and some Reaper MSP "Hearth Fire".  Lastly,  I did some highlights on the shoulder skulls and helmets with Reaper MSP "Sparkling Snow", and then painted the bases with Americana "Mississippi Mud".
     I let the Swordsmen dry overnight and the next day I gave them a coat of Americana "DuraClear Matte" varnish.    Then, when  the varnish was dry, I used some white glue to flock the bases.  Another overnight dry, and I sprayed them with Testor's "Dullcote". 


    I'm really pleased with ow these guys turned out.   Sometimes I really appreciate these nice simple, clean and plain, sculpts and what an ease they are to paint. 

Monday, November 2, 2020

Dreadmere Mercenary, Axeman: Bones 4 Dreadmere Figure

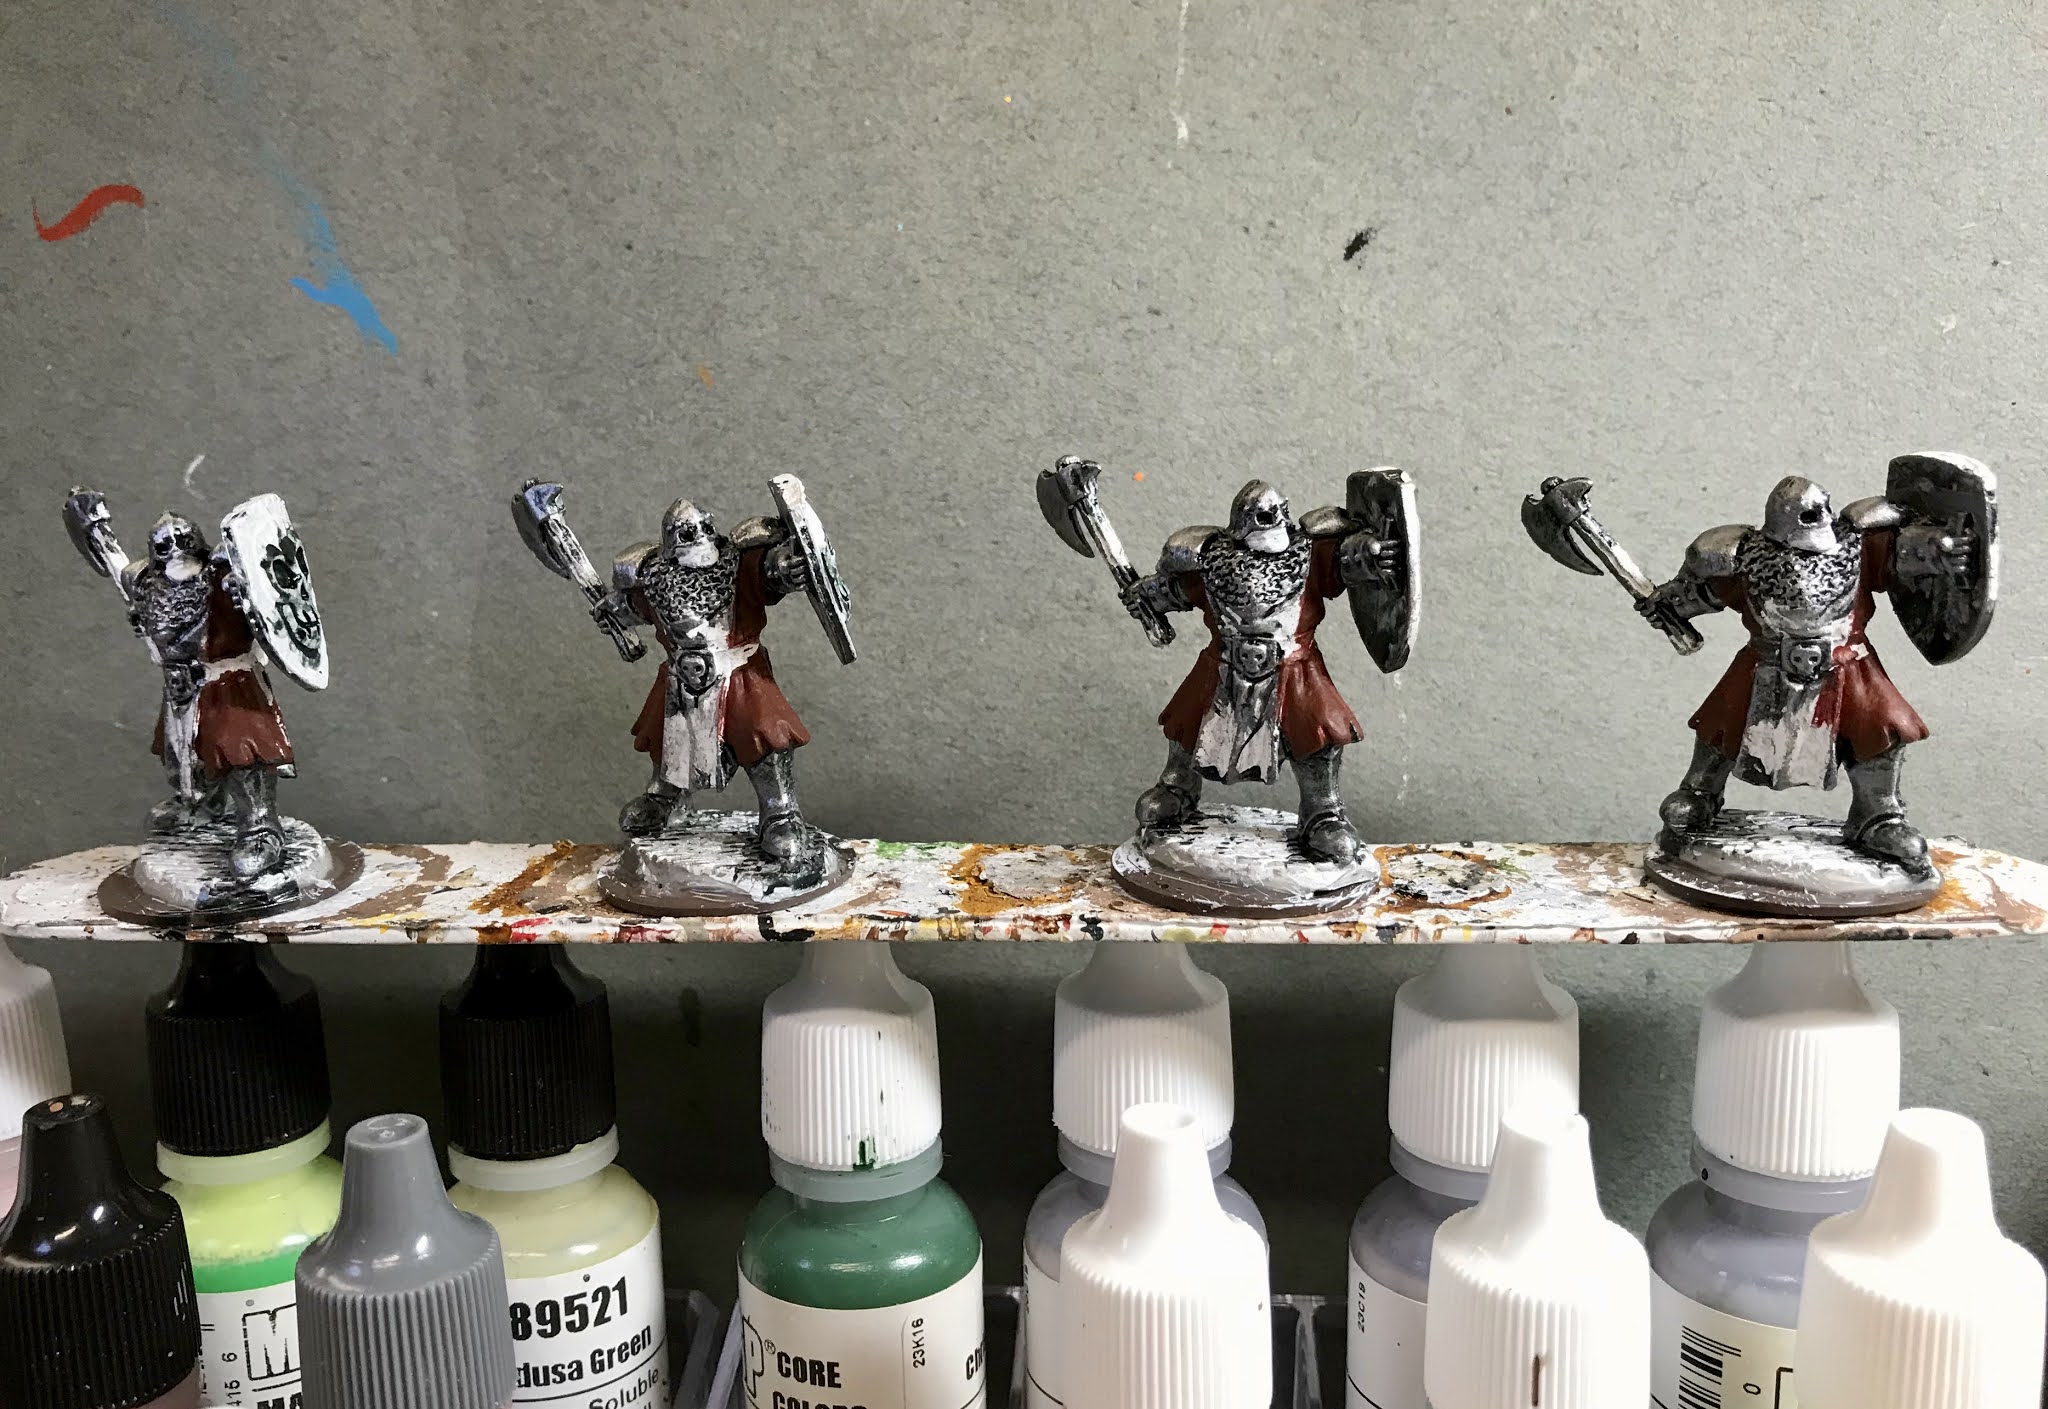
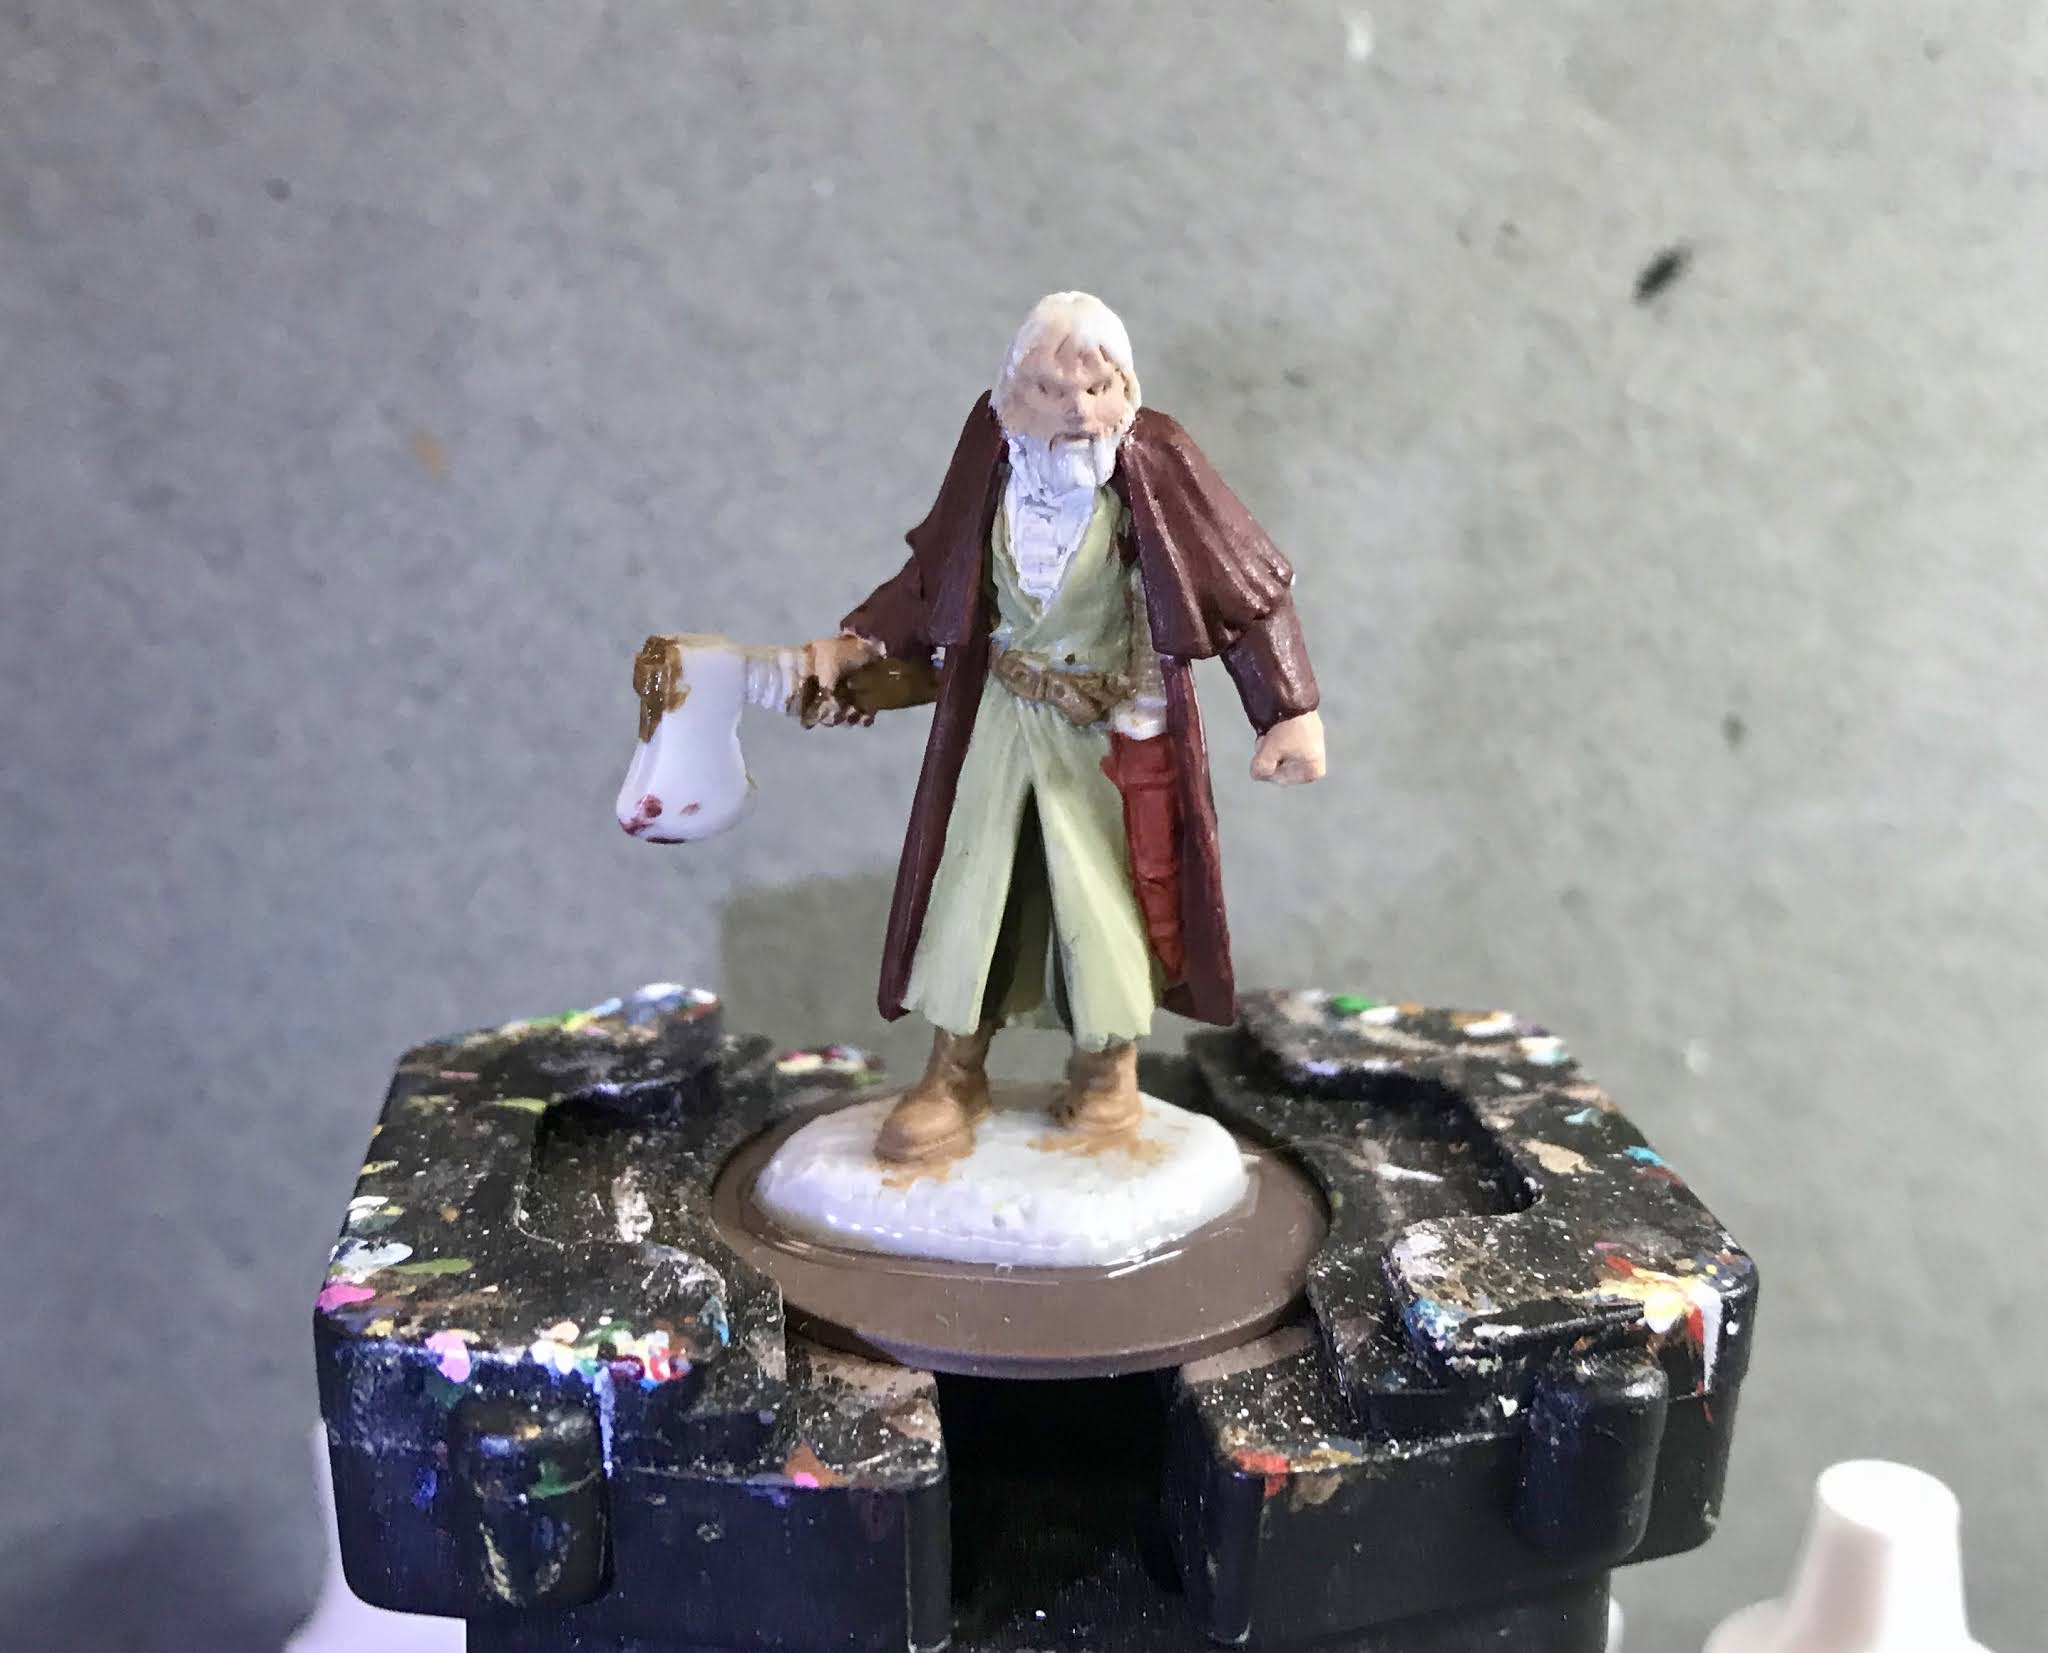
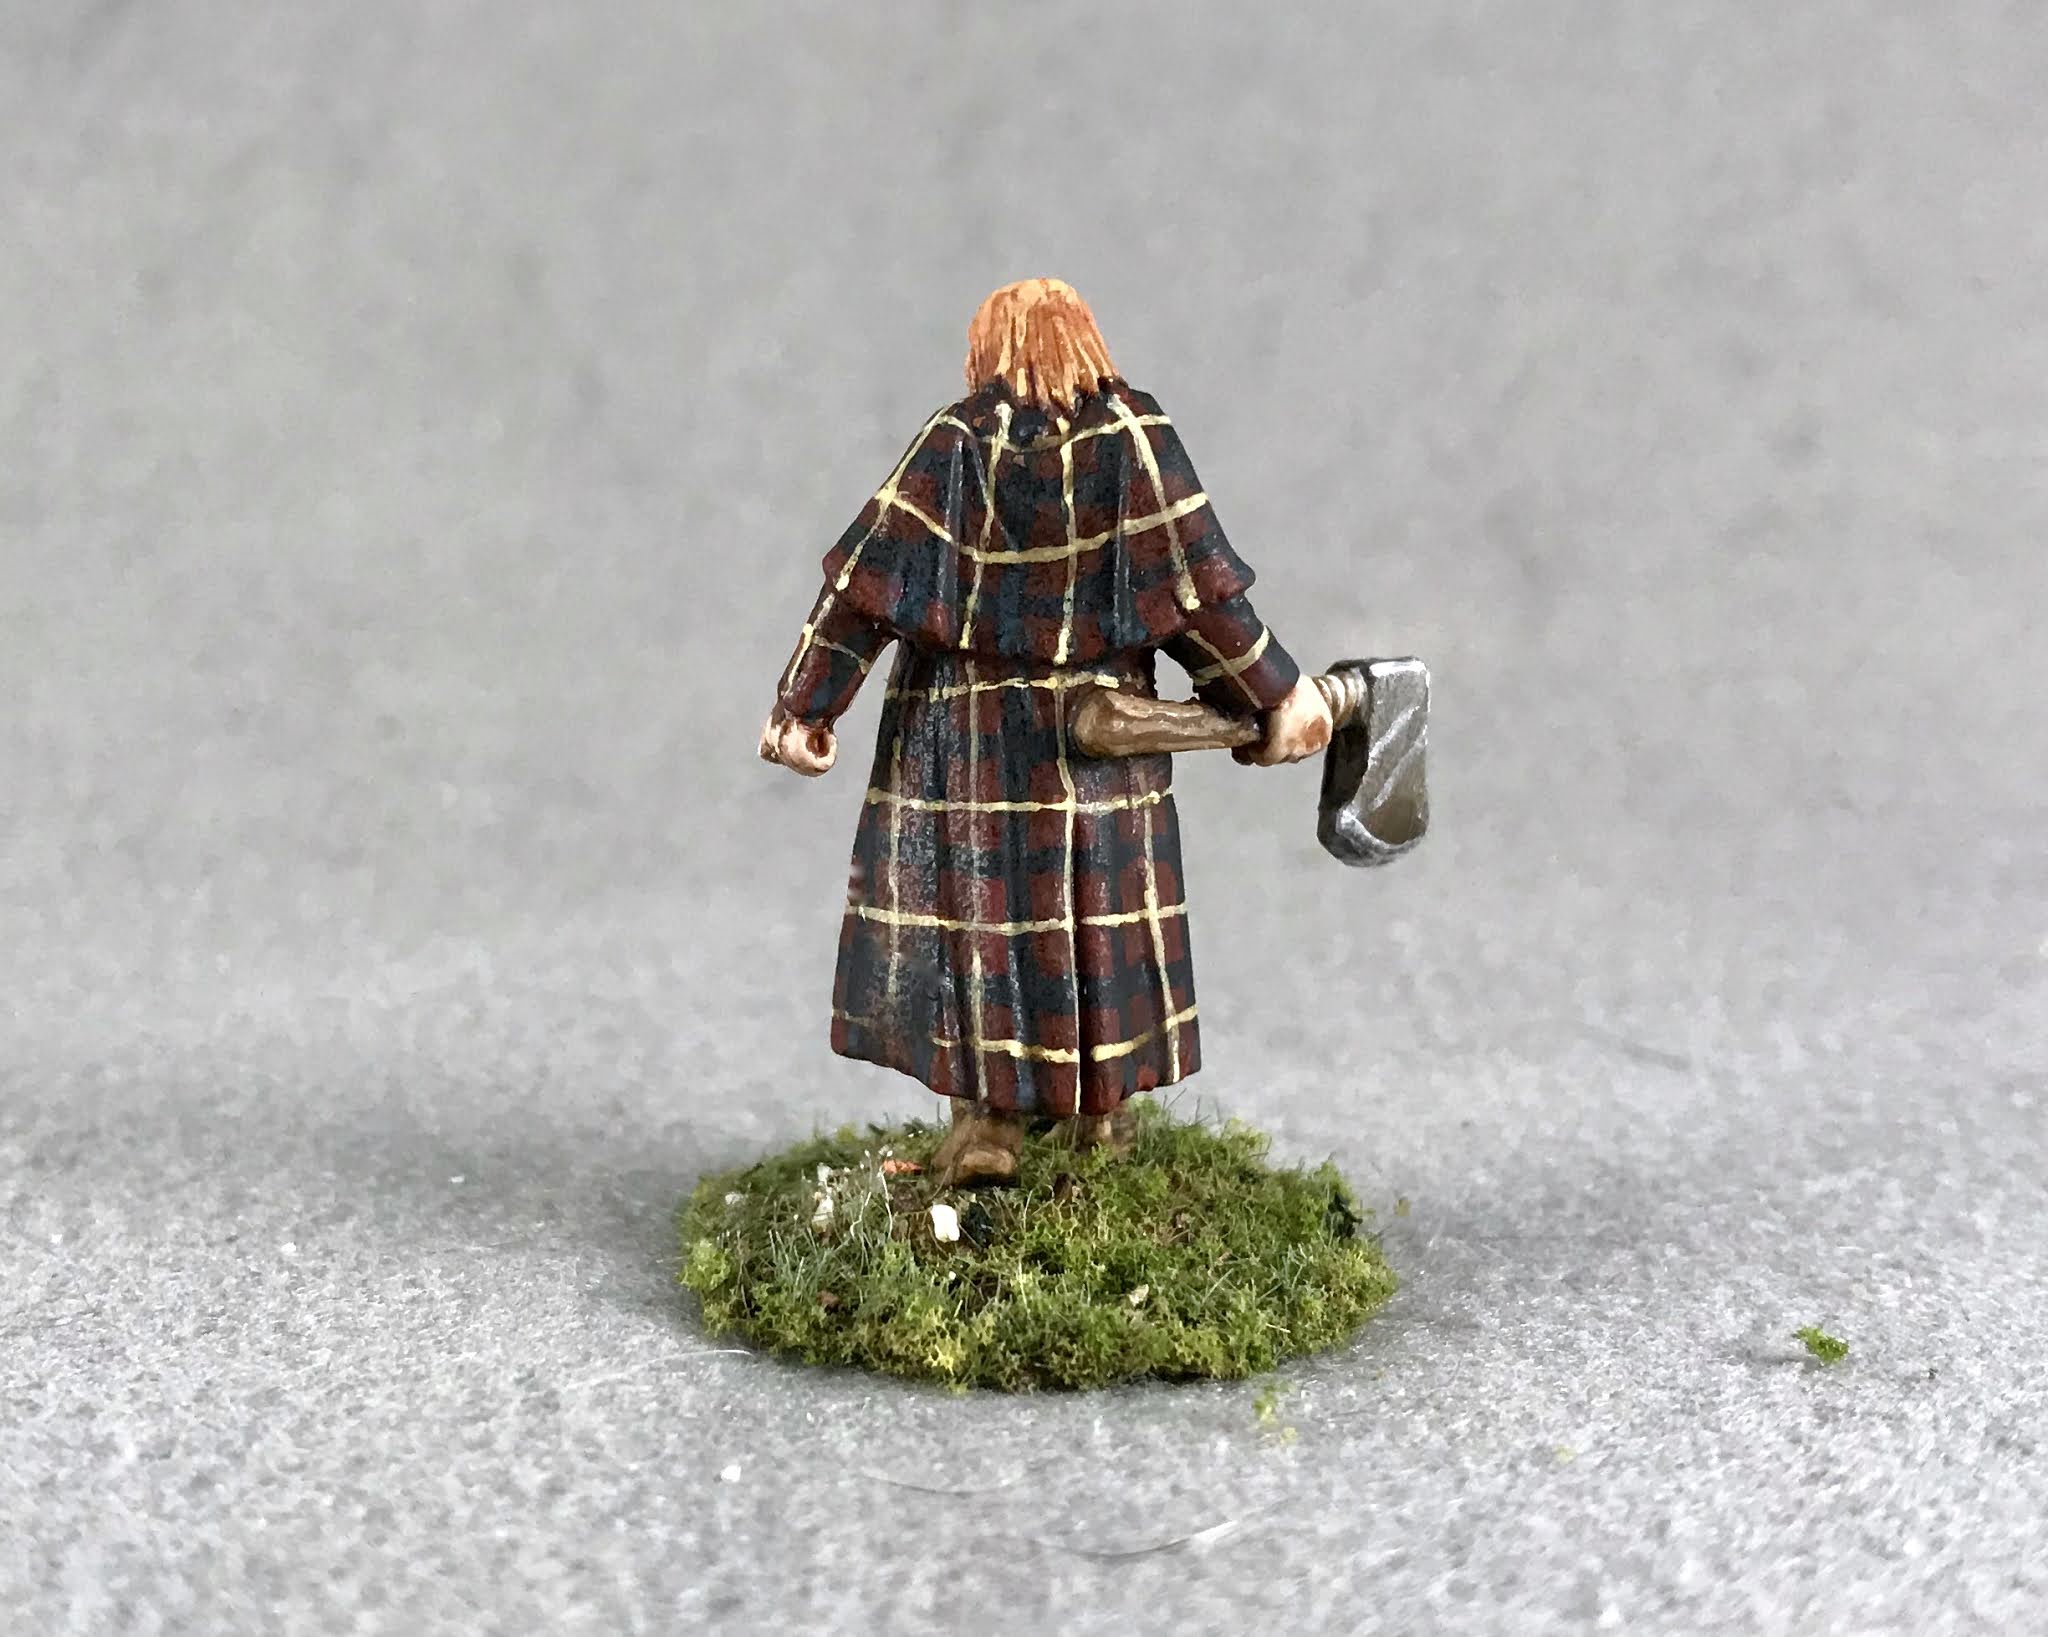
  This past week I painted the "Dreadmere Mercenary, Axeman" from the Bones 4 Dreadmere Expansion.  With the Darkreach Expansion complete, I thought I'd start picking away at Dreadmere next.   
     Though I mostly paint with regular craft store acrylics, over the years I've managed to collect a few dozen Reaper paints.  Some have been freebies included with orders or giveaways through promos like their Goulie Bags and Stockings; some were purchased at a show were a dealer was clearing out old stock for $1 a bottle, others were bought for a buck each when Reaper cleared out the remains of their HD line; and some were purchased outright (mainly the skin triads) from Reaper.
    So with this fellow, I thought it would be a fun challenge to see if I could paint him entirely with Reaper paints.
      I prepped the figure in the usual way, soaking it in a dish of water with a couple drops of dish-soap added, then giving it a light scrub with a soft toothbrush, and then rinsing and drying it.  I then glued the figure to a brown-primed 1" fender washer with Aleene's Tacky glue, and then placed the figure in my painting grip.
     I began by painting his face and hands with Reaper MSP "Tanned Skin".  I then painted his shirt with Reaper MSP "Graveyard Bone", and his pants with Reaper MSP HD "Umber Brown".   After that, I painted his robes with Reaper MSP Pathfinder "Medusa Green". 
     Next, I painted the coat with Reaper MSP Pathfinder "Urgathoa Red"; and then painted the boots, belt, and sword grip with Reaper MSP HD "Golden Brown".  After that, I painted the scabbard with Reaper MSP HD "Rusty Red", and the axe handle with Reaper MSP "Turkey Brown".
    I then painted the axe head, sword fittings, and belt buckle with Reaper MSP "Dark Elf Skin", and the binging on the axe using Reaper MSP "Ginger Cookie".  After that, I painted his hair and beard with Reaper MSP "Pumpkin Orange"; and then attempted a plaid pattern on the coat with a cross-hatch of Reaper MSP "Coal Black", followed by a cross-hatch of Reaper MSP "Golden Glow". 
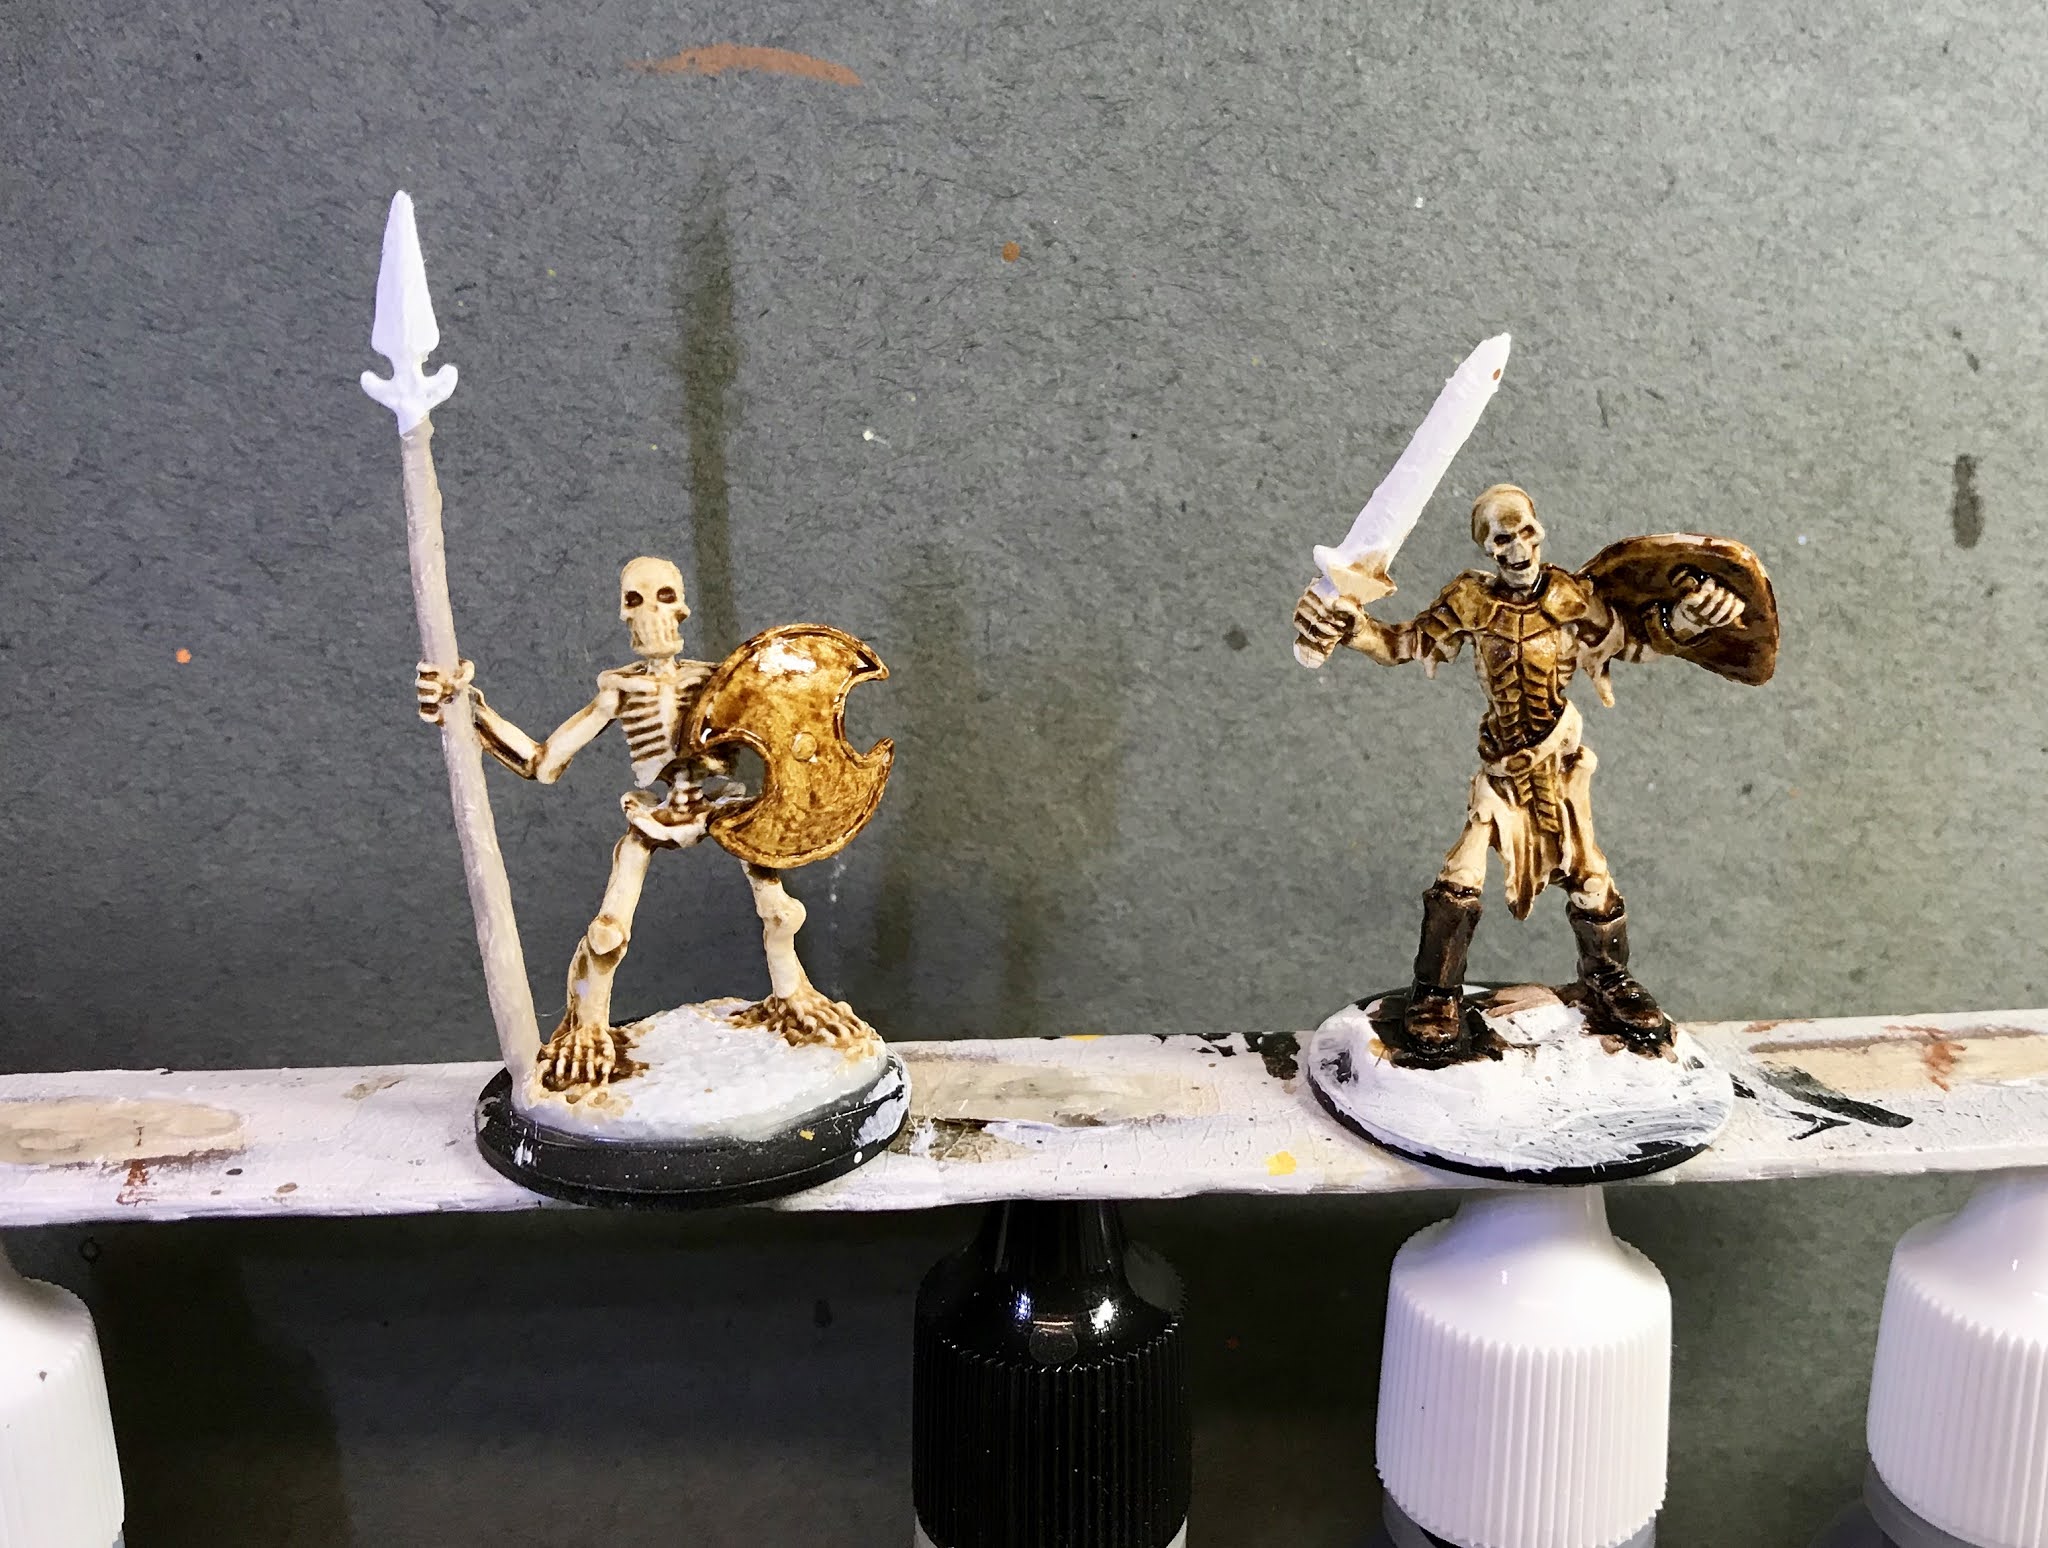
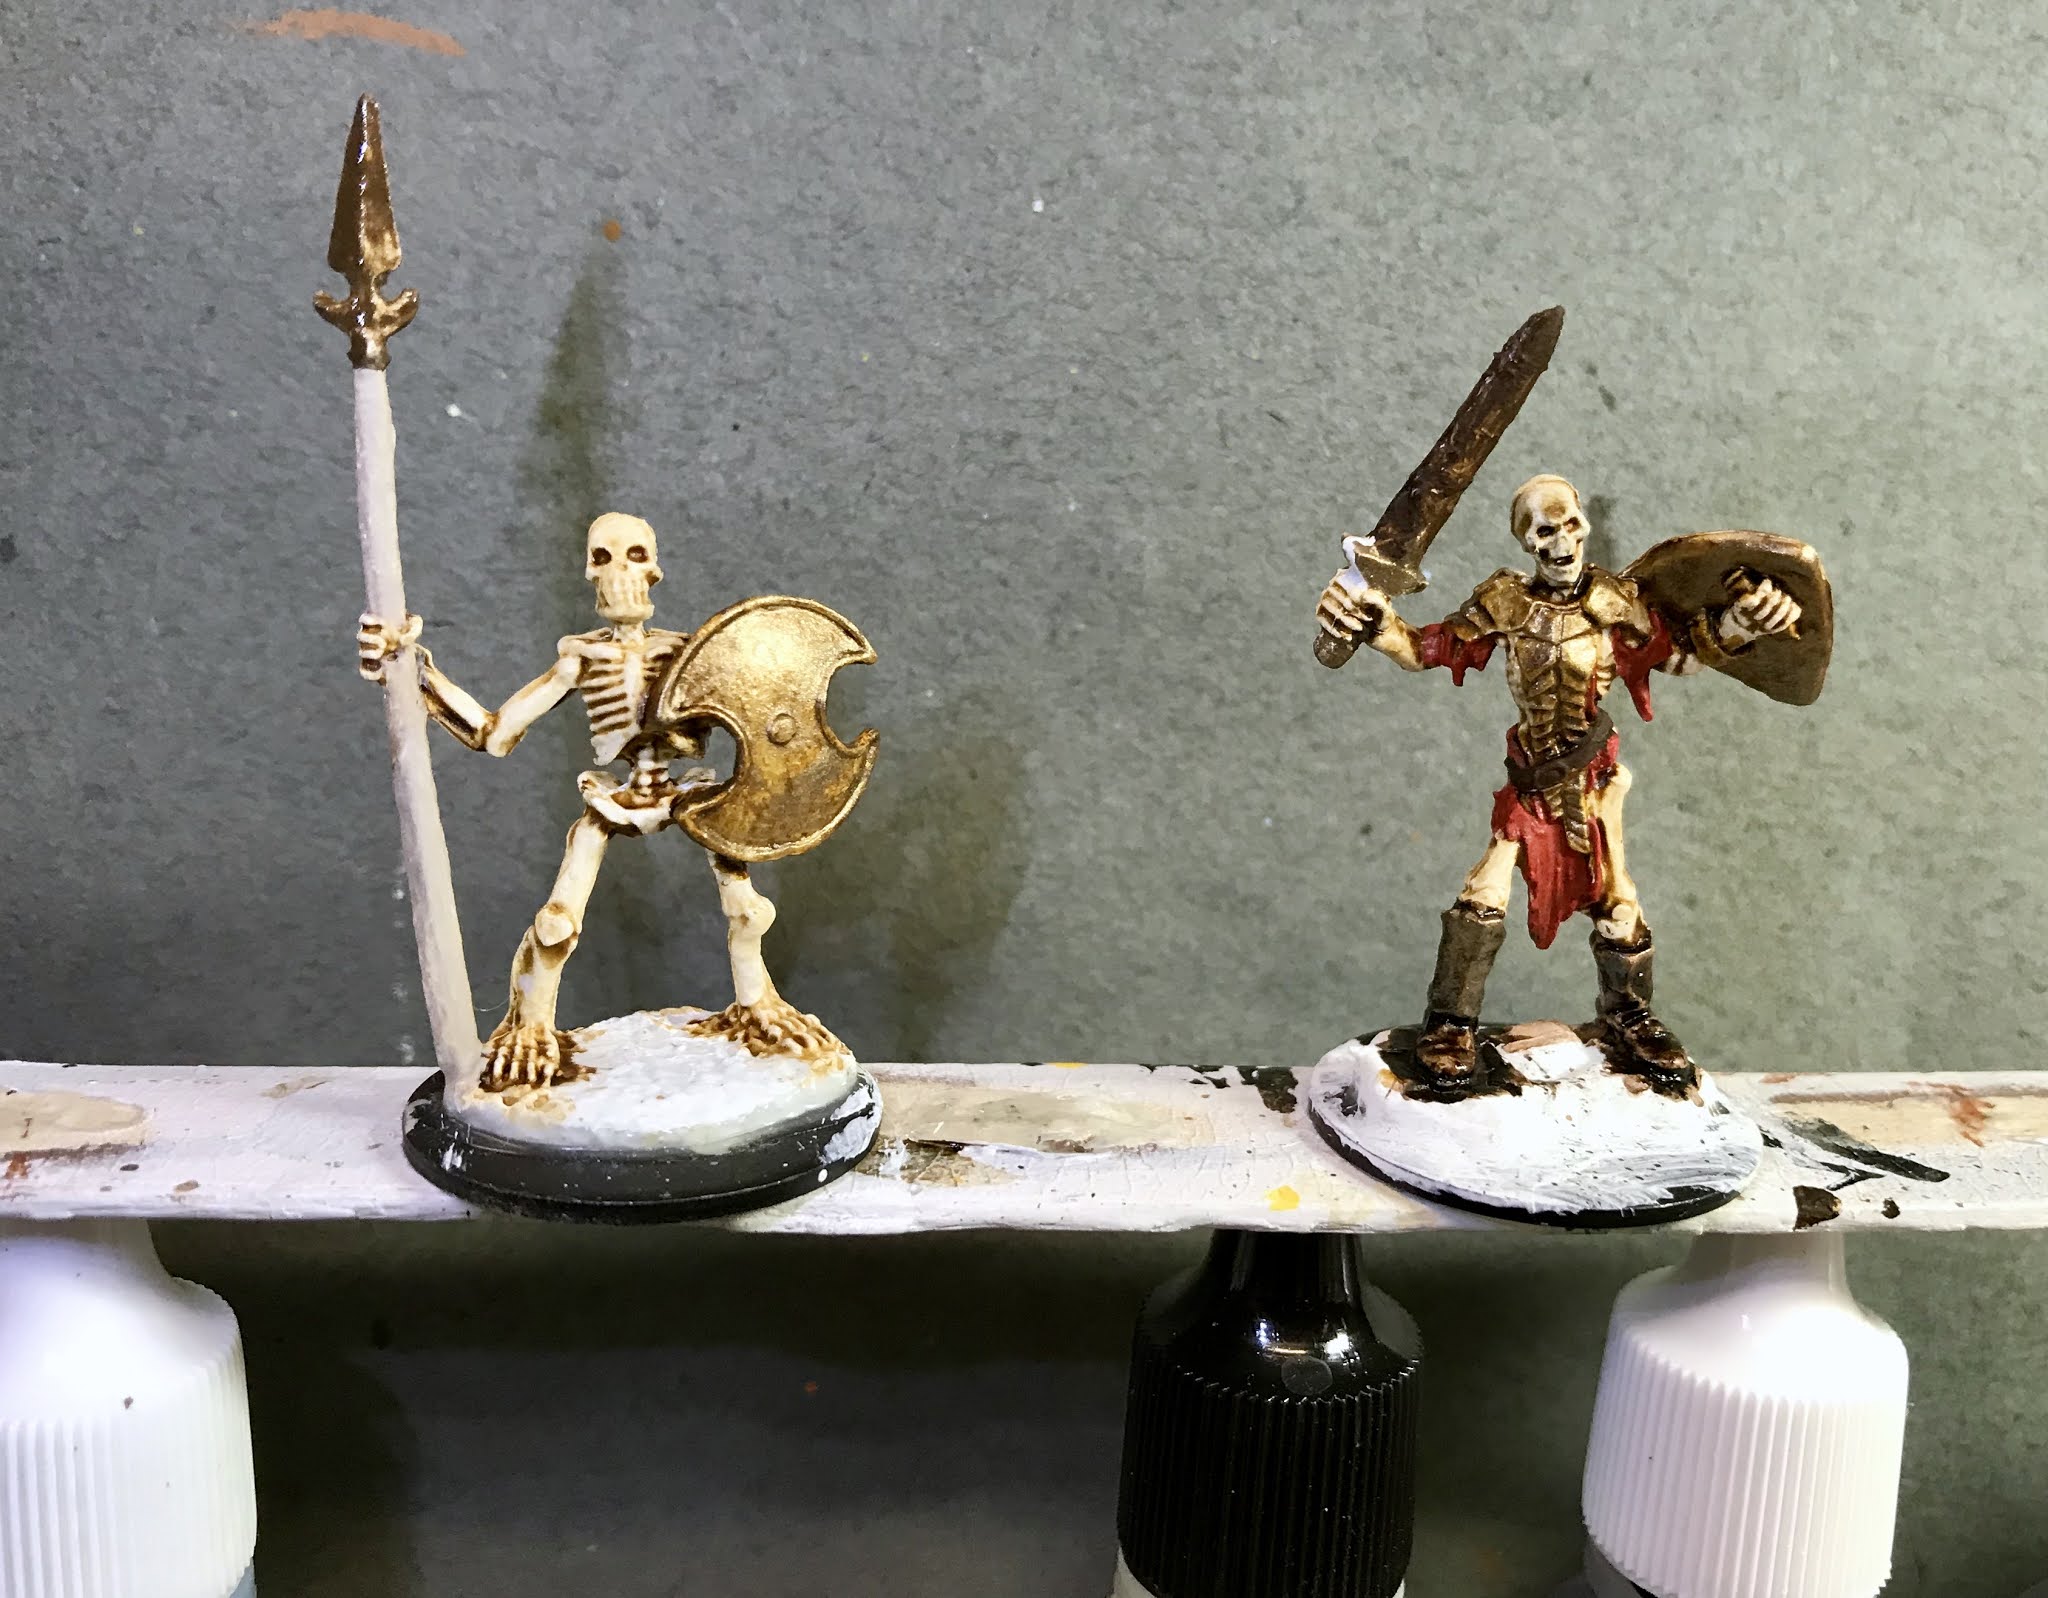
     Next, I painted the axe head, sword fittings and belt buckle again, this time with Reaper MSP "Aged Pewter".  I then let the figure dry for a while, and followed with applying a coat of Citadel "Reikland Fleshshade wash to his head and hands.  When that was dry, I applied a coat of Citadel "Agrax Earthshade" wash to the rest of the figure.
     I let the washes dry, and then painted his eyes, and highlighted his face and hands with the base "Tanned Skin", and Reaper MSP "Tanned Highlight".  After that, I highlighted his hair with "Hallowed Orange", and his shirt with Reaper MSP "Peppermint White". 
     Next,  I highlighted his robe with a mix of the base "Medusa Green" and the "Peppermint White".  I then highlighted his shoes and belts with Reaper MSP "Bronzed Skin", and his scabbard with a mix of the "Bronzed Skin" and the base "Rusty Red".  I followed up by highlighting the binding on the axe with the "Graveyard Bone", and the axe handle with a mix of the base "Turkey Brown" and the "Graveyard Bone". 
      I wasn't sure how even to begin highlighting a plaid jacket, nor was I sure I wanted to get involved with doing so, but I at least made and attempt to pick out highlights along the edges. I used Reaper MSP Bones "Cinnamon Red" mixed with the base "Urgathoa Red" for the red edges, the "Coal Black" mixed with a bit of the "Peppermint White" for the edges of the black stripes, and the base "Golden Glow" for the tips of the yellow stripes. 
     Lastly, I highlighted the axe blade, sword fittings and belt buckle with a mix of the base "Aged Pewter" and Reaper MSP "Sparkling Snow".  I wrapped things up by painting his base with some of the "Turkey Brown".
         I let the figure dry overnight and the next day I gave it a coat of Americana "DuraClear Matte" varnish.    Then, when  the varnish was dry, I used some white glue to flock the base.  Another overnight dry, and I sprayed it with Testor's "Dullcote". 


     Well, in general I'm pleased.  It's not an award winning plaid coat, but it looks pretty good at arms length on the game table. It's a weird combination of colors, but I was limited by my assortment of Reaper paints.  I actually kind of like how it looks.

Monday, October 26, 2020

Skeleton Warriors: Bones 2 Figures

     This past week I did a pair of Skeletons from the Bones 2 Shambling Dead set.  I had prepped these back when we were playing Ghost Archipelago a couple years ago, but never got around to painting them, and they had just kind of been floating around my painting table ever since.  I finally got tired of seeing them, so thought I'd slap some quick paint on them and get them finished.
      I had prepped the figures in the usual way, soaking the parts in a dish of water with a couple drops of dish-soap added, then giving them a light scrub with a soft toothbrush, and then rinsing and drying them. I then had glued them to 1" black-primed fender washers with Aleene's Tacky glue.  I now glued the washers onto a tongue depressor with a couple drops of Elmer's white glue.
     Since I planned to use some Citadel Contrast Paint on these, I started off by giving them a base coat of Ceramcoat "White".
     When the base coat was dry, I gave them a coat of Citadel Contrast "Skeletal Horde".  When that was dry, I went over their armor and shields and shield straps with Citadel Contrast "Snakebite Leather".  After that, I did the boots with Citadel Contrast "Wyldwood", and the spear shaft with Folk Art "Barn Wood. 
    Next, I painted the tunic on the righthand one using Reaper MSP Bones "Cinnamon Red", and then I painted the spear point, sword blade, and belt with Americana "Asphaltum".   After that I painted the armor, shields, and sword grip with Folk Art Brushed Metal "Brushed Bronze".
     I then went over the shields and armor with  some thinned Americana "Sea Breeze" to give a verdigris look. When it was dry, I added some splotches to the left shield with Crafters Acrylic "Bright Yellow", and the right shield with Americana 'True Blue, to represent the remains of old paint on the shields.  I let the figures dry for a while, and then went over everything but the skeletal bones themselves with a coat of Citadel "Agrax Earthshade" wash.  I then filled the eye holes and mouths with some Citadel "Nuln Oil" wash to help define them better.
     When the washes were dry, I drybrushed the spear shaft with some Americana "Bleached Sand", and then hit the bones of the skeletons with a light drybrush of some Crafter's Acrylic "Light Antique White".  I then applied some splotchy rust to the spearpoint and sword blade with some accent "Golden Oxide", and then did highlights on the righthand skeleton's tunic with some Crafter's Acrylic "Orange Spice".  After that, I went over the paint remands on the shields again; using Crafter's Acrylic "Daffodil Yellow" for the one on the left, and Americana "Wedgewood Blue" for the righthand one.  I then painted on the remnants of some decorations, using Ceramcoat "Black"on the left, and Americana "Snow White" on the right.  Lastly, I painted the bases with Americana "Mississippi Mud".
     I let the skellies dry overnight and the next day I gave them a coat of Americana "DuraClear Matte" varnish.    Then, when  the varnish was dry, I used some white glue to flock the bases.  Another overnight dry, and I sprayed them with Testor's "Dullcote". 

     Not great, but good enough for the tabletop and I'm happy to finally get them finished and ready for action.