This past week I painted my remaining Snakemen figures: two Hero/Leader types and a Shaman, from the Bones 4 Core
Nagendra Set.
Last week I painted the 8 Swordsmen, Glaivesmen and Archers from the two 6-figure Nagendra sets I ordered in the Kickstarter.
I prepped the figures in the usual way; soaking them in a dish of water with a couple drops of dish-soap added and then rinsing and drying. I didn't want to have two dual sword wielders, as I only needed one to represent a Leader for the unit; so I cut the left sword arm off of one of the figures and replaced it with a spare shield arm from a Bones Gnoll, using Gorilla Superglue gel. I then glued the figures to 1" black-primed fender washers with some of the Gorilla Superglue Gel glue. I then glued the two sword figures to a tongue depressors, and the shaman to a separate one, with a couple drops of the Elmer's glue each.
 |
| New shield arm added. |
Like the previous figures, I first gave these a base coat with Krylon Camouflage with Fusion "Woodland Light Green" to give better opacity to the green paint I would be using.
 |
| Oops, I forgot to take a "beginning" picture of these two before I started applying paint! |
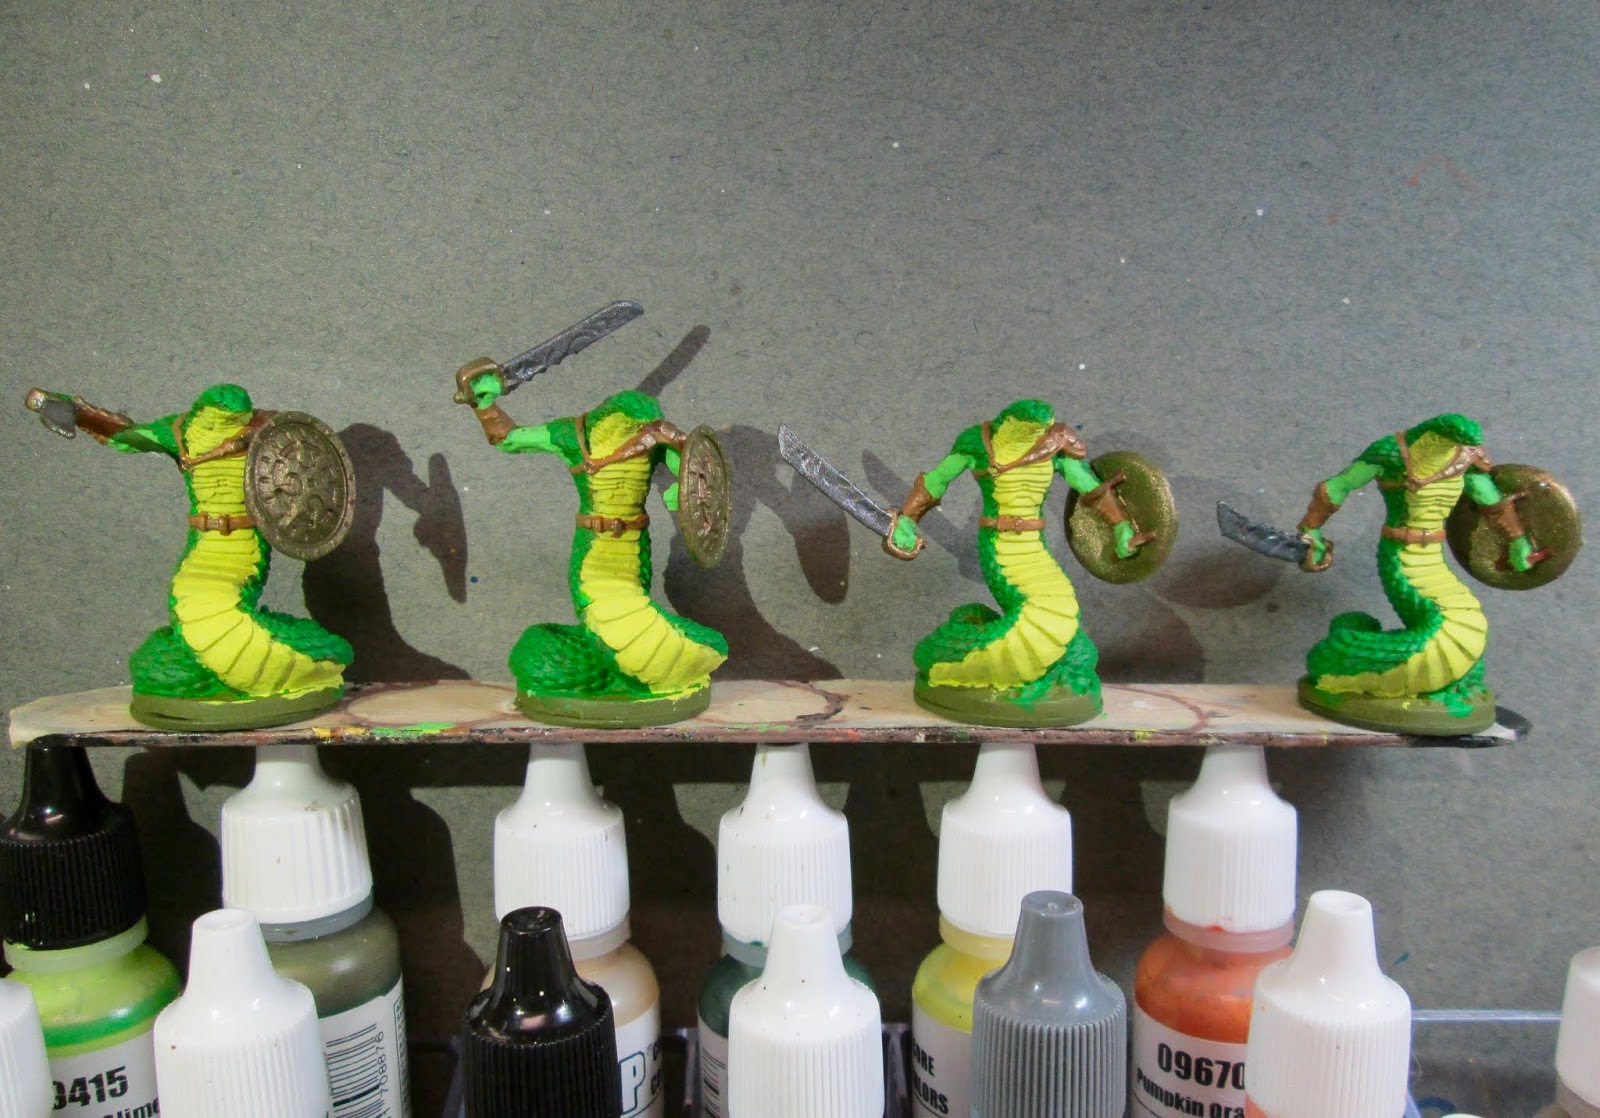
I began by painting their bodies with Americana "Festive Green", and their belly scales with Americana "Margarita". After that, I painted the unscaled portions of their arms with Crafters Acrylic "Wild Green".
Next, I painted their belts with Accent "Mustard Seed", and the back of the shield with Crafter's Acrylic "Navy Blue". I then painted their shield, armor, sword hilts, and belt buckles with Folk Art Burnished Metal "Burnished Bronze", and their sword blades with Folk Art Metallics "Gunmetal Grey". After that, I painted the straps on their shield with Americana "Light Cinnamon".
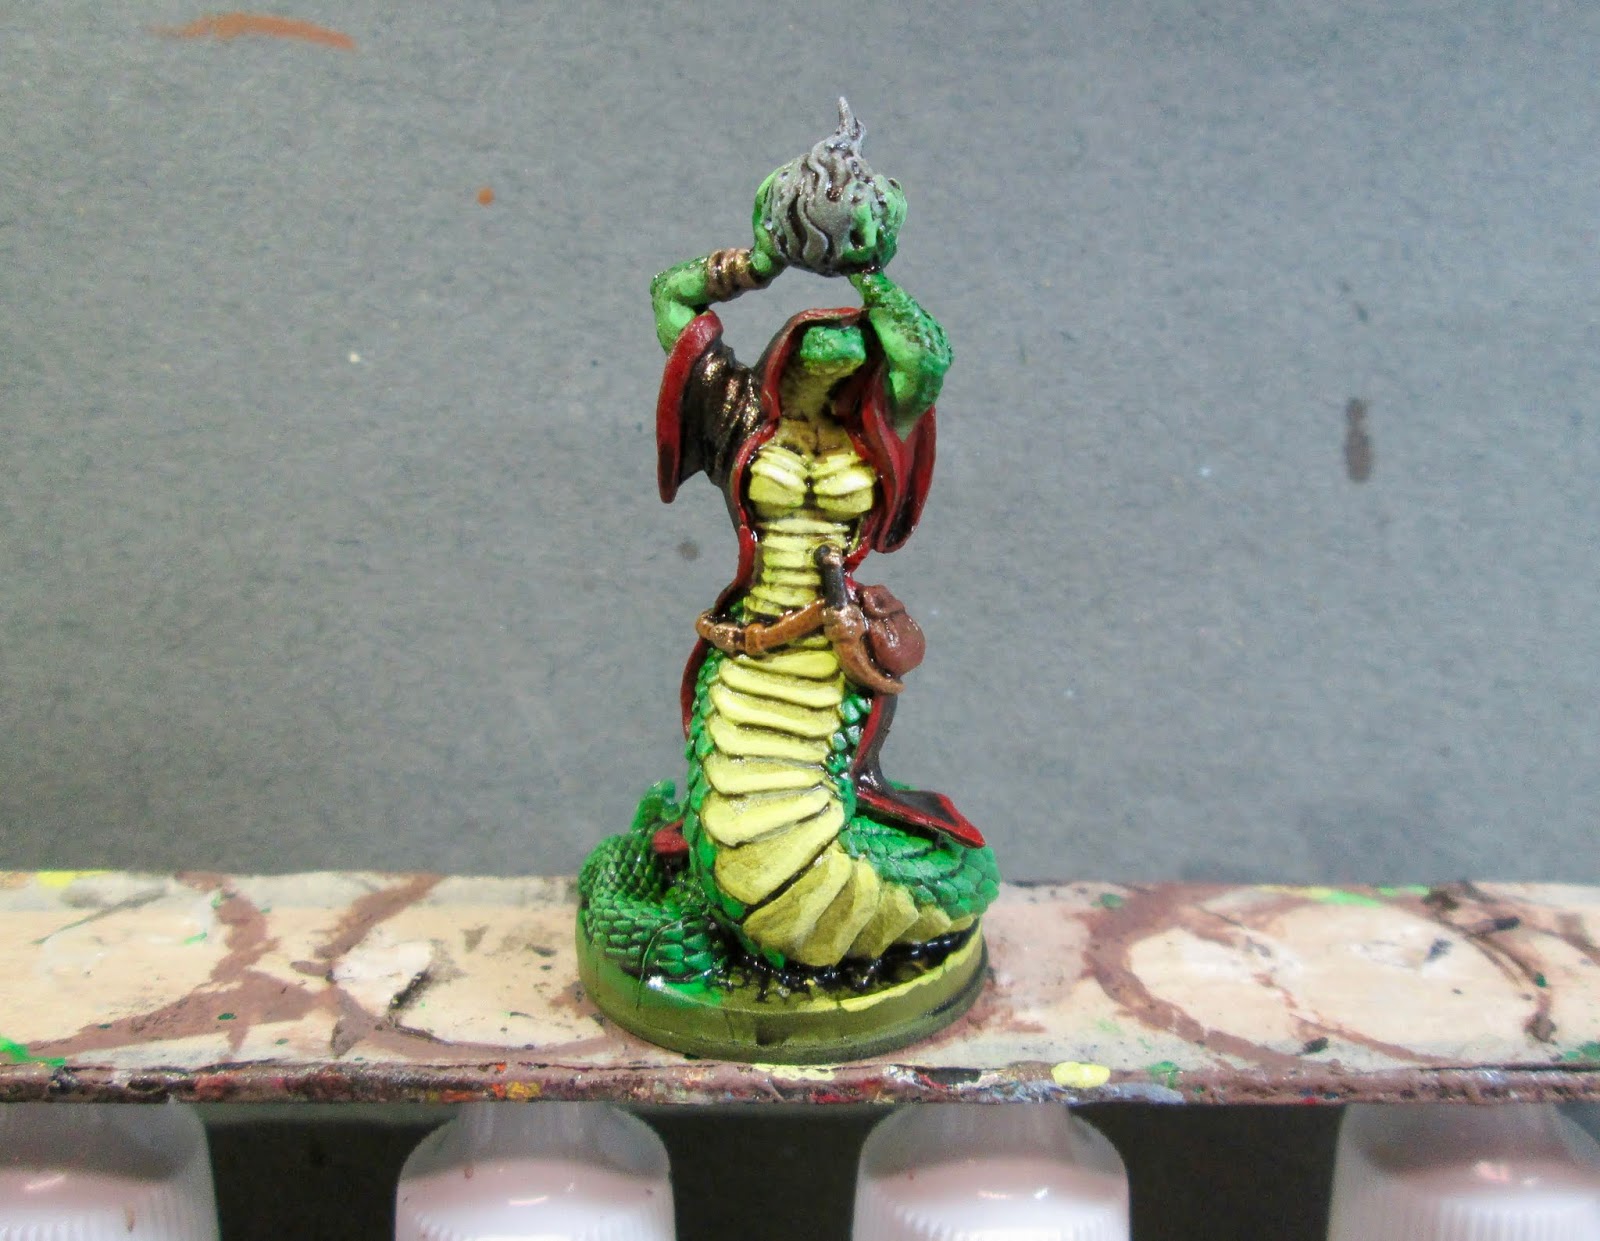
Like above, for the Shaman I painted the belt, and the dagger sheath, with Accent "Mustard Seed". I then painted her robe with Ceramcoat "Black", and when dry, repainted it with Folk Art Color Shift "Black Flash". Next, I did the trim on the robe with Reaper MSP Bones "Cinnamon Red" and the dagger grip with Ceramcoat "Walnut". After that, I painted the pouch on her belt with the "Light Cinnamon", and the ball of flame with Crafter's Acrylic "Cool Blue".
After everything had dried for a while I gave the figures a complete wash with Citadel "Nuln Oil" wash, except for their sword blades. When the wash was dry, I drybrushed their body scales with the base "Festive Green", and then some of the "Festive Green" mixed with some Reaper MSP Bones "Dungeon Slime". Next, I highlighted the belly scales with the base "Margarita", and then with some of the "Margarita" mixed with some Americana "Snow White". After that, I highlighted the scaleless parts of the arms with the base "Wild Green".


Next, I gave their sword blades a wash with some thinned Iron Wind Metals "Mid Blue" Ink, and then highlighted the belts, and dagger sheath with the base "Mustard Seed". I then highlighted the shield straps with the base "Light Cinnamon. After that, I highlighted the shield, armor, sword hilts, dagger fittings, and belt buckles with Ceramcoat "14K Gold". By now the ink wash on the sword and glaive blades had dried, and I highlighted them with Ceramcoat "Metallic Silver".
On the shaman, I highlighted her robes with a mix of the "Black Flash", some Folk Art Color Shift "Blue Flash", and a little Folk Art Pearl "Aqua Moire". After that, I highlighted the trim on the robe with Ceramcoat "Opaque Red". Next, I worked on the ball of flame. I realized I shouldn't have given it the wash with the "Nuln Oil", so I repainted it with the "Cool Blue". When that was dry, I gave it a coat of thinned Americana "Snow White". When the "Snow White" was dry, I drybrushed the flame, and the surrounding parts of the figure (to give an Object Source Lighting OSL effect), with the "Cool Blue". After that, I touched up the flames with some Crafter's Acrylic "Tropical Blue", and did final flame highlights with Americana "True Blue".
I finished up by painting all their eyes with Reaper MSP "Holly Berry".
I let the figures dry overnight and the next day I gave them a coat of Americana "DuraClear Matte" varnish. Then, when the varnish was dry, I used some white glue to flock the bases. Another overnight dry, and I sprayed them with Testor's "Dullcote".
I'm really happy with how these figures turned out. I especially surprised myself with the blue flame and OSL. I'm never quite sure what I'm doing with light, fire, and OSL, and it always seems overdone when I'm actually painting; but I'm really pleased with how the Shaman turned out in the photos.
And here's a photo of the whole group of Nagendra Snakemen: