Showing posts with label Plant. Show all posts

Monday, March 14, 2022

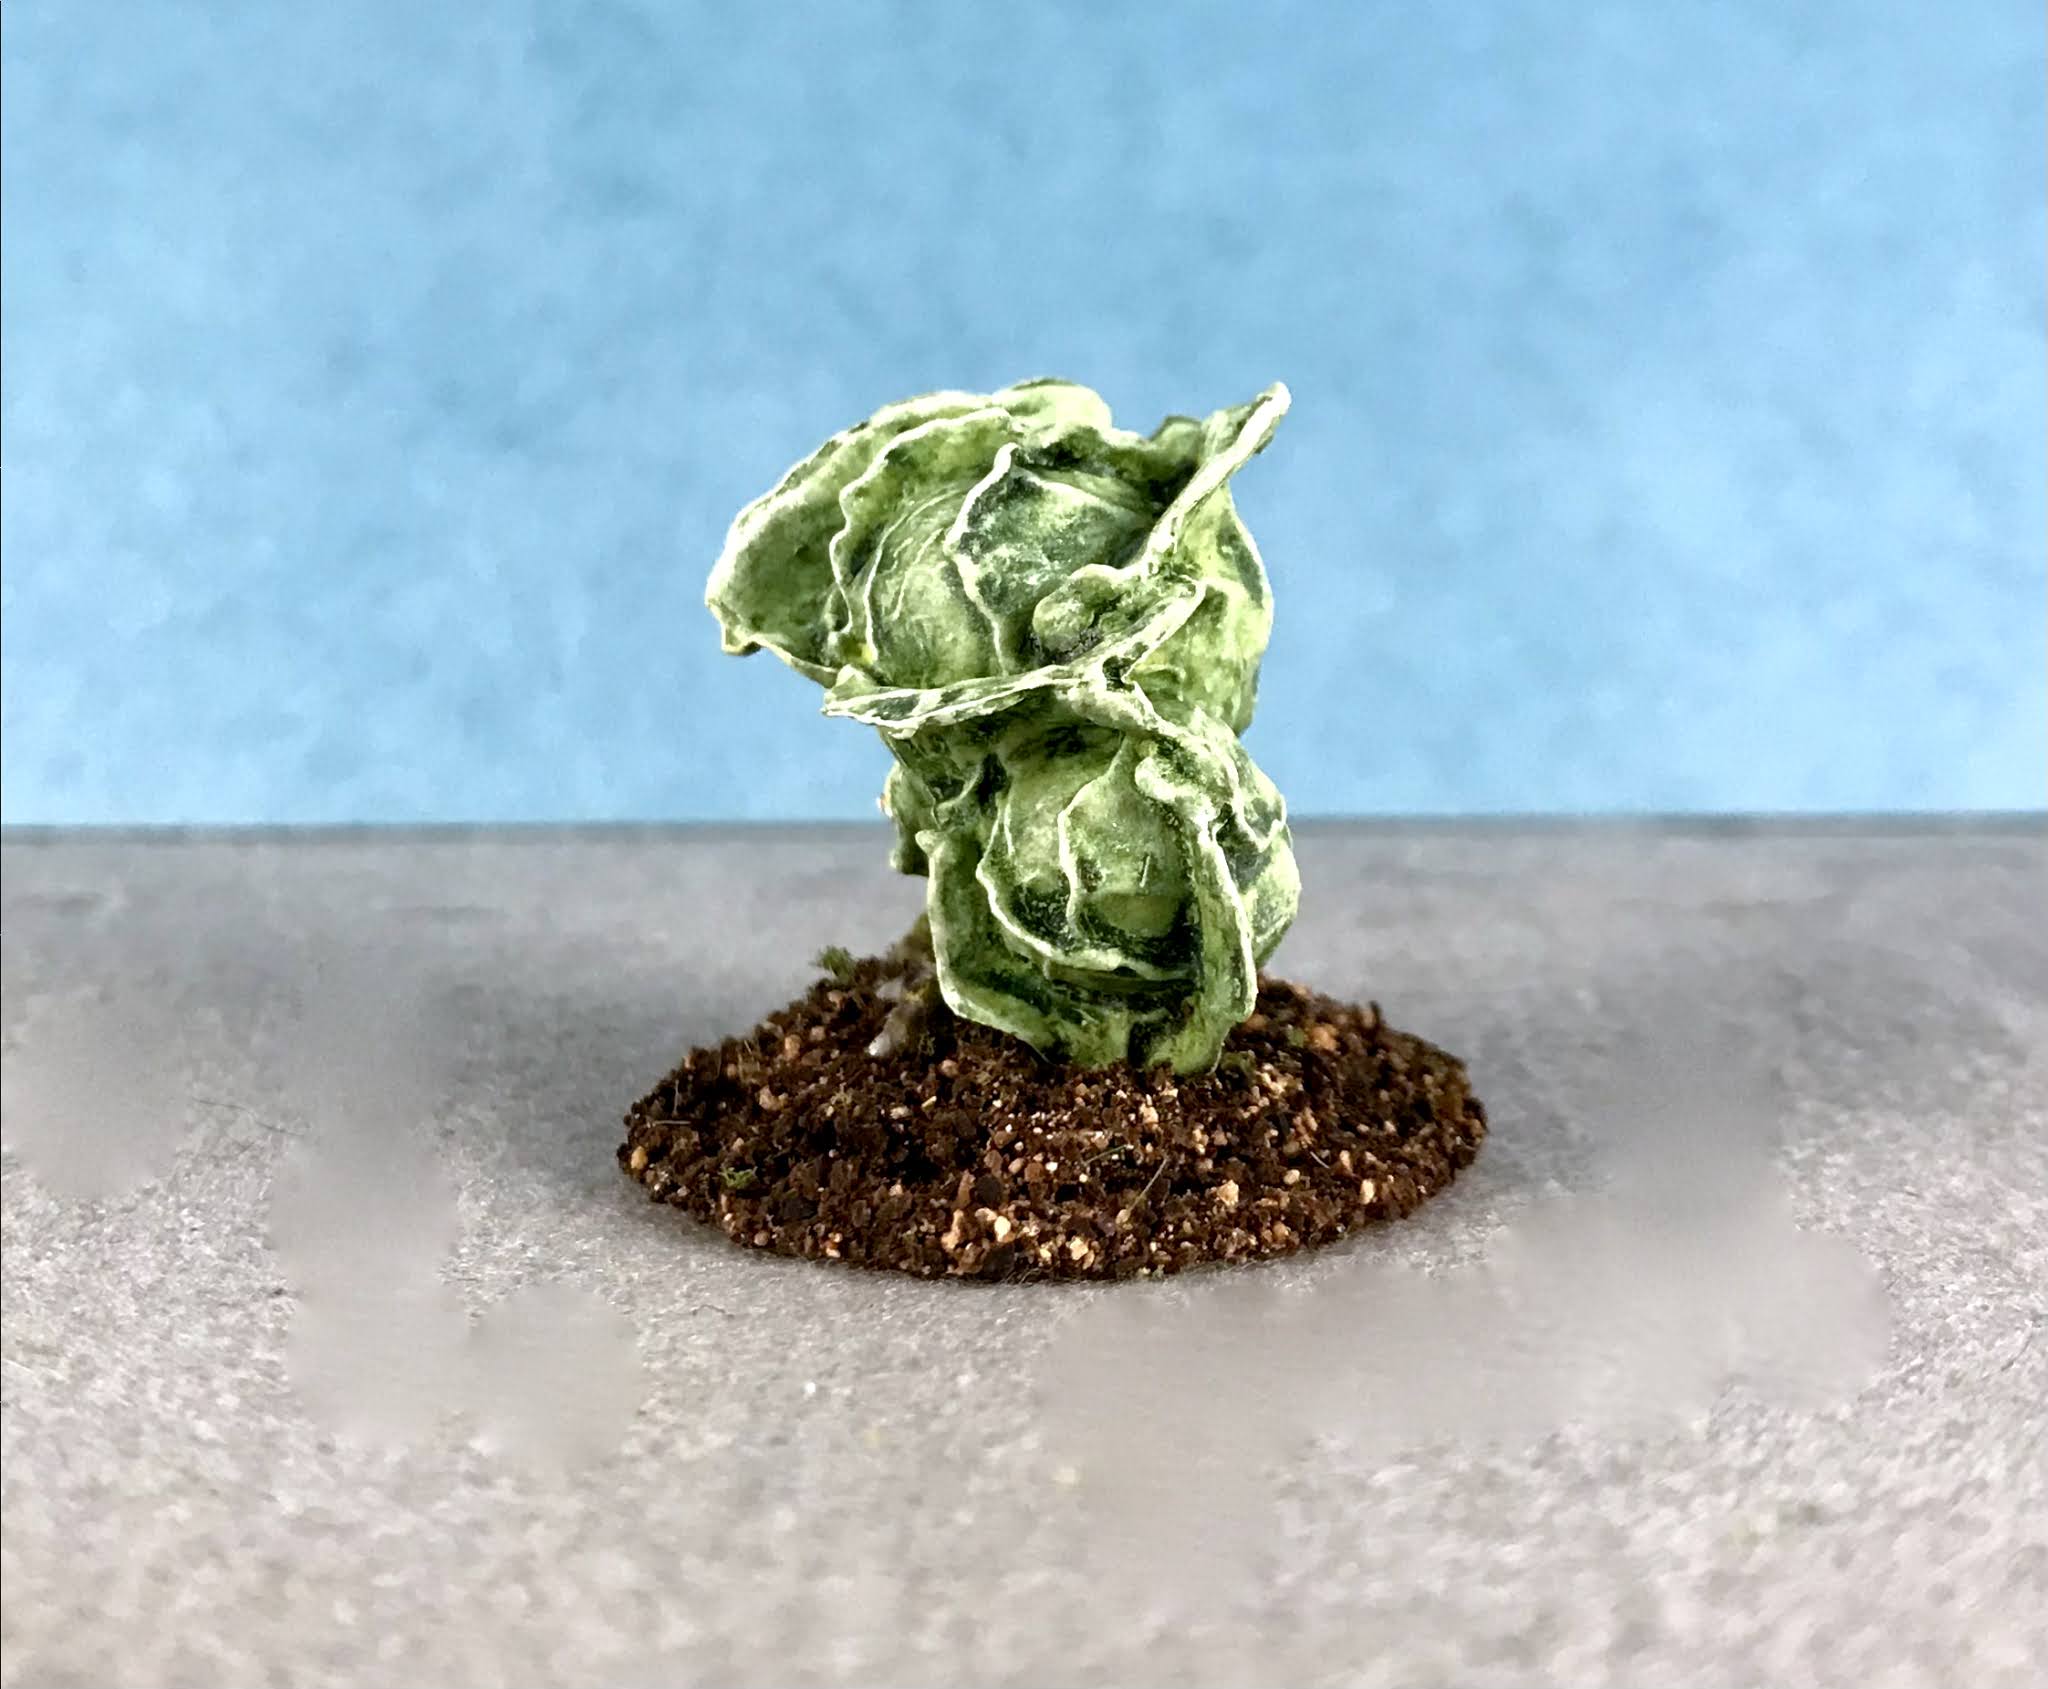
Dire Cabbage: Bones 5 Fan Favorites Figure

    This past week I painted the "Dire Cabbage" from the Bones 5 Fan Favorites Expansion.  
    I prepped the figure in the usual way, soaking it in a dish of water with a couple drops of dish-soap added, then giving it a light scrub with a soft toothbrush, and then rinsing and drying it.  I then trimmed the figure's integral base a little, and glued the figure to a 1" black-primed metal washer with some Aleene's Tacky glue.  I then placed the figure in my painting grip.   
     I began by painting the entire figure with Americana "Olive Green".  I then heavily drybrushed it with Ceramcoat "White".
     I let the first coats dry for a while, and then gave the entire figure a coat of thinned Citadel  Contrast "Creed Camo".  When this was dry, I went back and dry brushed it again with the base "Olive Green", and then drybrushed with the "White". 
               Next, I went over his legs with a coat of Citadel Contrast "Aggaros Dunes".  I then painted the mouth with Anita's "Violet", and the spikes on his tail with Crafter's Acrylic "African Violet" .  After that, I mixed a little Reaper MSP "Breast Cancer Awareness Pink" into the "African Violet", and blended in some lighter tips on the tail spikes.
          I then painted his claws with Folk Art "Barn Wood", and his teeth with Reaper MSP "Bleached Linen". After that, I painted the eye socket with Citadel Contrast "Wyldwood". 
      I let the claws and teeth dry for a while, and then gave then a coat of Citadel "Agrax Earthshade" wash.  When the wash was dry, I highlighted the claws with the base "Barn Wood", and the teeth with the base "Bleached Linen".  After that, I painted the eye with Reaper MSP "Holy Berry".  I went back then and did spot highlights on the teeth, and a pinpoint highlight in the eye, using some Ceramcoat "White".  Lastly, I painted the base with Americana "Charcoal Grey". 
     I let the figure dry overnight and the next day I gave it a coat of Americana "DuraClear Matte" varnish. When dry, I used some white glue to glue a mix of dried used coffee grounds and nutmeg to the figure's base. Another overnight dry, and I sprayed the figure with Testor's Dullcote". 


     I'm really happy with this little guy!  It is such a fun and imaginative figure; and there's a lot of detail in the sculpt which made painting it a lot of fun.  


Monday, January 21, 2019

Vegypygmies: Bones 3 Figures

     I continued to work through the Bones 3 StoneSkull Expansion this past week, and painted the pair of Vegypygmies that came in that box.
     I prepped the figures in the usual way; soaking them in a dish of water with a couple drops of dish-soap added and then rinsing and drying.   I then glued them to 7/8" black-primed fender washers with Aleene's Tacky glue.  I then glued the figures to a  tongue depressor with a couple drops of the Elmer's glue each.
      I began by painting each entire figure with Americana "Avocado", and then painted their cloths with  Americana "Forest Green".   After that I painted their hair with Apple Barrel "Apple Black Green".
     Next, I painted their spear shafts, and the back of the shield with Folk Art "Dapple Grey", and the spear points with Americana "Zinc". I then painted the face of the shield with Ceramcoat "Black".   After everything had a while to dry, I gave each figure a complete coat with Citadel "Agrax Earthshade" wash.
          When the wash was dry, I highlighted their bodies with  a drybrush of Aleene's "Dusty Khaki", and then painted their eyes with Americana "Margarita"with "Black" pupils.   I then used Americana "Festive Green" to highlight their cloths, and Folk Art Artist's Pigment "Hauser Green Medium" to highlight their hair.  Next, I picked out the design on the shield with Crafter's Acrylic "Citrus Green", and then highlighted the spear shafts with Folk At "Grey Green".  I then decided against painting the spear points a white metal (which I had intended), and go with a bronze look instead; so I first painted them with Folk Art Brushed Metal "Brushed Bronze", and then did highlights with a bit of the "Brushed Bronze" mixed with Ceramcoat "14K Gold".
     Lastly, I painted the figures integral bases with Americana "Bittersweet Chocolate".
     I let the figures dry overnight and the next day I gave them a coat of Americana "DuraClear Matte" varnish.    Then, when  the varnish was dry, I used some white glue to flock their bases.  Another overnight dry, and I sprayed them with Rustoleum "Matte Finish", since I unfortunately ran out of Testor's Dullcote" without having time to replace it.

     Well, I'm happy with the figures, but not thrilled with the Rustoleum "Matte Finish".   I definitely think I'll hit these with some Dullcote when I get a new can.

Monday, July 10, 2017

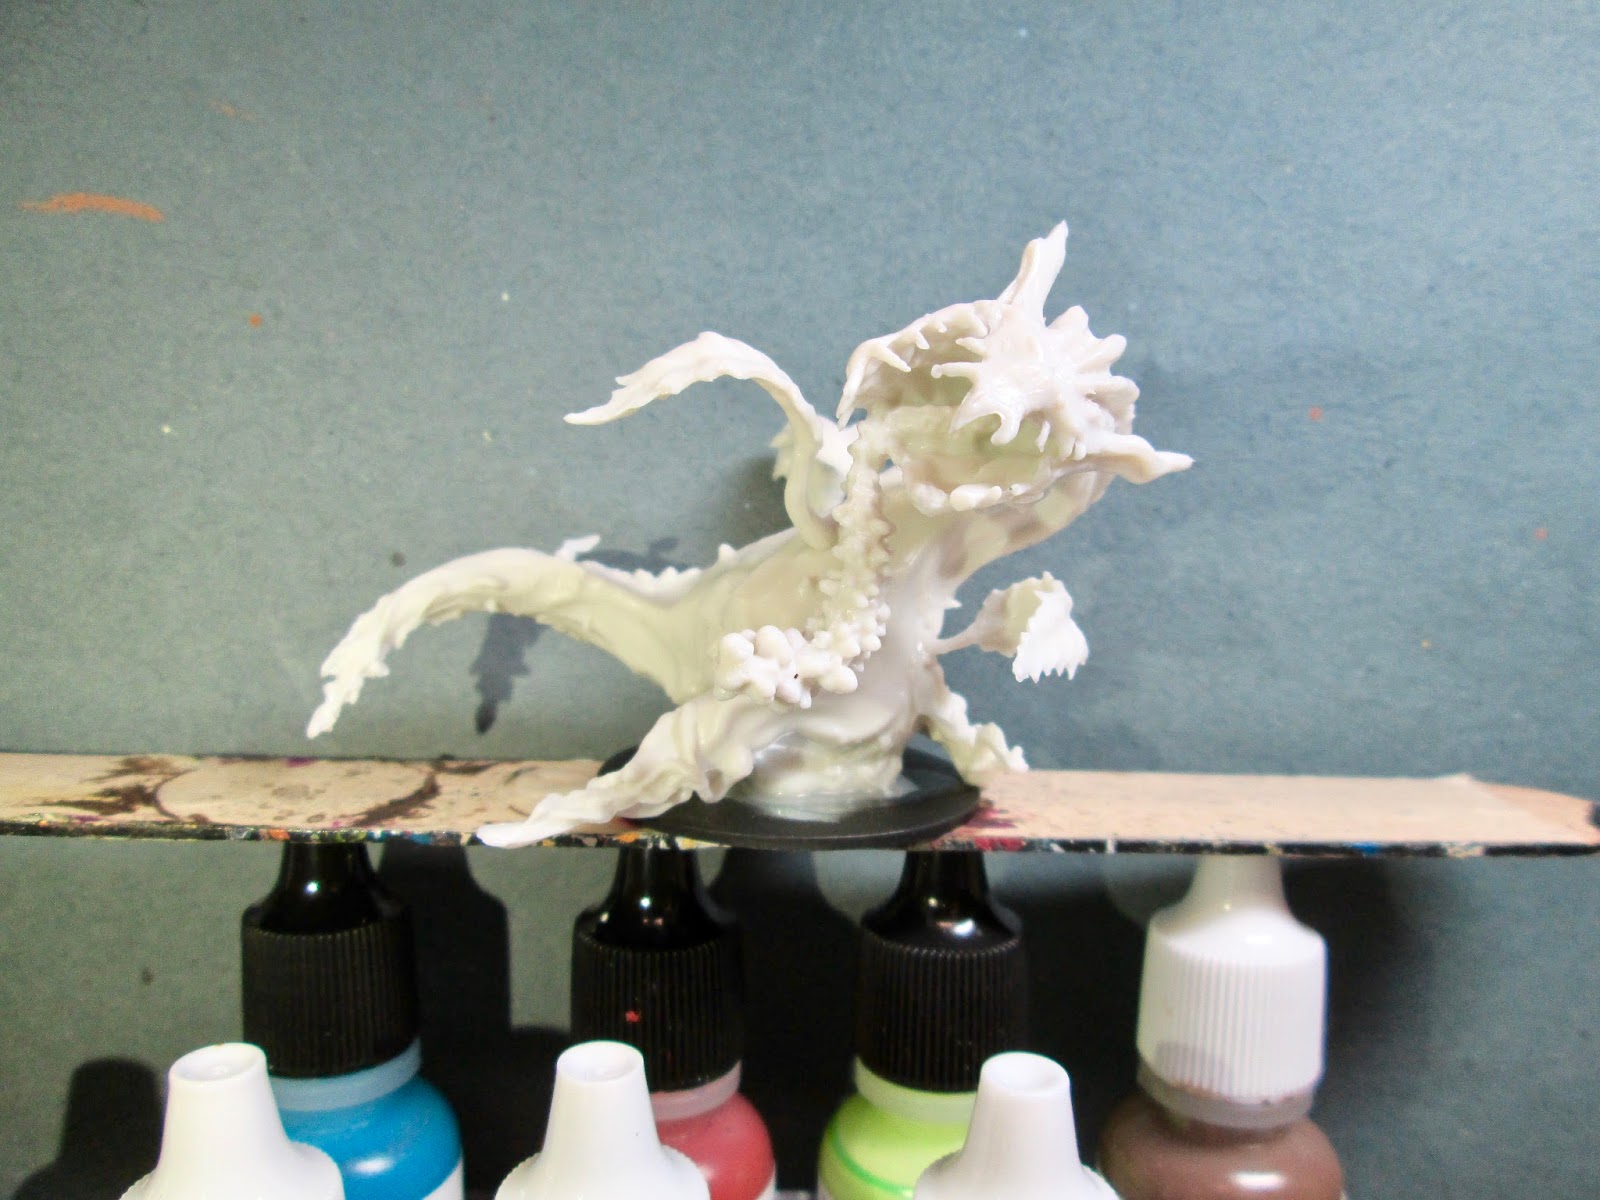
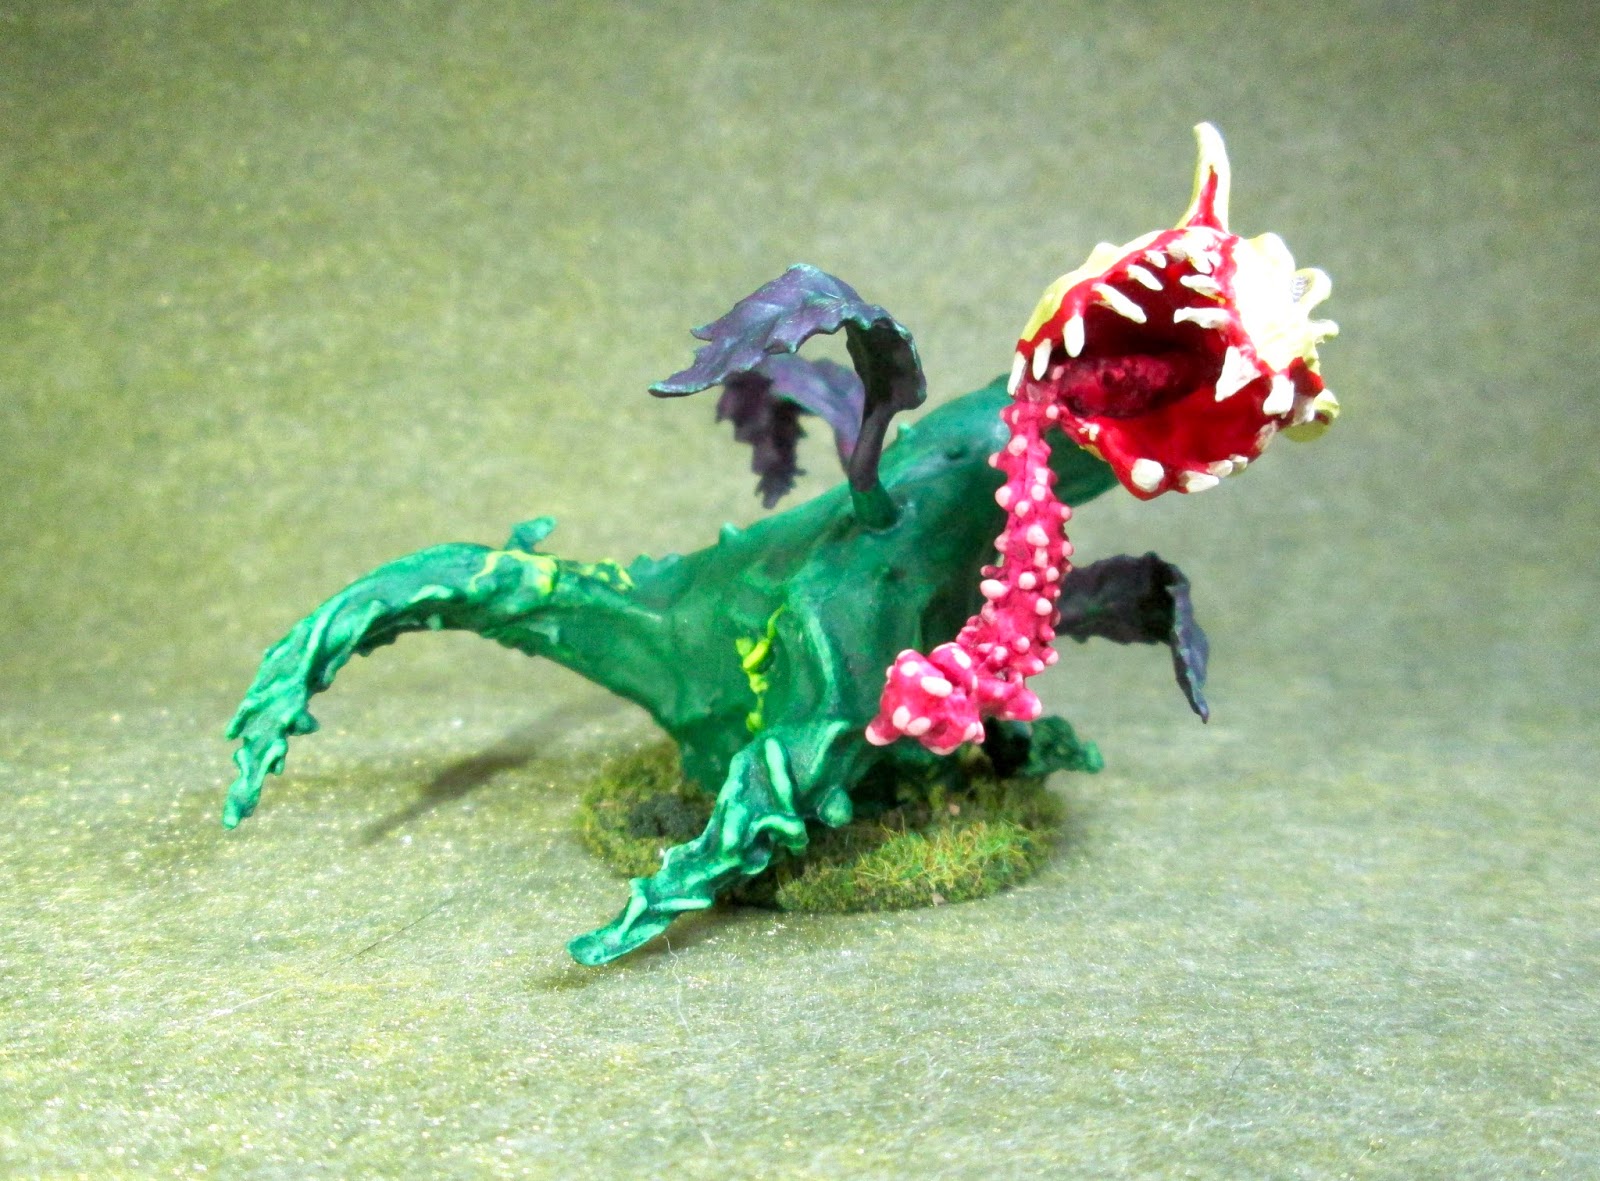
Dragon Plant: Bones 3 Figure

     This past week I finished up the Dragon Plant figure from the Bones 3 Stoneskull Expansion set.   Since I had really liked how my Death Star Lilies had turned out,  I thought I would use a similar color scheme.  This would also give me the option of using them as a mother and babies at some point.
     I prepped the figure in the usual way; soaking the parts in a dish of water with a couple drops of dish-soap added, then giving them a light scrub with a soft toothbrush, and then rinsing and drying them.   When dry, I assembled the figure with  Gorilla Superglue.  I then glued the figure to a black-primed 2" fender washer with Aleene's Tacky glue, and then glued the washer-mounted figure to a tongue depressor with a couple drops of the Elmer's glue.
     I began by painting the body of the plant with Americana "Forest Green".  When dry, I drybrushed it with some Crafter's Acrylic "Holiday Green", and then some Crafter's Acrylic "Wild Green".  I then used some of the "Wild Green" to highlight some of the tendrils on the plants appendages.
     Next, I painted the vines on the plant with Crafter's Acrylic "Citrus Green" and then painted the Leaves with Crafter's Acrylic "African Violet".
     After everything had a few hours to dry, I gave the entire body a wash with Citadel "Dark Green" ink using a wet brush.  When the ink wash was dry, I went back over the tendrils with the "Wild Green", and back over the vines with the "Citrus Green".  I then drybrushed the leaves with the "Forest Green".
     I moved to the "head" and this point, painting the outside of the bloom with Americana "Margarita".  I then applied some thinned Crafter's Acrylic "Purple Passion" to the ribbed areas on the bloom.  When this was dry, I drybrushed over it again with the "Margarita", and then drybrushed the whole bloom with some Apple Barrel "Lemon Chiffon". After that, I painted the inside of the bloom, the edges of the "petals", and the base of the pistil "tongue", with Ceramcoat "Opaque Red".
     Next, I took some Crafter's Acrylic "Tutti Frutti", and blended it into the red base of the pistil, and then painted the rest of the pistil with it as well. When dry, I gave the entire pistil a wash with some Iron Wind Metals "Purple" ink using a wet brush.  While this dried, I painted the "teeth" along he edge of the petals with Americana "Bleached Sand", and then went back over them with White highlights.   When the pistil wash was dry, I went back over it and did highlights on each of the little bumps using Crafter's Acrylic "Cherry Blossom Pink".
     Lastly, I painted the washer base with Ceramcoat "Walnut".
     I let the figure dry overnight and the next morning I gave it a coat of Americana "DuraClear Matte" varnish. When that was dry, I flocked the base. Another overnight dry, and I sprayed it with Testor's Dullcote".


       I can't say that I am a huge fan of this figure.   I find the pose and sculpt in general to be rather awkward and simplistic.  And, this is another one of those really hard figures to photograph, as there is no true "front".   I think it could have been executed better.  That all being said, my heart wasn't in the paint job, and while I think it turned out okay, I'm not to thrilled with it.

Monday, June 19, 2017

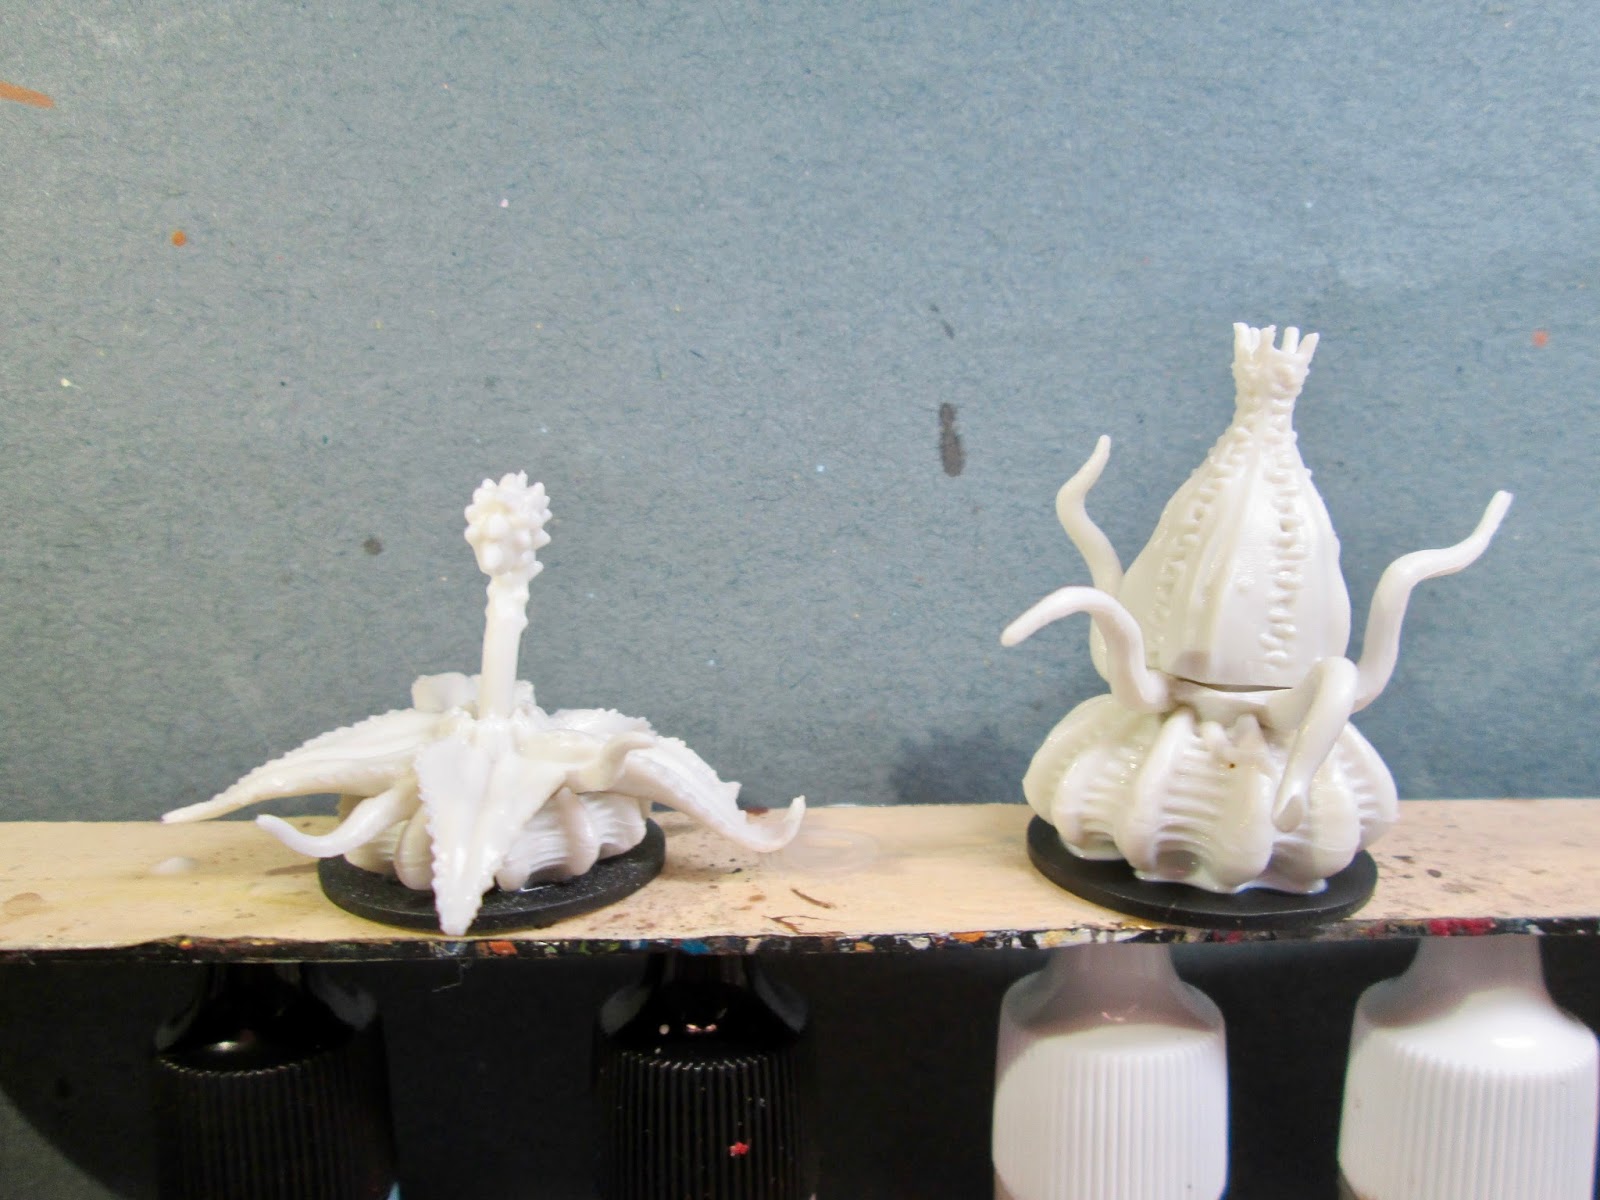
Death Star Lilies: Bones 3 Figures

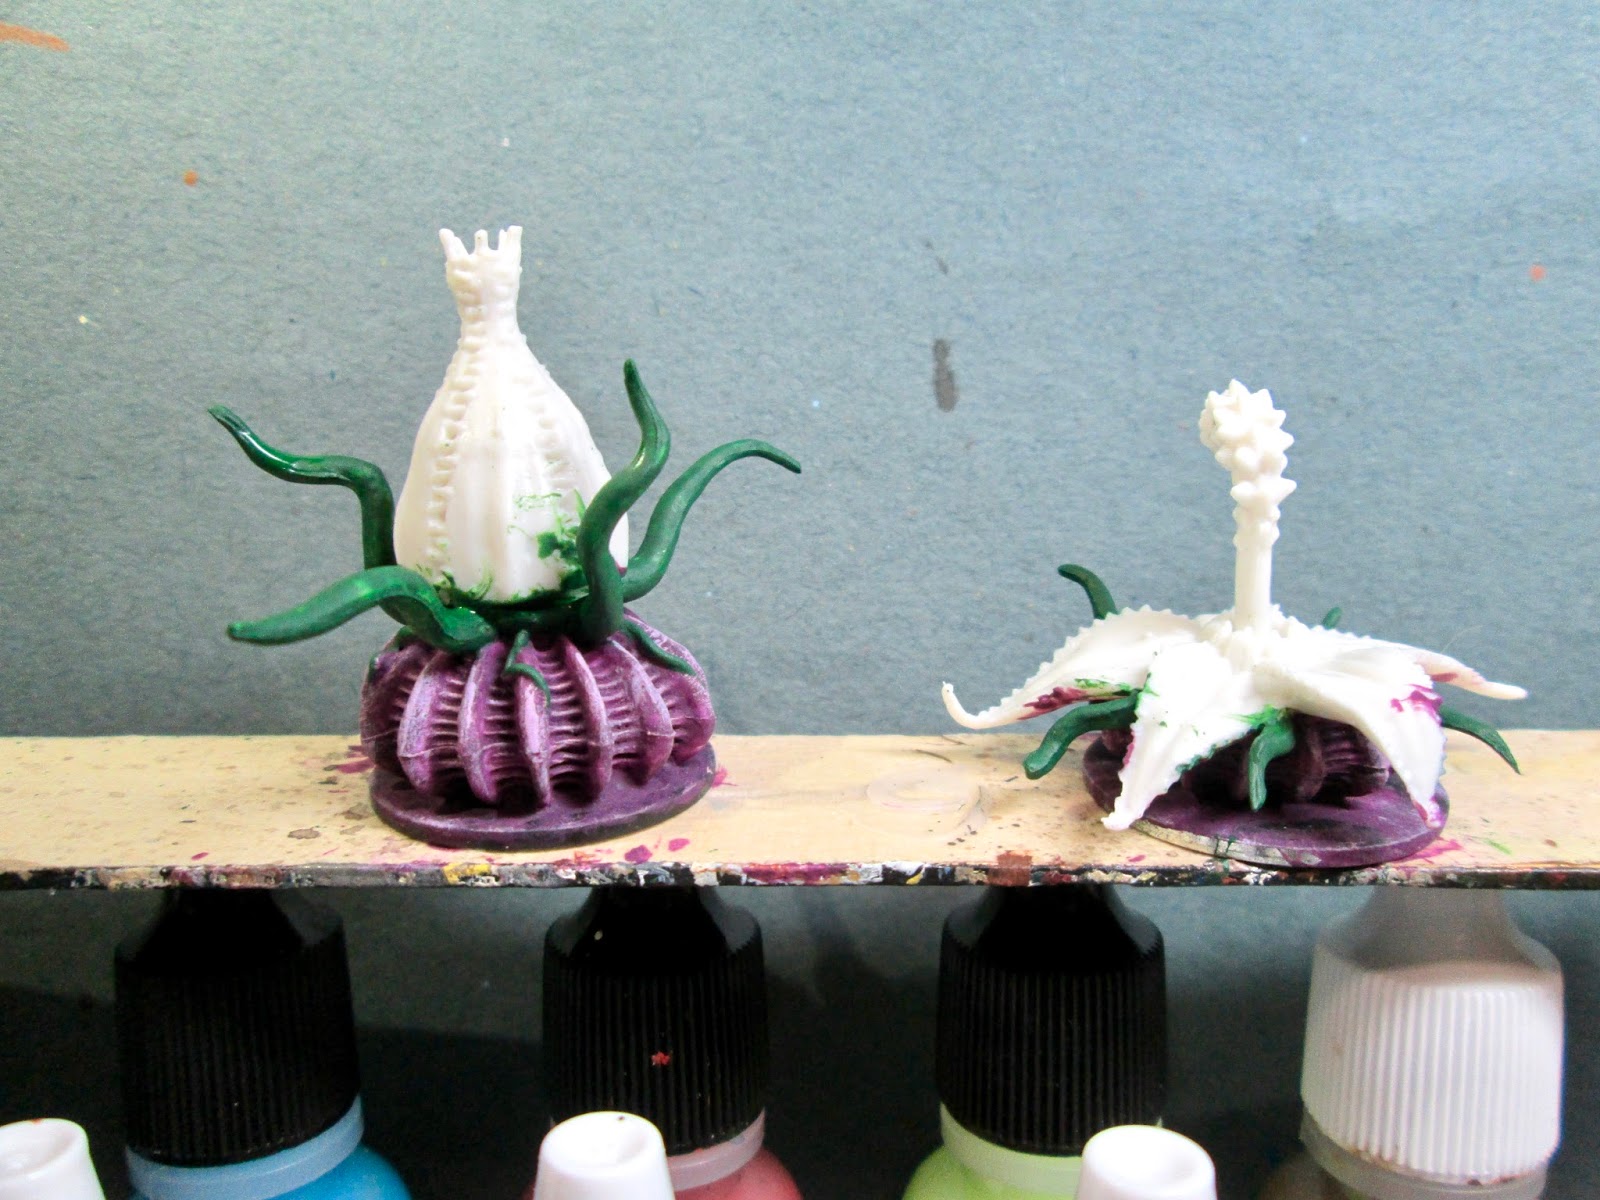
    This past week I began work on my new Bones 3 stuff, and to start painting I chose the pair of Death Star Lilies from the Stoneskull Expansion set: something not too complex, yet colorful, and fun to work on.
     I prepped these figures in the usual way; soaking them in a dish of water with a couple drops of dish-soap added, then giving them a light scrub with a soft toothbrush, and then rinsing and drying them.   I then glued the figures to black-primed 1" fender washers with Aleene's Tacky glue, and then glued the washer-mounted figures to a tongue depressor with a couple drops of the Elmer's glue under each washer.
     I began by painting the bottom potions of the plants with Crafter's Acrylic "African Violet".  When dry, I drybrushed the ridges and spines with Apple Barrel "Apple Lavender".  I then painted all the tentacles with Reaper MSP "Christmas Wreath".
     Next, I painted the petals, (the outside of the petals specifically on the opened lily), with Crafter's Acrylic "Daffodil Yellow".  I then painted the edges of the petals with Reaper MSP "Holly Berry".  After the "Holly Berry" had a while to dry, I ran some Citadel "Agrax Earthshade" wash down the seams between the petals on the closed lily.    When the wash was dry, I highlighted the petals with Apple Barrel "Lemon Chiffon", and some plain "White".  I then used the White to paint all the little teeth running down the edges of the petals.  After that, I highlighted the tentacles with Crafter's Acrylic "Wild Green".
     I then worked on finishing the open lily.  I begn by painting the inside of the petals with Americana "Margarita".  After that, I fixed up the petal edges with the "Holly Berry", and also used this color to paint the central circle of the plant, and the pistil.  While the "Holly Berry" was still wet, I blended it with Crafter's Acrylic "Tutti Frutti" to paint the end of the pistil.
     I let everything dry for awhile, and then once again, I ran some "Agrax Earthshade" wash down the edges of the petals, and also applied some to the central circle where the bases of the petals met.    When this wash was dry, I highlighted the central circle at the base of the pistil with some Crafter's Acrylic "Pure Pumpkin", and the bumps on the pistil with some Crafter's Acrylic "Cherry Blossom Pink" I then highlighted the inside of the open petals with some of the "Margarita" mixed with some White.  I then painted all the little teeth along the edges of the petals with White.
    Lastly, I painted the washers with some Ceramcoat "Walnut".
    I let the figures dry overnight and the next morning I gave them a coat of Americana "DuraClear Matte" varnish. When that was dry, I flocked their bases. Another overnight dry, and I sprayed them with Testor's Dullcote".

     I'm quite pleased with how these plants came out.  I think they have the right blend of joyous color and sinister intent.