The Reaper BONES 6 Kickstarter went live today. So far, I'm in for the Core Set amount. The reality is that I have almost all of Bones 5, and most of Bones 4, still unpainted, so my intent is to go easy on this one. Fingers crossed I pass all my Will roles. :)
My Efforts to Paint the Miniatures From the 1st, 2nd, 3rd, and 4th BONES Kickstarters!
Showing posts with label Bones. Show all posts
Thursday, March 31, 2022
Monday, July 5, 2021
BONES 5 Arrives!
I am happy to announce that last week my Bones 5 Kickstarter order arrived from Reaper! Below are some pictures of the haul and a few things I initially looked at. Due to company visiting over a long Fourth of July weekend, I didn't have a lot of time to paw through everything, so hopefully more photos next week.
![]() |
| My haul of the Core and Expansions. Also shown, Sophie's Lucky Dice set. |
![]() |
| My mound of baggie wrapped Add-Ons and Extra Sets. Figure included for scale. |
![]() |
| The Core Set's "Gem Dragon". The base is actually hollow, so crafty folks can attempt to electrify it if they want. |
![]() |
| The terrain from the Mandupar Pass Encounter. This is a beautiful big hunk of plastic. I was amazed at how dynamic and detailed the monkey face above the cave was. |
![]() |
| The back of the Mandupar Pass cave entrance. I really appreciated Reaper making the effort to add detail to the back, making it to a playable area as well. |
![]() |
| The other half of theTownsfolk set. |
![]() |
| The Henchmen set. Lots of character in these guys! |
![]() |
| The Dwarf King's Crypt. This is another beautiful set with the figures oozing character. My one disappointment is the blue they used for the Dwarf King's ghost. I wish they had just left it clear. |
That's all I have time for now. I will do more next week, so if there's anything you want to see, please let me know in the comments. Last week I posted a list of all the sets I ordered at the bottom of my painting article.
Monday, March 15, 2021
Dire Bear and Cave Bear: Bones Figures
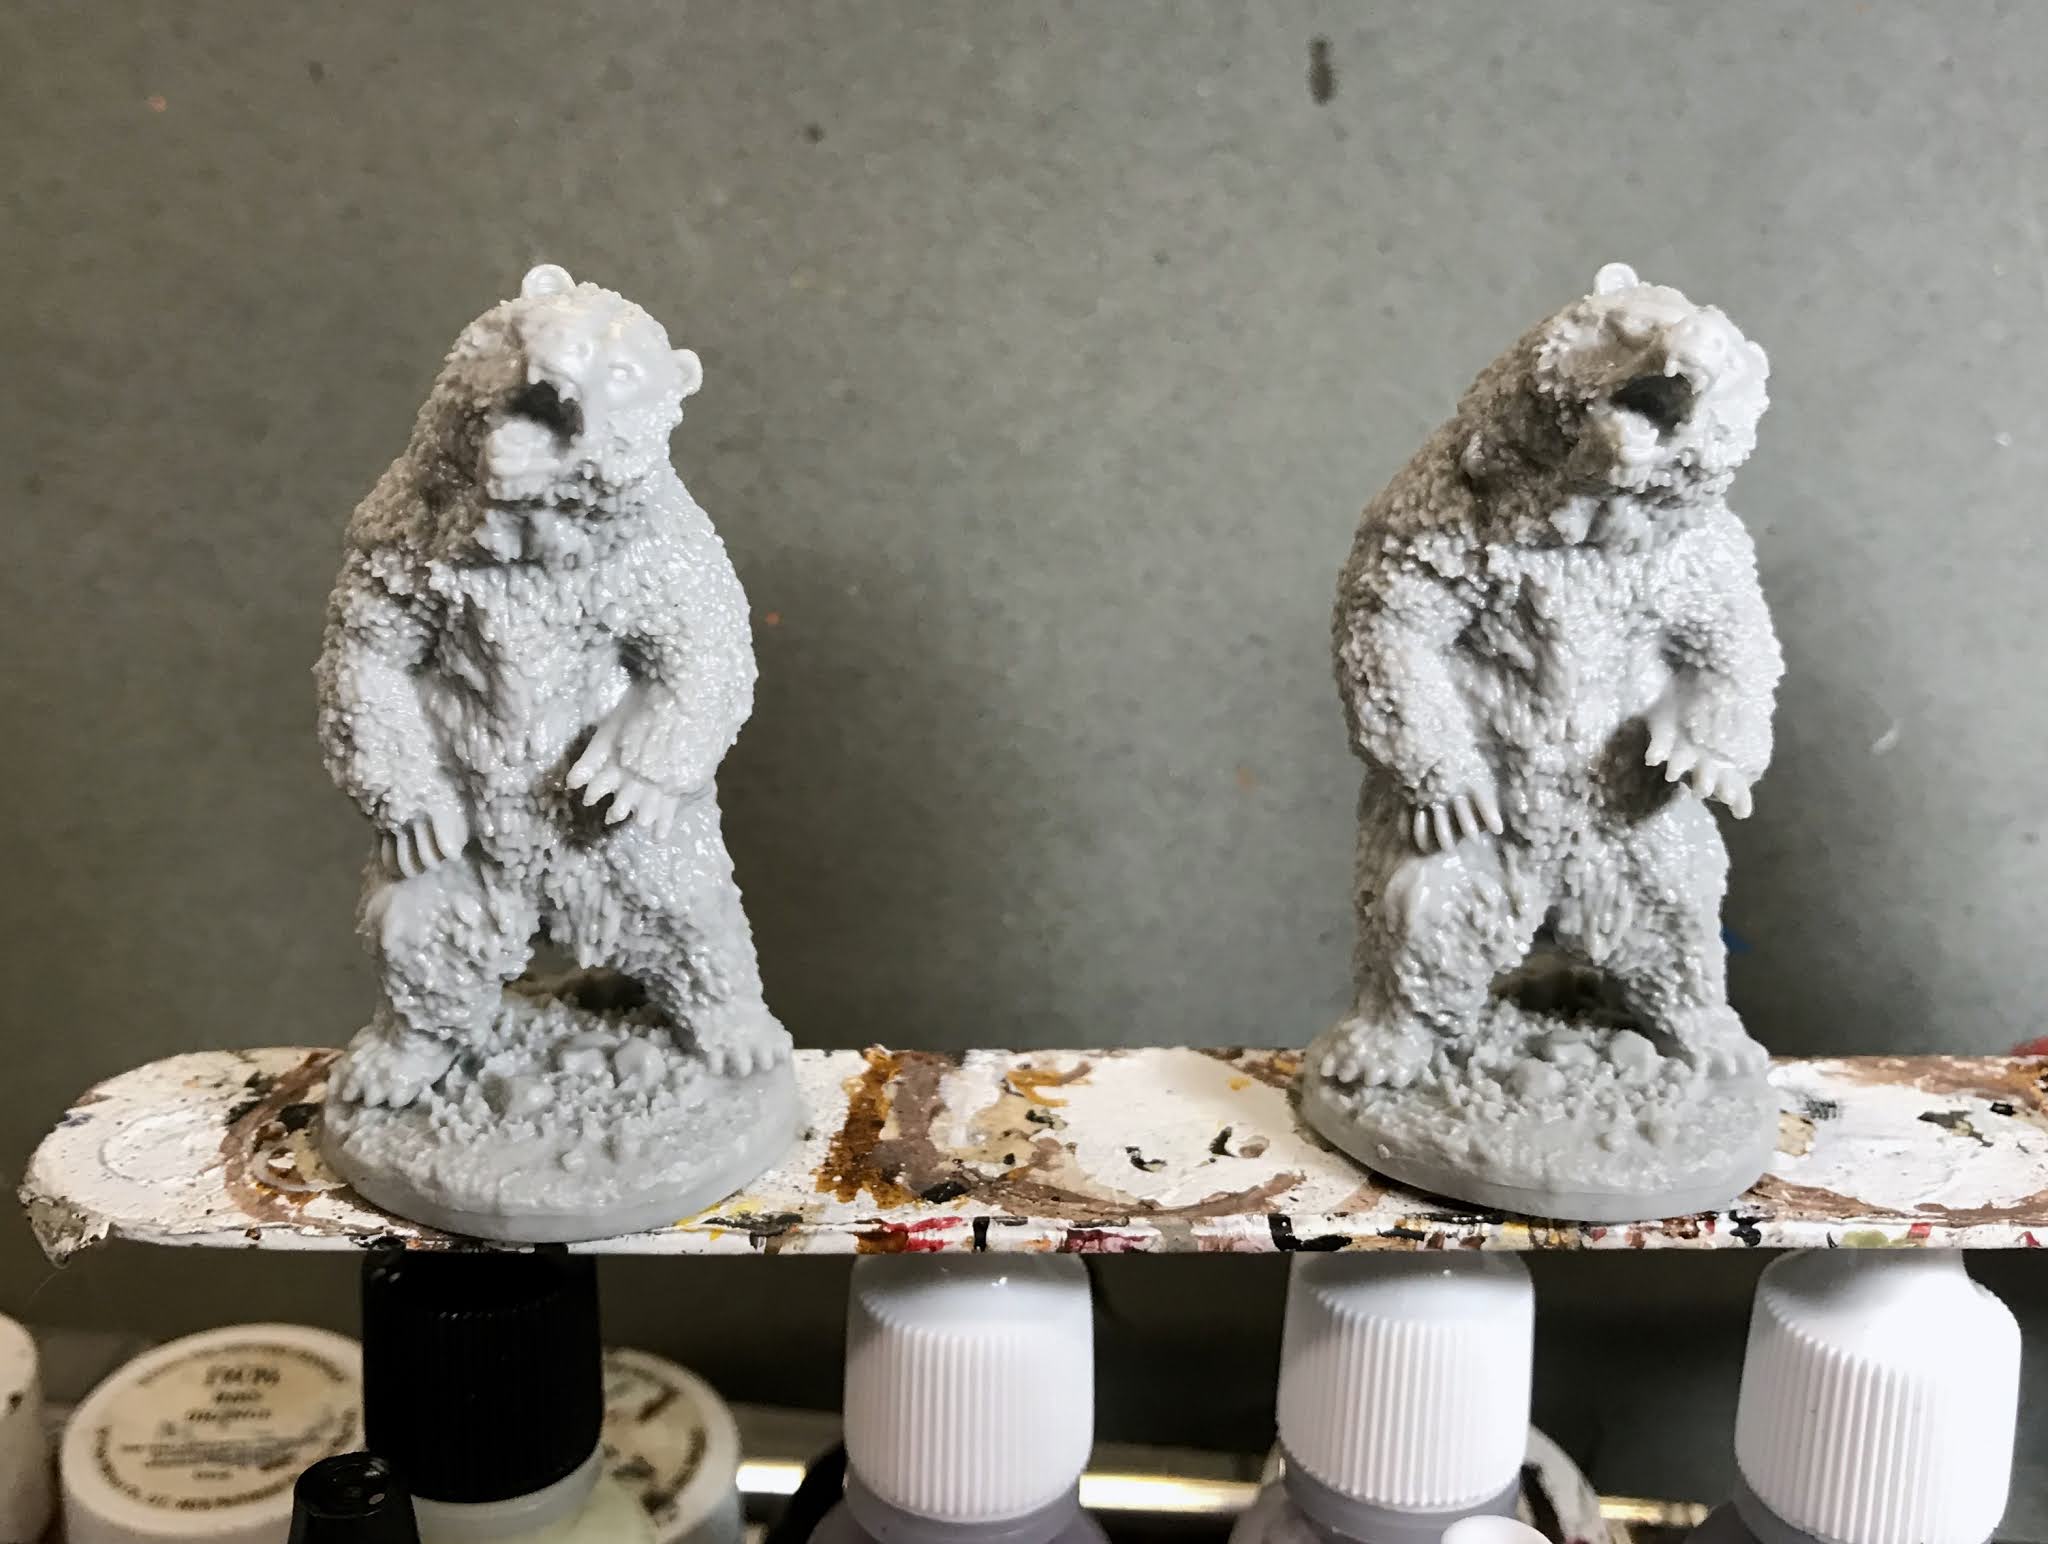
This past week I worked on the three remaining bear figures for the unit of War Bears that I began the previous week when I painted the Reaper Bones Werebear and a Cave Bear. I painted two Dire Bears and another Cave Bear this time, to complete the 5-figure unit.
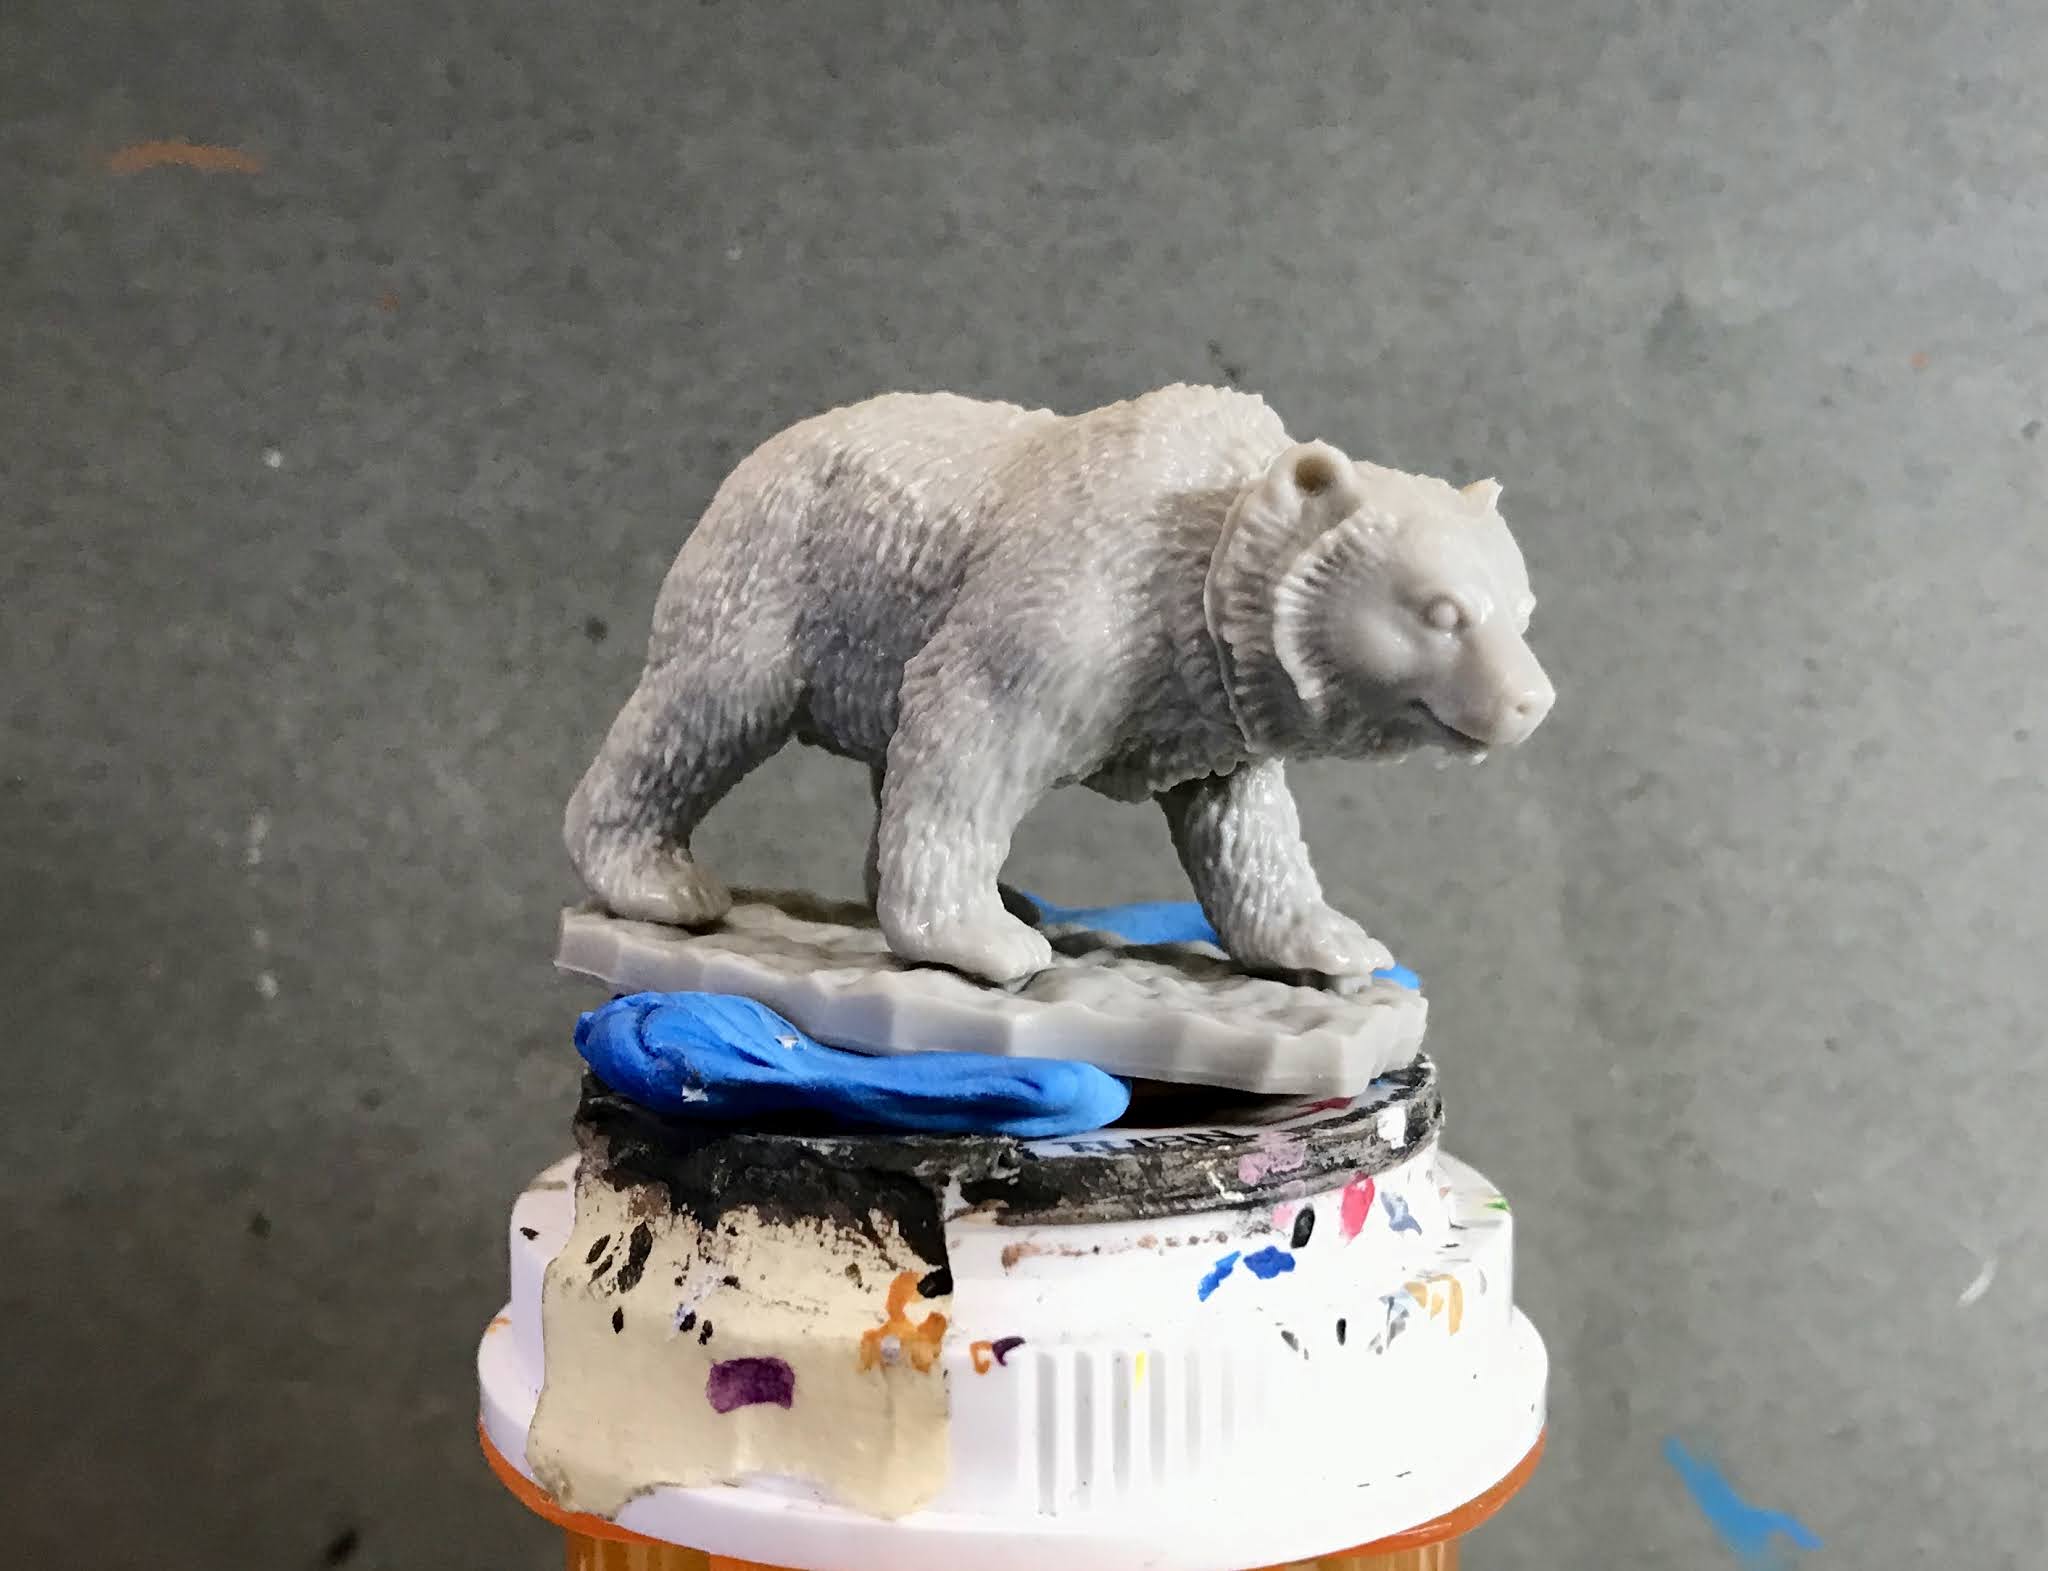
I prepped the figures in the usual way, soaking them in a dish of water with a couple drops of dish-soap added, then giving them a light scrub with a soft toothbrush, and then rinsing and drying them. I then glued the two Dire Bears to a tongue depressor with a couple drops of Elmers glue, and used some blue-tac to attach the Cave Bear to a pill bottle.
I basically followed the paint scheme I had established last time, beginning by painting the bears entirely with Ceramcoat "Territorial Beige". I then immediately painted the forearms and lower legs with Americana "Charcoal Grey", blending it in with the still-wet "Territorial Beige". After that, I painted the insides of the Dire Bears' mouths with Americana "Shading FLesh".
Next, I painted the Dire Bears' teeth with Americana "Antique White". I let everything dry, and then I gave all three bears a complete coat of Citadel "Agrax Earthshade" wash.
When the wash was dry, I drybrushed the dark areas of fur with Folk Art "Teddy Bear Brown". I then drybrushed the rest of the fur with first, Reaper MSP "Ginger Cookie", and then a little Americana "Bleached Sand". I highlighted the tongues with a little Crafter's Acrylic "Cherry Blossom", and then highlighted the teeth with some of the "Bleached Sand". I then painted the noses and eyes with Ceramcoat :Black, and then gave the eyes highlight dots with Americana "Snow White". After that, I highlighted the noses with some Americana "Grey Sky". Lastly, I painted the figure's base with the "Mississippi Mud".
I let the figures dry overnight and the next day I gave them a coat of Americana "DuraClear Matte" varnish. I then glued each figure to a brown-primed 2"x2" steel base and when dry, used some white glue to flock the base. I let them dry overnight, and sprayed them with Testor's "Dullcote"the next day.
![]() |
| The whole unit. |
Monday, March 8, 2021
Wearbear: Bones 3 Figure & Cave Bear: Bones 4 Lost Valley Figure
This past week I painted the "Werebear" from the Bones 3 Lycanthropes set, and the "Cave Bear" from he Bones 4 Lost Valley Expansion. I want to make a unit of War-Bears for a fantasy army I'm building, (See: Arakus Landarzad), and thought a selection of the Reaper bear figures would fit the bill. I chose the Werebear to be the leader of the unit; similar to Beorn, the man who could change into a bear as depicted in the Hobbit. The Cave Bear would just serve as one of the rank and file in the unit. My plan was to mount these with 2 figures on a 2"x2" base.
I prepped the figures in the usual way, soaking them in a dish of water with a couple drops of dish-soap added, then giving them a light scrub with a soft toothbrush, and then rinsing and drying them. I then put the Werebear directly into my painting grip, and used some blue-tac to attach the Cave Bear to a pill bottle.
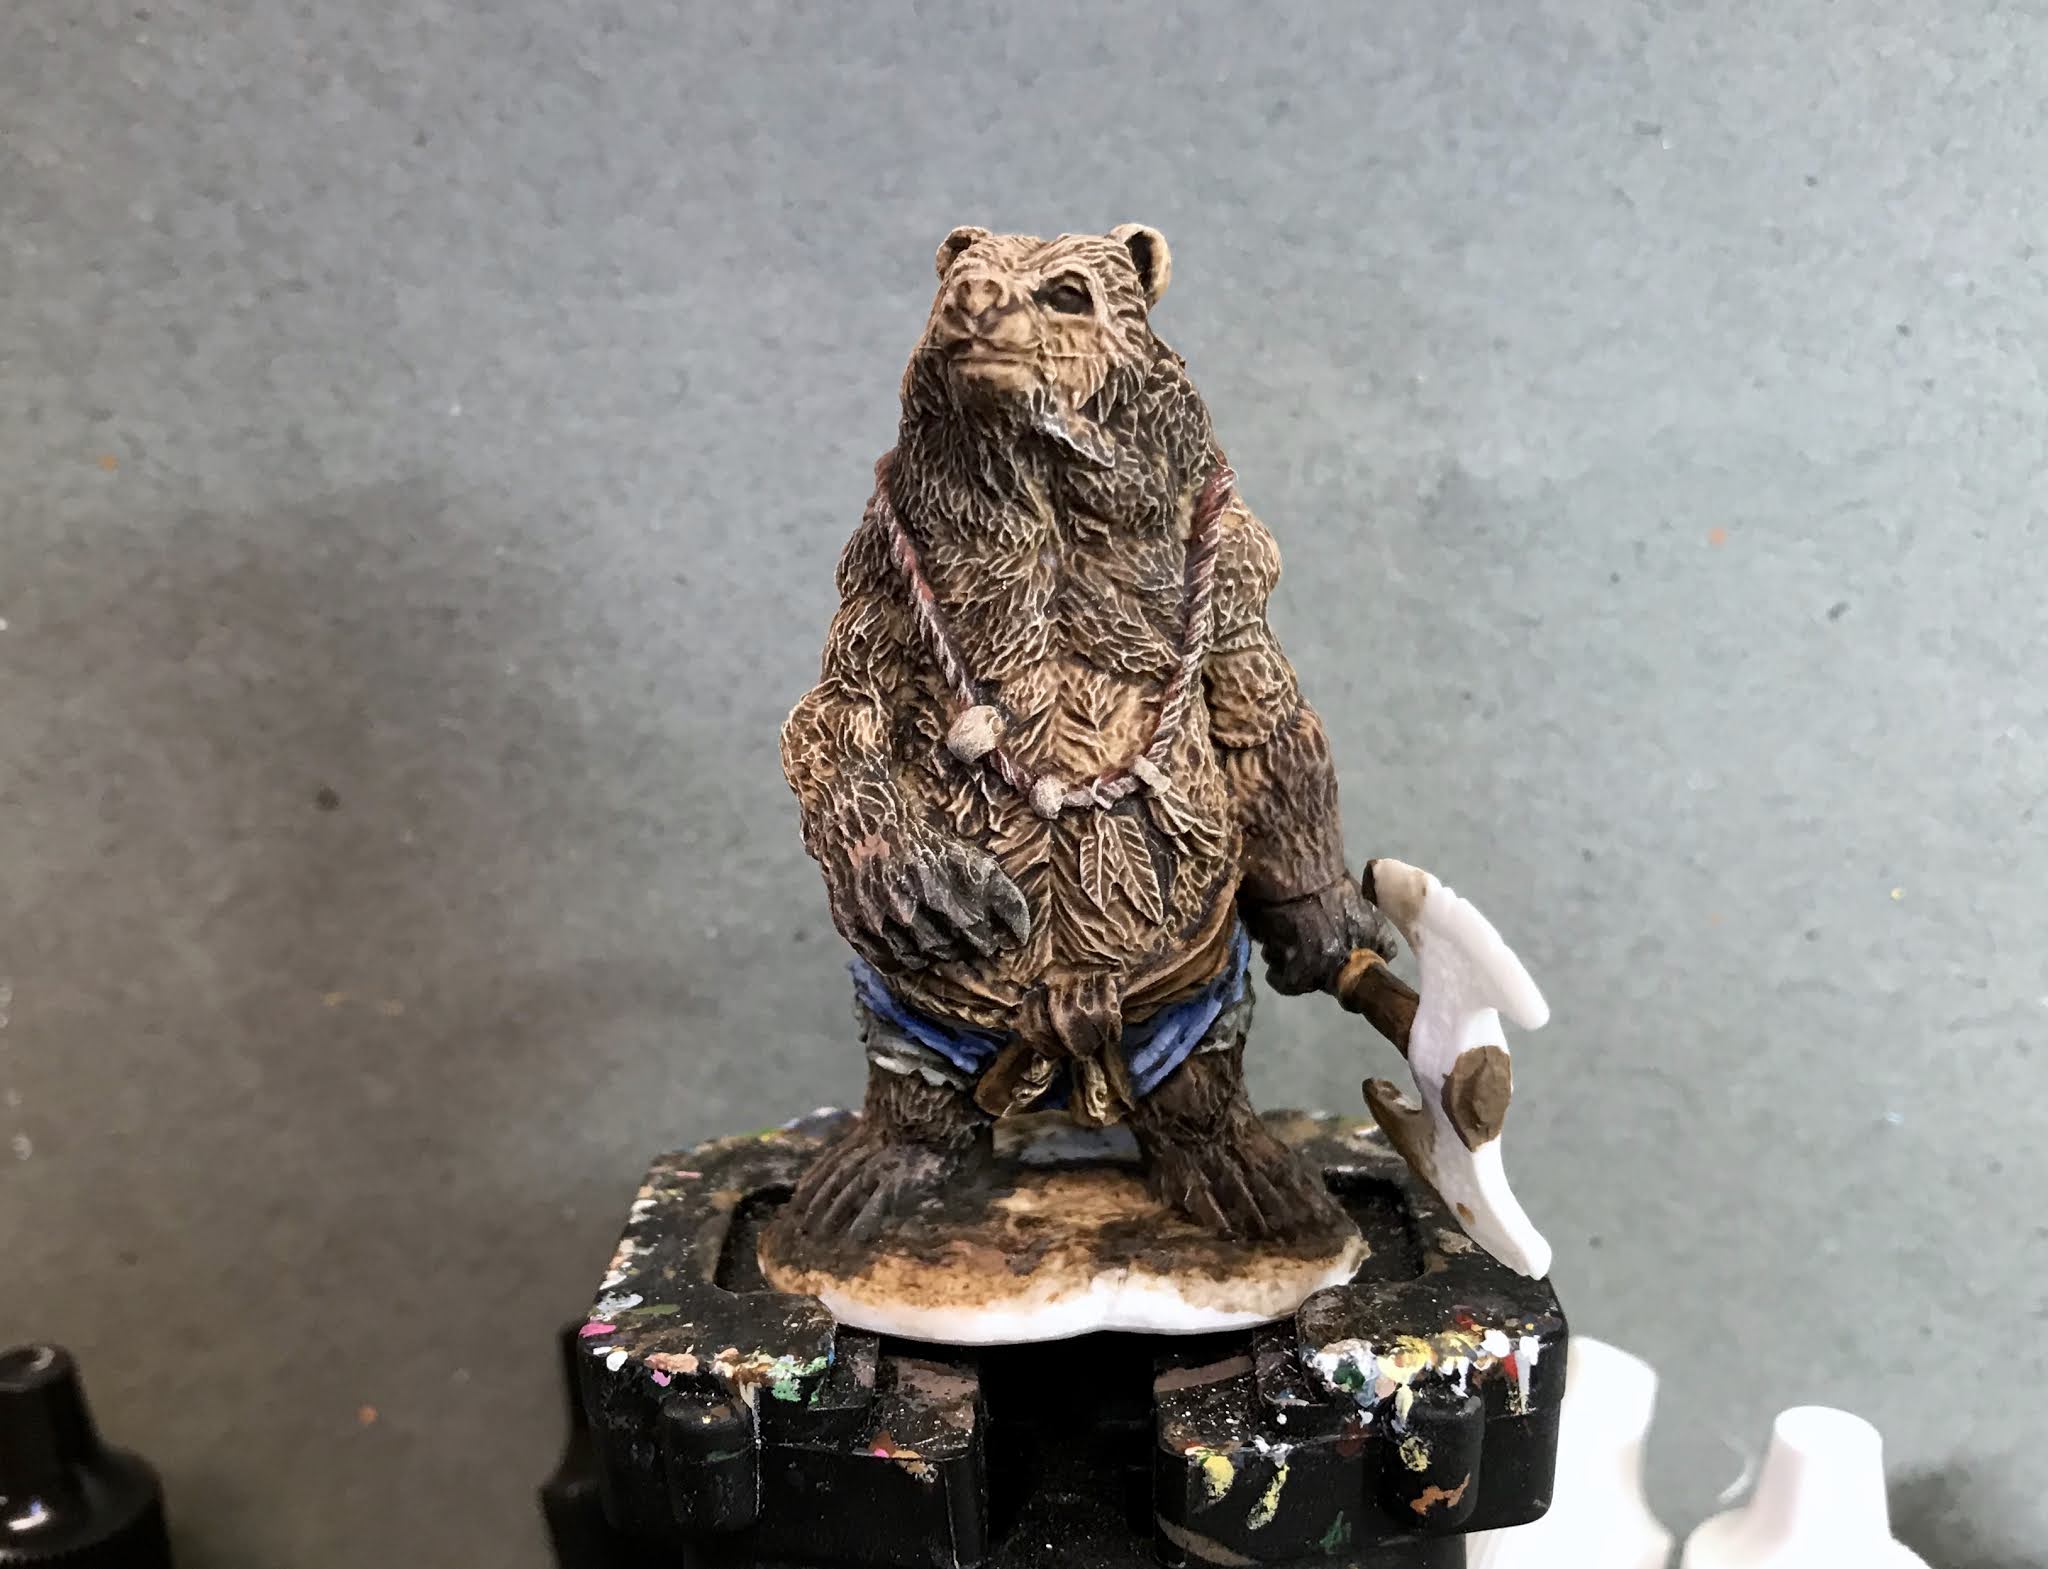
I painted these two figures basically the exact same way, so I will only show the Werebear in the step-by-step photos. I wanted to make them look kind of like grizzly bears, so I googled some images to give myself some inspiration of the coloration.
I began by painting the bears entirely with Ceramcoat "Territorial Beige". I then immediately painted the forearms and lower legs with Americana "Charcoal Grey", blending it in with the still-wet "Territorial Beige". I then painted the claws with Americana "Dark Chocolate". After that, I painted his under-shorts with Folk Art "Dapple Gray", his over-shorts with Ceramcoat "Denim Blue", and his sash with accent "Mustard Seed".
Next, I painted his rope belt with Americana "Buttermilk", and his rope necklace with Reaper MSP "Auburn Shadow". Aftr that, I painted the axe handle with Reaper MSP "Shield Brown", and the wrap on the axe handle with Reaper MSP "Hallowed Orange". I let the figures dry for a while, and then gave them both a complete coat of Citadel "Agrax Earthshade" wash.
When the wash was dry, I drybrushed the dark areas of fur with Folk Art "Teddy Bear Brown". I then drybrushed the rest of the fur with first, Reaper MSP "Ginger Cookie", and then a little Americana "Bleached Sand". Next, I highlighted the under-shorts with a mix of the base "Dapple Gray", and some Folk Art "Gray Green". After that, I highlighted the over-shorts with a mix of the base "Denim Blue' with some Apple Barrel "Apple Scotch Blue".
I then highlighted the sash with Americana "Antique Gold", and a little Crafter's Acrylic "Daffodil Yellow". Next, I painted one feather on his necklace with Ceramcoat "Black" and the other with Americana "Grey Sky". After that, I painted one of the beads with Reaper MSP "Ultramarine Blue", the other with Pathfinder MSP Urgathea Red", and the fringe decoration with Apple Barrel "Burnt Sienna".
Next, I highlighted the axe handle with Folk Art "Barn Wood", and the wrap on the axe handle with Reaper MSP "Bronzed Highlight". I then painted the axe head with Americana "Zinc" and highlighted the belt with Folk Art "Butter Pecan". I followed that with touching up the necklace cord with the "Auburn Shadow" where the fur drybrushing had gotten on it, and afterwards highlighted it with Americana "Shading Flesh". After that, I highlighted the blue bead with Reaper MSP Bones "Tropical Blue", and the red bead with Reaper MSP "Blood Red". I then highlighted the black feather with some of the "Apple Scotch Blue", the white feather with Ceramcoat "Snow White", and the tassel with Ceramcoat "Maple Sugar Tan".
I then painted the nose and eyes with the "Black", and gave the nose highlights with the "Grey Sky" and the eyes highlights with the "Snow White". Afterwards, I painted the axe head with Folk Art Metallic "Gunmetal Gray" and then the clasp holding the tassel on the necklace with Folk Art Brushed Metal "Brushed Bronze". I then applied a coat of Citadel "Nuln Oil" wash to the center pattern of the axe head. When dry, I went back and highlighted the axe head with Ceramcoat "Metallic Silver", and the tassel clasp with Folk Art Metallic "Pure Gold". Lastly, I painted the figure's base with the "Mississippi Mud".
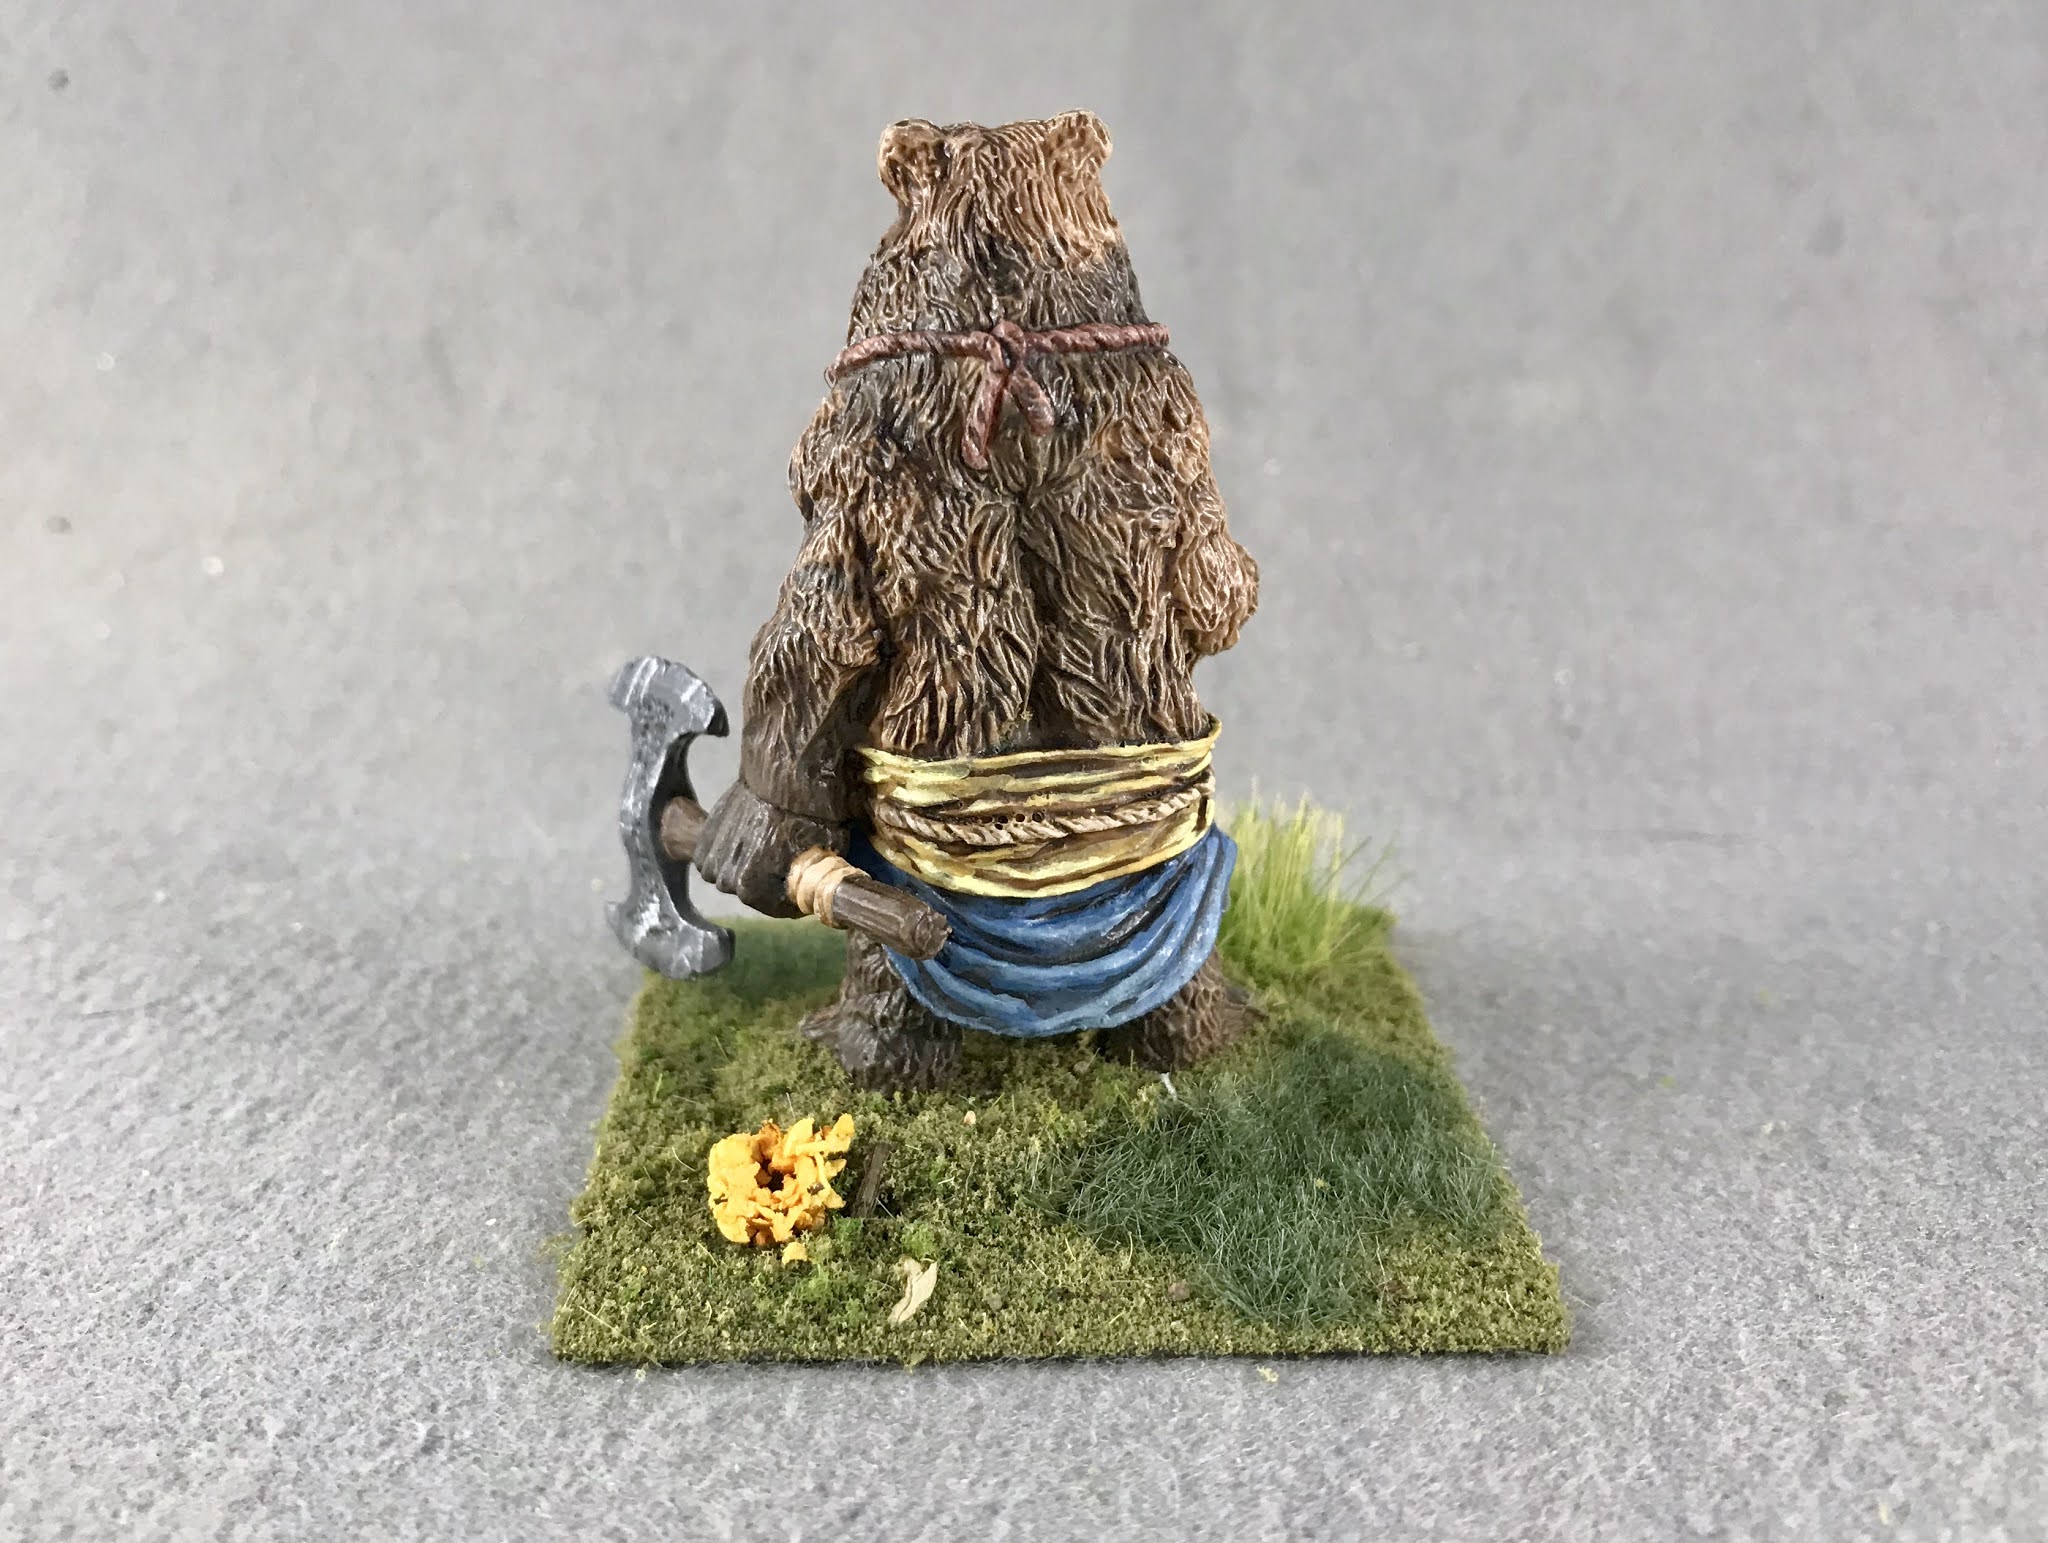
I let the figures dry overnight and the next day I gave them a coat of Americana "DuraClear Matte" varnish. My plan had been to mount these two figures side-by-side on a 2"x2" base, and I had just assumed they would both fit. I had a bit of set back though when I test fitted them, as the figures' bases were too large, and the feet not placed well to even consider trimming the bases down. So I made the decision to change to a 1-figure per base unit, as that seemed to be my only choice.
![]() |
| Ooops! |
I then glued each figure to a brown-primed 2"x2" steel base and when dry, used some white glue to flock the base. I let them dry overnight, and sprayed them with Testor's "Dullcote"the next day.
I'm really happy with how these guys turned out. The fur on both is really sculpted well to take advantage of drybrushing. And in the end, I think they are big enough to not look too lonely mounted individually on their bases. I now have 3 more to paint to complete a unit of 5 bases
Monday, February 8, 2021
Painting Mudcroak Squog Mounted on Giant Rhinocerous Beetle Conversion Bones Figure
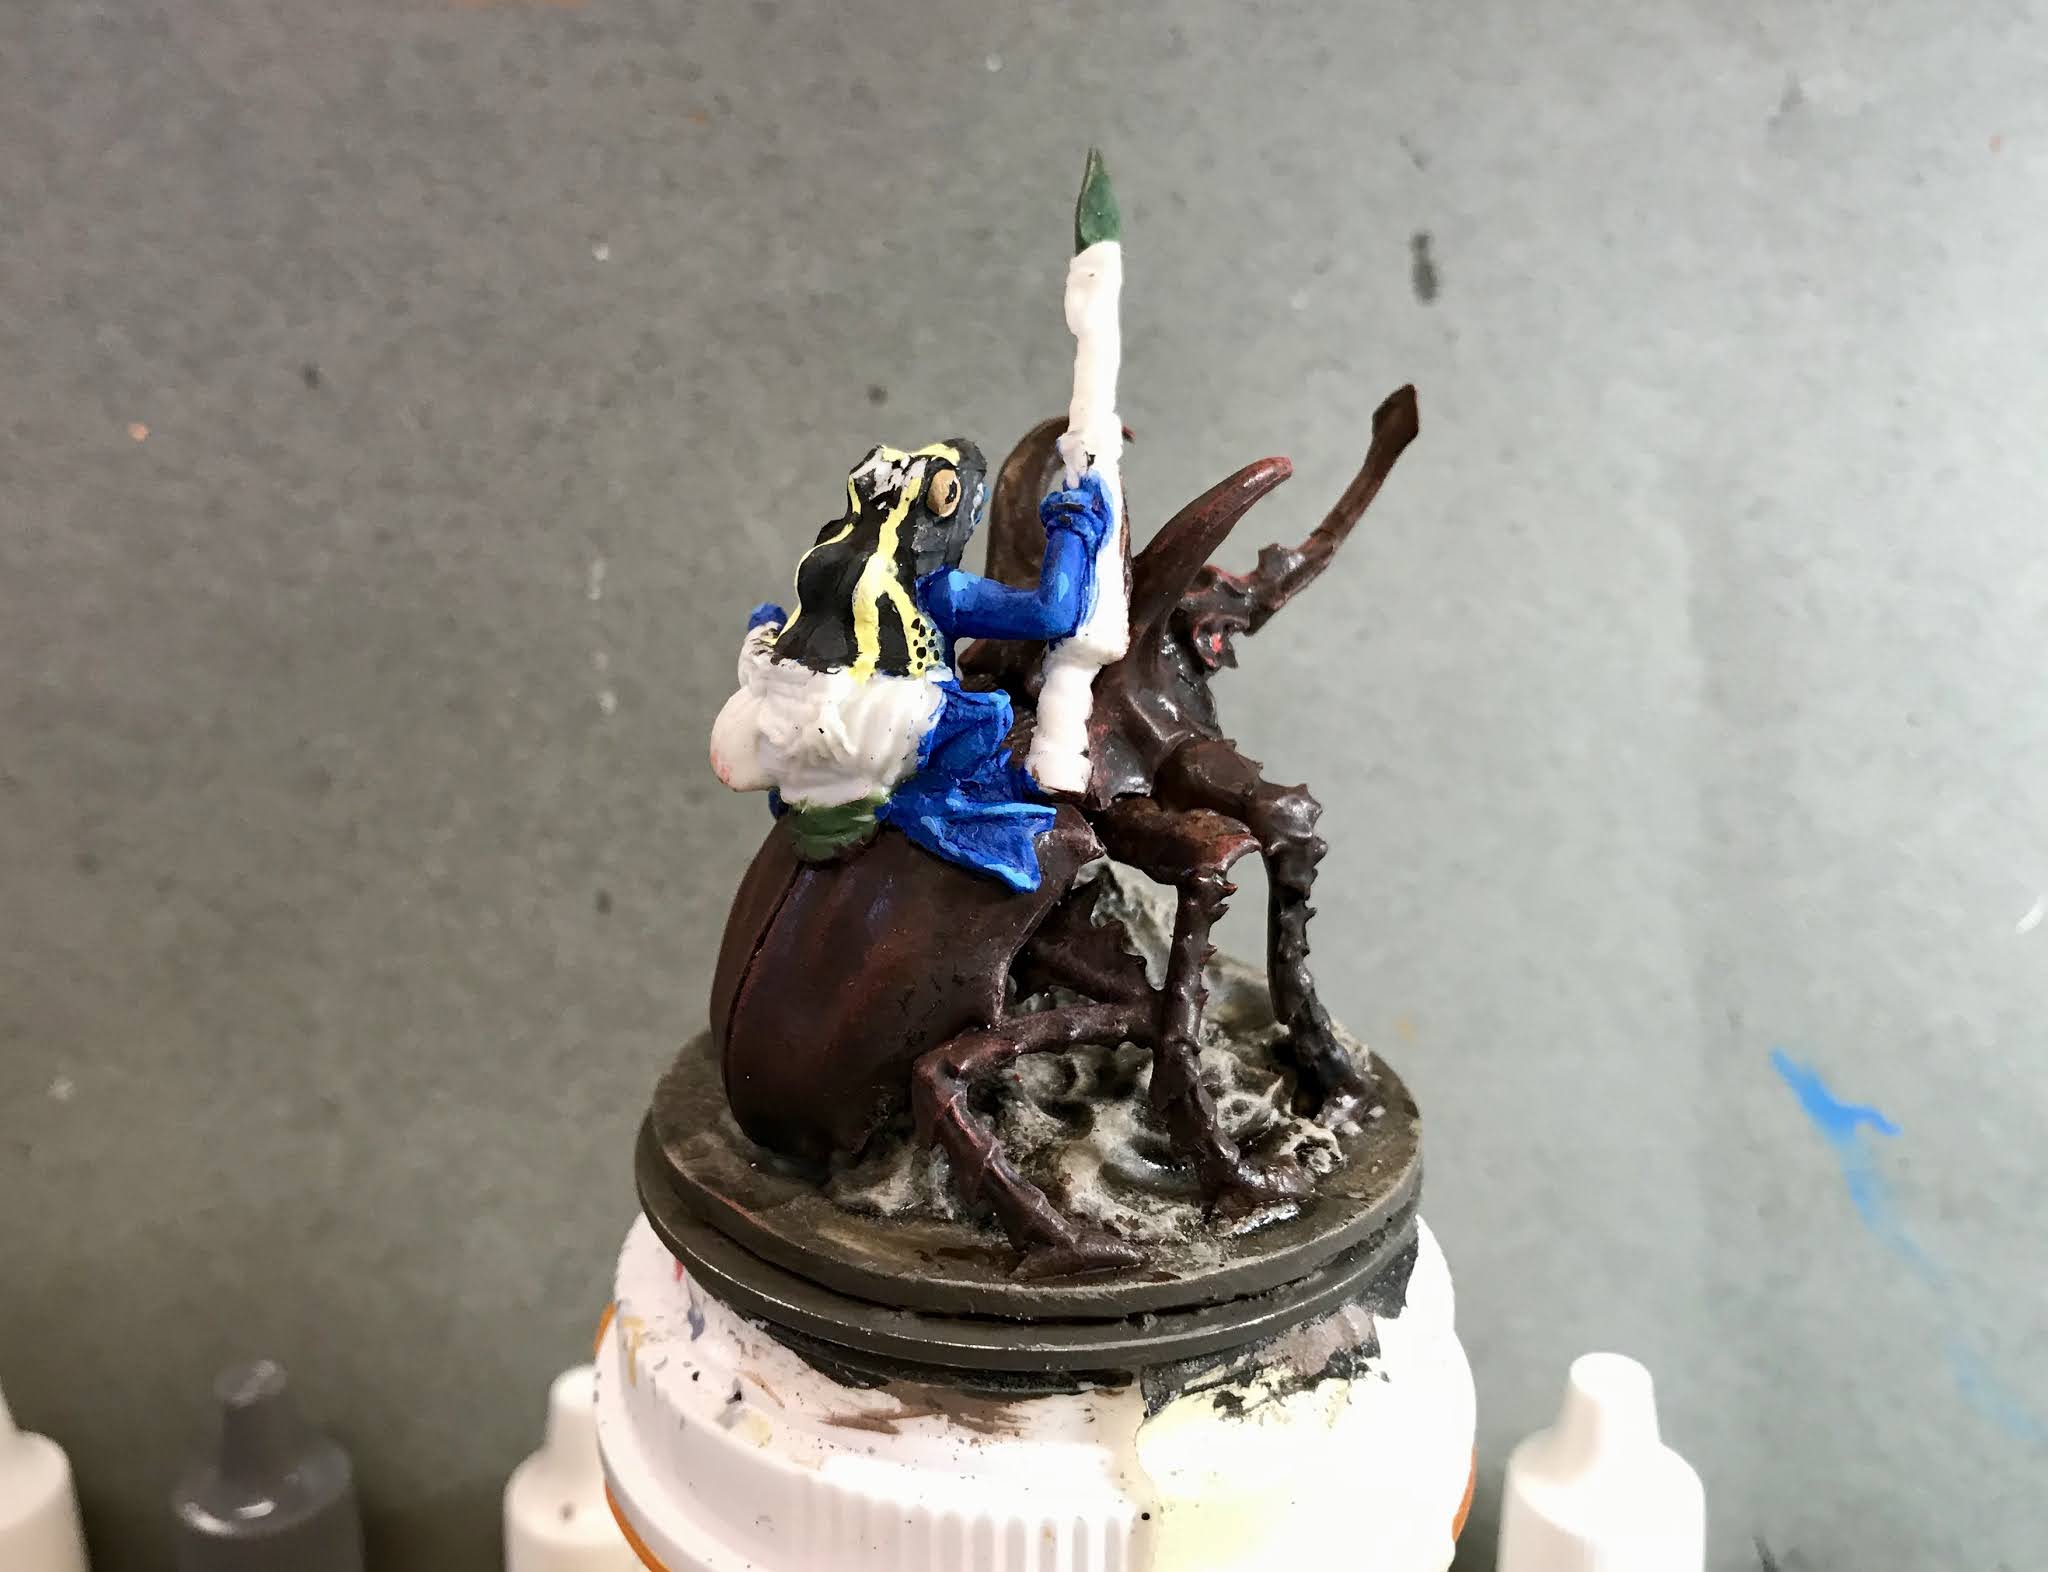
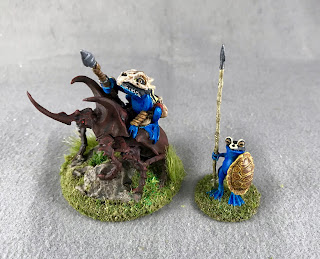
Last week I posted about the conversion figure I made using the "Giant Rhinoceros Beetle" from Bones 4 Fan Favorites Expansion, and a "Mudcroak, Squog" figure. This past week, I set about painting the figure. As I mentioned in that article, I planned to use this figure as a Hero or Leader with my existing Frog Army, made up mostly of Eureka Miniatures' range of Frog Warriors. Most of the units in this army are painted like Dyeing Poison Dart Frogs, and I want to paint this figure that way too.
![]() |
| An actual Dyeing Poison Dart Frog |
![]() |
| A couple examples of my original warrior frog figures, and the paint job I would be attempting to replicate. |
I had glued the figure to a 2" fender washer when I was making it; and now I glued that washer, using a couple drops of Elmer's glue, to the top of a large pill bottle.
Given the way the beetle sat so close to the sculpted terrain of the base, I thought it might be best to paint the base first. So, I gave it a base coat of Americana "Charcoal Grey"; and when that was dry, I gave it a cot of Citadel "Agrax Earthshade" wash. When the wash was dry, I drybrushed the base with, first, Ceramcoat "Territorial Beige", and then with Americana "Fawn".
Next, I worked on the beetle. I gave it a base coat of Accent "Real Umber", and when dry, I gave it a coat of Citadel "Nuln Oil" wash. When the wash was dry, I drybrushed the top of the body and legs with some Folk Art "Tomato Red". After that, I drybrushed the underside with Americana "Neutral Grey". I finished the beetle by painting its eyes with a little Reaper MSP "Holly Berry".
I then began work on the frog. I first painted frog's underside, arms, and legs with Americana "True Blue". When dry, I gave it a coat of slightly thinned Iron Wind Metals "Dark Blue" Ink. When the ink wash was dry, I painted the back of the frog with Ceramcoat "Black.
Next, I highlighted the blue of the frog with a mix of the base "True Blue", and some Crafter's Acrylic "Tropical Blue". Then I highlighted the black back with some Ceramcoat "Charcoal". The next step was to paint on the banding pattern using Crafter's Acrylic "Daffodil Yellow". I realized at that point my job would be a lot easier without the skull helmet in place; and though I had tried to do things the lazy way, I decided the hemet needed to come off. So with a careful pull and twist I was able to separate it from the head. I fixed the blue and black arts of the head, and the yellow banding that goes up on to the head. I then highlighted all the banding with Apple Barrel "Lemon Chiffon". My next step was to do the teeth. I painted them with Ceramcoat "White", and when dry, I gave them a coat of the "Nuln Oil". When the "Nuln Oil" was dry, I highlighted the teeth with Americana "Snow White: After that, I painted the eyes using reaper MSP "Bronzed Skin", gave them pupils with the "Black", and then highlight dots with some "Snow White".
Meanwhile, I also painted the helmet completely with the "White", and when it was dry, I gave it a coat of Citadel Contrast "Skeleton Horde". When that was dry, I drybrushed it with Americana "Bleached Sand", and then a little of the "White"
Satisfied with the head, I scraped a little of the paint off the head as well as the underside of the helmet, and use the Gorilla Super Glue Gel to Glue the finished helmet in place. I then painted his kilt-like garment with Pathfinder MSP "Urgathoa Red", and his spear shaft with Reaper MSP "Shield Brown". Next, I painted the pouch hanging on the back of his kilt with Reaper MSP "Ginger Cookie", the one hanging at his side with Reaper MSP "Bronzed Skin", and the bit of plant hanging from his belt with Reaper MSP Bones "Dungeon Slime". After that, I painted the long tassel hanging from the spear shaft with Reaper MSP HD "Rusty Red": and the wrist wrap on his left forearm, as well as the bracelets on his right arm, the metal fitting on his helmet, and the badges on his spear shaft, with Reaper MSP HD "Golden Brown".
I then painted the base of the spear shaft as well as the spear point with Americana "Zinc", and the frog's rope belt with Americana "Antique White". I also decided that the base coat on the plant hanging from his belt was too light, soI repainted it with Americana "Festive Green". I let everything dry for a while, and then I gave the spear, everything hanging from his belt (belt included), and his wraps and bracelets, a coat of the "Agrax Earthshade" wash.
When the wash was dry, I first highlighted his kilt-like garment with, first, Reaper MSP "Fresh Blood", and then a little Reaper MSP "Holly Berry". I then highlighted the plant sprig with the Dungeon Slime", the pouch on the back with Americana "Khaki Tan", and the pouch on the side with Folk Art "Butter Pecan". I then highlighted the rope belt with Reaper MSP "Graveyard Bone". After that, I highlighted the wrist wrap on his left forearm with a little Reaper MSP "Hallowed Orange"
Next, I highlighted the spear shaft with the "Territorial Beige", and then I turned to the tassel on the spear shaft, which I highlighted with a drybrush of Crafter's Acrylic "Orange Spice", and then a little Americana "Tangerine". After that, I worked on the metallics, painting the star on the helmet, the bracelets, and the badges on the spear shaft with Folk Art Brushed Metal "Brushed Bronze"; and the spearpoint, as well as the end of the spear, with Folk Art Metallic "Gunmetal Gray". When these were dry, I went back and highlighted the "Brushed Bronze" with Folk Art Metallic "Pure Gold", and highlighted the "Gunmetal Gray" with Ceramcoat "Metallic Silver". I let the figure dry overnight and the next day I gave it a coat of Americana "DuraClear Matte" varnish. Then, when the varnish was dry, I used some white glue to flock the base. Another overnight dry, and I sprayed it with Testor's "Dullcote". When the "Dullcote" was dry, I went back and repainted the eyes and and teeth with a little Americana "DuraClear Gloss" varnish.
Monday, February 1, 2021
Mudcroak Squog Mounted on Giant Rhinocerous Beetle Conversion Bones Figure
Back when the Bones 4 Kickstarter was running, when the Giant Rhinoceros Beetle was revealed in the Fan Favorites set, someone posted this photo of a Frog riding a Beetle to the Reaper Forum's "Bones 4 Kickstarter" Thread. I knew immediately then it was a conversion I would eventually want to try. I have an extensive Frog Army, and I wanted such a figure to be a Leader or Hero for my forces. Well, I finally decided last December was the time, as I decided I wanted to make a pair of these; one to give a friend who also has a Frog Army, and one for myself. I completed the gift one last year, and sent that off for Christmas, and the recipient was very pleased with it. It was now time to work on mine.
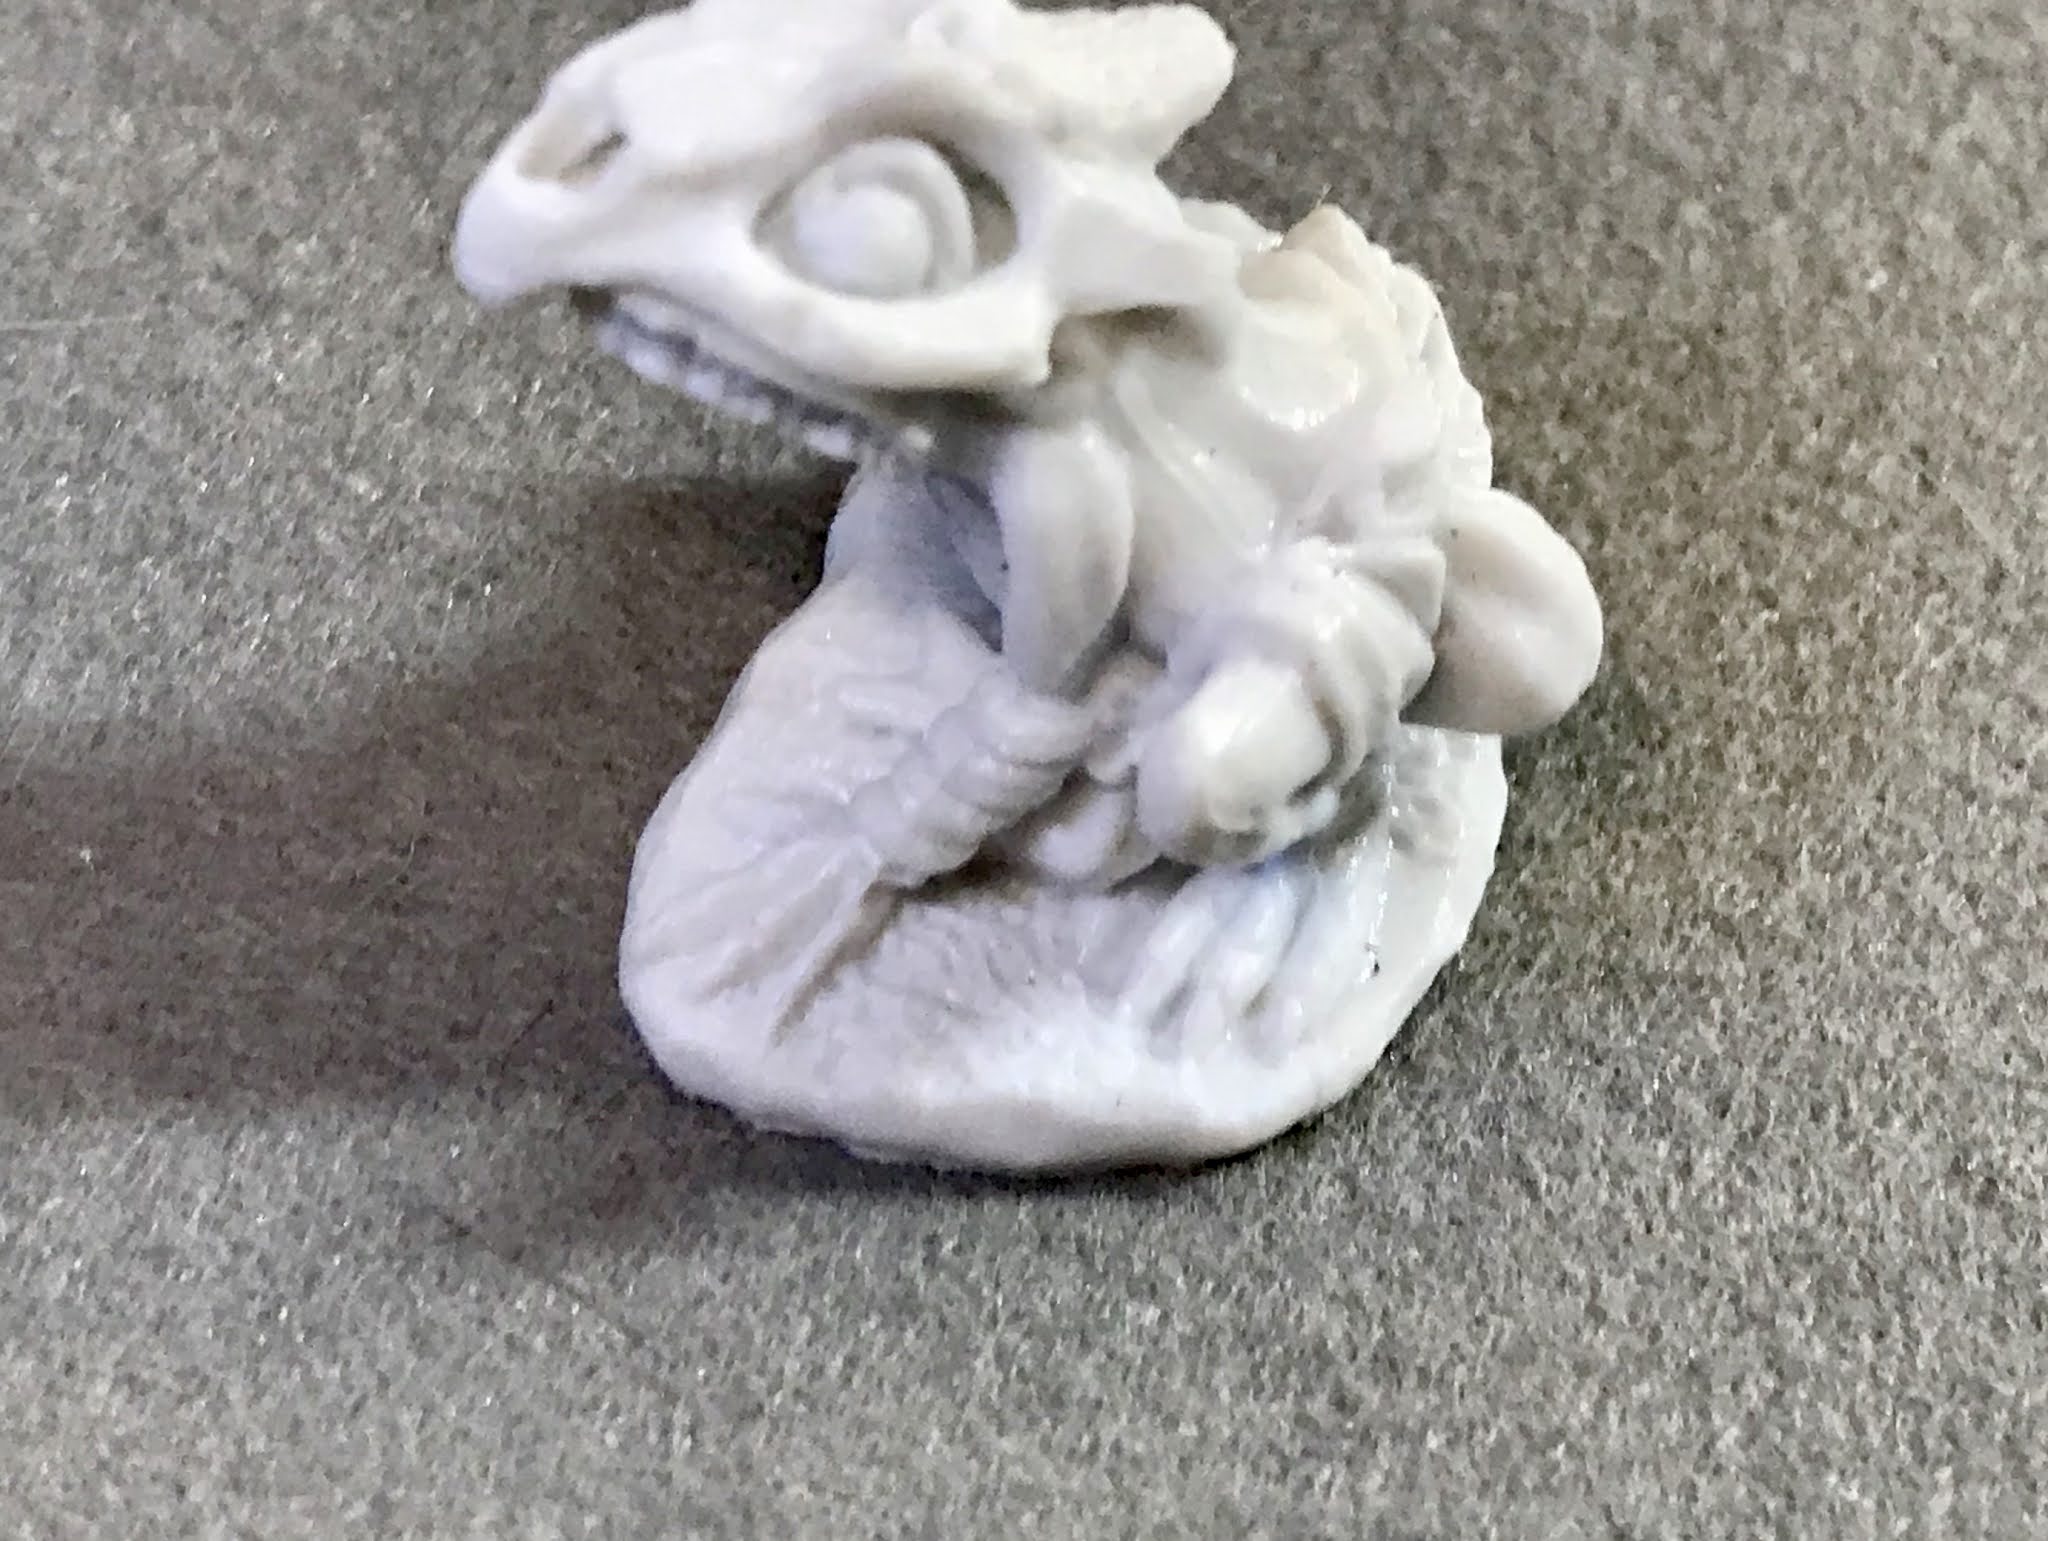
I had the pieces I needed at hand; the Bones Black "Giant Rhinoceros Beetle" from the Kickstarter, and my rider - for which I had decided to use the Bones "Mudcroak" Squog figure.
As I looked at Mudcroak, I knew I would have to separate him from his base, but I also knew there was no way I could remove all his thin feet and little toes from the base without damaging them. I also knew it would be very hard to conform a figure that was sculpted to sit flat, to mount correctly onto the curved back of the beetle. So, right off the bat I made the decision to just remove his feet along with the base, with the plan that I would then resculpt them with greenstuff directly onto the beetle's back once I had the frog glued in place.
Here's a test fit I did, with the frog held in place with blue-tac.
After I removed the base from the frog figure, the next step was to attach him to the back of the beetle. I first drilled small holes into the frog and beetle and inserted a small section of paperclip to act as pin to help hold the two together. You can see in the photo below where I tried to carve the underside of the frog a little to help it conform more to the beetle's curved back. I had to be careful, as I did't want to carve away too much of the frog's body.
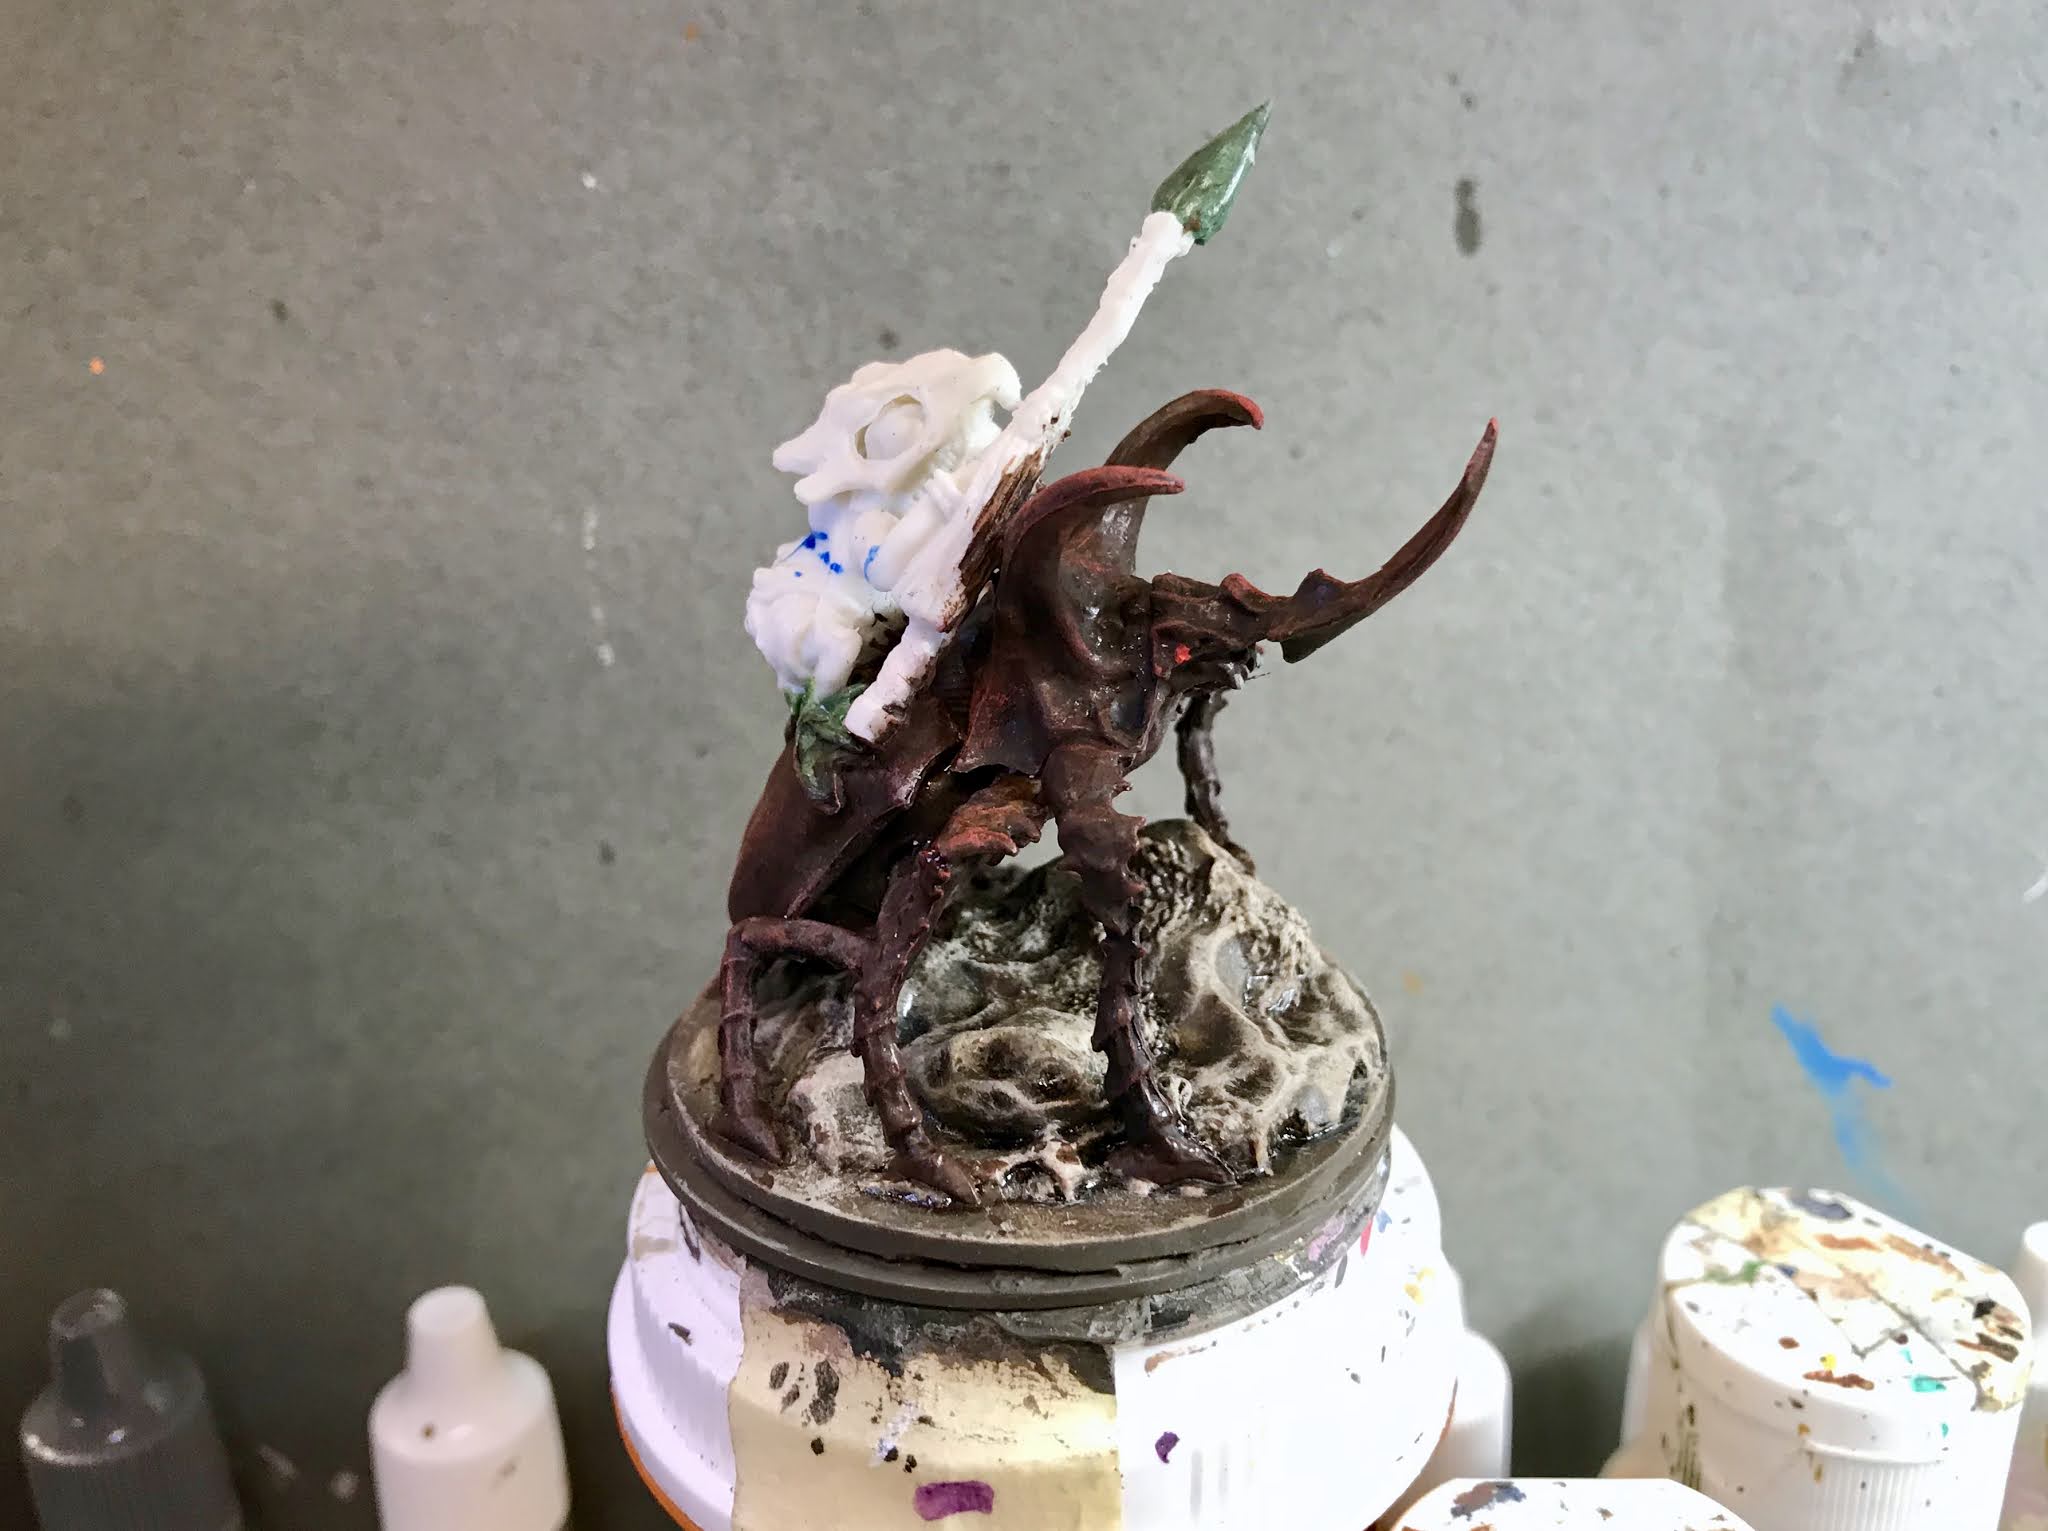
Next, I trimmed down the integral base of the beetle, as I felt it stood too high. I mount my figures on fender washers and use magnetic storage, so really didn't need the extra height that this base had.
I then glued the frog to the beetle's back, and the base to a black-primed 2" washer, using Gorilla Superglue gel for both; and clamped the base while the glue set.
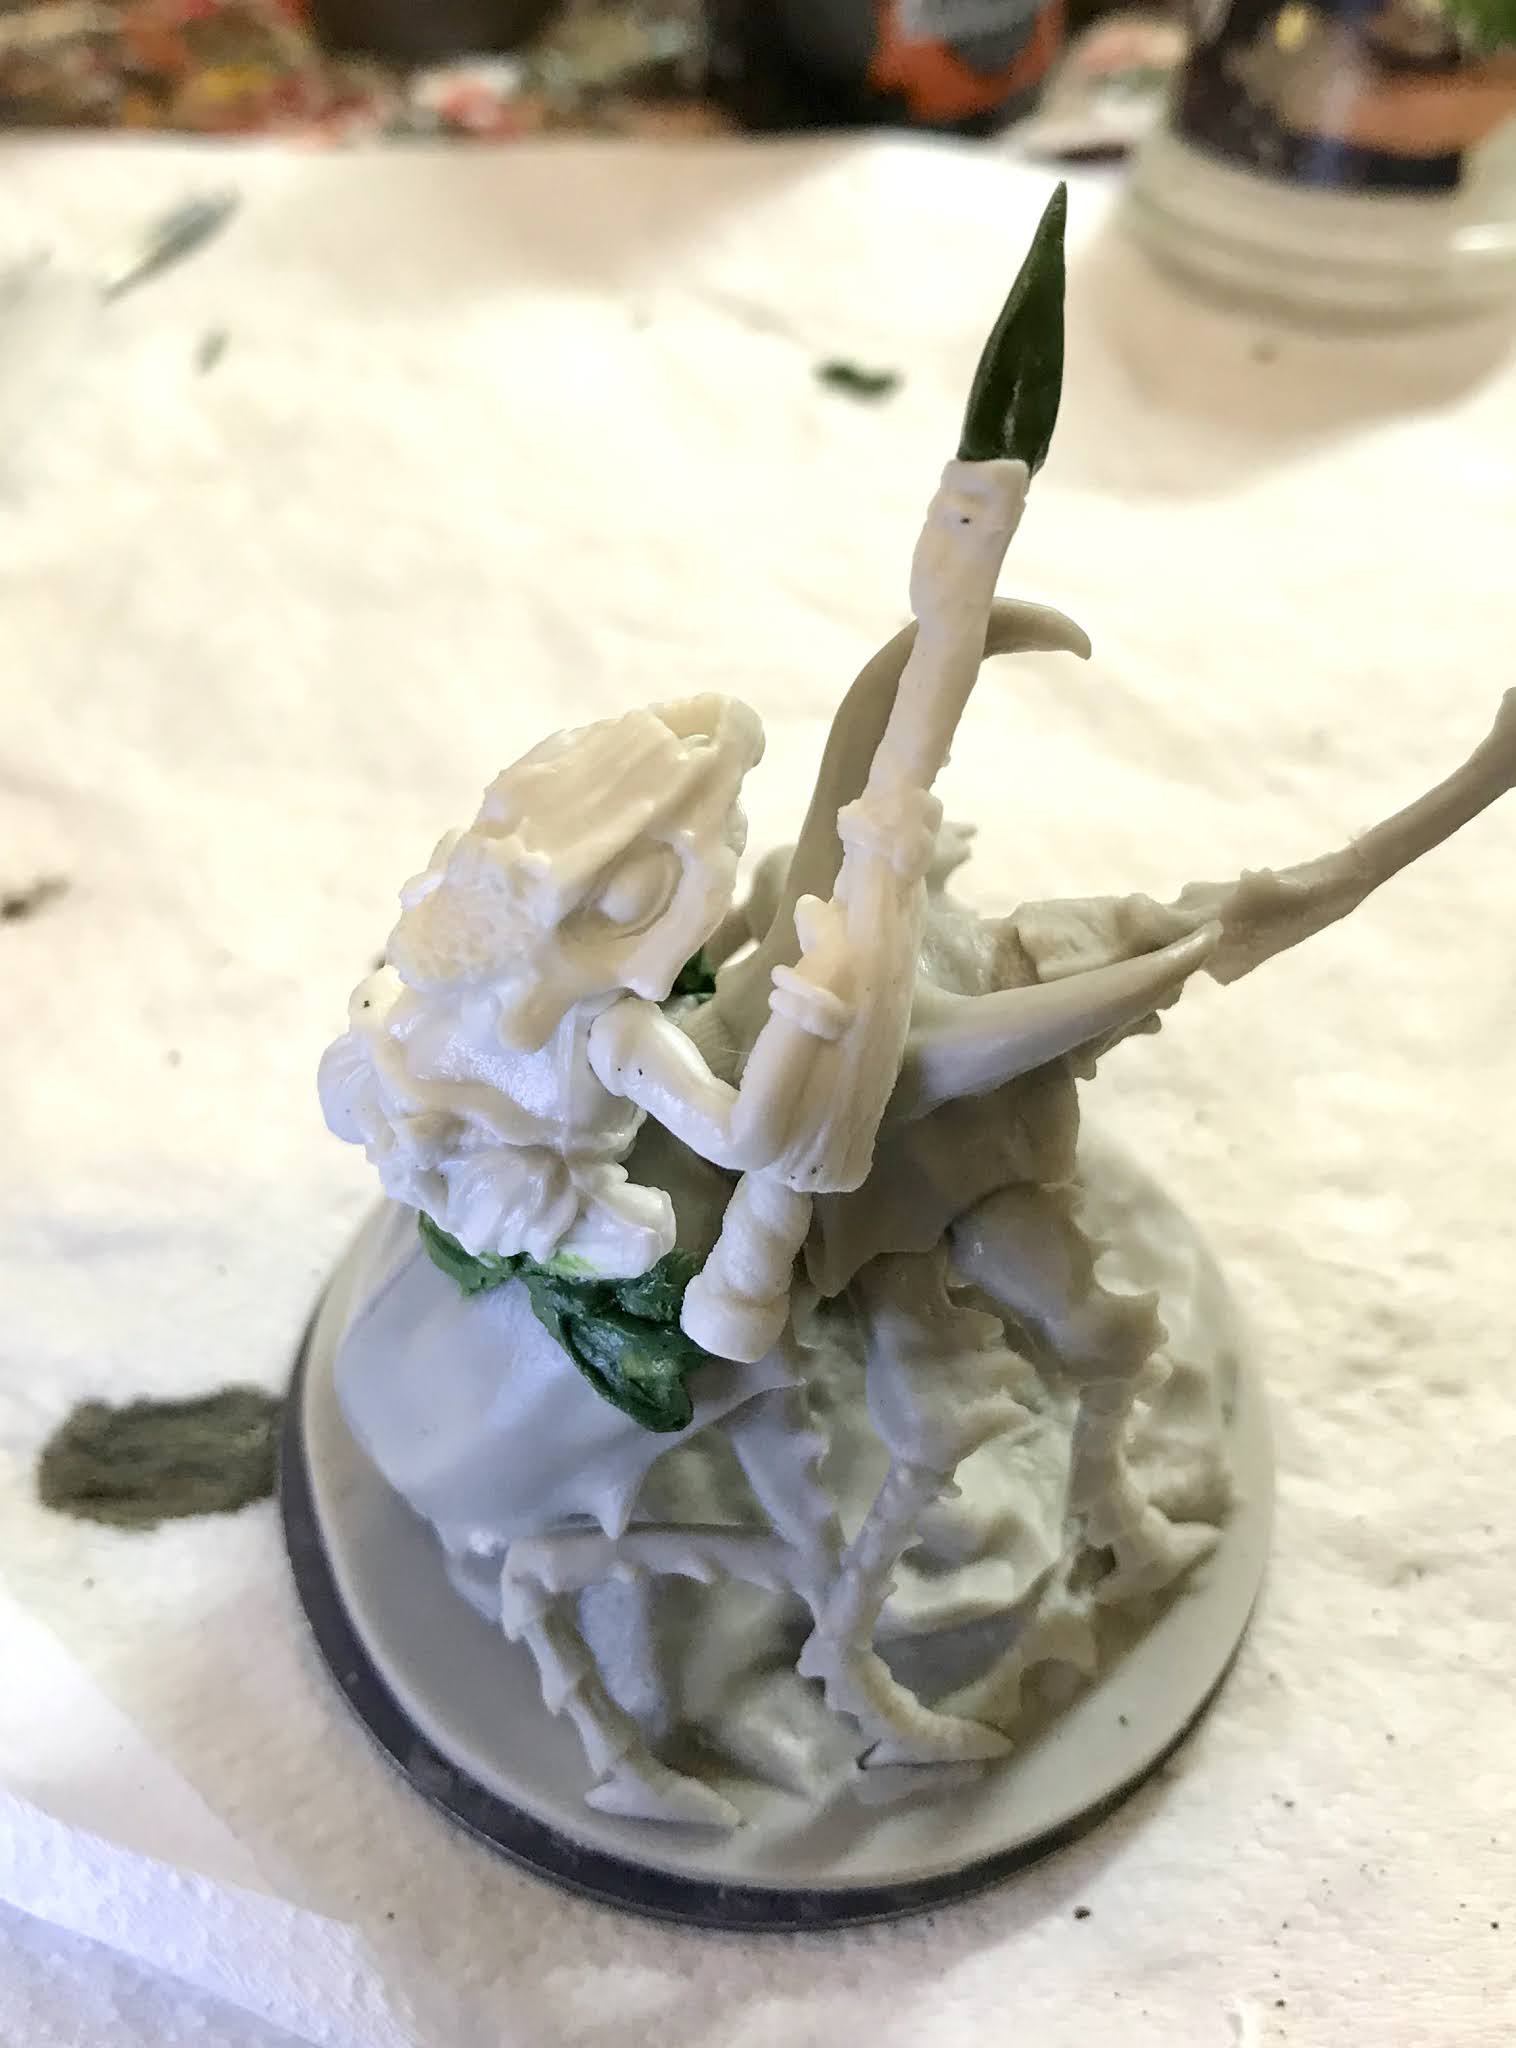
Next, I began the initial greenstuff work on the figure, and added on the base pads of the feet, the left hand which I had had to remove, and I extended the loin cloth in the back. I'm not a sculptor by any means, but felt frog feet were in my ability level.
I then added the toe ridges to the back feet, and did the final connections to connect the feet and hand to their respective limbs. I also gave the spear a bigger point, as the existing one was too small.
At this point, I think it's ready to paint. So tune in next week to see the finished product!
Subscribe to:
Posts (Atom)