 |
| The one on the left is the one I used. |
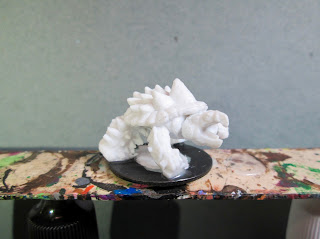
I prepped the figure in the usual way; soaking it in a dish of water with a couple drops of dish-soap added, then giving it a light scrub with a soft toothbrush, and then rinsing and drying it. I then carefully cut off his arms, legs, and head. I also cut away his shield and club.
Next, I trimmed the underside of his shell so it would sit flatter on a base. After that I trimmed his head and his limbs so they would fit the shell better in what would be it's new horizontal orientation. I then glued all the parts back together. I then glued the figure to a black-primed 1" fender washer with Aleene's Tacky glue, and then glued the washer-mounted figure to a tongue depressor with a couple drops of the Elmer's glue.
I began by painting the whole figure with a 50/50 mix of Americana "Avocado", and Apple Barrel "Apple Black Green". When they were dry, I gave the entire turtle a wash with Citadel Agrax Earthshade" wash.
When the wash was dry, I drybrushed the turtle with Folk Art "Grey Green". After that I painted his eys with Reaper MSP "Holly Berry", and then painted the inside of his mouth with Apple Barrel "Flesh". Then, when the flesh was dry, I agve his mouth a wash again with the "Agrax Earthshade". When the wash was dry, I added some quick highlights to his tongue with the base "Flesh".
Lastly, I painted the base with Americana "Raw Umber".
I let the figure dry overnight and the next day I gave it a coat of Americana "DuraClear Matte" varnish. Then, when the varnish was dry, I used some white glue to flock the base. Another overnight dry, and I sprayed it with Testor's Dullcote".
I'm pleased with how this little fellow came out. It was just a quick conversion, but I think he makes a snappy little snapping turtle! :)


Hail the snapping Shellback!
ReplyDelete:-)
DeleteGreat conversion!
ReplyDeleteThanks!
DeleteBrilliant! Simple and easy.. Love it!
ReplyDeleteThanks, David!
Delete