This past week, I continued to work through the remaining Bones 3 Stoneskull Expansion figures, and painted the Temple Dragon. I am going to be painting a Drogon from Game of Thrones in the future, so saw this as an opportunity to test a color scheme.
I prepped the figure in the usual way; soaking the parts it in a dish of water with a couple drops of dish-soap added, then giving them a light scrub with a soft toothbrush, and then rinsing and drying them. I then assembled the figure using Gorilla Superglue Gel. After that, I glued the figure to a black-primed 1.25" fender washer with Aleene's Tacky glue, and then placed the figure in my painting grip.
I began by painting the entire figure with Ceramcoat "Black". When it was dry, I wet blended the wings, both top and underside, a three way transition from "Black", to Reaper MSP Bones "Cinnamon Red", to Americana "Burnt Orange". I also used some thinned "Cinnamon Red" to paint the spines and scales along the back and the body around the wings.
And here's how it looked when dry.
Next, I went back over the body drybrushing it with the "Black" to try to give the red the appearance of being down in and between the scales and not on the tops. I then painted the mouth with a mix of Americana "Shading Flesh" and Folk Art "Burgundy". After that I painted the eye sockets and lips with Folk Art "Milkshake", and the teeth with Crafter's Acrylic "Light Antique White".
Then after everything had a while to dry, I gave the entire figure a wash with Citadel "Nuln Oil" Wash. When the wash was dry, I drybrushed the dragon with, in succession; Americana "Neutral Grey", Crafter's Acrylic "Storm Cloud Grey", and Folk Art "Platinum Gray". After that, I painted the statue on which the dragon is perched upon with the "Light Antique White", and added some striations with the "Black".
Next, when the statue had time to dry, I gave it a wash with the "Nuln Oil" too. I then highlighted it with Americana "Snow White", and used this color to highlight the teeth too. I painted in the eyes, trying to add a little Accent "Mustard Seed" to the pupils to give them a gold-flecked looked.
Lastly, I painted the washer base with Americana "Zinc".
I let the figure dry overnight and the gave it a coat of Americana "DuraClear Matte" varnish. Another overnight dry, and I sprayed it with Testor's Dullcote".
Shown with a Reaper human figure to give a sense of scale.
All in all I'm really happy with how this dragon turned out. I think he looks suitably fierce, and I think the color gradations in his wings turned out looking pretty good.
This week I decided to finish up the Stitch Golem set from the Bones 3 Stoneskull Expansion, and painted the second of the two Lesser Stitch Golems. You can find his brother here: Lesser Stitch Golem, and the big one here: Gutrags.
I prepped the figure in the usual way; soaking it in a dish of water with a couple drops of dish-soap added, then giving it a light scrub with a soft toothbrush, and then rinsing and drying it. I then glued the figure to a black-primed 1" fender washer with Aleene's Tacky glue, and then placed the figure in my painting grip.
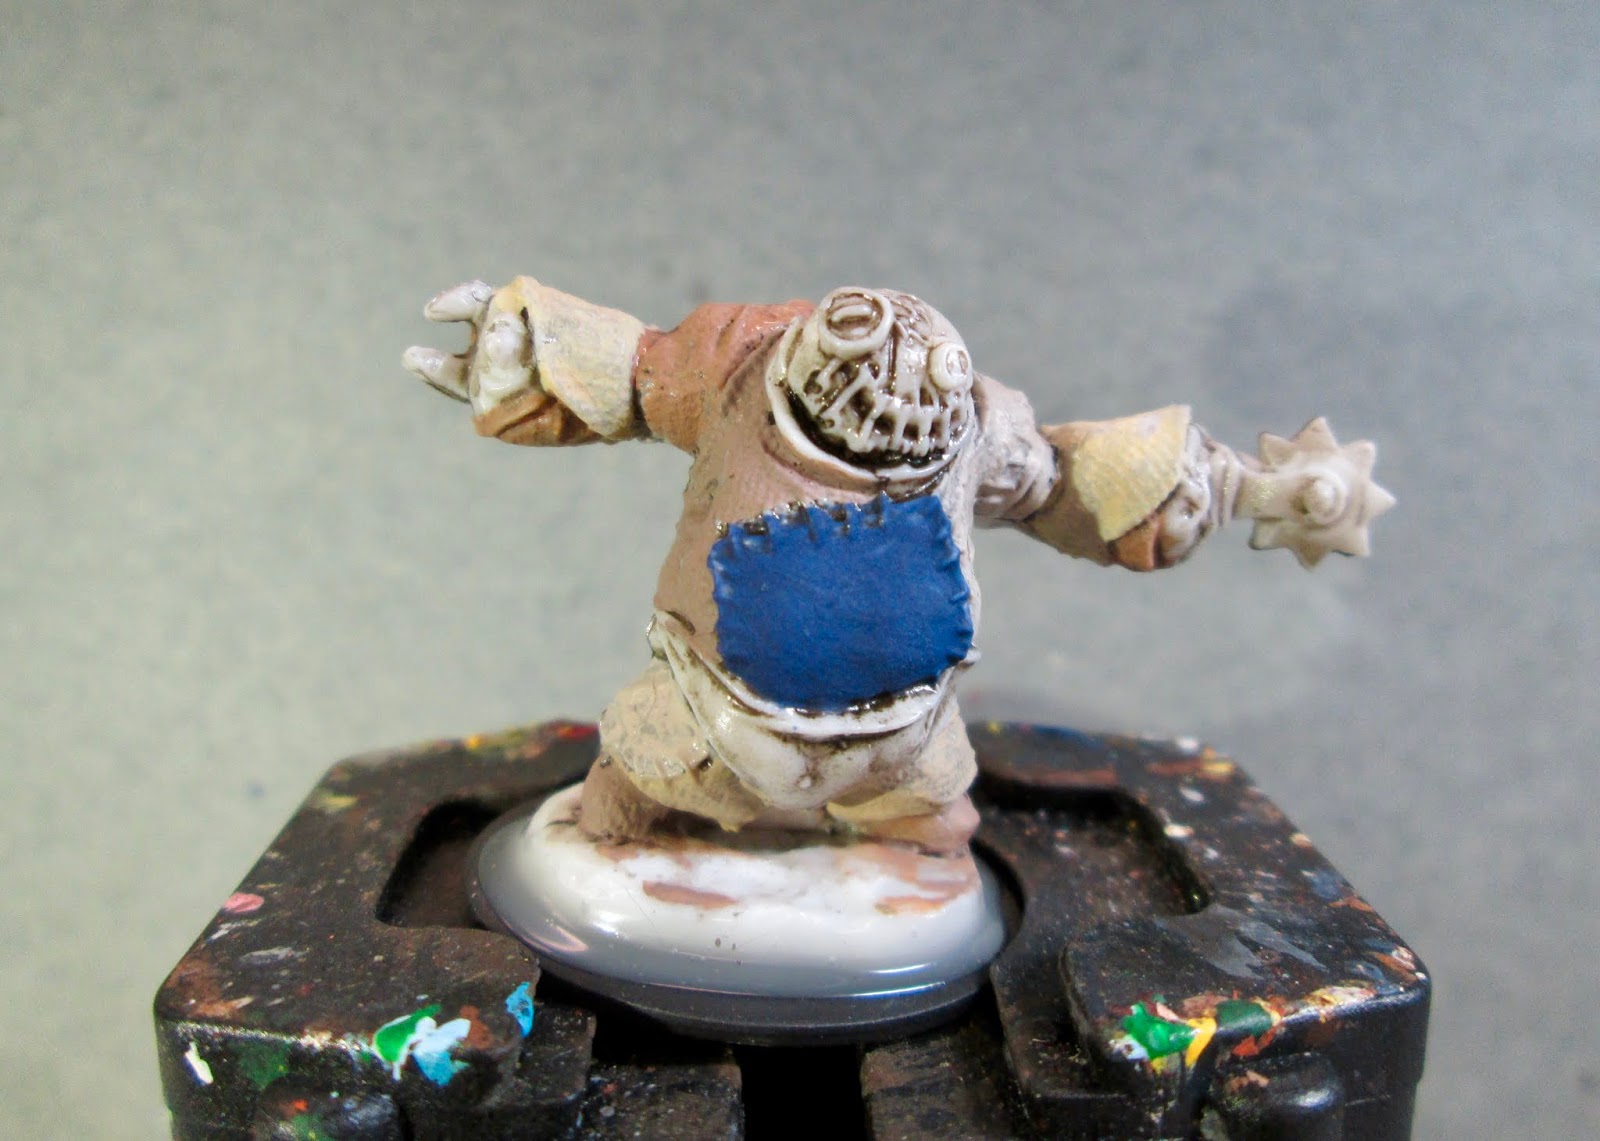
I began by giving the figure a wash with Reaper MSP "Brown Liner"; and when that was dry, I started painting by doing the large square of fabric on his belly with Crafter's Acrylic "Navy Blue". I then painted some of the textured sections of fabric with Americana "Antique White", some textured section with Folk Art "Butter Pecan".
Next, I tried to finish painting the textured fabric bits, using Folk Art "Barn Wood", Americana "Mississippi Mud". and Americana "Sable Brown"
I then worked on painting the smoother fabric; painting his head with Crafter's Acrylic "Tutti Frutti", and his "diaper" with Folk Art "Porcelain White". Next I painted parts of his arms with Americana "Forest Green", and Ceramcoat "Denim Blue". After that, I painted the large square on hs back with Apple Barrel "Yellow".
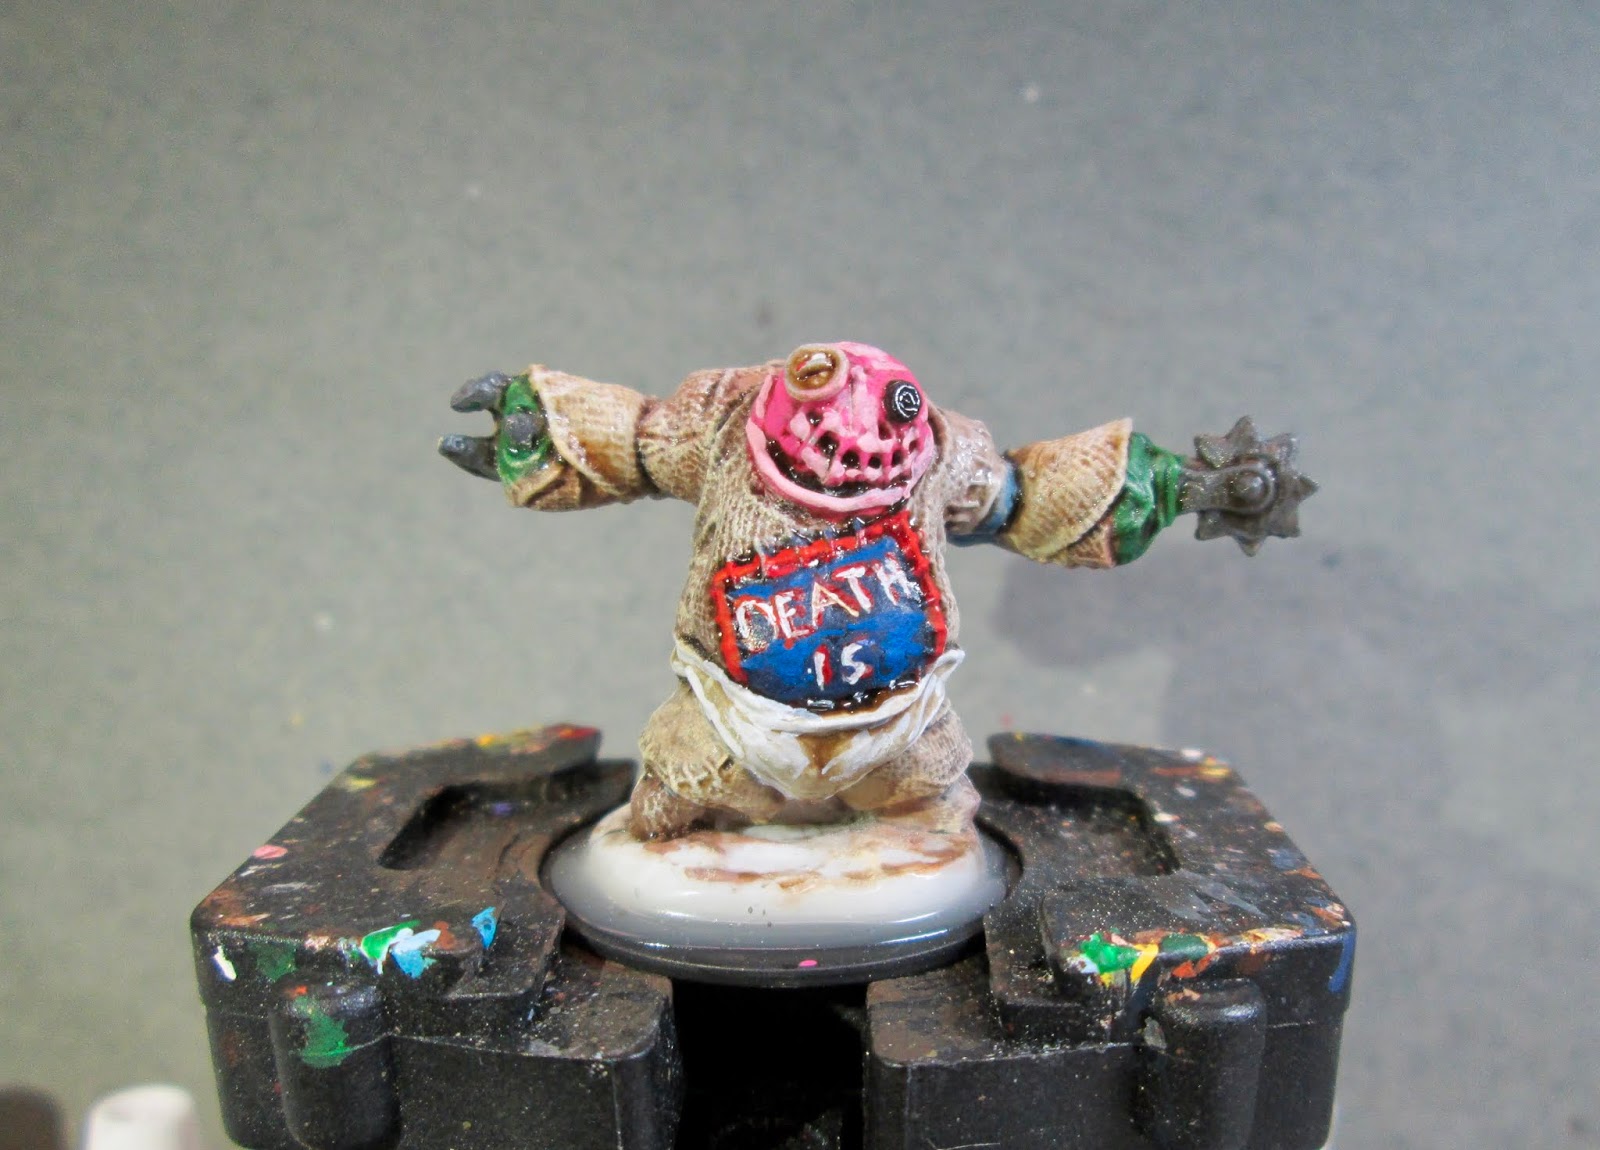
Next, I painted the lettering and border on his belly to try and make it look like part of a flag, and then did some red polka dots on the "Yellow" square on his back. After that, I painted the buttons an assortment of random colors I had around the table, and his claws and pattern tracer with Americana Zinc. Then, after everything had time to dry, I gave the entire figure a wash with Citadel "Agrax Earthshade" wash.
After the wash was dry, I began highlighting by drybrushing all the brown/tan/beige colored cloth with the "Antique White", and then did a lighter drybrushing with Americana "Bleached Sand". This was followed with highlighting his head with Crafter's Acrylic "Cherry Blossom Pink" and highlighting the flag cloth on his belly with some Americana "True Blue" and highlighted the letters with the base colors. I also highlighted the polka dot section with some Crafter's Acrylic "Daffodil Yellow", and the dots with Ceramcoat "Bright Red".
Next, I highlighted the green on the arms with Americana "Festive Green", and then highlighted the "Rusty Red" sections with some Crafter's Acrylic "Orange Spice", and the blue section with Apple Barrel "Apple Scotch Blue". After that, I did the stitching, using both the "Bleached Sand", and Ceramcoat "Black" in different spots. I highlighted the buttons a variety of colors I had sitting around, and then painted the claws and needle with Folk Art Metallics "Gunmetal Grey", and then highlighted them with Ceramcoat "Metallic Silver".
Lastly, I painted the figure's integral base with Americana "Bittersweet Chocolate".
I let the figure dry overnight and the next day I gave it a coat of Americana "DuraClear Matte" varnish. Then, when the varnish was dry, I used some white glue to flock the base. Another overnight dry, and I sprayed it with Testor's Dullcote".
I'm really happy with how this last one turned out. They were fun figures to paint. And, to finish things off, here is a family photo of the completed trio from the Stoneskull Expansion.
Also to note, since Reaper announced last week that there would be a slight delay in shipment of Bones 4, pushing it back one month to March; it looks like I'll have more time to get more of Stoneskull completed. :)
I continued to work through the Bones 3 StoneSkull Expansion this past week, and painted the pair of Vegypygmies that came in that box.
I prepped the figures in the usual way; soaking them in a dish of water with a couple drops of dish-soap added and then rinsing and drying. I then glued them to 7/8" black-primed fender washers with Aleene's Tacky glue. I then glued the figures to a tongue depressor with a couple drops of the Elmer's glue each.
I began by painting each entire figure with Americana "Avocado", and then painted their cloths with Americana "Forest Green". After that I painted their hair with Apple Barrel "Apple Black Green".
Next, I painted their spear shafts, and the back of the shield with Folk Art "Dapple Grey", and the spear points with Americana "Zinc". I then painted the face of the shield with Ceramcoat "Black". After everything had a while to dry, I gave each figure a complete coat with Citadel "Agrax Earthshade" wash.
When the wash was dry, I highlighted their bodies with a drybrush of Aleene's "Dusty Khaki", and then painted their eyes with Americana "Margarita"with "Black" pupils. I then used Americana "Festive Green" to highlight their cloths, and Folk Art Artist's Pigment "Hauser Green Medium" to highlight their hair. Next, I picked out the design on the shield with Crafter's Acrylic "Citrus Green", and then highlighted the spear shafts with Folk At "Grey Green". I then decided against painting the spear points a white metal (which I had intended), and go with a bronze look instead; so I first painted them with Folk Art Brushed Metal "Brushed Bronze", and then did highlights with a bit of the "Brushed Bronze" mixed with Ceramcoat "14K Gold".
Lastly, I painted the figures integral bases with Americana "Bittersweet Chocolate".
I let the figures dry overnight and the next day I gave them a coat of Americana "DuraClear Matte" varnish. Then, when the varnish was dry, I used some white glue to flock their bases. Another overnight dry, and I sprayed them with Rustoleum "Matte Finish", since I unfortunately ran out of Testor's Dullcote" without having time to replace it.
Well, I'm happy with the figures, but not thrilled with the Rustoleum "Matte Finish". I definitely think I'll hit these with some Dullcote when I get a new can.
This past week I painted Gutrags, Stitch Golem from the Bones 3 Stoneskull Exxpansion. I think I'm going to try and complete the Stoneskull Expansion box before Bones 4 arrives. We'll see how that goes... 😄
I painted one of the other Bones 4 Stitch Golems back in October of last year: Lesser Stitch Golem. So I had had then blog entry to guide me in painting this bigger one.
I prepped the figure in the usual way; soaking it in a dish of water with a couple drops of dish-soap added, then giving it a light scrub with a soft toothbrush, and then rinsing and drying it. I then glued the figure to a black-primed 1.5" fender washer with Aleene's Tacky glue, and then placed the figure in my painting grip.
I began by giving the figure a wash with Reaper MSP "Brown Liner"; and when that was dry, I started painting by doing the large square of fabric on his belly with Apple Barrel "Lemon Chiffon". I then painted some of the textured sections of fabric with Americana "Antique White", some textured section with Folk Art "Butter Pecan", and others with "Sable Brown"
Next, I tried to finish painting the textured fabric bits, using Folk Art "Barn Wood", and then Americana "Mississippi Mud". I then painted his head with Reaper MSP "Hearth Fire", sections of his arms and legs with Reaper MSP HD "Rusty Red". I also used some Reaper MSP "Christmas Wreath", and Anita's "Violet" to help finish the remaining fabric sections.
I painted the small patch on his back with Crafter's Acrylic "Storm Cloud Grey, as well as one other small section of fabric I found. I then painted a tartan pattern on the fabric sections i had painted "Christmas Wreath", and a little blue flower pattern on the large "Lemon Chiffon" square on his belly. After that, I painted the buttons an assortment of random colors I had around the table, his claws and needle with Americana Zinc, and his open mouth and belly rip with Ceramcoat "Black".
Then, after everything had time to dry, I gave the entire figure a wash with Citadel "Agrax Earthshade" wash. After the wash was dry, I began highlighting by drybrushing all the brown/tan/beige colored cloth with the "Antique White", and then did a lighter drybrushing with Americana "Bleached Sand". This was followed with highlighting his head with Crafter's Acrylic "Bright Yellow".
Next, I highlighted the flower pattern cloth, as well as some of the lines on the Tartan sections with a little of the "Lemon Chiffon". I also highlighted the Tartan sections with some Crafter's Acrylic "Holiday Green", and then highlighted the "Rusty Red" sections with some Crafter's Acrylic "Orange Spice", and the "Violet" sections with Apple Barrel "Apple Lavender". After that, I did the stitching, using both the "Bleached Sand", and the "Black" in different spots. I highlighted the buttons a variety of colors I had sitting around, and then painted the claws and needle with Folk Art Metallics "Gunmetal Grey", and then highlighted them with Ceramcoat "Metallic Silver".
Lastly, I painted the figure's integral base with Americana "Bittersweet Chocolate".
I let the figure dry overnight and the next day I gave it a coat of Americana "DuraClear Matte" varnish. Then, when the varnish was dry, I used some white glue to flock the base. Another overnight dry, and I sprayed it with Testor's Dullcote".
Well, I'm really pleased with how this fellow came out. I had a fun with all the different fabrics. I'm looking forward to getting the third (and last) of these Stitch Golems painted up, and then I'll post a picture of the trio.
Happy 2019, everybody! This past week I painted the Wraith figure from the Bones 3 Core Set. I had selected this figure a couple weeks ago, with some kind of idea in my head to paint it as Father Time, in order to post for New Year's Eve. But I simply didn't have time to work on it. It's just as well, I think, since in retrospect it's not a very good Father Time figure.
I prepped the figure in the usual way; soaking it in a dish of water with a couple drops of dish-soap added, then giving it a light scrub with a soft toothbrush, and then rinsing and drying it. I then glued the figure to a black-primed 1" fender washer with Aleene's Tacky glue, and then placed the figure in my painting grip.
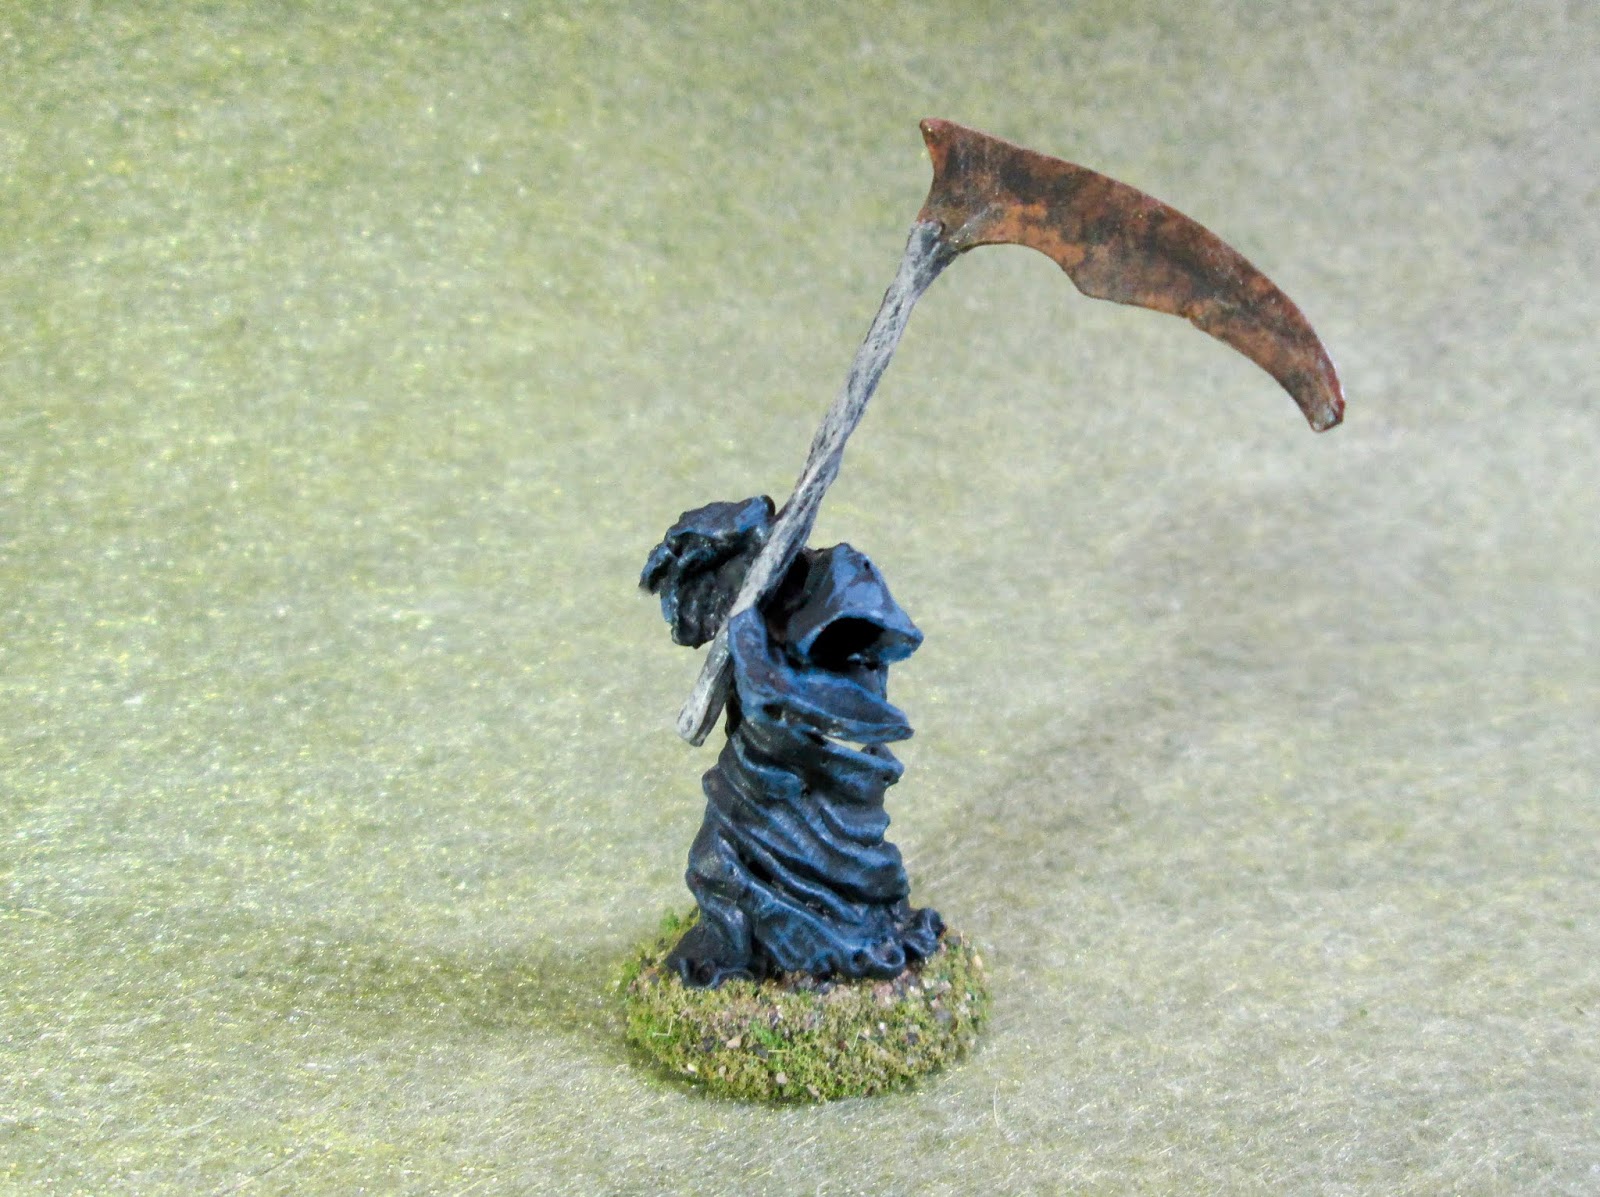
I began by painting the figure, including it's integral base, with Ceramcoat "Black", and when that was dry, I went over the figure with Reaper MSP "Coal Black". When that was dry, I drybrushed the figure with Citadel "The Fang"
I then fully painted the scythe handle with the "Black", and then, when dry, drybrushed it with Americana "Neutral Grey", followed by Folk Art "Barn Wood". I then painted the blade with Americana "Asphaltum".
Next, I splotched the blade with fist, Americana "Light Cinnamon", and then Americana "Terra Cotta". I painted the base with Americana "Bittersweet Chocolate".
I let the figure dry overnight and the next day I gave it a coat of Americana "DuraClear Matte" varnish. Then, when the varnish was dry, I used some white glue to flock the base. Another overnight dry, and I sprayed it with Testor's Dullcote".
Oops! I see in the photo where I missed a bit of Black deep in a fold.
It was a very simple figure, perfect for a busy week. And generally I am pleased with it.
And to think Bones 4 could be here in a month or so! I'm going to be very interested to try the new Bones Black figures. And my backlog of Bones will grow exponentially!
Happy New Year's Eve everybody. It's been a hectic week here this past week between Christmas Day and today, so, though I got a Bones figure all ready to paint, I never got a chance to work on it. Instead, I thought I'd show off the Reaper Nativity set I painted for my wife for Christmas, even though it's metal. Unfortunately, due to time again, I didn't get it totally done yet.
I decided I wanted to set the nativity in the more historical cave setting, than in the traditional wooden stable; so I set about using broken up cork tiles to make the cave. I used hot glue to stack them on a tree cross-section I got at the local big box craft store.
This is the kind of tile I used to make the cave.
Back view.
I added a little hidden compartment in the top that I could place a small tea-light in order to illuminate the interior.
Top view.
I first painted Mary, Joseph, and the Baby.
And then as time allowed, I painted the Sheep and Shepherd, since they were quick and simple figures.
And this is how it looked all put together. There is a Donkey yet, and the three Wise Men, that will be added. I eventually would like to add an appropriate Angel, and perhaps a Cow as well, though they are not included in the kit.
See you all in 2019! It's hard to believe, but the arrival of the Bones 4 Kickstarter could be in less than two months!
[Edit: I meant to publish this yesterday (Monday the 24th), but got so caught up in Christmas Eve activities, I totally forgot. Now that Christmasing has quieted down for a moment, I thought I'd take the opportunity to get it on the blog. Enjoy and Merry Christmas!)
This past week I once again mined my Bones backlog for something quick and simple that I could squeeze in painting among the usual pre-Christmas chaos. I also, wanted something I could give a Holiday or Winter spin, and thus I landed on the Were-armadillo figure from the Bones 3 Stoneskull Expansion, which I thought would make a pretty good "Holiday Armadillo".
For those of you who weren't regular watchers of the 80s-90's sitcom "Friends", the Holiday Armadillo is a character made up by one of the show regulars, named Ross, in one of the Holiday episodes. Ross wants to teach his son, who is half Jewish, about Hanukkah instead of focusing on the Christmas holiday as is usually the case. In the end though, Ross gives in to his son's desire for Santa to visit, and tries to rent a Santa costume, only to find out there are none available. In a desperate move, he settles for an Armadillo costume, and comes up with the story that he's the Holiday Armadillo, Santa's half-Jewish friend and assistant. This leads to a great opportunity for Ross to talk about Jewish traditions with his son.
In subsequent years, the Holiday Armadillo has taken on a bit of a life of its own, and a quick Google search reveals all sorts of T-shirts and ornaments available for purchase, as well as a generous assortment of memes.
My goal was to try and copy, as best I could, the coloration of the costume.
I prepped the figure in the usual way; soaking it in a dish of water with a couple drops of dish-soap added, then giving it a light scrub with a soft toothbrush, and then rinsing and drying it. I then, after clipping the edges of the figure's integral base to make it smaller, glued the figure to a black-primed 1.5" fender washer with Aleene's Tacky glue, and then placed the figure in my painting grip.
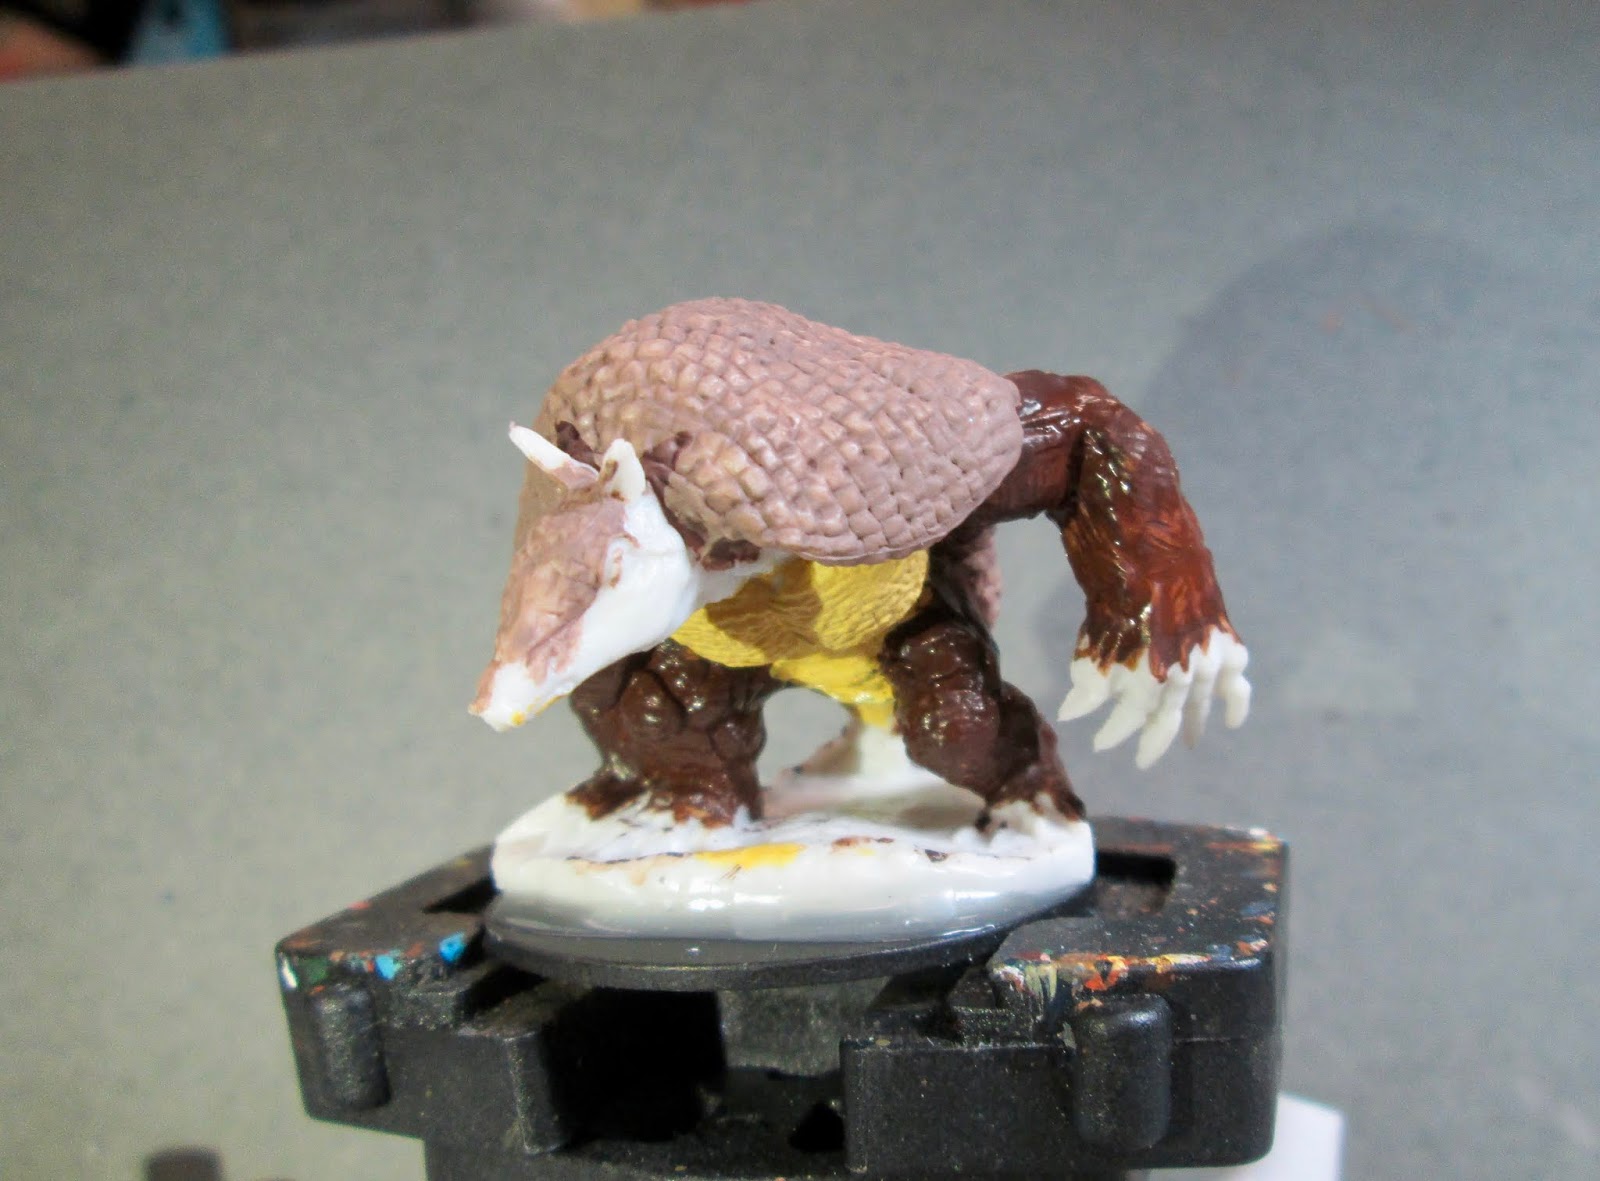
I began by painting his back armor with Americana "Mississippi Mud", and then his chest plates with Accent "Golden Harvest". After that, I painted his legas and arms with Accent "Real Umber".
I then decided to repaint the middle back armor section with Folk Art "Teddy Bear Brown", and . used the same color to paint his tail. Afterwards, I painted his face and hands with Anita's "Burnt Sienna" and then painted his claws and nose with Americana "Bleached Sand".
Then, after everything had overnight to dry, I gave the entire figure a coat of Citadel "Agrax Earthshade" wash. When the wash was dry, I drybrushed is upper and lower back armor, as well as the small bit of armor on his head with Crafter's Acrylic "Storm Cloud Grey", and then a little Folk Art "Platinum Grey". I then painted the eyes ceramcoat "Black", and highlighted his face and hands with a mix f the base "Burnt Sienna", and some Crafter's Acrylic "Orange Spice".
Next, I highlighted the middle section of back armor with a mix of the "Storm Cloud Grey and Americana "Khaki Tan", and then highlighted his underbelly with Crafter's Acrylic "Daffodil Yellow". After that, I highlighted his arms and legs with a drybrush of Americana "Neutral Grey" mixed with Americana "Light Cinnamon", and highlighted his claws and nose with the base "Bleached Sand". I wrapped things up by highlighting his tail with the "Khaki Tan".
Lastly, I painted the base with Ceramcoat "Snow White".
I let the figure sit overnight, and the next morning I gave it a coat of Americana "DuraClear Matte" varnish. Later that afternoon I flocked the base using Woodland Scenics snow flocking. Another overnight dry, and I sprayed them with Testor's Dullcote".
I'm happy with how this fellow turned out. The yellow should have been a little paler to truly match the costume; and seeing the final photos, I see I need to go back and add some tiny reflection dots to the eyes, but overall I think I came pretty close.