Thursday, June 6, 2019

Raft and Rowboat: Bones 4 Dreadmere Models

   This past week I also painted the Raft and Rowboat from the Bones 4 Dreadmere Expansion Set.  We're doing a water based Ghost Archipelago scenario later this month, and I wanted to include these if needed.
       I prepped the pieces in the usual way; soaking them in a dish of water with a couple drops of dish-soap added and then rinsing and drying.  I then assembled the raft, by gluing in the oars and the fish basket, using Gorilla Super Glue Gel.   (It also comes with a pair of loose fish, but I thought I'd save those to use somewhere else.)    After that, I glued 1"x1" steel bases to the undersides of both models using Gorilla Super Glue Gel.

     I started with the raft, and began by painting the bark of the logs with Americana "Charcoal Grey".  After that, I painted the ends with Americana "Fawn", and the ropes with Folk Art "Barn Wood".
     When the raft had dried for a bit, I gave the whole thing a wash with Citadel "Agrax Earthsahde" wash.  Then, when the wash was dry,  I drybrushed the bark with a 50-50 mix of Americana "Neutral Grey" and Americana "Mississippi Mud", followed by a lighter drybrush with Americana "Dove Grey".  I then drybrushed the ends of the logs with Americana "Antique White", and the ropes with Americana "Bleached Sand". 

     I then started on the rowboat.  I glued that to a tongue depressor for easier handling, using a couple drops of Elmer's glue.
      I began by painting the entire boat with Folk Art "Barn Wood".  I then painted the netting with Folk Art "Porcelain White", and the fish basket with Americana "Fawn".
      Next, I painted the lamp with Folk Art Burnished Metal "Burnished Bronze".  I then painted the plank patches on the outside of the boat with Folk Art "Grey Green",  Folk Art "Dapple Grey", and Americana "Mississippi Mud".   After that, I painted the rope with Americana "Neutral Grey",and the fish in the basket with Folk Art Color Shift "Blue Flash".
    I let the paint dry for a while, and then I gave the entire raft a coat of Citadel "Nuln Oil" wash.
     When the wash was dry, I drybrushed the boat with Americana "Dove Grey".  I then drybrushed the net with some Crafter's Acrylic "Light Antique White" mixed with some of the base "Porcelain White", and drybrushed the fish basket with some Americana ""Antique White". After that I drybrushed the lantern with some Ceramcoat 14K Gold, and put some color on the fish with Folk Art Metallics "Metallic Emerald Green".  Lastly, I painted the panes of the lantern with Ceramcoat "Black".


     These were nice simple pieces to get done.  I didn't spend a lot of time with them, but I think they turned out looking pretty good nonetheless.

Monday, June 3, 2019

Bufo (Frogman) Bones 4 Dreadmere Figure

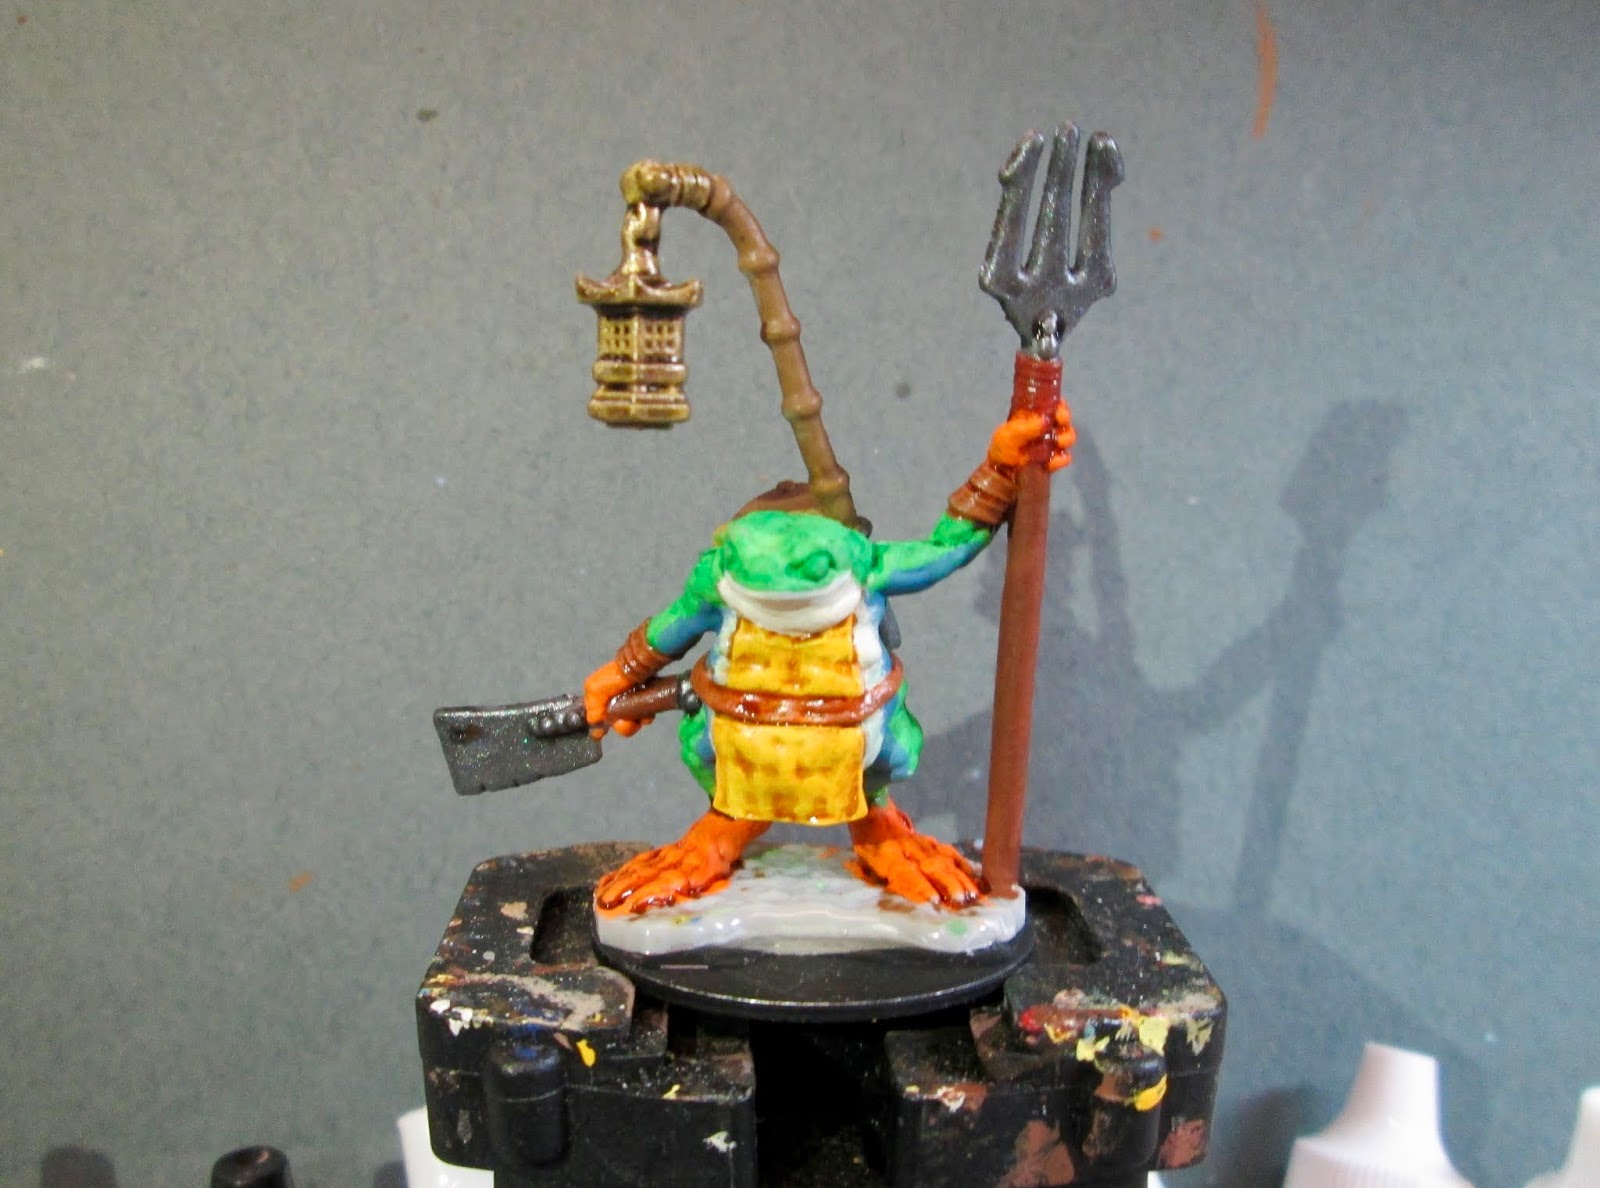
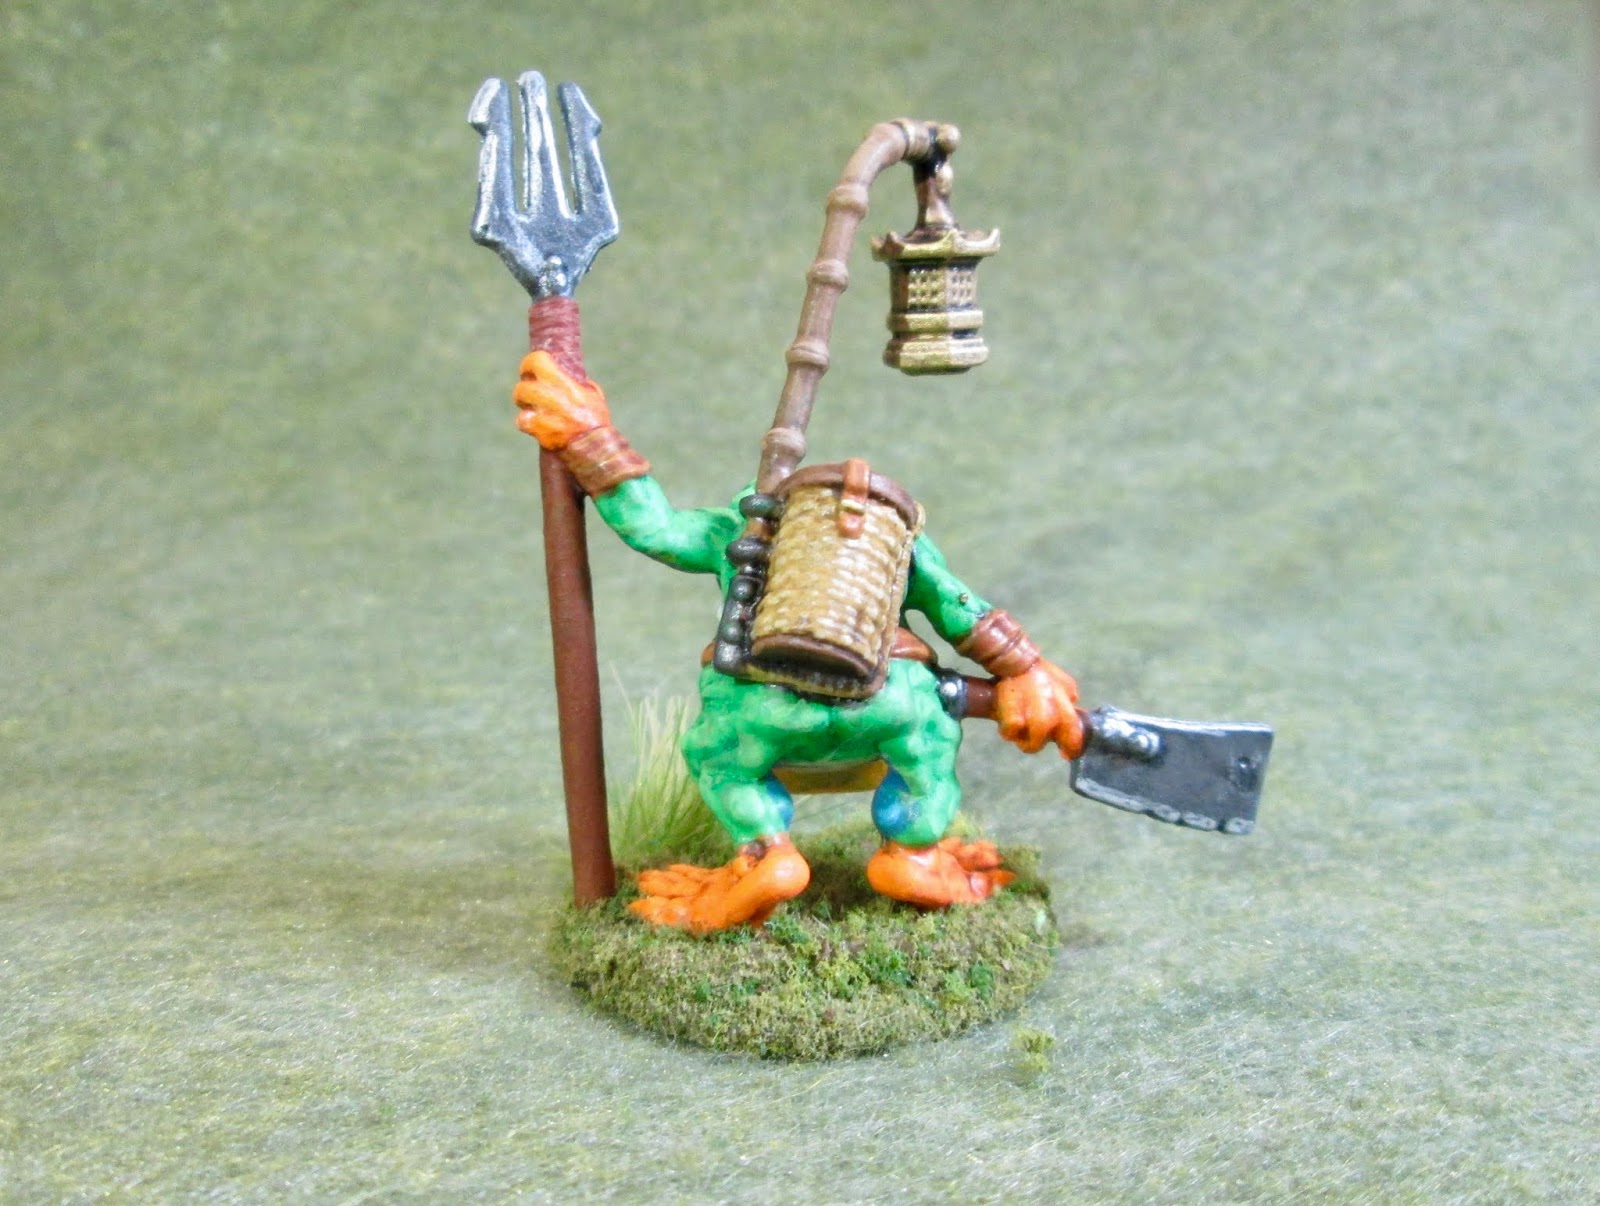
  This past week I painted Bufo, the Frog-man (or maybe he's a Toad-man since "Bufo" literally means "Toad") figure from the Bones 4 Dreadmere Expansion.  Since most all my frog figures are painted like colorful tree frogs and poison dart frogs, I thought I'd continue that pattern here, and paint Bufo like a Red Eyed Monkey Tree Frog. I love how full of character this figure is, and had been looking forward to painting him since the Kickstrater ran.

       I prepped the figure in the usual way, soaking it in a dish of water with a couple drops of dish-soap added, then giving it a light scrub with a soft toothbrush, and then rinsing and drying it.  I then glued the figure to a black-primed 1.25" fender washer with Aleene's Tacky glue, and then placed the figure in my painting grip.
     I began by painting his body with Crafter's Acrylic "Wild Green".  When it was dry, I gave it a wash with some thinned Citadel "Dark Green" ink.  Then, when the ink wash was dry, I painted his belly with Americana "Bleached Sand", and the border area between the "Wild Green and "Bleached Sand" with Ceramcoat "Denim Blue".  The "Denim Blue" also went up the undersides of his arms, and the insides of his legs.
    Next, I painted his hands and feet with Crafter's Acrylic "Pure Pumpkin", and his apron (tabard?) with Apple Barrel "Yellow".  I then painted his belt with Americana "Terra Cotta", and the basket on his back with Accent "Golden Harvest".  After that, I painted the bottom and top of the basket with Reaper MSP HD "Golden Brown", and the lamp pole with Reaper MSP "Olive Skin".
     I then painted the trident shaft and the axe handle with Americana "Light Cinnamon", and then the wrist bands with the "Terra Cotta".  After that, I painted the lamp and its fittings with the "Golden Harvest", and the axe and trident heads with Americana "Zinc"  I also painted the strapping on the trident with Anita's "Burnt Sienna".
   
     Next, I painted the trident and axe heads with  Folk Art Metallics "Gunmetal Grey" and the lamp and its fittings with Folk Art Burnished Metal "Burnished Bronze".  Then, after the figure had a chance to dry for a while, I put some Citadel "Reikland Fleshshade" wash on the feet, hands, belt, apron, wrist straps, and trident straps.    When that was dry, I applied some Citadel "Agrax Earthshade" wash to the basket, lamp pole, trident shaft, and axe handle.  Then when that was dry, I applied some Citadel "Nuln Oil" wash to the lamp, and trident and axe heads.
     When all the washes were dry, I highlighted his belly with Americana "Snow White", and the blue areas with Crafter's Acrylic "Tropical Blue".  I then highlighted his body with the base "Wild Green", and his feet with Reaper MSP "Hearth Fire".  After that, I painted his eyes with Reaper MSP "Holly Berry", and then gave them ceramcoat "Black" pupils.
 
     Next,  I highlighted his apron/tabard using Crafter's Acrylic "Bright Yellow", and then painted a cattail badge on it using the "Holly Berry".  I then highlighted his basket using Americana "Moon Yellow for the weaving, and Americana "Sable Brown for the lid and bottom.  After that, I highlighted his belt, wrist guards, and the strap on the basket with Accent "Golden Oxide"; the lamp pole with Reaper MSP "Olive Skin Highlight"; and the trident shaft and axe handle with Folk Art "Teddy Bear Brown".  Wrapping things up, I highlighted the strapping on the trident shaft with Americana "Shading Flesh", the trident and axe heads with Ceramcoat "Metallic Silver", and the lamp with Ceramcoat "14K Gold" followed by a little Ceramcoat "Wedding Gold".   Lastly, I painted the entire base with "Americana "Mississippi Mud".
       I let the figure dry overnight and the next day I gave it a coat of Americana "DuraClear Matte" varnish.    Then, when  the varnish was dry, I used some white glue to flock the base.  Another overnight dry, and I sprayed it with Testor's "Dullcote".  When the "Dullcote" was dry, I went back and hit is eyes with a little Americana "DuraClear Gloss" varnish.   


     I'm really happy with how this one turned out!    It's a great little sculpt with a lot of charm.

    Be sure to tune in Thursday, for another bonus entry on the blog! I'll be posting a couple more of the Dreadmere pieces!

Monday, May 27, 2019

Ghost Pirates: Bones 4 Figures

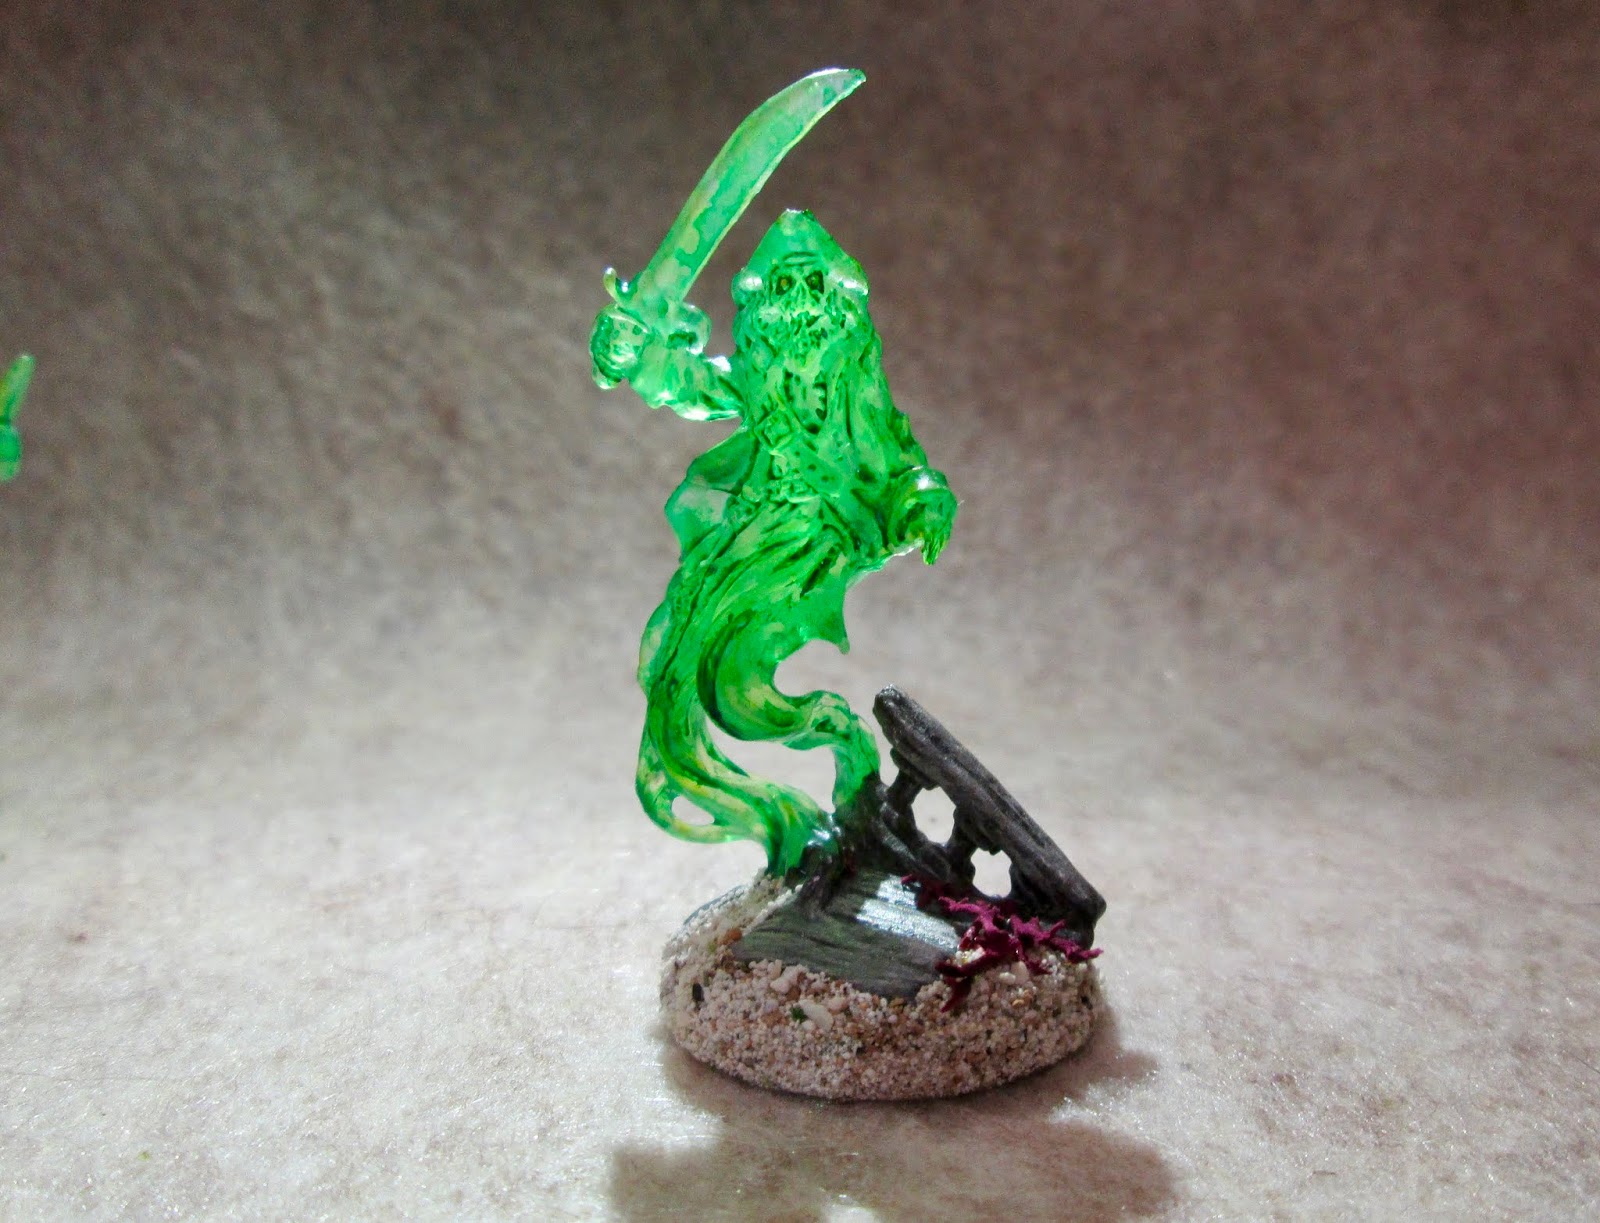
   This past week I worked on the Ghost Pirates set from the Bones 4 Core Set.   The Core Set came with 5 of these figures, and I ordered a second set so I would have a unit of 10 for larger games. I painted the second 5 the exact same way that I painted the first 5, so did not include progress shots of them; but I did include them in the group photos at the end.
   I prepped the figures in the usual way; soaking them in a dish of water with a couple drops of dish-soap added and then rinsing and drying.   I then glued each one to an unprimed 1" fender washer, with Aleene's Tacky glue.  I then glued the figures to a number of tongue depressors with a couple drops of the Elmer's glue each.
 
       I began by painting the washers with Americana "Metal Primer".  I then painted the figures completely with Americana "DuraClear Matte" varnish; as I  planned to use ink on them, and the matte varnish gives the ink something to hold on to better than the bare plastic.  When the matte varnish was dry, I applied a heavily thinned wash of Citadel "Green" Ink to the figures, trying to keep it just on the pirates themselves and not on the "scenery" pieces on the bases.

Note, I added a coat of un-thinned "Green" ink to the bottles the righthand pirate is carrying to give them a green glass look.
      When the ink was was dry, I painted their eyes with tiny dots of Americana "Margarita", and then painted the bases with Americana "Bittersweet Chocolate".

     Next, I drybrushed the scenic bases with a 50-50 mix of Americana "Neutral Grey" and Americana "Mississippi Mud".  This was followed with a lighter drybrushing using Folk Art "Barn Wood", and a last highlight drybrushing with Americana "Dove Grey".  I then painted the skulls on the bases with, first, Americana "Khaki Tan", and then drybrushed with Crafter's Acrylic "Light Antique White".  Lastly, I painted the rest of the base and washer with the Mississippi Mud".
    I let the figures dry overnight and the next day I gave them a coat of Americana "DuraClear Matte" varnish.    Then, when  the varnish was dry, I used some white glue to apply a fine sand mixture to the bases.  I decided not to spray varnish these as I have had some issues in the past with the translucent figures getting a little tacky after a while; so I'm just going to go with the brush on matte varnish. I did put a little Americana "DuraClear Gloss" varnish on the bottles the drinking pirate is holding to make them look like glass.
This is the original five I painted as shown above.

These are the original five as well.

And here's the whole crew.


     I'm really happy with these.  They turned out just as I had hoped.    The translucents are always a challenge to strike the right balance between keeping the translucency and applying shadow and highlight, and I think I hit a happy balance here.

Thursday, May 23, 2019

Converting and Assembling the Mossbeard Treeman: Bones 4 Figure

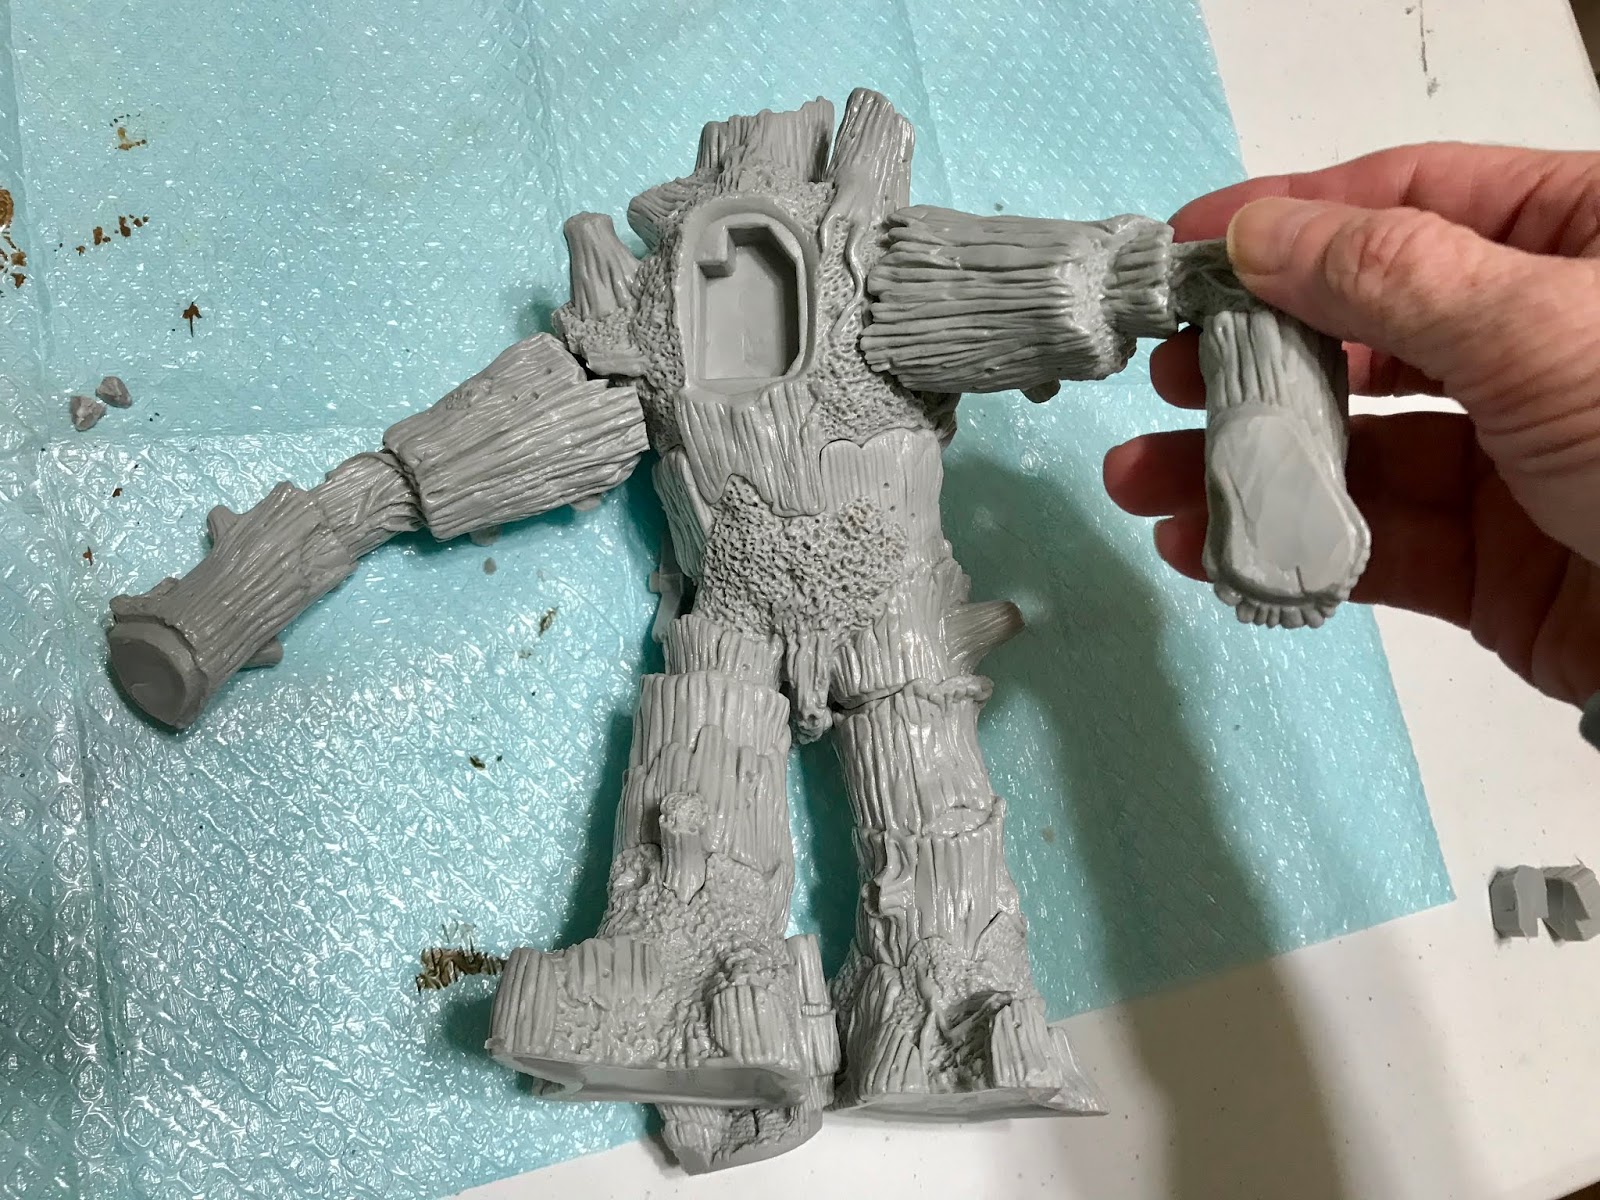
     How about a bonus Thursday post today!  This past week I worked on assembling and converting the Mossbeard Treeman figure from the recent Bones 4 Kickstarter.   While I loved the basic design of the figure, I did have one quibble with it.  In my mind the arms were wrong, as they were narrower at the shoulder and wider at the wrists.  I felt that arms, as well as tree branches, are generally thicker at the base/shoulder, and get thinner as they go towards the ends.   When I pledged for the figure my hope was that it wouldn't be too hard to reverse the arms and mount them with the thick end at the shoulders and put the hands on the the thinner ends.

     Since the arms and hands were all constructed with peg and hole joints, reversing them would give me peg on peg and hole on hole connections.  This wouldn't work, so the first thing I did was cut of the pegs to make the peg on peg parts fit more closely together.   The pegs on the wrists and hands were large thick chunks of plastic, so in order to remove them more easily, I first soaked them in boiling water for about 40 seconds.
     I was then was easily able to slice through them with a hobby knife.
 
     I then assembled the legs and body, and laid out all the parts to get a feel for how it would look.   So far I was happy.
     Next I trimmed the overhanging shoulder on the body's right side.
     I then worked on trimming the new shoulder connections on the arms (What were intended to be the wrists) so that they would fit onto the body more closely.  This was a matter of trim a little, put it up against the body to test, and trim a little more as needed.
     Test fitting.
     I then got the idea to glue the pegs that I had sliced off back into the holes in the shoulders and body where they would have gone.  This, I realized, would give me good points to put in pins to help anchor the arms.
     So I then drilled holes to insert anchor pins.  I didn't have any wire thick enough, so decided to use some doweling.
     While I got the holes and pins all ready, I didn't actually glue the arms yet; as I wanted to first work on blending the wrist joints with some greenstuff epoxy putty.


      I used some of the leftover greenstuff to fill the gap in the joint where his head joins his body.
  After the wrists had time to set,  I glued the arms to the body using the wood pegs to anchor them.
      After the glue had time to set, I then blended the shoulder joints using greenstuff.


    I then primed an old CD disc and glued the feet to it.  That completes the conversion and assembly phase.  Now all that's left is the painting!
Shown with Sir Forscale.