Monday, March 14, 2022

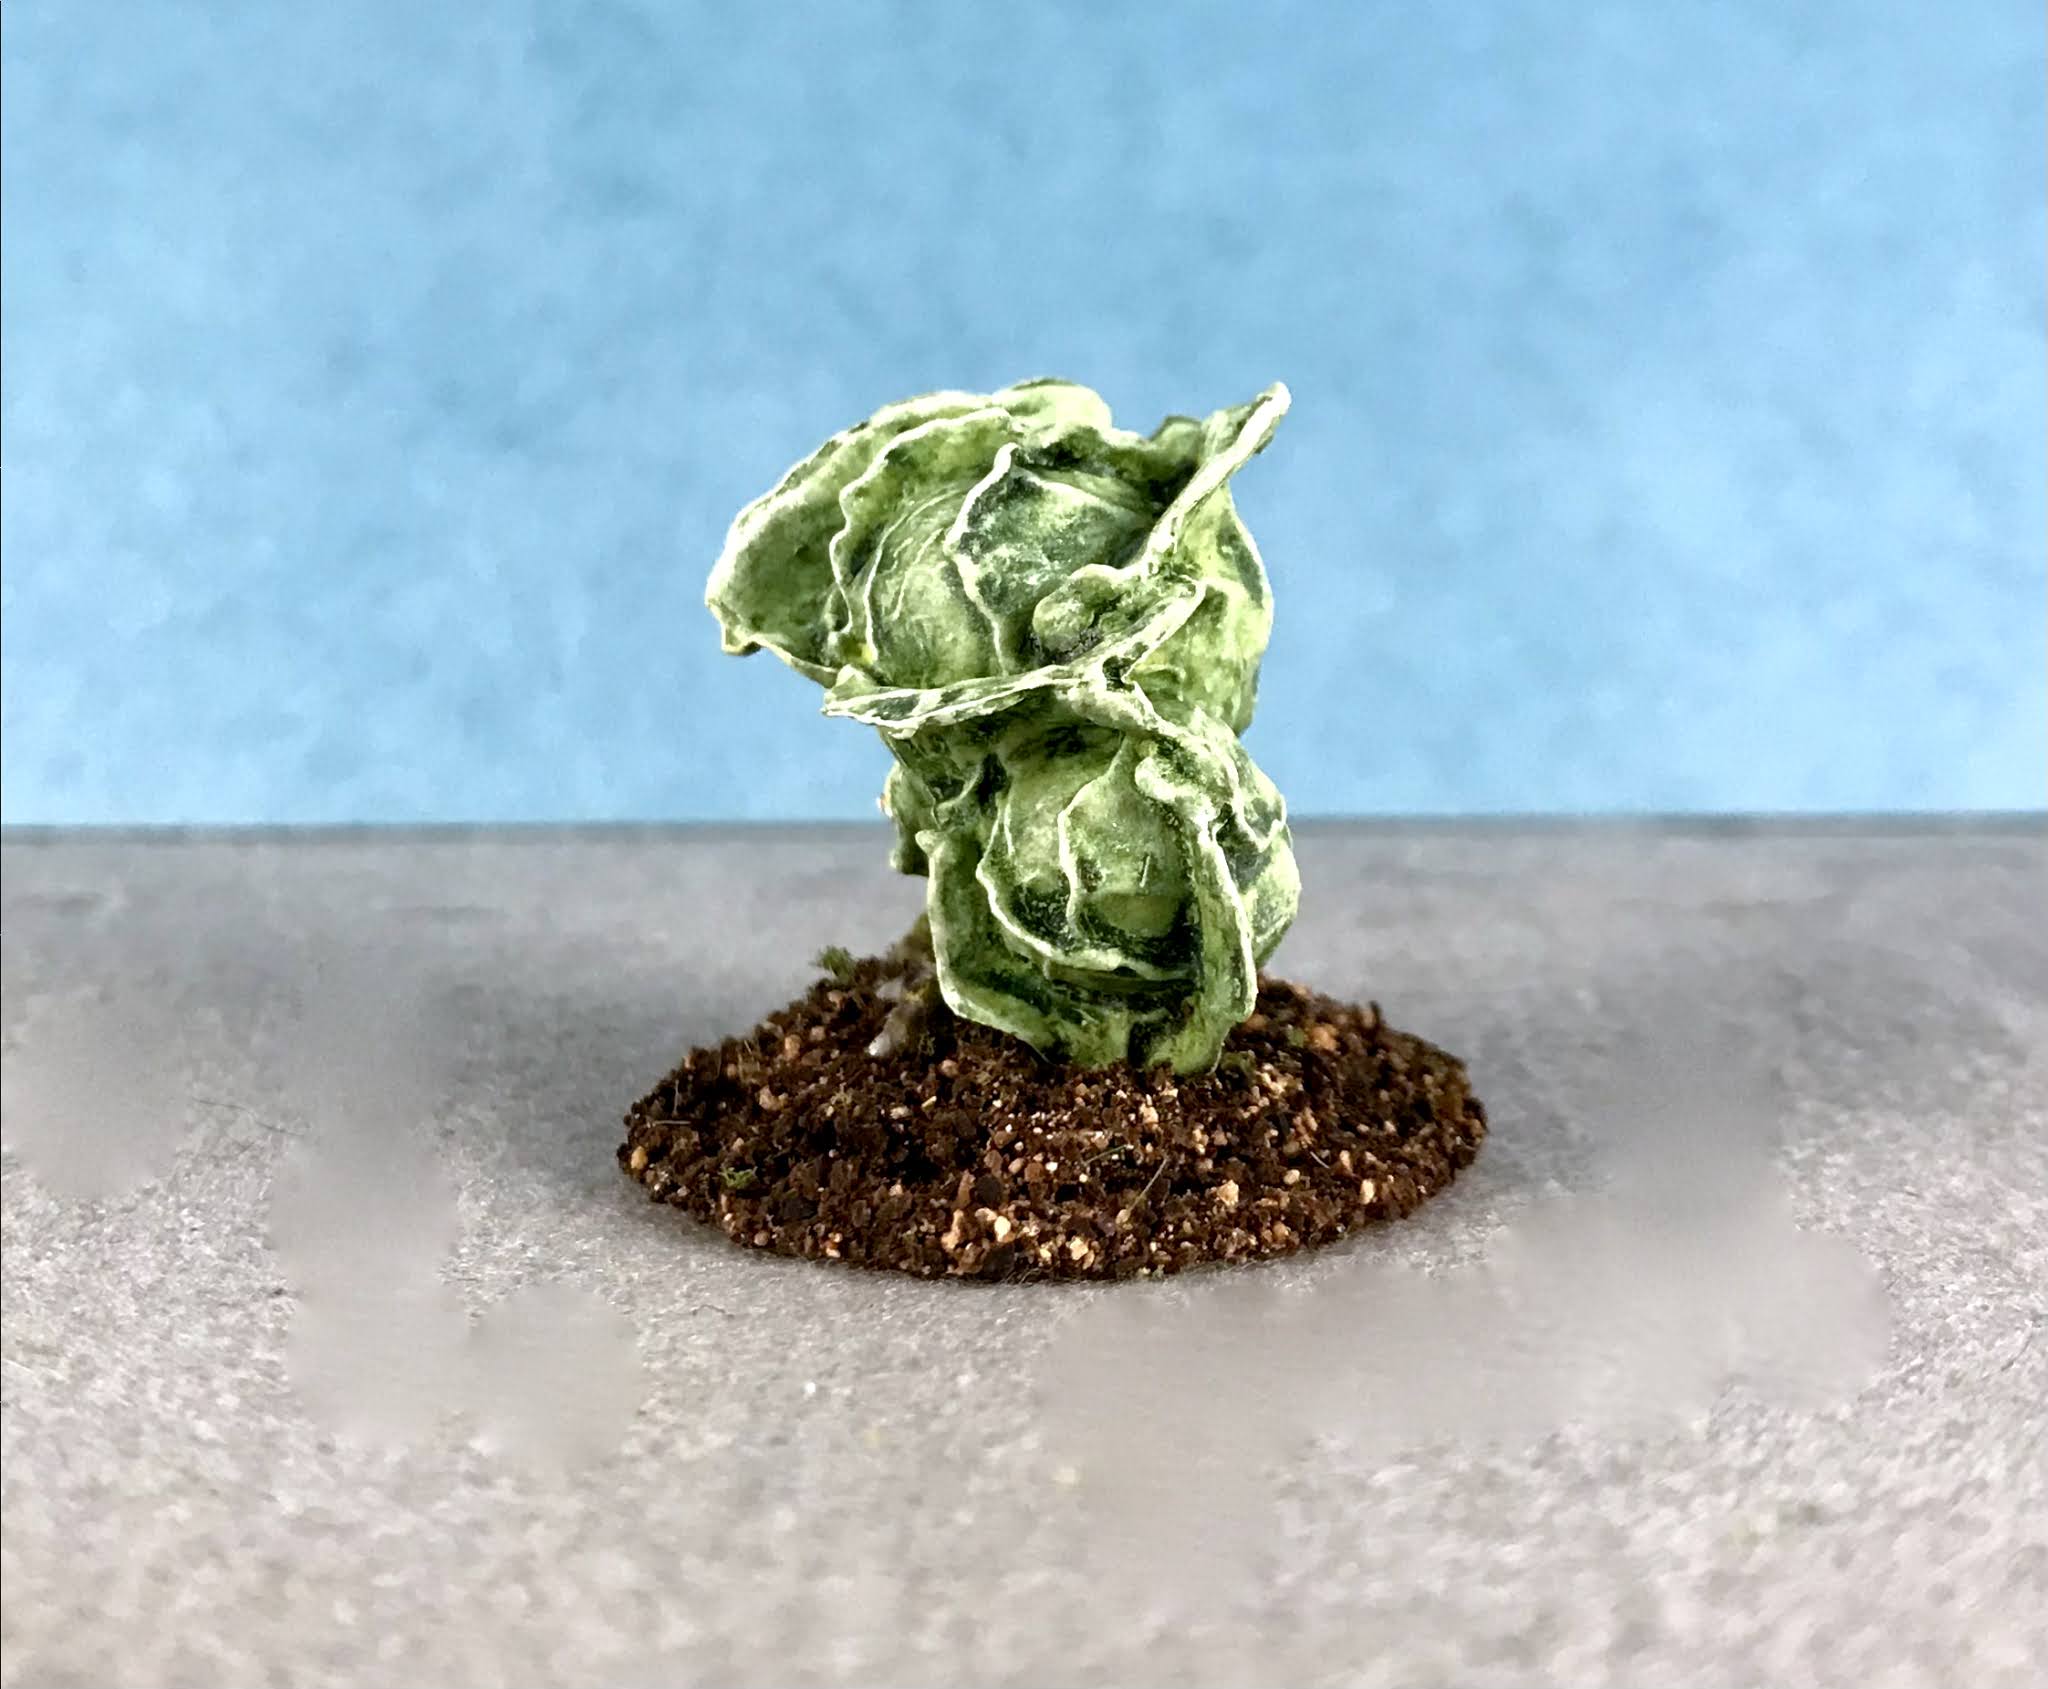
Dire Cabbage: Bones 5 Fan Favorites Figure

    This past week I painted the "Dire Cabbage" from the Bones 5 Fan Favorites Expansion.  
    I prepped the figure in the usual way, soaking it in a dish of water with a couple drops of dish-soap added, then giving it a light scrub with a soft toothbrush, and then rinsing and drying it.  I then trimmed the figure's integral base a little, and glued the figure to a 1" black-primed metal washer with some Aleene's Tacky glue.  I then placed the figure in my painting grip.   
     I began by painting the entire figure with Americana "Olive Green".  I then heavily drybrushed it with Ceramcoat "White".
     I let the first coats dry for a while, and then gave the entire figure a coat of thinned Citadel  Contrast "Creed Camo".  When this was dry, I went back and dry brushed it again with the base "Olive Green", and then drybrushed with the "White". 
               Next, I went over his legs with a coat of Citadel Contrast "Aggaros Dunes".  I then painted the mouth with Anita's "Violet", and the spikes on his tail with Crafter's Acrylic "African Violet" .  After that, I mixed a little Reaper MSP "Breast Cancer Awareness Pink" into the "African Violet", and blended in some lighter tips on the tail spikes.
          I then painted his claws with Folk Art "Barn Wood", and his teeth with Reaper MSP "Bleached Linen". After that, I painted the eye socket with Citadel Contrast "Wyldwood". 
      I let the claws and teeth dry for a while, and then gave then a coat of Citadel "Agrax Earthshade" wash.  When the wash was dry, I highlighted the claws with the base "Barn Wood", and the teeth with the base "Bleached Linen".  After that, I painted the eye with Reaper MSP "Holy Berry".  I went back then and did spot highlights on the teeth, and a pinpoint highlight in the eye, using some Ceramcoat "White".  Lastly, I painted the base with Americana "Charcoal Grey". 
     I let the figure dry overnight and the next day I gave it a coat of Americana "DuraClear Matte" varnish. When dry, I used some white glue to glue a mix of dried used coffee grounds and nutmeg to the figure's base. Another overnight dry, and I sprayed the figure with Testor's Dullcote". 


     I'm really happy with this little guy!  It is such a fun and imaginative figure; and there's a lot of detail in the sculpt which made painting it a lot of fun.  


Monday, March 7, 2022

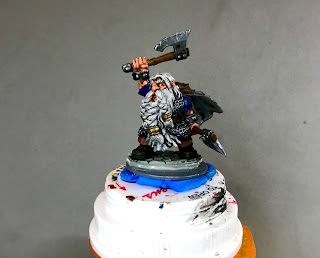
Boran Bronzebeard (B): Bones 5 Figure

      This week I finished up the second of the two "Boran Bronzebeard" figures I have. He is one of the Dwarf warrior models from the two The Dwarf King's Crypt Encounter Sets that I got through the Bones 5 Kickstarter.  Between the two sets, I have 12 of the Dwarf warriors (2 each of the 6 that came in each set.  
        I prepped the figures in the usual way, soaking them in a dish of water with a couple drops of dish-soap added, then giving them a light scrub with a soft toothbrush, and then rinsing and drying them.  
      I decided I would do them up as a unit for use in various wargames, so I wanted to do one of the figures up as a distinct leader, and one up as a distinct assistant leader.  So, I needed to make some conversions to the figures to make them more distinct.  
      For the one that would be the leader, I decided I would swap out his axe for a war-hammer, since all the other warriors are axe-armed, it would make him more unique.  For the second figure, I decided to take the spare axe I now had, and put it in his left hand so he would be dual-wielding. 

        The first version, the leader is posted here: Boran Bronzebeard (A).   This is the second, assistant leader, figure.   I stuck him  on a pill bottle with a bit of blue-tac to start.
       I began painting by giving all the chainmail armor a coat of Ceramcoat "Black".  When dry, I drybrushed it with Folk Art Metallic "Gunmetal Grey".  I then went over it lightly with a drybrush of Reaper MSP "Polished Silver".  Next I painted his face, arms, and hands with Americana "Shading flesh", and his tunic with Crafter's Acrylic "Bright Blue".
     Next, I painted his cape with Americana "Zinc" and the fur on his cape with Americana "Asphaltum".  After that, I did his shoes, belt and pouch with Reaper MSP "Noir Wanut Brown".
     Then I painted his boot tops with Americana "Terra Cotta, and then I did the parts I planned to eventually paint metallic gold, with Accent "Mustard Seed".  I followed this with painting his beard with Americana  "Grey Sky", his axe handles with Reaper MSP "Turkey Brown", the axe heads and handle bases with the "Zinc", and the soles of his boots with the "Black". 
       I then painted the beard holders with Folk Art Brushed Metal "Brushed Bronze"; and then did the axe heads and the handle bases with Reaper MSP "Honed Steel".  After that, I painted the bracelets, with the "Gunmetal Grey" that I had used earlier on the chainmail. 
     I let the figure dry for a while, and then gave his face, arms, and hands a coat of Citadel Shade "Reikland Fleshshade".   I let that dry, and then gave the rest of the figure a coat of Citadel Shade "Nuln Oil". 
      I let all the washes dry for a while, and then began on the highlighting.  First I painted his eyes, and then highlighted his skin with the base "Shading Flesh", mixed with "Reaper MSP "Rosy Highlight". I then highlighted his beard with first the base "Grey Sky" and then Americana "Snow White".
     Next, I highlighted his tunic with the base "Bright Blue", and some Crafter's Acrylic "Cool Blue".  I then highlighted his cape with the base "Zinc", and some Crafter's Acrylic "Storm Cloud Grey".  After that, I highlighted his boot tops with the base "Terra Cotta", and highlighted the boots, belt and pouch with Crafter's Acrylic "Cinnamon Brown" . 
     I then highlighted the fur on the cap with the base "Asphaltum", and some Americana "Mississippi Mud", and then did the highlights on the axe handles with some Reaper MSP "Shield Brown".  After that, I highlighted his beard rings with some Folk Art Metallic "Pure Gold", and some Ceramcoat "Wedding Gold". I wrapped up the painting by highlighting the axes with the "Polished Silver", and the bracelets with Ceramcoat "Metallic Silver".
      I let the figure dry overnight and the next day I gave him a coat of Americana "DuraClear Matte" varnish.  Then when the varnish was dry, I used some white glue to glue some sand onto the bases.  When this was dry I  painted it with Citadel Contrast "Wyldwood".  When that was dry,  I drybrushed the sand with Americana "Neutral Grey", and then a bit of Folk Art "Barn Wood".  Due to the weather, I was not able to give the figure a final spray varnish.


Monday, February 21, 2022

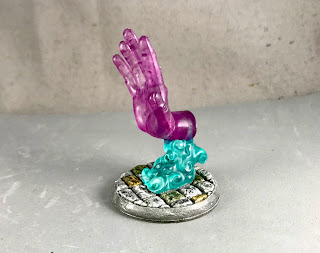
Hand Spell Effects: Bones 5 Figures

     This past couple weeks I painted the 3 translucent Hand Spell Effects from the Spell Effects 2 set in the Bones 5 Kickstarter Core Set. 
       I prepped these figures in the usual way, soaking the pieces in a dish of water with a couple drops of dish-soap added, then giving them a light scrub with a soft toothbrush, and then rinsing and drying them.  Once dry, I glued the parts together (hand and base) using Gorilla Gel superglue.   I then glued them to 2" primed metal washers, using the superglue again.  I then glued each washer to a pill bottle with a couple drops of Elmer's School Glue.   
     I painted these all basically in the exact same way, so only took photos of the first one.
     I began by painting the entire hand, and the swirl of magic vapor it sits on with Americana "DuraClear Matte" varnish to give the paint a better surface to stick too.  When dry, I painted the grasping hand with Citadel Contrast "Iyanden Yellow", the pushing hand with Citadel Contrast "Magos Purple", and the punching hand with Citadel Contrast "Blood Angels Red".  I let these colors dry, and then painted the vapor clouds with Citadel Contrast "Aethermatic Blue".
     When the Contrast paint was dry, I painted the stonework bases with Americana "Neutral Grey".  When dry, I gave the bases a  wash with Citadel Shade "Nuln Oil". I let the "Nuln Oil" dry, and then drybrushed the bases with, first, Folk Art "Gray Green" , and then, secondly, some Americana "Dove Grey".   After the drybrushing, I went back and added a little thinned Citadel Contrast "Militarum Green" to a couple of the stones on each base; followed by doing the same with a little thinned Citadel Contrast "Aggaros Dunes" on a couple other stones, to add some visual interest.
        The next day I gave all three pieces a complete coat of Americana "DuraClear Matte" varnish. 


     I think these are really cool figures, but in my opinion Reaper made them twice as big as they should have been.  With their big 2" bases they are simply huge.  I would have preferred 1" bases, with the hands likewise scaled down to about half size.  That being said, these were fun to paint, and I think really look great with just a little effort.  


Friday, February 11, 2022

Reaper Bones 6 Kickstarter Name and Date Announced!

     This week, Reaper announced the kick-off date, March 24th 2022, and theme name, "Tales From the Green Griffin",  of their upcoming Bones 6 Kickstarter.  If you'd like to  see a handful of photos of figures that are expected to be included, head over to the Bones 6 Re-Launch Hype thread on the Reaper Forums:  Bones 6 Pre-Launch Hype.


Monday, February 7, 2022

Boran Bronzebeard (A): Bones 5 Figure

     This week I finished up the first of the two "Boran Bronzebeard" figures I have. He is one of the Dwarf warrior models from the two The Dwarf King's Crypt Encounter Sets that I got through the Bones 5 Kickstarter.  Between the two sets, I have 12 of the Dwarf warriors (2 each of the 6 that came in each set.  
       I prepped the figures in the usual way, soaking them in a dish of water with a couple drops of dish-soap added, then giving them a light scrub with a soft toothbrush, and then rinsing and drying them.  
     I decided I would do them up as a unit for use in various wargames, so I wanted to do one of the figures up as a distinct leader, and one up as a distinct assistant leader.  So, I needed to make some conversions to the figures to make them more distinct.  
      For the one that would be the leader, I decided I would swap out his axe for a war-hammer, since all the other warriors are axe-armed, it would make him more unique.  For the second figure, I decided to take the spare axe I now had, and put it in his left hand so he would be dual-wielding. 
They were easy conversions to do. I first sliced the axe off the first figure's hand, then drilled through the raised hand on that figure. Next,I drill a hole in the lowered left hand on the second figure. I then cut the war-hammer handle into two sections, and glued each into one end of the hand.  After that, I glued the spare axe into the left hand of the second figure.  (For the completed second figure, see: Boran Bronzebeard (B).
     I then trimmed down the bases of the figures, and glued them to 1" primed metal washers, using Aleene's Tacky Glue.   I then stuck the first one  on  pill bottle with a bit of blue-tac.
      I began painting by giving all the chainmail armor a coat of Ceramcoat "Black".  When dry, I drybrushed it with Folk Art Metallic "Gunmetal Grey".  I then went over it lightly with a drybrush of Reaper MSP "Polished Silver".  Next I painted his face, arms, and hands with a mix of Reaper MSP "Rosy Shadow", and Reaper MSP "Bronzed Shadow".
     Next, I painted his tunic sleeves with Reaper MSP "Dreidel Blue", and his cape with Reaper MSP "Void Blue".  After that, I painted the fur on his cape with Crafter's Acrylic "Storm Cloud Grey", and his shoes, belt and pouch with Reaper MSP "Noir Black".
     Then I painted his boot tops, and all the parts I planned to eventually paint metallic gold, with Accent "Mustard Seed".  I followed this with painting his beard with Reaper MSP "Auburn Shadow", his hammer handle with Reaper MSP "Chocolate Bar", and the hammer head and handle base with Americana "Zinc". 
          I noticed at that point that I had't painted the soles of his boots, so I quickly did those with Reaper MSP "Blackened Brown".  I then painted the beard holders and bracelets  with Folk Art Brushed Metal "Brushed Bronze", and the hammer head and handle base with the "Gunmetal Grey" that I had used earlier on the chainmail. 
     I let the figure dry for a while, and then gave his face, arms, and hands a coat of Reaper MSP "Flesh Wash". I let that dry, and then gave his beard and the bracelets a wash with Citadel Shade "Agrax Earthshade".  Another drying period, and I gave a coat of Citadel Shade "Nuln Oil" to his clothing, cape, fur, hammer, and boots. 
     Once more I let all the washes dry for a while, and then began on the highlighting.  First I painted his eyes, and then highlighted his skin with the base "Rosy Shadow", mixed with varying amounts of "Reaper MSP "Rosy Skin". I then highlighted his beard with first Crafter's Acrylic "Orange Spice", and then Accent "Golden Oxide". 
   Next, I highlighted his tunic with the base "Dreidel Blue", and some Reaper MSP Bones "Tropical Blue".  I then highlighted his cape with the base "Void Blue", and some Reaper MSP "Ultramarine Blue", with some final highlight touches with a little of the "Dreidel Blue".  After that, I highlighted his boot tops with the base "mustard Seed", and highlighted the boots, belt and pouch with the base "Noir Black" with  little of the "Tropical Blue" mixed in. 
       I then highlighted the fur on the cap with the base "Storm Cloud Grey", and some Americana "Grey Sky", and then did the highlights on the war-hammer handle with some Reaper MSP "Shield Brown".  After that, I highlighted his bracelets and beard rings with some Folk Art Metallic "Pure Gold", and some Ceramcoat "Wedding Gold". I wrapped up the painting by highlighting the war-hammer with the base "Gunmetal Grey", and a little of the "Polished Silver".
      I let the figure dry overnight and the next day I gave him a coat of Americana "DuraClear Matte" varnish.  Then when the varnish was dry, I used some white glue to glue some sand onto the bases.  When this was dry I  painted it with Citadel Contrast "Wyldwood".  When that was dry,  I drybrushed the sand with Americana "Neutral Grey", and then a bit of Folk Art "Barn Wood".  Due to the weather, I was not able to give the figure a final spray varnish.


      In other news, way back in August of last year, I got in my head the idea to keep a couple of the figures from the Bones V Townsfolk Add-On at hand while painting, and made such and announcement when I posted about the Anchor of Damnation when I painted it: Here
   My thought was that as I had extra color dispensed from various dropper bottle paints I could use some of it to gradually apply colors to the Townsfolk.  This was a good idea, as I got base colors applied to both the figures; but the problem was I never had a time set aside to do the final finishing washes and highlights.
    Well this past week I set some time aside and finally finished those first two Townsfolk that had been languishing on my paint table in a half-completed state for a few months now.


Monday, January 17, 2022

Dwarven Archway: Bones 5 Figures

     Over the past few months, I have been working on pieces from the pair of Dwarf King's Crypt Encounter Sets I have from the Bones 5 Kickstarter.  This past week I did the two "Archway" pieces.  
      I prepped these terrain pieces in the usual way, soaking them in a dish of water with a couple drops of dish-soap added, then giving them a light scrub with a soft toothbrush, and then rinsing and drying them.  I then glued a pair of 80mm x 40mm steel bases under each one to give an underside that would stick to a magnetic storage surface.  The cavities in the underside of the arches were just a couple millimeters too short in length, so I ended up having to cut a couple notches in the underside to get the bases to fit.   I had to use a stacked pair of the steel  bases under each one so they would have the required depth to end up flush with the bottom of the arch.
     I then glued each archway to the top of a weighted prescription bottle.  (I forgot to take a "Before" shot of the arches, so we'll get right into the painting. 
     I began by painting both ahces entirely with Ceramcoat "Charcoal".  When dry, I gave both of them complete washes with Citadel "Nuln Oil" Shade.
     I let the wash dry, and then drybrushed the arches with, first,  Americana "Zinc", then Crafters Acrylic "Storm Cloud Grey".
     Lastly, I did a drybrush of both pieces with Americana "Grey Sky". The next day I gave both pieces a coat of Americana "DuraClear Matte" varnish.   The weather has been too wintery to do any spraying, so I wasn't able to give these their final Testor's Dullcote" varnish yet.    


     I'm pleased with how these turned out.  I was tempted to do something fancy, like making some of the runes glowing, but in the end I really just wanted them for plain pieces of terrain.  I added one of the Dwarf Zombies for scale. 

Monday, January 3, 2022

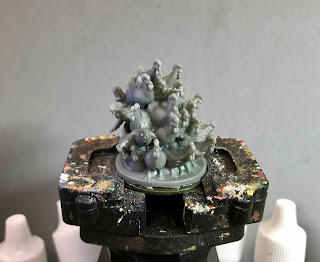
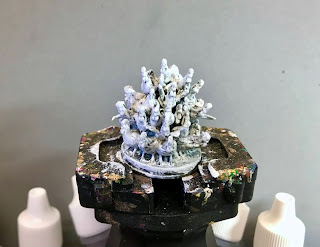
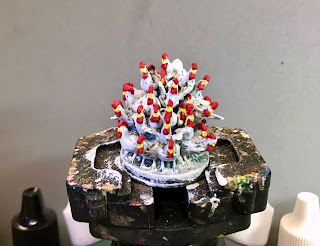
Chicken Swarm: Bones 5 Fan Favorites Figure

      Happy 2022 everyone!  Back before Christmas one of the last things I got painted was the "Chicken Swarm" figure from the Bones 5 Fan Favorites Expansion as a Christmas gift for a friend.  I didn't want to post it before Christmas for that reason; so now I thought I'd get it up on the blog
      I prepped the figure in the usual way, soaking it in a dish of water with a couple drops of dish-soap added, then giving it a light scrub with a soft toothbrush, and then rinsing and drying it.  I then glued the figure to a 1" primed metal washer, using Aleene's Tacky Glue.  I then put the figure into my painting grip.   
     I began by painting the entire figure with Ceramcoat "White".  When this was dry, I gave the whole thing a coat of Citadel Contrast "Apothecary White".  When this was dry, I drybrushed the figure with Americana "Snow White". 
     I then painted the comb and wattle with Folk Art "Tomato Red", and after that I painted the beaks with Americana "Primary Yellow". 
     Next, I painted the shadow areas around the legs at the bottom, as well as the entire base, with Citadel Contrast "Wyldwood"; and when dry, I painted the legs with Americana "Antique Gold".  After that, I painted all the little eyes with Ceramcoat "Black".
     I let the figure dry overnight and the next day I gave the swarm a coat of Americana "DuraClear Matte" varnish.    Then, when  the varnish was dry,  I used some white glue to flock the bases.  Another overnight dry, and I sprayed the figure with Testor's Dullcote".       


     This is such a fun figure, and I'm really pleased with how it turned out! It was an interesting challenge since, while it is basically a simple figure, the repetitive nature of painting so many identical tiny chicken parts proved to require an added level of concentration.