Monday, October 18, 2021

Halloween Knight: Bones 5 Figure, Part 1

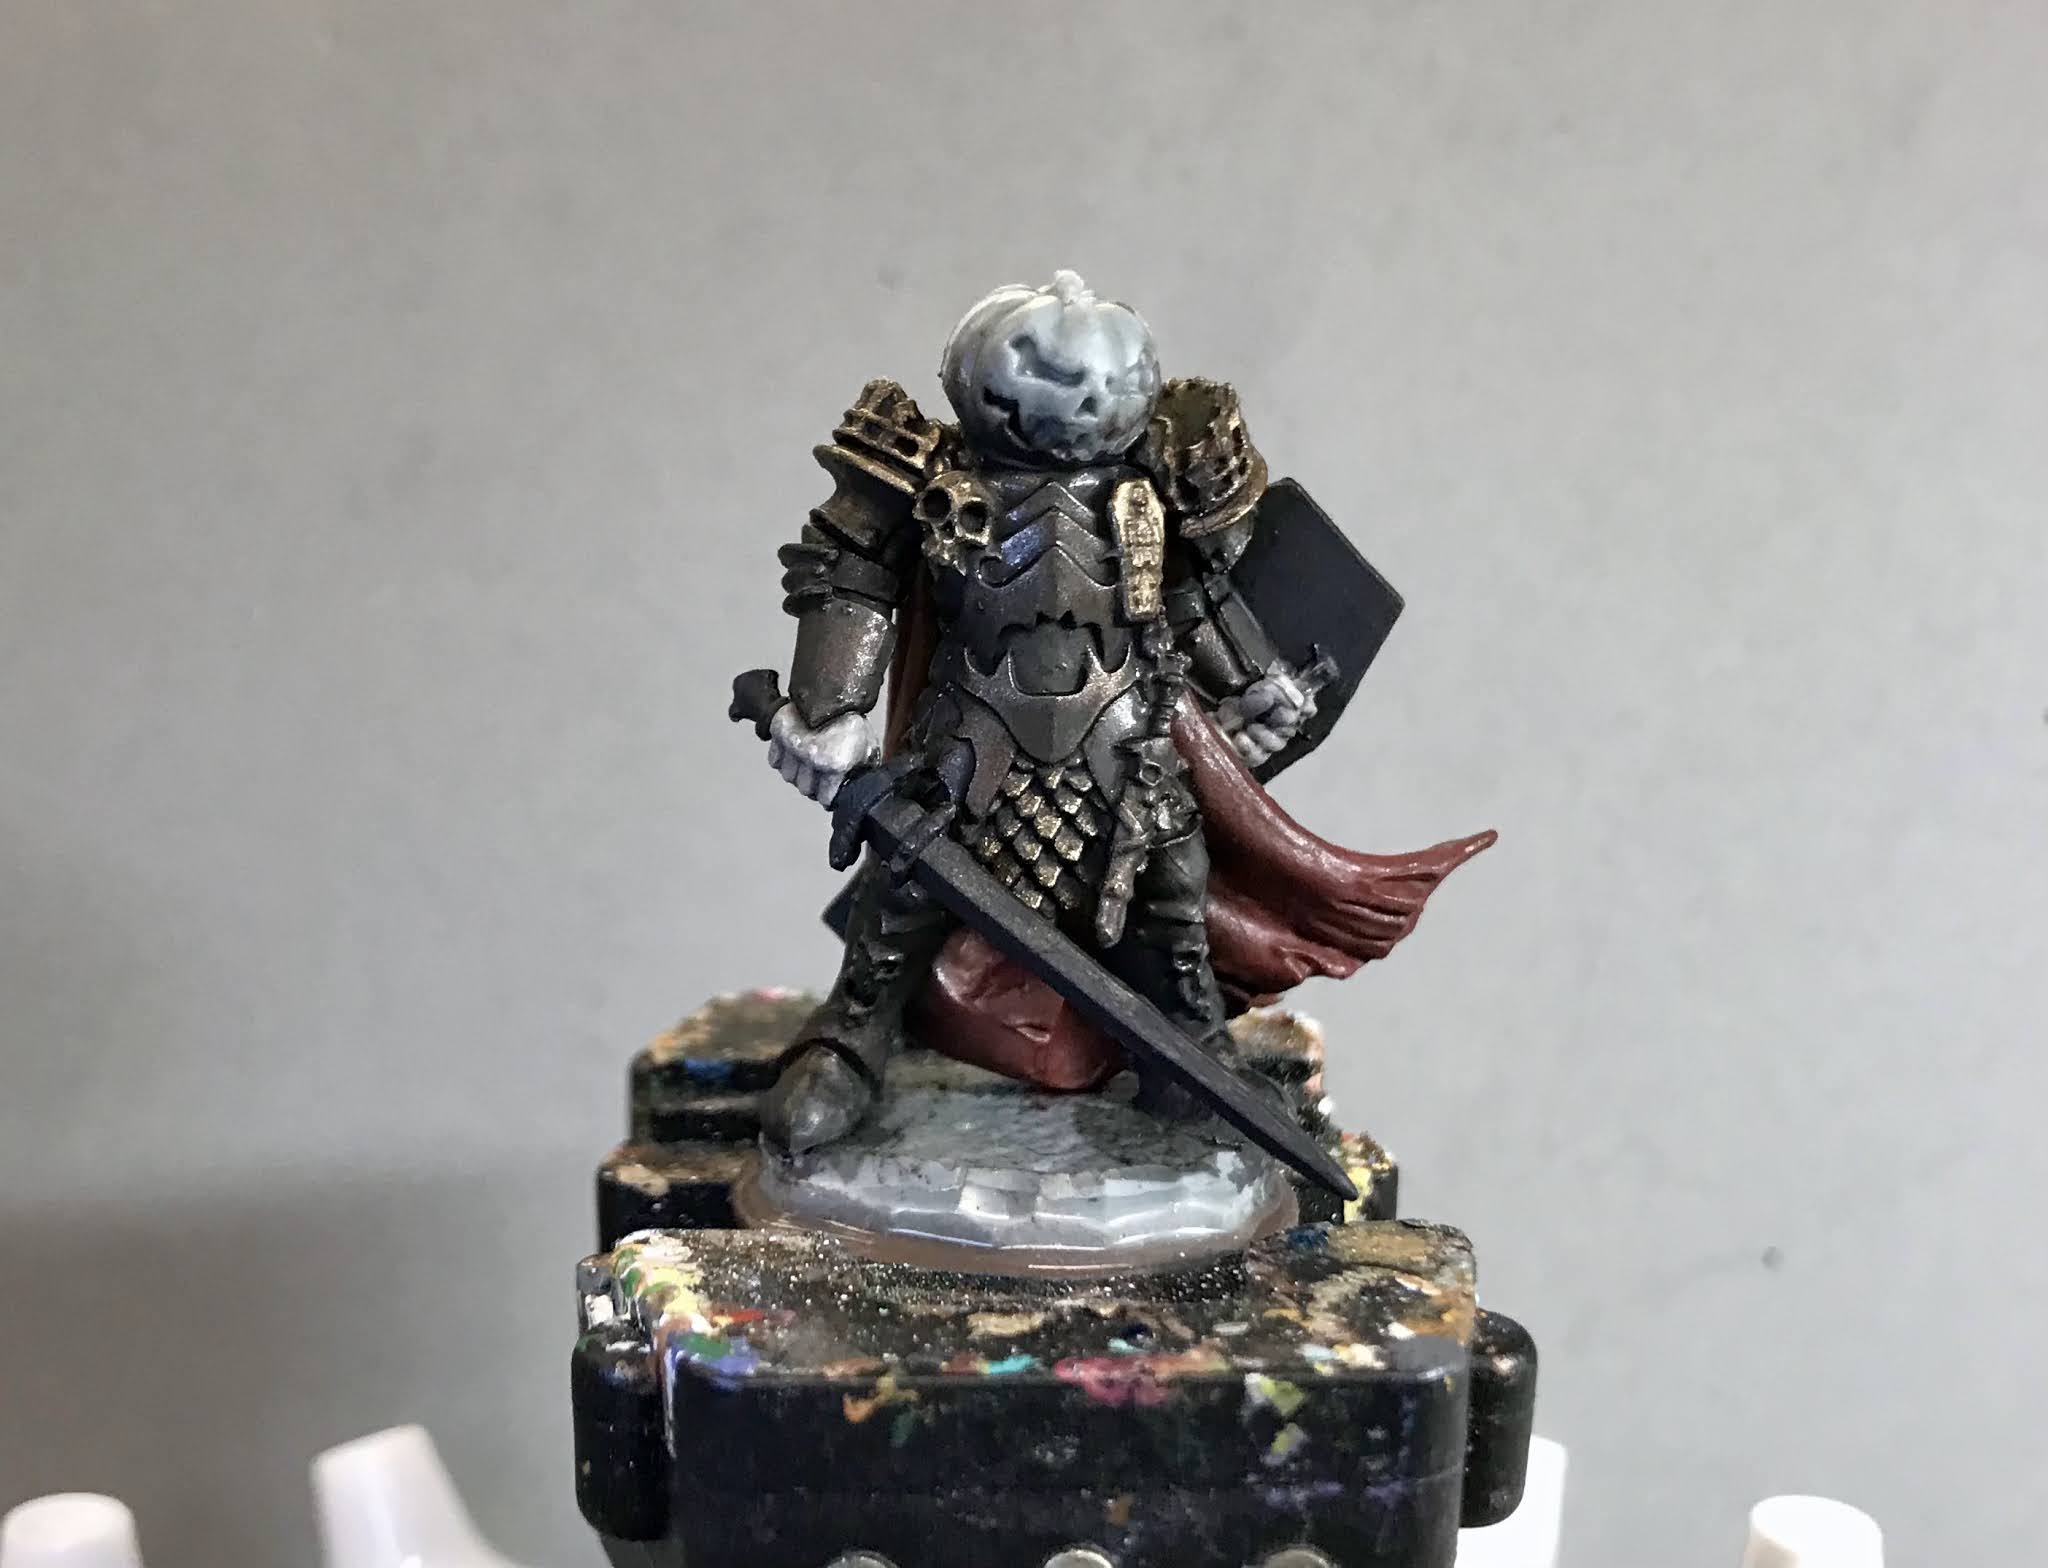
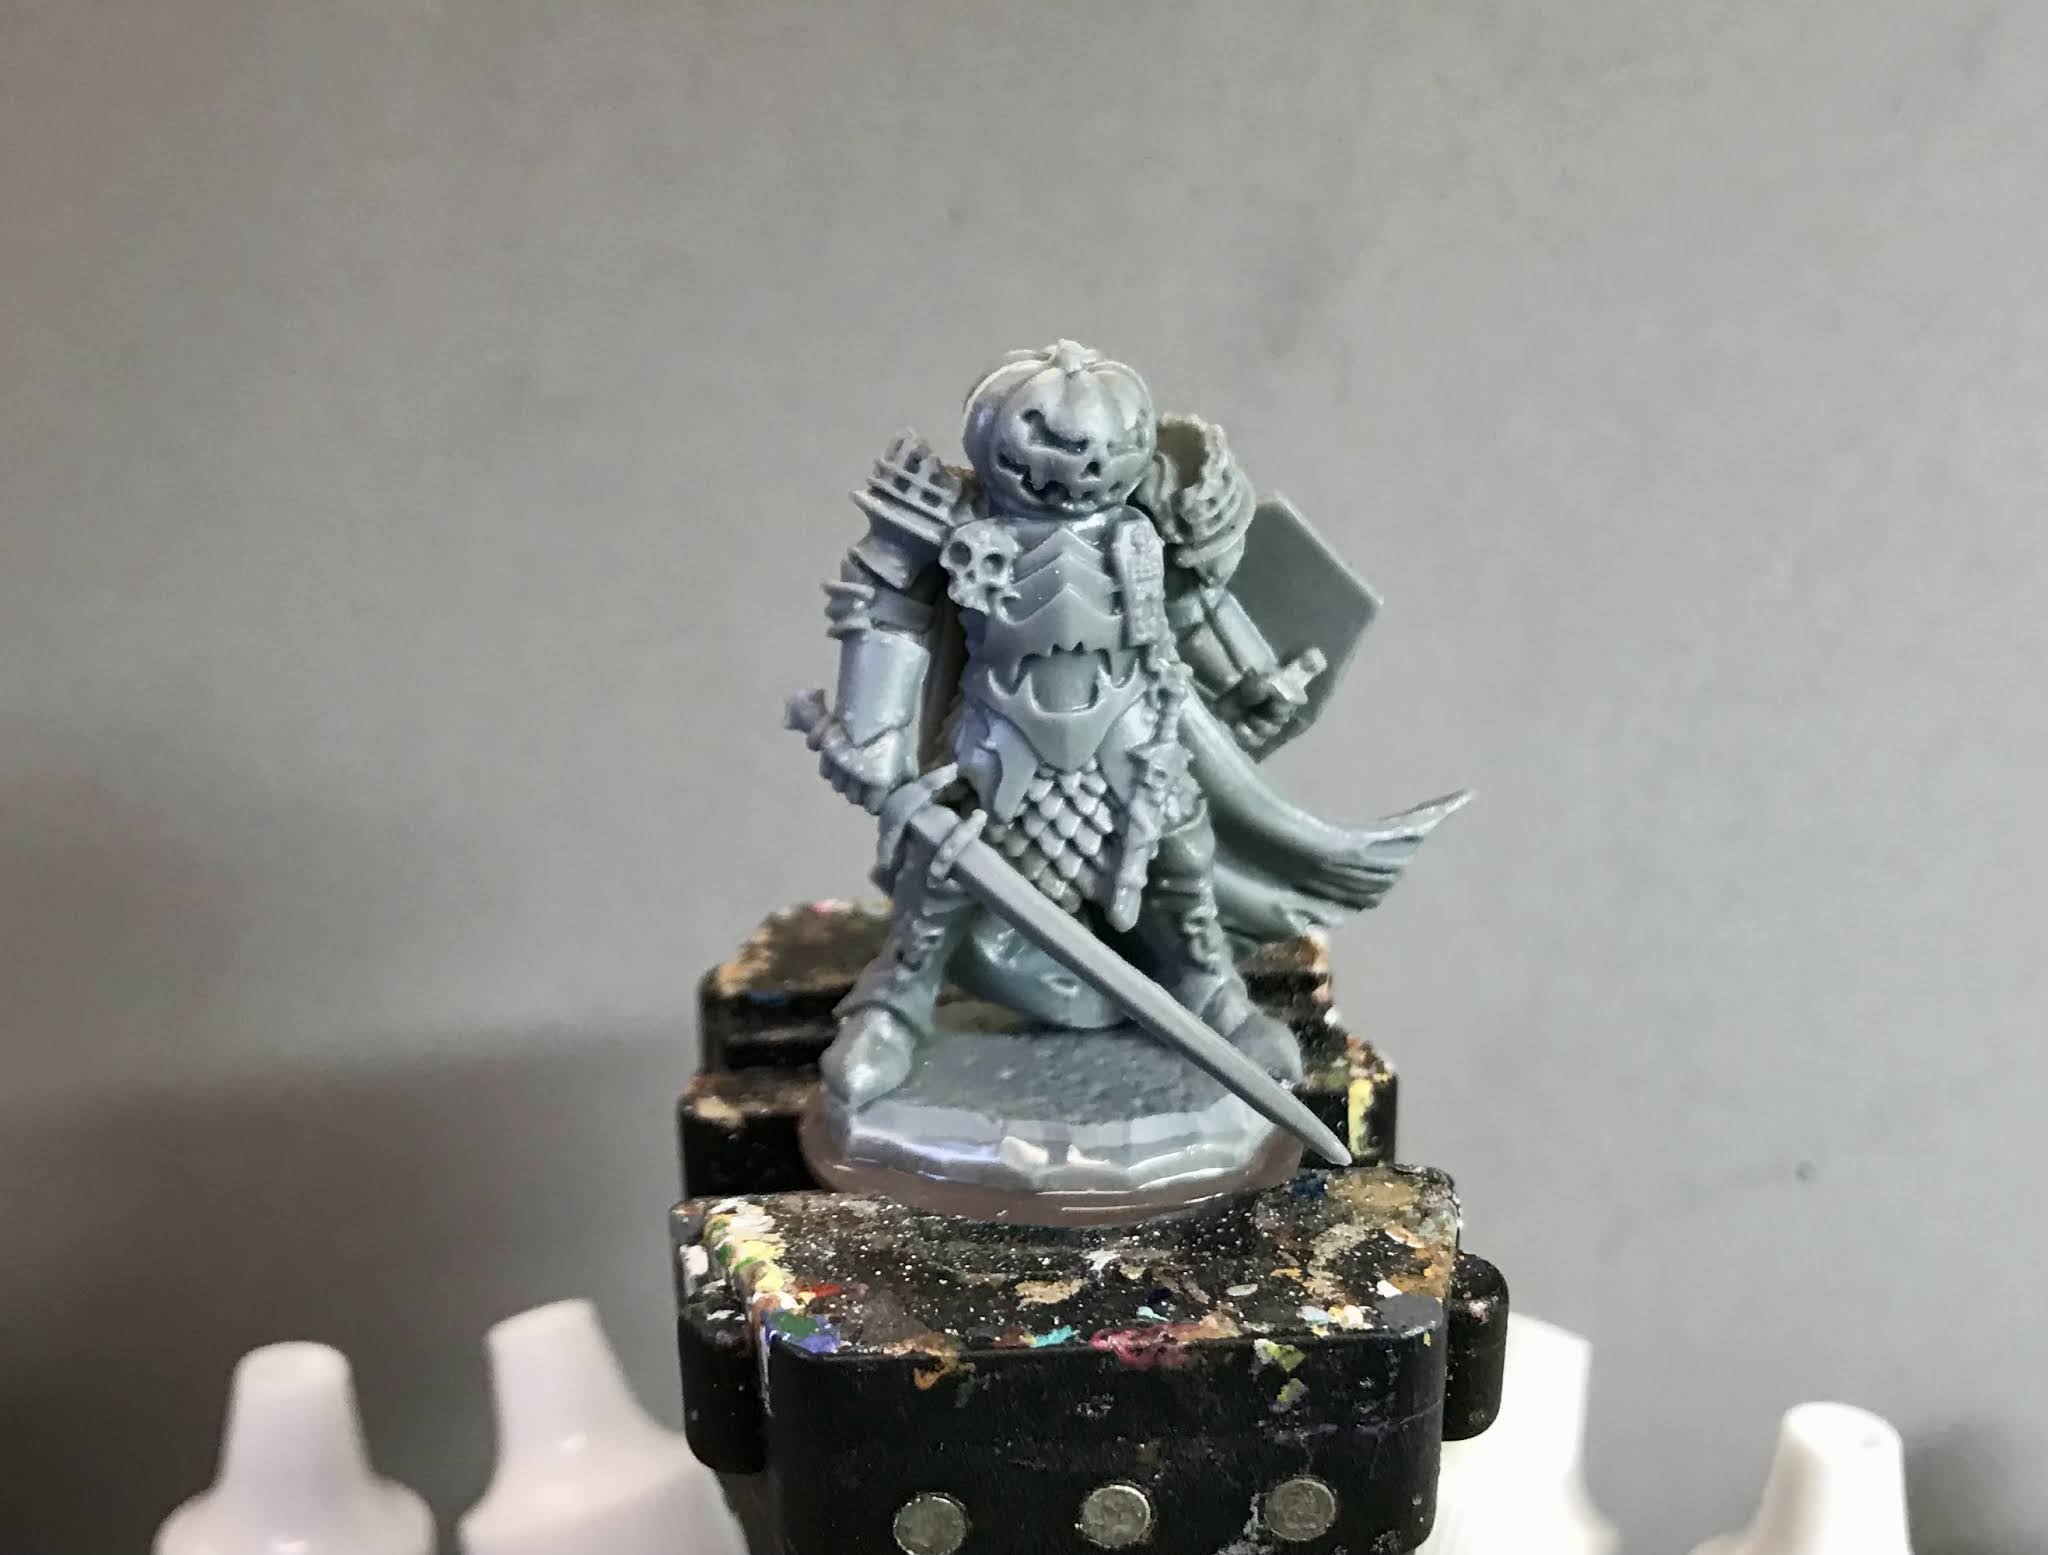
     This past week I started work on the "Halloween Knight" from the Bones 5 Core Set.  Given the time of year, I thought I'd take a break from working on the Dwarf King's Crypt, and do one of the Halloween figures that came in Bones 5.  Unfortunately, I didn't get it done on time, so will post the rest of the painting information next Monday.
     I prepped the figure in the usual way, soaking it in a dish of water with a couple drops of dish-soap added, then giving it a light scrub with a soft toothbrush, and then rinsing and drying it.  I then trimmed the figure's integral base a little, and glued the figure to a 1" primed metal washer with some Aleene's Tacky glue.  I then put the figure into my painting grip.       
     To start, I painted all the armor and the sword with Ceramcoat "Black".  When the "Black" was dry, I drybrushed the armor with Reaper MSP "Scorched Metal".  I then drybrushed the shoulder pieces with Folk Art Brushed Metal "Brushed Bronze".  After that, I drybrushed the scale armor skirt with Folk Art Color shift "Black Flash". 
     Next, I painted the lining of the cape with Pathfinder MSP "Urgathea Red", and then the did the hands with Reaper MSP "Alien Flesh".  After that, I painted the back of the shield with Reaper MSP "Nightmare  Black", and used the "Brushed Bronze" to paint the skull on the left of the chest armor and the little coffin on the right, as well as defining the base of the shoulder pieces.  I let everything dry for a while, and then gave the armor and the hands a coat of Citadel "Nuln Oil" wash.
     When the "Nuln Oil" was dry, I drybrushed the plate armor with a mix of the base "Scorched Metal, and some Ceramcoat "Metallic Silver".  Next, drybrushed the scale armor with the base "Black Flash" with a little of the "Metallic Silver mixed in as well, and the shoulder pieces with Folk Art Metallics "Pure Gold".  I then used the "Pure Gold to touch up the armor skull and coffin with a regular brush. After that, I painted the outer layer of the cape with Reaper MSP "Coal Black", and then painted the dagger sheath and coffin-lid shield face with Crafter's Acrylic "African Violet". I also painted the pumpkin head with Crafter's Acrylic "Orange Spice". 
     Next, I painted the shield face with Folk Art Color Shift "Purple Flash", and then painted the sword with Folk Art Metallic "Gunmetal Gray".  After that, I painted the design on the shield and parts of the sword hilt with Americana "Antique Gold". 
   And that's where I am now.   I hope to finish it up this week, and have it ready to post on Monday. See you all then.
    Part 2, the completion on the figure, can be found here: Part 2

Monday, October 11, 2021

Zombie Dwarf Thanes #2: Bones 5 Encounter Figures

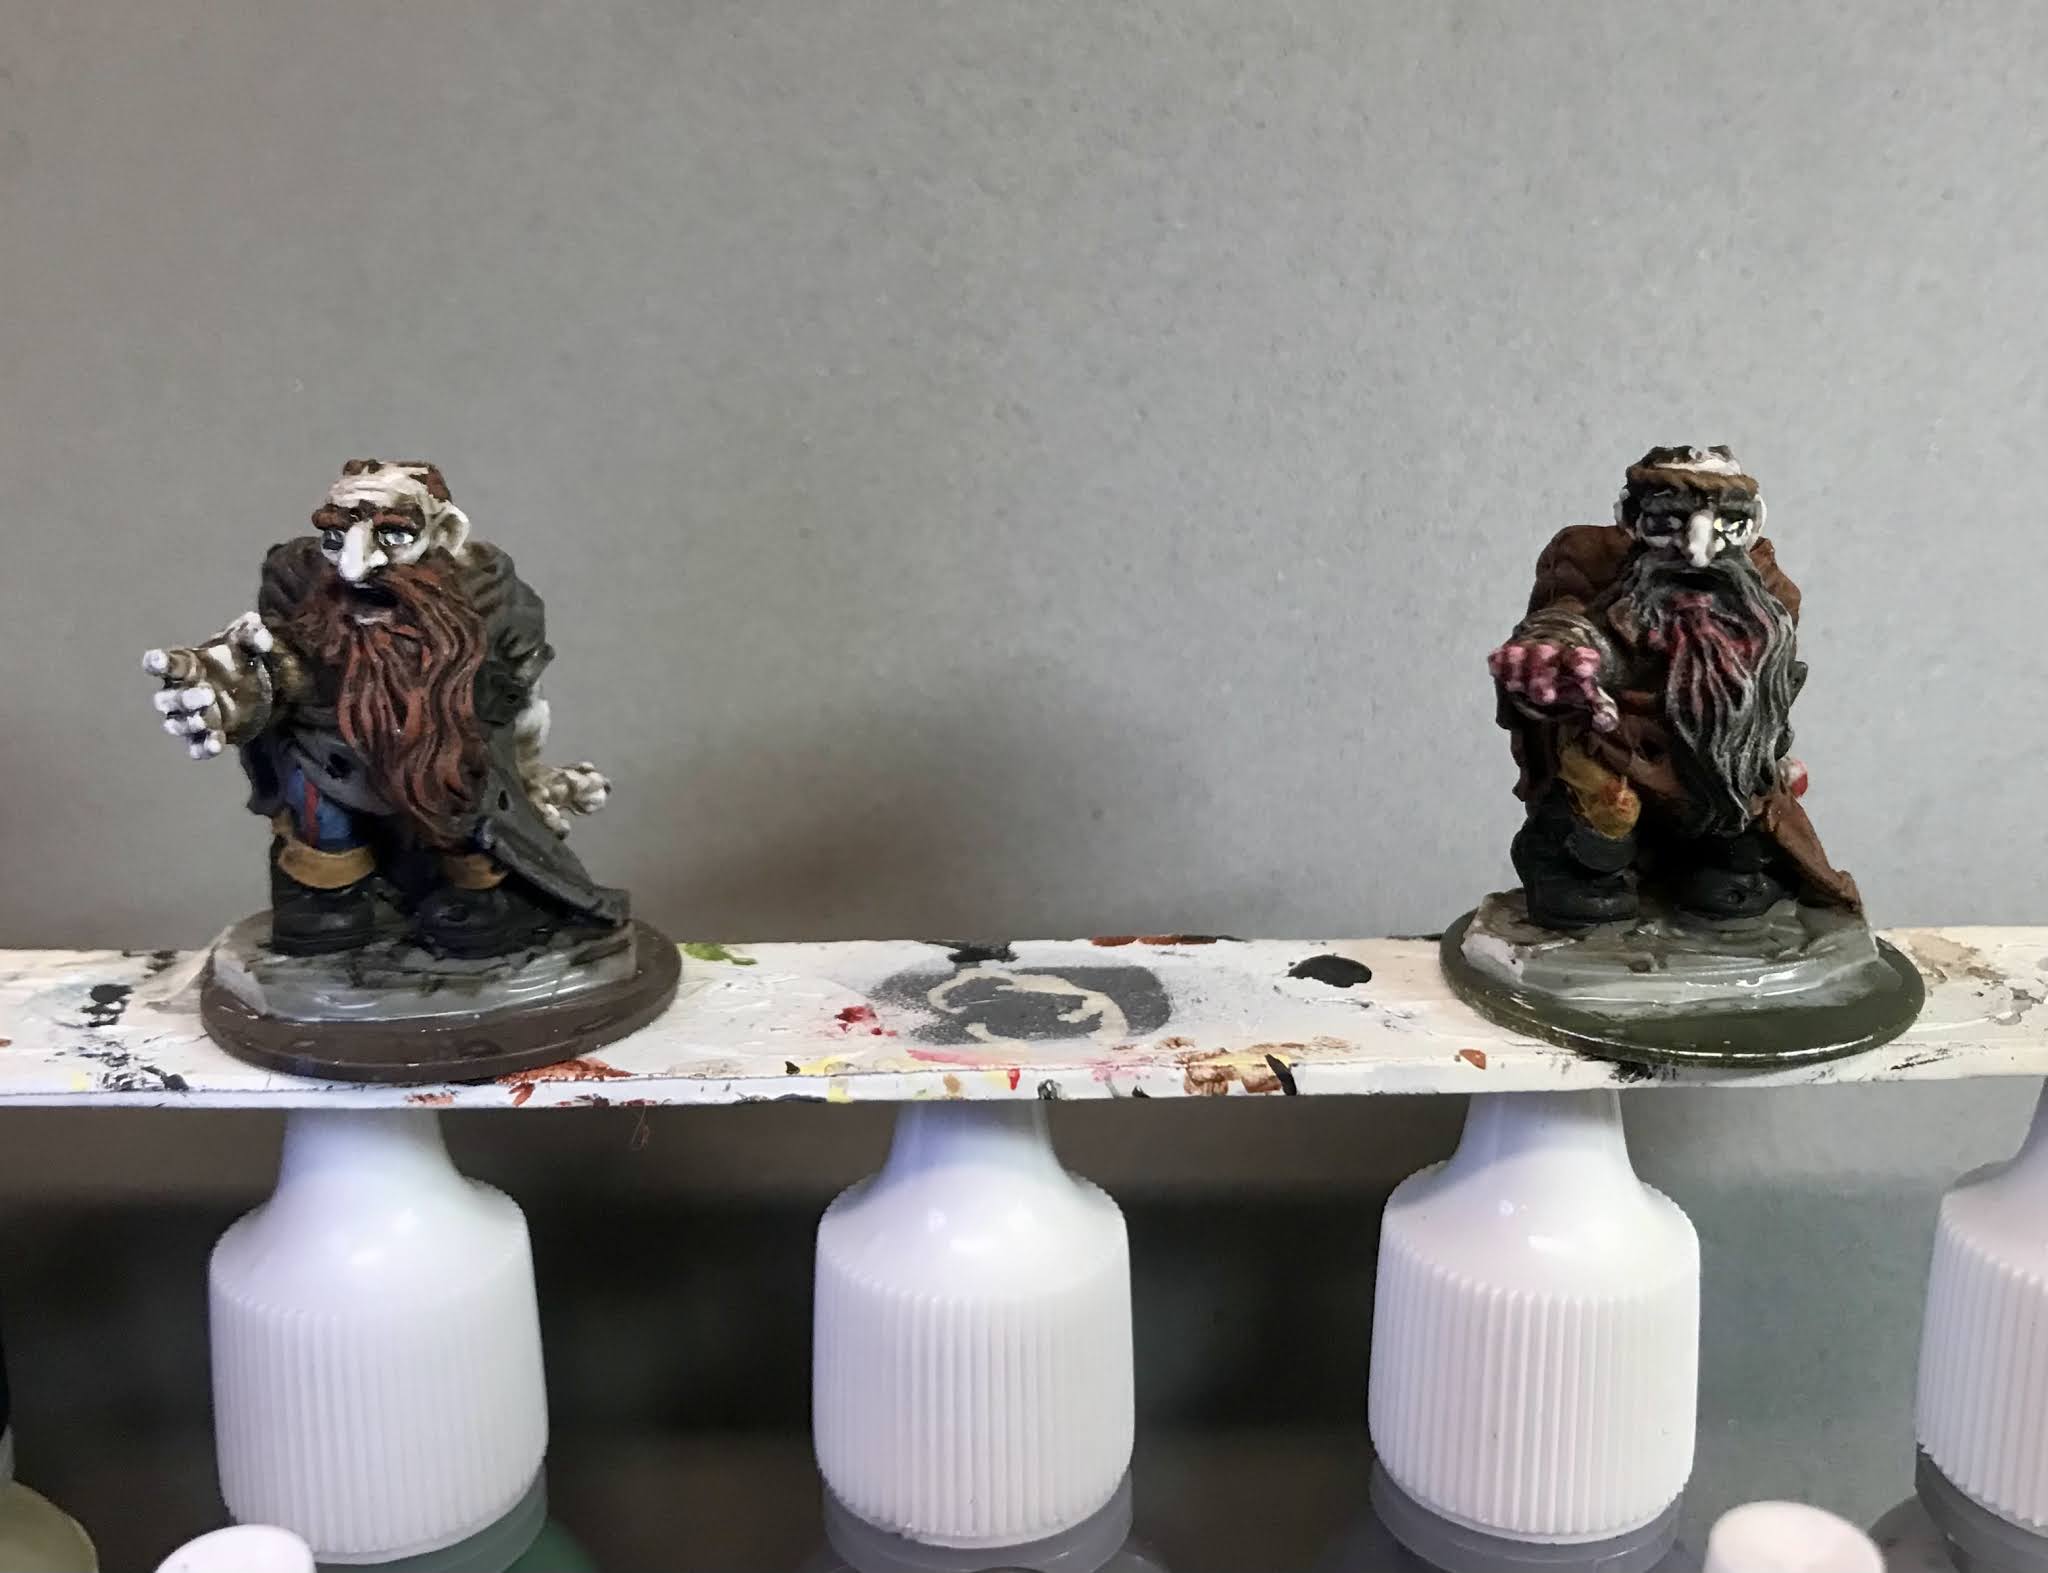
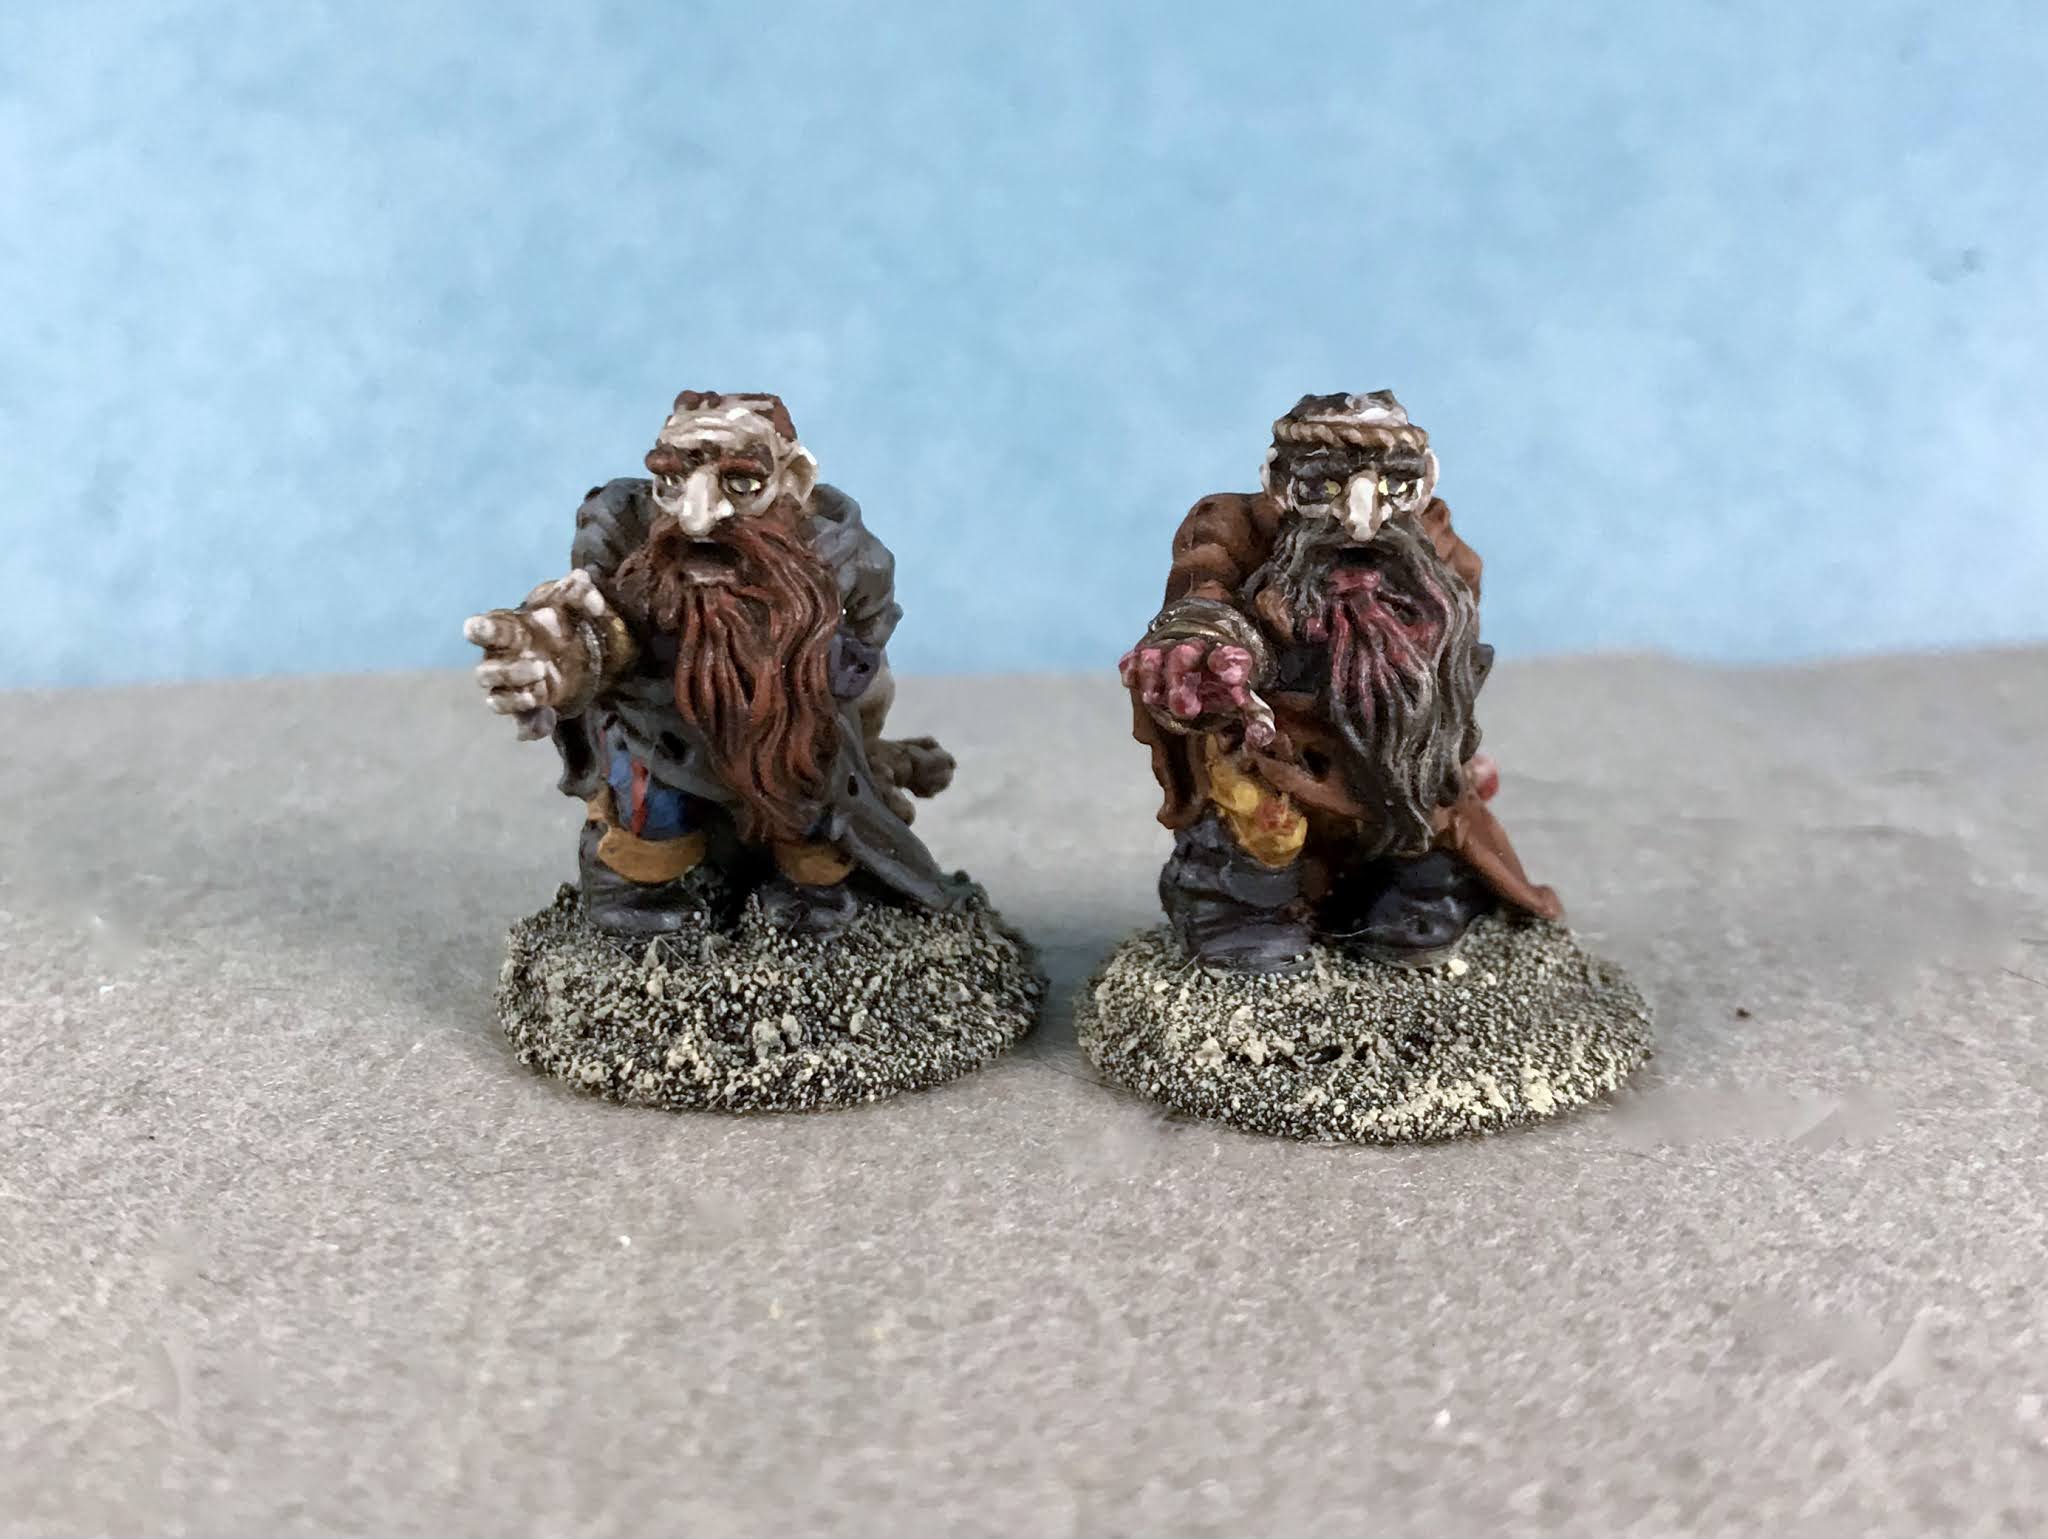
    This past week I painted the last two of the "Zombie Dwarf Thane" figures from the Bones 5 The Dwarf King's Crypt Encounter set; this time "Zombie Dwarf Thane #2".  Last week, I painted a pair of "Zombie Dwarf Thane #1".  As mentioned in my last post, the set only comes with one of each of these figures, but I ordered two of the Encounters as I wanted pairs of a number of the set's scenery items, as well as a bunch of these Dwarf Zombies.
    This will give me 6 of the Zombies. So to help them look more like a mixed group, I decided to paint each pair of identical figures differently, to give the pairs more of a differing appearance.   Also, while the Like the Thane #1 figure I did last week, these also had a raised right arm that I could easily chop.  So as I mentioned with the Thane 1 figures, I was able to simply swap the right hand on one of the #1's for the right hand off of one of these #2's.  This helped give that pair and this pair a slightly different appearance. 
      I prepped the figures in the usual way, soaking them in a dish of water with a couple drops of dish-soap added, then giving them a light scrub with a soft toothbrush, and then rinsing and drying them. At this point I did the hand swap, and also trimmed the circlet crown off of the one on the left.  I then glued them to 1" primed metal washers, using Aleene's Tacky Glue.  I glued the washers to a tongue depressor with a couple drops of Elmer's School Glue.
      I began by painting the skin on both figures with Reaper MSP "Alien Flesh".  Next, I painted the pants on the first figure with Ceramcoat "Denim Blue", and then the pants on the second figure with Americana "Antique Gold".   I then added stripes on the lefthand pants using a broad stripe of Reaper MSp "Void Blue", and then centering a smaller stripe of Reaper MSP "Holly Berry" within the thick one.  After that, I painted the boots on both figures with Ceramcoat "Black", and then painted the folded tops of the left boots with Accent "Mustard Seed" just to add a little extra visual difference. 
  Next, I painted the robes on the lefthand Thane with Americana "Zinc", and the robes on the righthand figure with Americana "Light Cinnamon".  I then painted the the belt on the lefthand one with Reaper MSP "Noir Black", and the belt on the righthand on with Americana "Americana "Charcoal Grey".  I also used the "Charcoal Grey" to paint the bracelets and the circlet on both Thanes.  After that, I painted the beard and hair on the lefthand one with Reaper MSP "Blackened Brown", and the beard and hair on the righthand one with Reaper MSP "Dusky Skin Shadow". 
   Next, I splotched Apple Barrel "Apple Maroon" on the hands, mouth, and beard of the righthand one, and also painted his circlet with Ceramcoat "Territorial Beige".  I then painted the bracelets with Folk Art Brushed Metal "Brushed Bronze", or Reaper MSP "Scorched Metal".    I let everything dry for a while, and then gave both figures complete coats of Citadel "Agrax Earthshade wash. 
     When the wash was dry, I painted their eyes with Apple Barrel "Lemon Chiffon", and then added pupils with Reaper MSP "Dark Elf Highlight".  After that, I highlighted their skin with the base "Alien Flesh", and then mixed in some Americana "Dove Grey".  I then mixed in some of the "Apple Maroon" to highlight the blood on the hands.  Next, I highlighted the beards, using Reaper MSP "Auburn Shadow" for the lefthand Thane's, and the base Charcoal Grey mixed with some Folk Art "Barn Wood" for the righthand Thane's. I then mixed some of the "Apple Maroon" in to highlight the righthand beard's blood spatter.
            I then highlighted the robes on the lefthand figure with the base "Zinc and then used some Crafter's Acrylic "Storm Cloud Grey". Afterwards, I highlighted his pants with the base "Denim Blue".  Next, I highlighted the robes of the righthand one with the base "Light Cinnamon" and then used some Folk Art "Teddy Bear Brown".  I followed with his pants, highlighting them with  the base "Antique Gold".   After that, I highlighted their boots and the belts with Reaper's MSP "Dark Elf Skin".  I then did a quick highlight on the lefthand one's boot top using the base "Mustard Seed", and the righthand one's circlet using Folk Art "Butter Pecan".  Lastly, I highlighted the bracelets I had painted with the "Scorched Metal" with Folk Art Metallic "Gunmetal Gray", and the other bracelets I highlighted with the base "Brushed Bronze".   I finished by painting the bases with Citadel Contrast " Templar Black".
      I let the Thanes dry overnight and the next day I gave them a coat of Americana "DuraClear Matte" varnish.  Then when the varnish was dry, I used some white glue to glue some sand onto the bases.  When this was dry I  painted it with Citadel Contrast "Black Templar".  When that was dry,  I drybrushed the sand with Folk Art "Rock Grey", and then a bit of Folk Art "Porcelain White".  Another overnight dry, and I sprayed the figures with Testor's Dullcote".   


      I'm happy with these last two of the Dwarf Zombies, and glad to have completed all of them.  Below is all six of them together.  I think they make a great looking mob! :)


Monday, October 4, 2021

Dwarf Queen and King Crypts: Bones 5 Quick Conversion Project.

      I didn't get to finish painting any figures this week, as Real Life intervened.  But, I was able to work on a simple conversion figure over the weekend.  
      As I've mentioned in my previous two posts, I purchased a pair of the Bones 5 The Dwarf King's Crypt Encounter set as I wanted pairs of a number of the set's scenery items, as well as a bunch of the Dwarf Zombies and Dwarf Fighters.
     One of the scenery items I was most looking forward to having a pair of, was the tomb; as I wanted to convert one to be the tombs to be for a Dwarf Queen, to go along with the Dwarf King's tomb.
     First thing I would need was a suitable Bones Female Dwarf figure to use as the tomb cover's carving; as I did not trust my ability to sculpt one from scratch.   I was not sure what figure to use, as so many of the ones I had, or looked at in the online store, were posed somewhat dynamically.  Then, as fate would have it, I came across one of the Gwyddis, Dwarf Valkyrie figures, and realized it was perfect.  Her pose is terribly static and two-dimensional, but it was perfect for what I needed.
The Gwyddis, Dwarf Valkyrie figure next to the tomb cover.

     First thing I did was cut the Dwarf King off of the tomb cover.  Bones Black is a very hard substance to cut, unlike Original Bones; so in order to do this, I let the tomb cover sit in a pot of boiling water for 4 minutes to get soft.  I then quickly pulled it out and carefully sliced the King off of it.  Next, I worked on the Gwyddis figure, which, being Original Bones, didn't need any pre-cutting treatment.  First I removed her backpack by twisting and pulling it off.  I then cut her base off, then her arms just below the shoulders.  After that, I carefully sliced down through the back of her head and skirt, trying my best to keep the blade straight and perpendicular to her orientation, so that she would lie flat on the tomb cover.  I then did a trial fit, and realized she was a little too tall to fit within the boundaries of the cover, so I carefully sliced a couple millimeters off the bottom of her skirt to make her shorter.
     While I was working on the tomb cover, I also drilled through it and the tomb base to insert a couple rare earth magnets, to keep the lid in place when the tomb was being stored or transported.  I then superglued the magnets in place.
     My next step was to superglue Gwyddis in place on the tomb cover. Once the glue was set, I worked on trimming and arranging her arms, and when I was satisfied, I glued them in place as well.
     Once the glue was set, I used 2-part epoxy (greenstuff) to fill in the gaps in the tomb, as well as the gaps between her repositioned arms and her shoulders, and some of the gaps between her arms and her body to help it look more like a solid carving. I also used the greenstuff to level off the hole where I glued the magnet n the lid.
     And here's the finished result, with the King and Queen side-by-side.     I'm really pleased with how this turned out.  It's not perfect, but when all painted up as weathered stone it should look just fine.

     Hopefully next week we will be back to normal and I can complete the last two Dwarf Zombies from this set.  See you all then. 

Monday, September 27, 2021

Zombie Dwarf Thanes #1: Bones 5 Encounter Figures

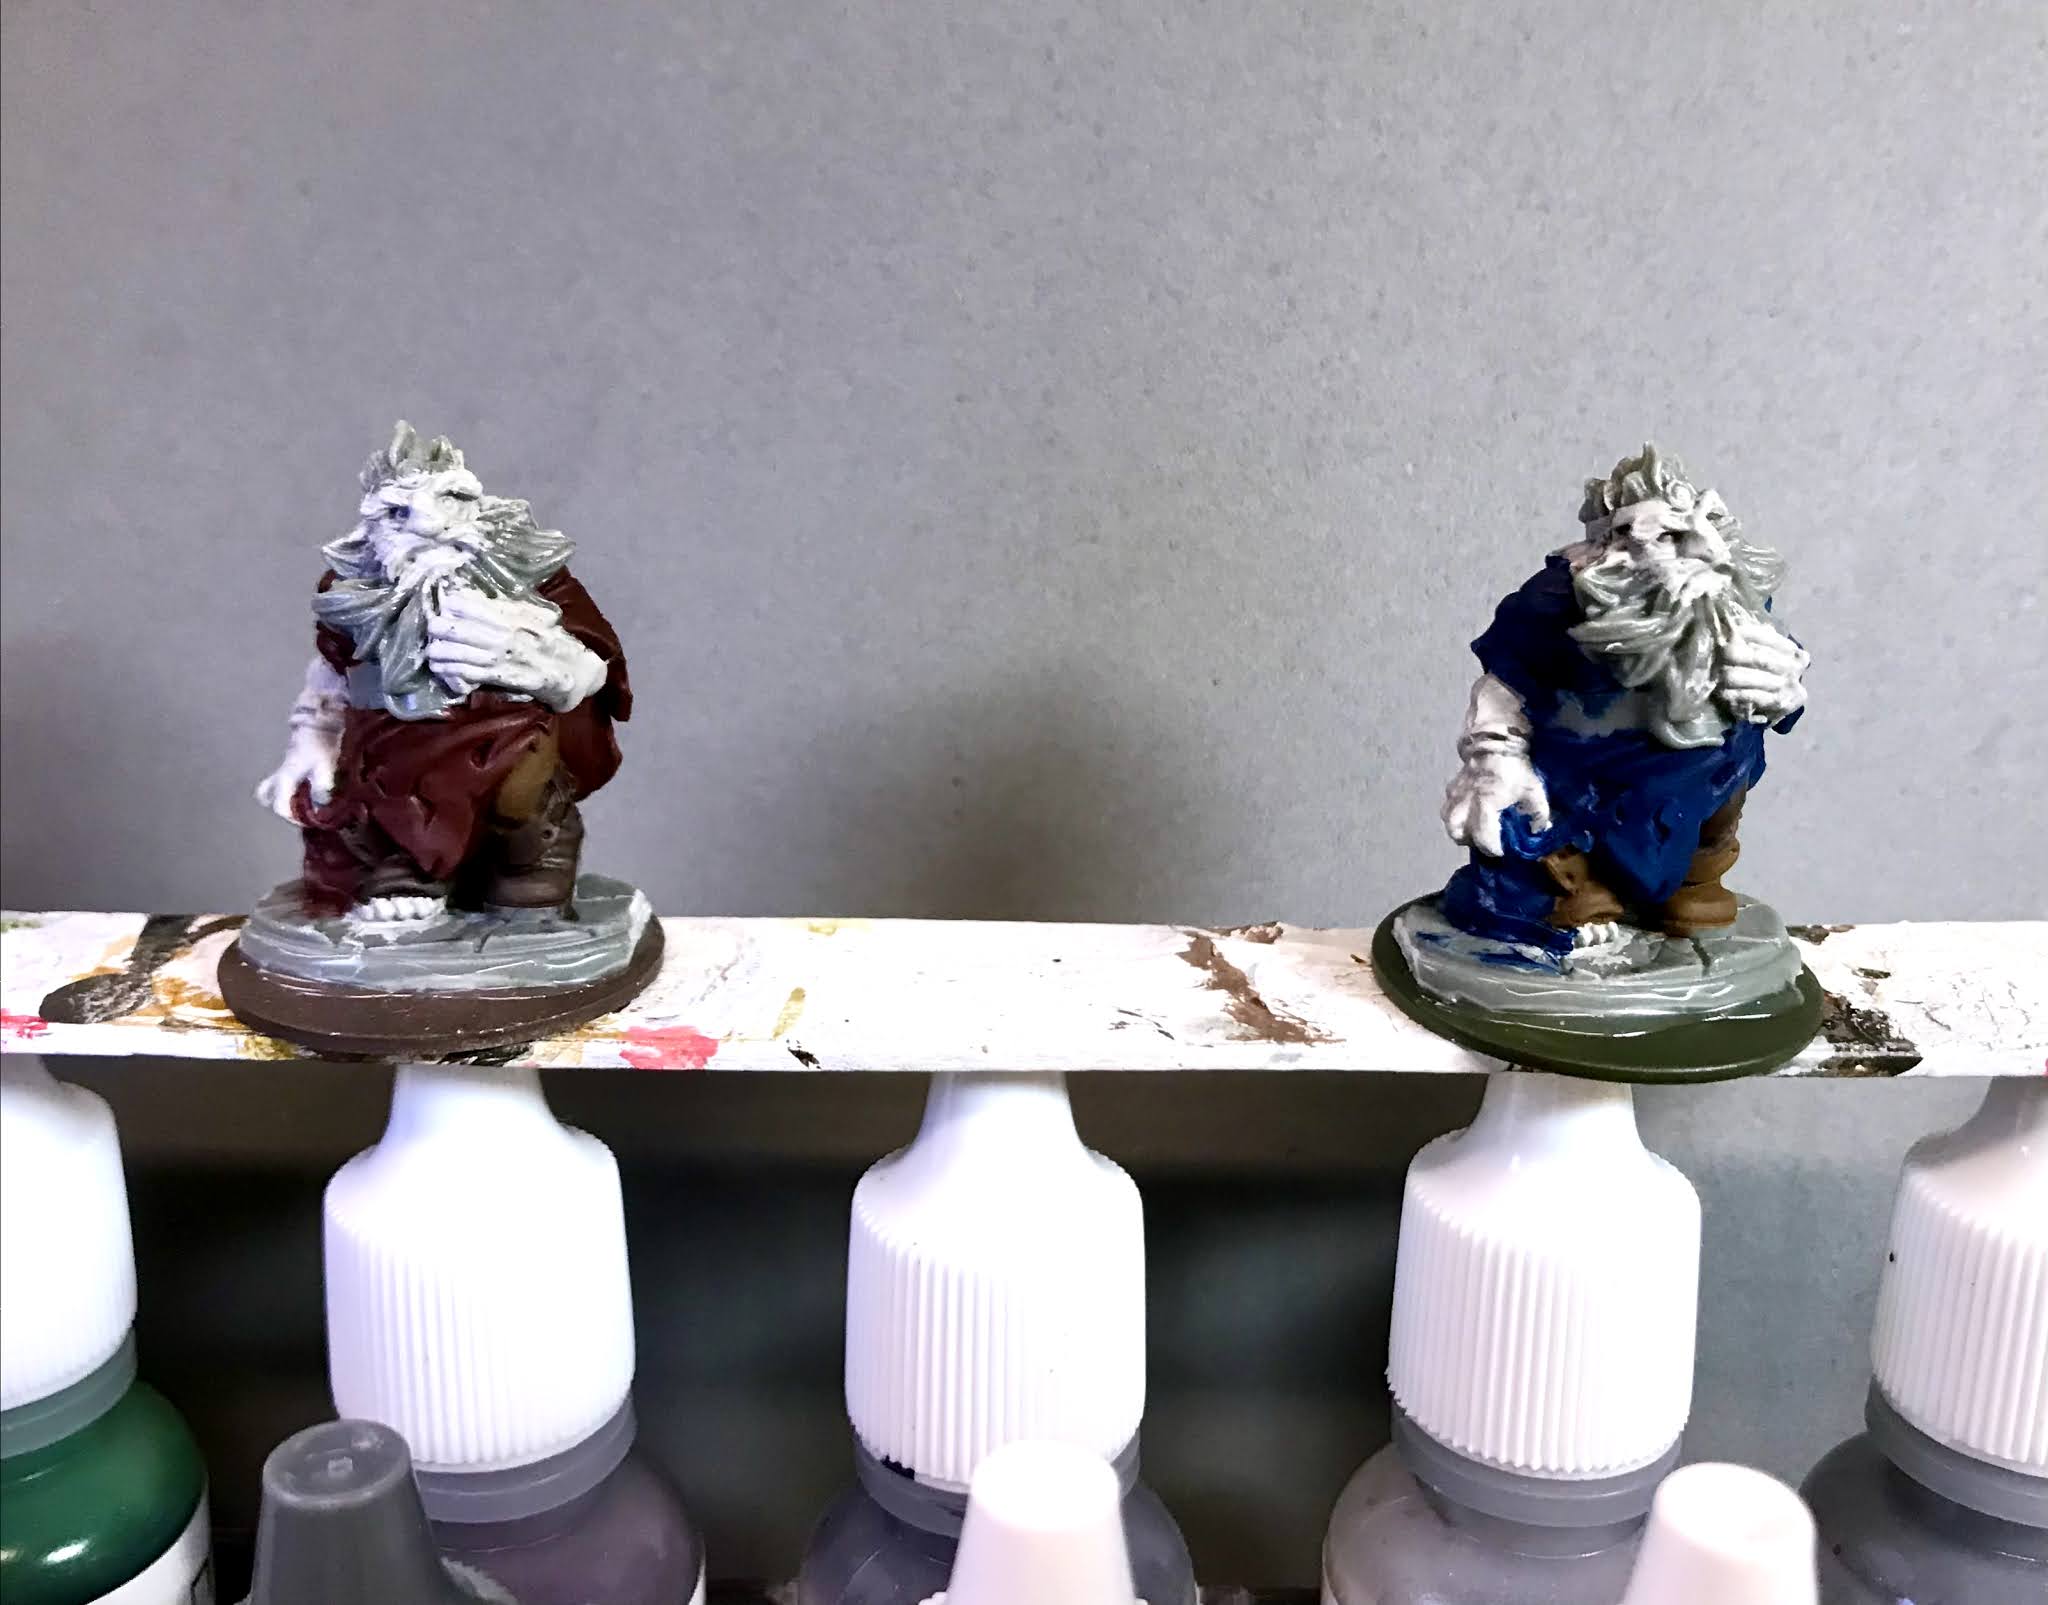
      This past week I painted two more of the "Zombie Dwarf Thane" figures from the Bones 5 The Dwarf King's Crypt Encounter set; this time "Zombie Dwarf Thane #1".  Last week, I painted a pair of "Zombie Dwarf Thane #3".  As mentioned in my last post, the set only comes with one of each of these figures, but I ordered two of the Encounters as I wanted pairs of a number of the set's scenery items, as well as a bunch of these Dwarf Zombies.
    This gave me 6 of the Zombies. So to help them look more like a mixed group, I decided to paint each pair of identical figures differently, to give the pairs more of a differing appearance.   Also, while the Thane #3 figure I did last week had no easily convertible limbs; this one, Thane #1,  as well as Thane #2, each had a raised right arm that I could easily chop.  So I was able to simply swap the right hand on one of the #1's for the right hand off of one of the #2's.  This helped give each pair a slightly different appearance. 
      I prepped the figures in the usual way, soaking them in a dish of water with a couple drops of dish-soap added, then giving them a light scrub with a soft toothbrush, and then rinsing and drying them. At this point I did the hand swap, and also trimmed the circlet crown off of the one on the left.  I then glued them to 1" primed metal washers, using Aleene's Tacky Glue.  I glued the washers to a tongue depressor with a couple drops of Elmer's School Glue.
     I began by painting the skin on both figures with Reaper MSP "Alien Flesh".  Next, I painted the pants on the first figure with Folk Art "Dapple Gray", and then the pants on the second figure with Folk Art "Barnyard Red".  After that, I painted the boots on both figures with Americana "Charcoal Grey".
     Next, I painted the robes on the lefthand Thane with Crafter's Acrylic "Forest Green", and the robes on the righthand figure with Reaper MSP "Ginger Cookie".  I then painted the soles of the boots with Ceramcoat "Charcoal", the belt on the lefthand one with Americana "Bittersweet Chocolate", and the belt on the righthand on with Americana "Light Cinnamon".  I also used the "Bittersweet Chocolate" to paint the bracelets and the circlet on the righthand Thane.
     I then painted the beard on the lefthand one with Americana "Asphaltum", and the beard on the righthand one with Reaper MSP "Black Noir". After that, I painted their teeth with Americana "Antique White", and then splotched Apple Barrel "Apple Maroon" on their hands and the mouth and beard of the lefthand one. Next, I painted the bracelets and the circlet on the righthand Thane, doing some with Folk Art Brushed Metal "Brushed Bronze", or Reaper MSP "Scorched Metal".    I let everything dry for a while, and then gave both figures complete coats of Citadel "Agrax Earthshade wash.
     When the wash was dry, I painted their eyes with Apple Barrel "Lemon Chiffon", and then added a pupil in their right eyes with Reaper MSP "Dark Elf Highlight".  After that, I highlighted their skin with the base "Alien Flesh", and then mixed in some Americana "Dove Grey".  I then mixed in some of the "Apple Maroon" to highlight the blood on the hands.  Next, I highlighted the beards, using Reaper MSP "Shield Brown" for the lefthand Thane's, and Americana "Zinc" for the righthand Thane's. The teeth were next, and I highlighted them with Americana "Bleached Sand".
     I then highlighted the robes on the lefthand figure with Americana "Avocado", and his pants with the base "Dapple Gray".  Next, I highlighted the robes of the righthand one with Americana "Khaki Tan", and his pants with Reaper MSP HD "Rusty Red".   After that, I highlighted their boots with Nicole's "Brown", and the lefthand belt with Crafter's Acrylic "Cinnamon Brown", followed by the righthand belt with Americana "Terra Cotta".  Lastly, I highlighted the bracelets I had painted with the "Scorched Metal", s well as the circlet, with Folk Art Metallic "Gunmetal Gray".   I finished by painting the bases with Citadel Contrast " Templar Black".
      I let the Thanes dry overnight and the next day I gave them a coat of Americana "DuraClear Matte" varnish.  Then when the varnish was dry, I used some white glue to glue some sand onto the bases.  When this was dry I  painted it with Citadel Contrast "Black Templar".  When that was dry,  I drybrushed the sand with Folk Art "Rock Grey", and then a bit of Folk Art "Porcelain White".  Another overnight dry, and I sprayed the figures with Testor's Dullcote".   


     I'm really happy with these two.  I can't wait to see the whole group of 6 together!

Monday, September 20, 2021

Zombie Dwarf Thanes #3: Bones 5 Encounter Figures

       This past week I painted two of the "Zombie Dwarf Thane #3" figures from the Bones 5 The Dwarf King's Crypt Encounter set.  The set only comes with one of these figures, but I ordered two of the Encounters as I wanted pairs of a number of the set's scenery items, as well as a bunch of these Dwarf Zombies.
    This gave me 6 of the Zombies. So to help them look more like a mixed group, I decided to paint each pair of identical figures differently, to give the pairs more of a differing appearance. 
      I prepped the figures in the usual way, soaking them in a dish of water with a couple drops of dish-soap added, then giving them a light scrub with a soft toothbrush, and then rinsing and drying them.  I then glued them to 1" primed metal washers, using Aleene's Tacky Glue.  I glued the washers to a tongue depressor with a couple drops of Elmer's School Glue.
     I began by painting the skin on both figures with Reaper MSP "Alien Flesh".  Next, I painted the pants on the first figure, and the boots on the other figure, with Reaper MSP "Turkey Brown".  I then reversed that and painted the boots on the first figure and the pants on the second figure with Reaper MSP "Blackened Brown".  After that, I painted the first zombie's robe with Pathfinder MSP "Urgathea Red", and the second zombie's robe with Reaper MSP "Void Blue". 
     Next, I painted both their belts with Reaper MSP HD "Umber Brown". I then painted the left zombie's beard with Americana Neutral Grey, and the right Zombie's beard with Americana "Terra Cotta".  While I had the "Terra Cotta" out, I used it to paint the bracelets and belt buckle on the righthand one as well, then went back and used the "Umber Brown" to paint the bracelets on the lefthand one. After that, I used  Americana "Antique Gold" to paint their teeth, then used Apple Barrel "Apple Maroon" to paint the open wounds.  I also used this color to paint a little gore on their beards and hands.
      Next, I painted their bracelets and belt buckles with Folk Art Brushed Metal "Brushed Bronze".  I then decided to do a pattern on one of their robes to give some more interest and differentiation, so I used some of the "Antique Gold" and did a quick pattern along the cuffs of the righthand one.  I let everything dry for a while, and then gave both figures a complete coat of Citadel "Agrax Earthshade" wash. When the wash was dry, I painted their one open eye with Apple Barrel "Lemon Chiffon". 
     My next step was to highlight the skin with the base "Alien Flesh", and then I mixed a little Americana "Dove Grey" in to do lighter highlights.   I then mixed a little of the "Apple Maroon" in to highlight the wounds, and hands. Next I used Americana "Buttermilk to highlight the teeth.  After that, I used the base "Neutral Grey" to highlight the lefthand zombie's beard, and then a little Folk Art Gray Green" to do lighter highlights.  I worked on the right one's beard next, highlighting it with the base "Terra Cotta", and then some Accent "Golden Oxide". 
     I then highlighted the pants on the left one, and shoes on the right one, with Folk Art "Teddy Bear Brown"; followed by highlighting the pants on the right ne, and shoes on the left one with Crafter's Acrylic "Cinnamon Brown".   Next, I highlighted the belts with Reaper MSP "Shield Brown".  After that, I highlighted the robes on the left one with Reaper MSP Bones "Cinnamon Red", and the robes of the right one with Americana "True Blue". Lastly, I highlighted the pattern on the blue robe's cuffs with the base "Antique Gold".  I finished by painting the bases with Ceramcoat "Black".
    I let the Thanes dry overnight and the next day I gave them a coat of Americana "DuraClear Matte" varnish.  Then when the varnish was dry, I used some white glue to glue some sand onto the bases.  When this was dry I  painted it with Citadel Contrast "Black Templar".  When that was dry,  I drybrushed the sand with Folk Art "Rock Grey", and then a bit of Folk Art "Porcelain White".  Another overnight dry, and I sprayed the figures with Testor's Dullcote".     


     I was a bit disappointed that the basic pose on these.  It is really simple from a sculpting standpoint, with everything molded close to the body.  They lack any dynamic "Zombie-ness".  To be fair, the detail itself is very good though.   They were fun to paint and despite the static nature came out looking rather good I think. 
Monday, September 13, 2021

Ghost of the Dwarf King and Everliving Flames: Bones 5 Encounter Figures

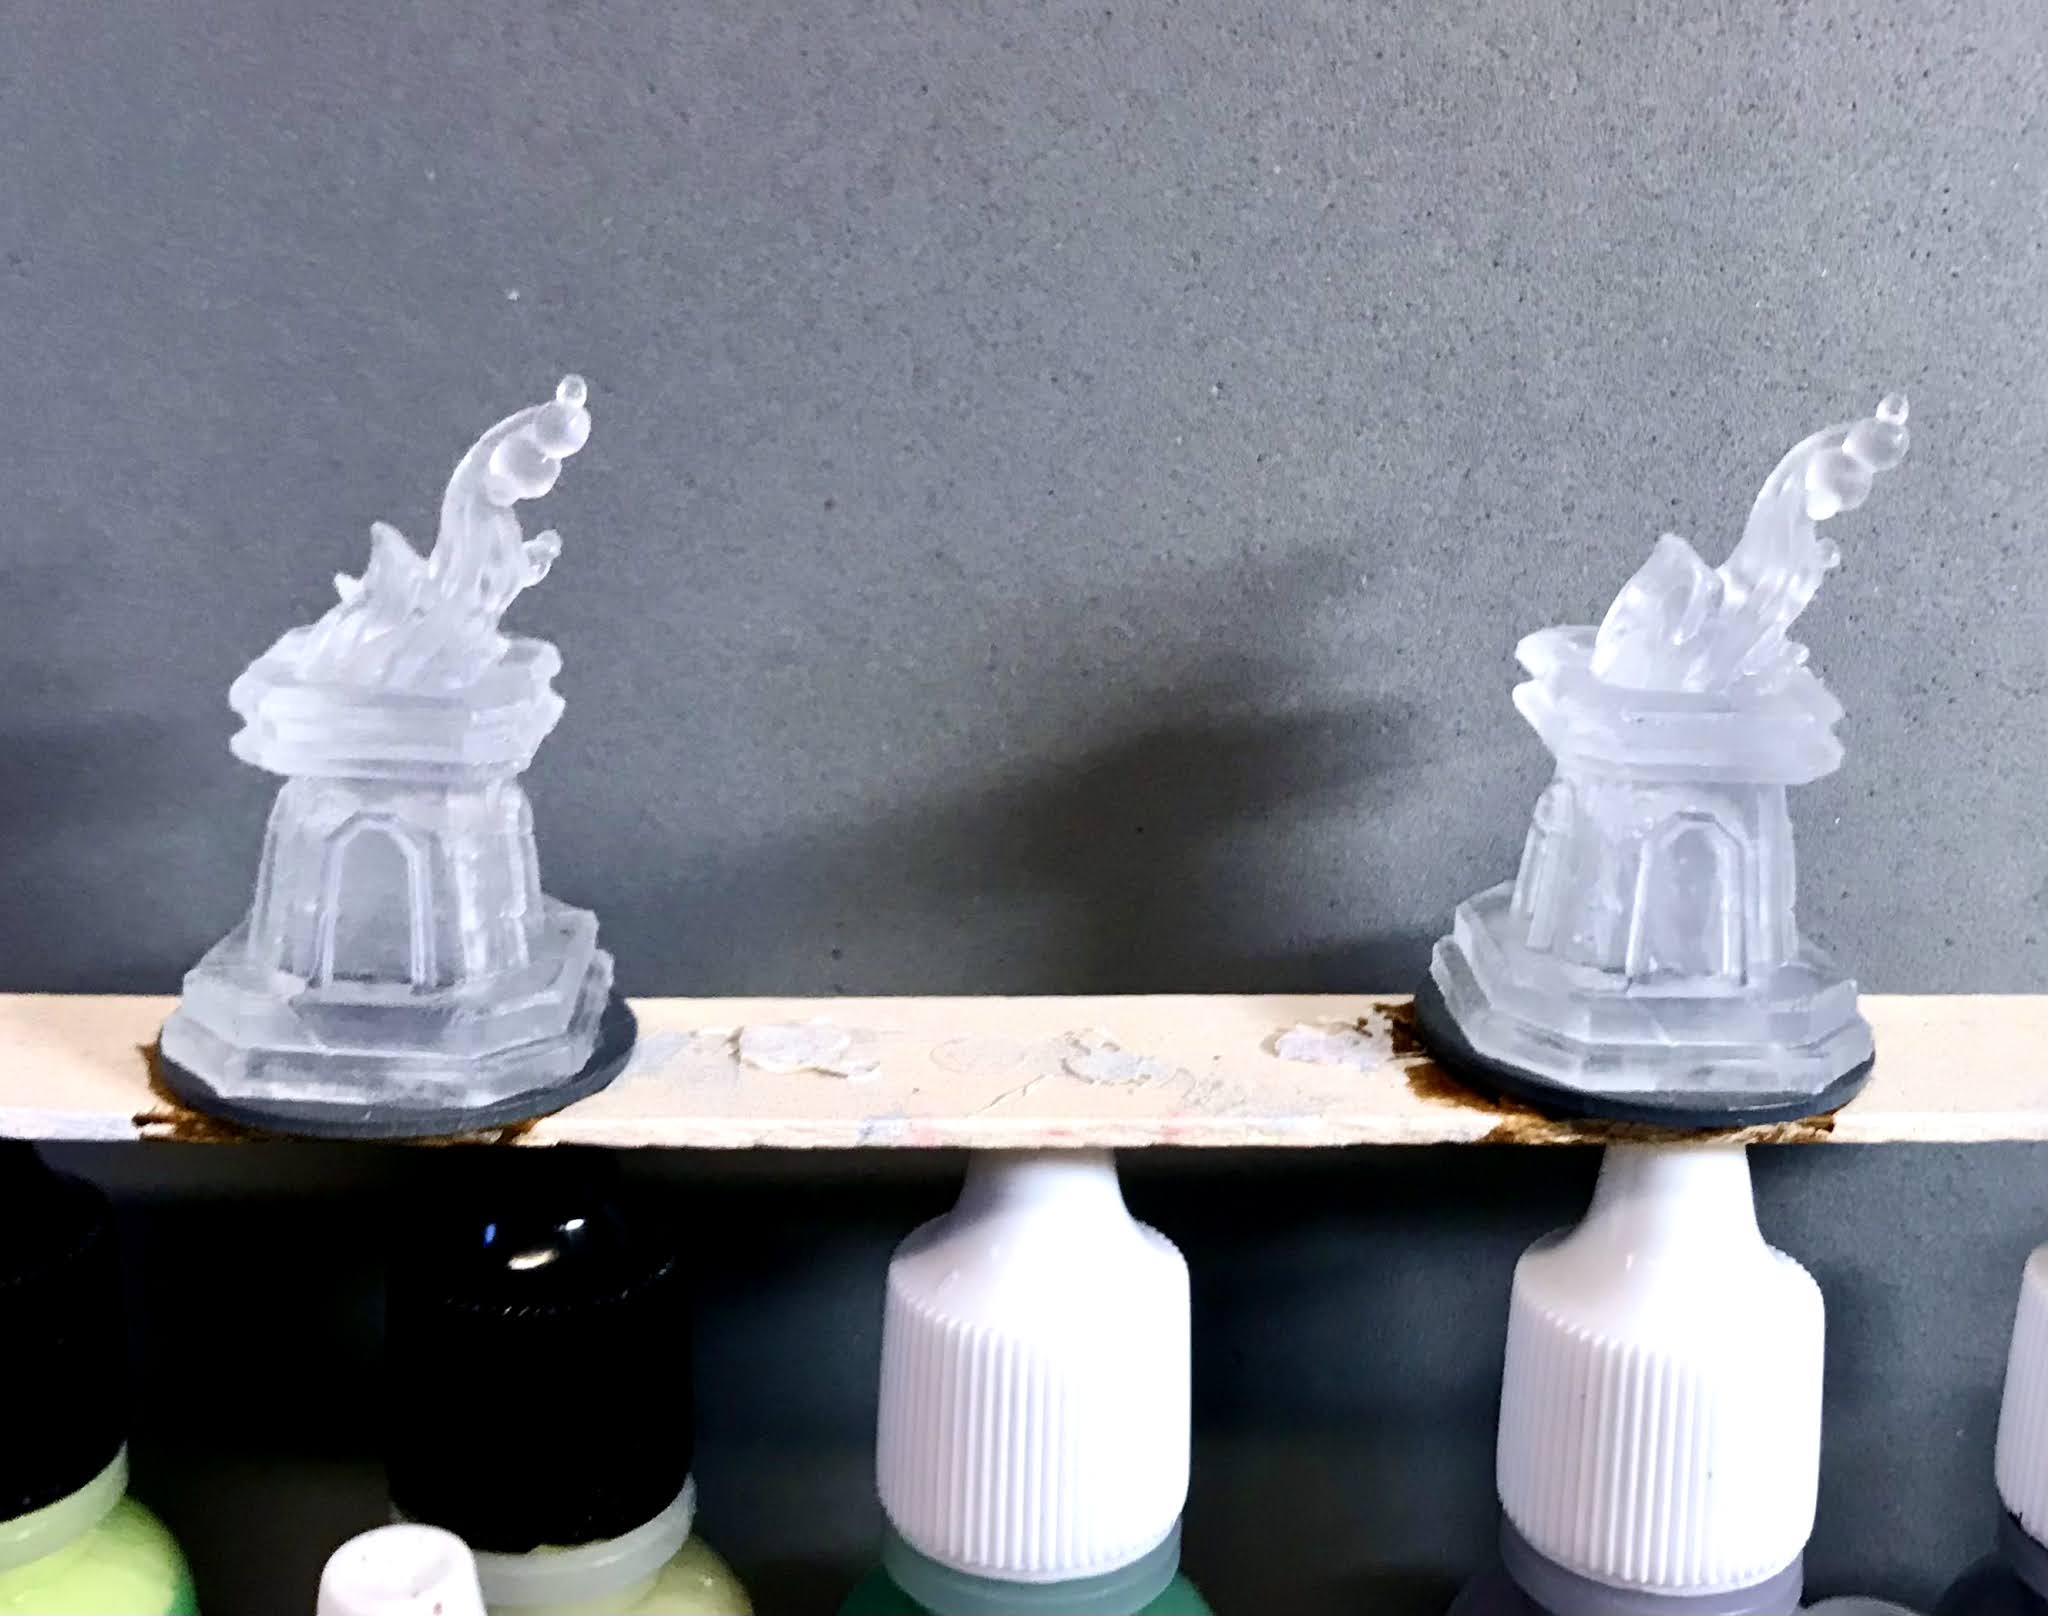
      This past week I painted the "Ghost of the Dwarf King Durman the Mad", and two of the "Everliving Flame" pieces, from the Bones 5 The Dwarf King's Crypt Encounter set.  The set only comes with one of the Everliving Flame terrain pieces, but I ordered two of the Encounters as I wanted pairs of a number of the set's scenery items, as well as a bunch of the Dwarf Zombies that came with it.
     As you can tell from my past entries, I've really had a lot of fun experimenting with all the translucent figures that came in this Kickstarter.  This gave me an excuse to start working on the excellent Dwarf Kings Crypt set.  I was interested to see what I could do with the King's ghost which had been cast in blue.
         I prepped the figures in the usual way, soaking them in a dish of water with a couple drops of dish-soap added, then giving them a light scrub with a soft toothbrush, and then rinsing and drying them.  I then glued the Dwarf King and the Flames to 1" primed metal washers, using Aleene's Tacky for the King, and some Gorilla Super Glue Gel glue for the Flames.  I then put the King into my painting grip, and glued the Flames to a tongue depressor with a couple drops of Elmer's School Glue.

          I started with the King, and began by painting the entire figure completely with Americana "DuraClear Matte" varnish.  Then, when the varnish was dry, I painted the figure completely again using thinned Citadel Contrast "Ultramarine Blue" to help provide some shadows in the recesses.
     When the "Ultramarine Blue was dry, I drybrushed the body with, first Citadel Dry "Hellion Green", and then Folk Art "Celadon Green", careful to avoid the weapon and the wisps coming from his left hand.  I then drybrushed the weapon, and the wisps in his left hand, using Crafter's Acrylic "Daffodil Yellow", and then Apple Barrel "Lemon Chiffon".  After that, I painted his eyes with Tamiya Color "Clear Red".  When dry, I added pupils with Reaper MSP "Holly Berry", and highlight dots with the "Lemon Chiffon".  Lastly, I painted his open mouth with Contrast "Black Templar".
     
     Next, I turned to the Eternal Flames. Like the Dwarf King,  I began by painting both the figures completely with Americana "DuraClear Matte" varnish.   When dry, I started on the flames, and painted the bottoms with Citadel Contrast "Iyanden Yellow", and then painted the midsections with Citadel Contrast "Gryph-Hound Orange". After that, I painted the tops of the flames with Citadel Contrast "Blood Angels Red", and then a tiny bit of Citadel Contrast "Black Templar" at the very tips.  
      I was really pleased with the flames until I painted the bases with Ceramcoat "Charcoal". Making the bases dark and opaque cut off a lot of the light that had helped brighten the translucent flames. 
     So, I decided I would need to paint the bases of the flames with regular acrylic paint to brighten them, and blend it with the more translucent Contrast paint as it went up.  So, I painted some areas with Reaper MSP "Hearth Glow, and then added some Crafter's Acrylic "Daffodil Yellow", and a little Apple Barrel "Lemon Chiffon".  I then added some dots of the "Lemon Chiffon" near the top to try and look like floating sparks. I then put a little of the "Black Templar" around the base of the flame to blend the bottom with the base of the braziers. 
     I then worked on highlighting the braziers, drybrushing with, first, Americana "Zinc", then, Crafter's Acrylic "Storm Cloud Grey", and then a bit of Americana "Grey Sky".   After that, I tried to do a bit of an OSL (object source lighting) effect by drybrushing the tops of the braziers, as well as the bottom where the flames leaned over the edge, with Crafter's Acrylic "Pure Pumpkin", Crafter's Acrylic "Bright Yellow", and the "Daffodil Yellow". I lastly used a bit of Reaper MSP "Holly Berry"  

    When everything was dry, I used some white glue to glue some sand onto the base of the Dwarf King.  When this was dry I  painted it with the "Black Templar".  When that was dry,  I drybrushed the edges of the base with some of the Crafter's Acrylic "Tropical Blue", and then I blended in some Crafter's Acrylic "Cool Blue" closer to the figure, to again try a little OSL effect to make it look like the ghost was glowing.
      I let all the figures dry overnight and the next day I gave them a coat of Americana "DuraClear Matte" varnish.     


     I'm generally pleased with these figures.  I think the translucence helps give them a unique look.  The OSL I feel is not my best, but works okay.  I probably should have spent more time with it, but was eager to get these figures finished up.