Monday, September 20, 2021

Zombie Dwarf Thanes #3: Bones 5 Encounter Figures

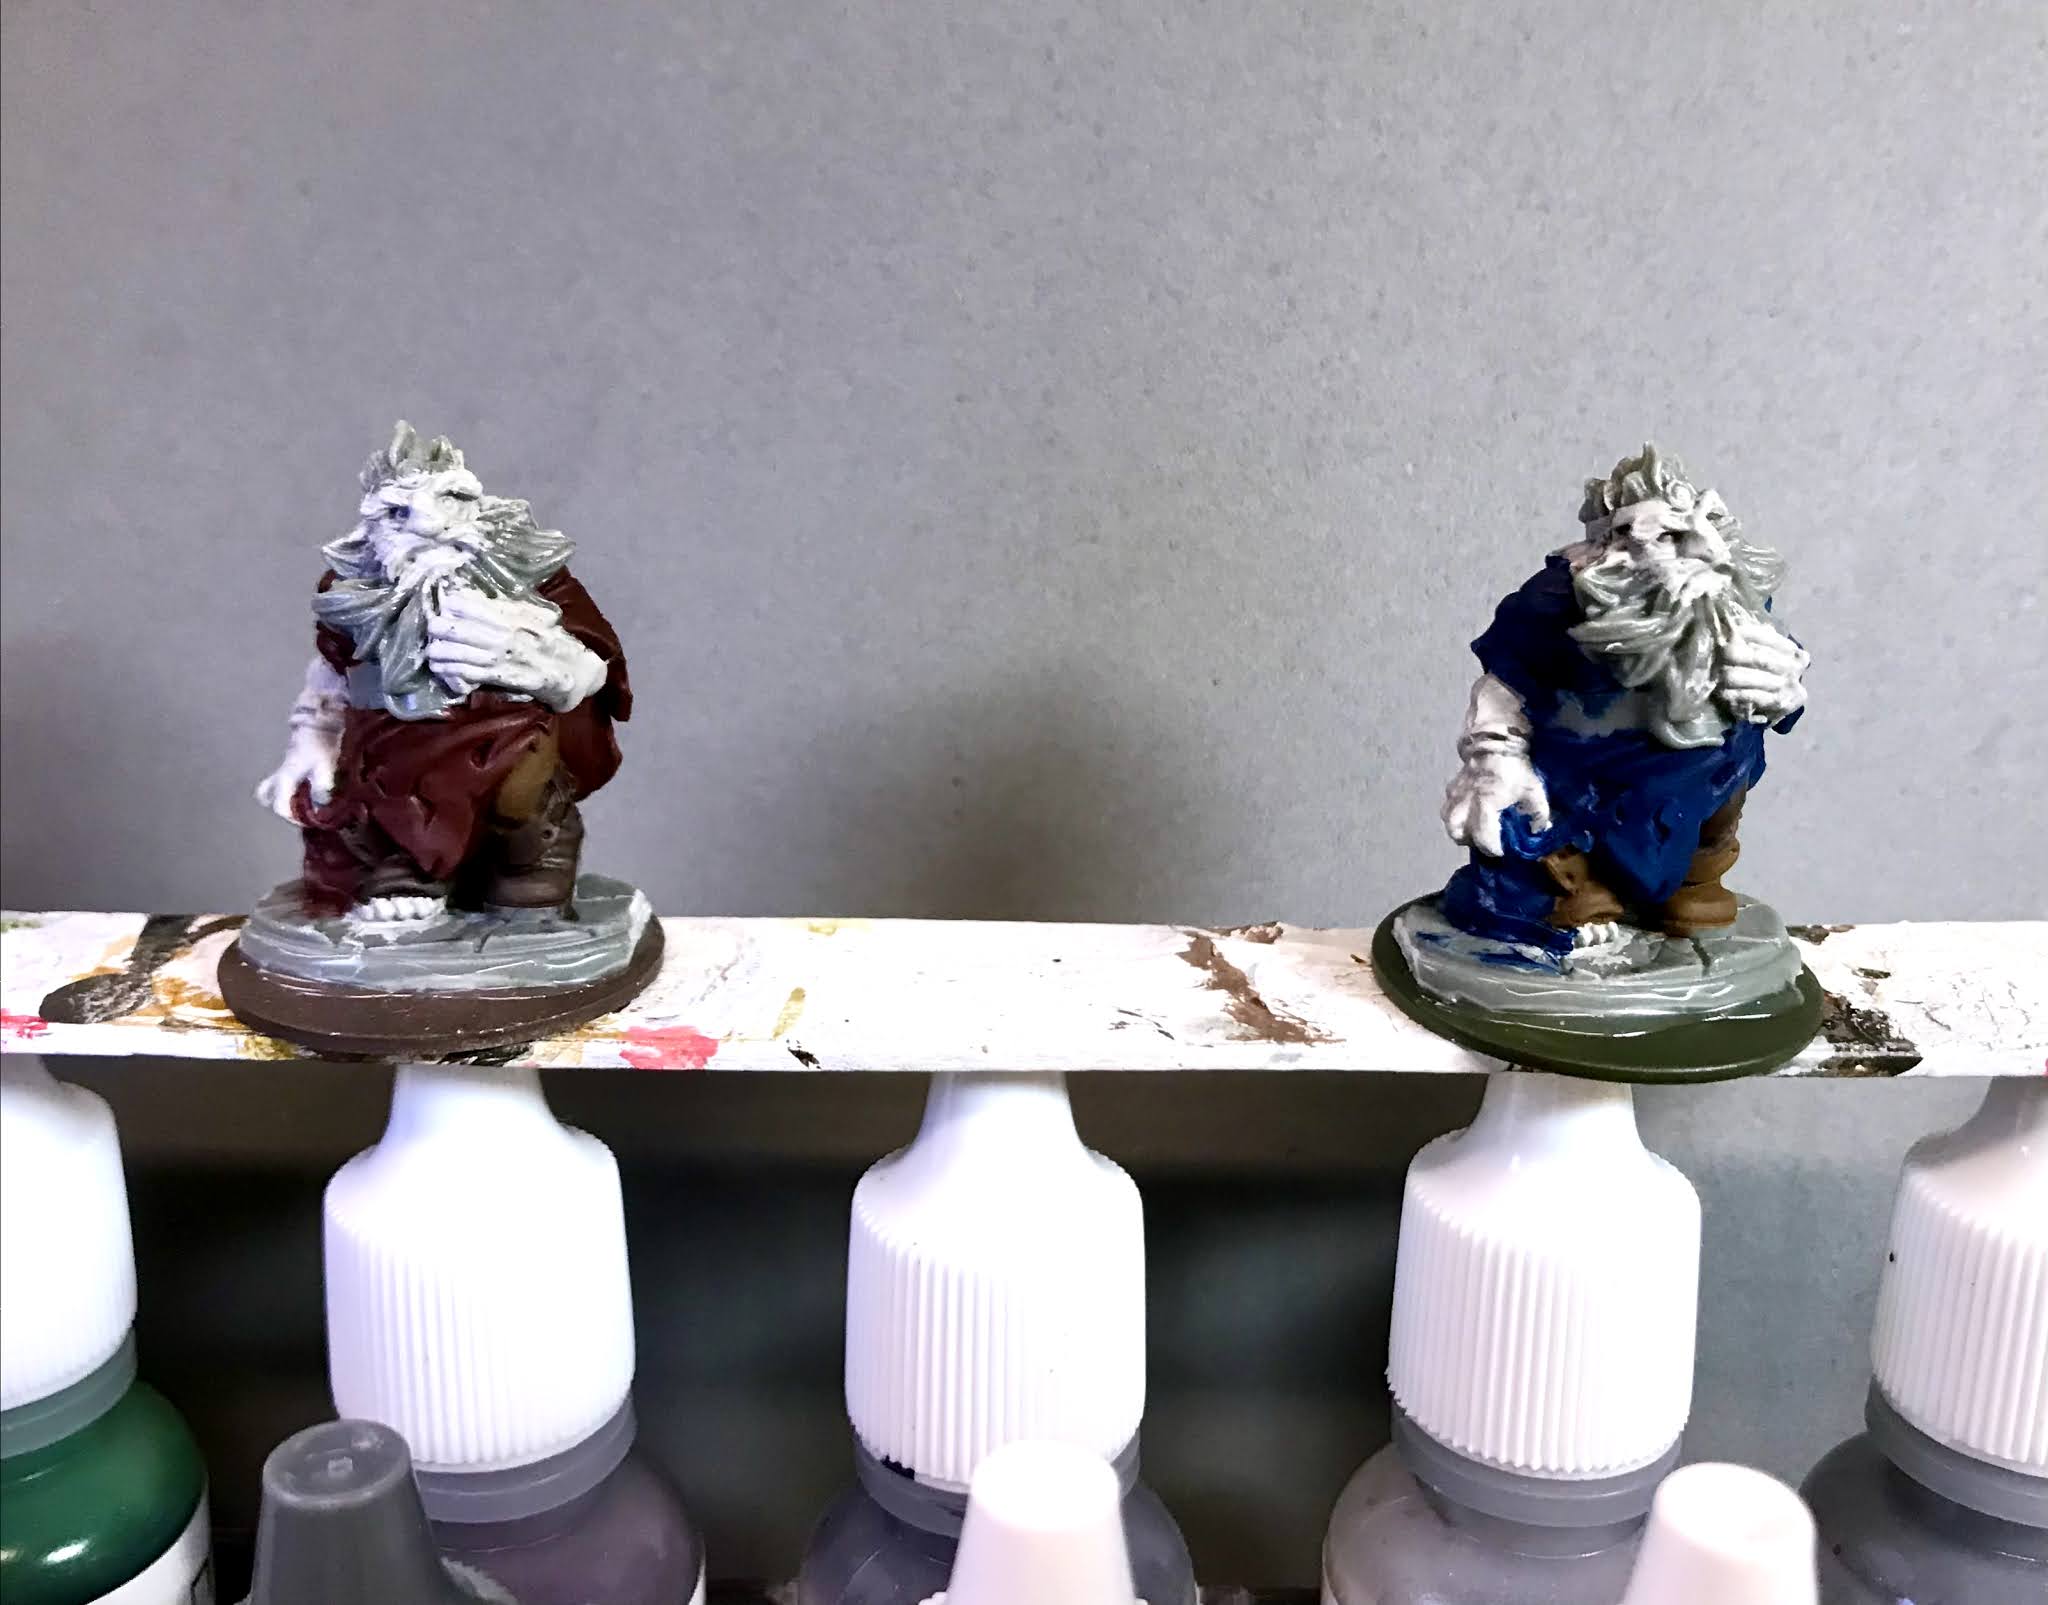
       This past week I painted two of the "Zombie Dwarf Thane #3" figures from the Bones 5 The Dwarf King's Crypt Encounter set.  The set only comes with one of these figures, but I ordered two of the Encounters as I wanted pairs of a number of the set's scenery items, as well as a bunch of these Dwarf Zombies.
    This gave me 6 of the Zombies. So to help them look more like a mixed group, I decided to paint each pair of identical figures differently, to give the pairs more of a differing appearance. 
      I prepped the figures in the usual way, soaking them in a dish of water with a couple drops of dish-soap added, then giving them a light scrub with a soft toothbrush, and then rinsing and drying them.  I then glued them to 1" primed metal washers, using Aleene's Tacky Glue.  I glued the washers to a tongue depressor with a couple drops of Elmer's School Glue.
     I began by painting the skin on both figures with Reaper MSP "Alien Flesh".  Next, I painted the pants on the first figure, and the boots on the other figure, with Reaper MSP "Turkey Brown".  I then reversed that and painted the boots on the first figure and the pants on the second figure with Reaper MSP "Blackened Brown".  After that, I painted the first zombie's robe with Pathfinder MSP "Urgathea Red", and the second zombie's robe with Reaper MSP "Void Blue". 
     Next, I painted both their belts with Reaper MSP HD "Umber Brown". I then painted the left zombie's beard with Americana Neutral Grey, and the right Zombie's beard with Americana "Terra Cotta".  While I had the "Terra Cotta" out, I used it to paint the bracelets and belt buckle on the righthand one as well, then went back and used the "Umber Brown" to paint the bracelets on the lefthand one. After that, I used  Americana "Antique Gold" to paint their teeth, then used Apple Barrel "Apple Maroon" to paint the open wounds.  I also used this color to paint a little gore on their beards and hands.
      Next, I painted their bracelets and belt buckles with Folk Art Brushed Metal "Brushed Bronze".  I then decided to do a pattern on one of their robes to give some more interest and differentiation, so I used some of the "Antique Gold" and did a quick pattern along the cuffs of the righthand one.  I let everything dry for a while, and then gave both figures a complete coat of Citadel "Agrax Earthshade" wash. When the wash was dry, I painted their one open eye with Apple Barrel "Lemon Chiffon". 
     My next step was to highlight the skin with the base "Alien Flesh", and then I mixed a little Americana "Dove Grey" in to do lighter highlights.   I then mixed a little of the "Apple Maroon" in to highlight the wounds, and hands. Next I used Americana "Buttermilk to highlight the teeth.  After that, I used the base "Neutral Grey" to highlight the lefthand zombie's beard, and then a little Folk Art Gray Green" to do lighter highlights.  I worked on the right one's beard next, highlighting it with the base "Terra Cotta", and then some Accent "Golden Oxide". 
     I then highlighted the pants on the left one, and shoes on the right one, with Folk Art "Teddy Bear Brown"; followed by highlighting the pants on the right ne, and shoes on the left one with Crafter's Acrylic "Cinnamon Brown".   Next, I highlighted the belts with Reaper MSP "Shield Brown".  After that, I highlighted the robes on the left one with Reaper MSP Bones "Cinnamon Red", and the robes of the right one with Americana "True Blue". Lastly, I highlighted the pattern on the blue robe's cuffs with the base "Antique Gold".  I finished by painting the bases with Ceramcoat "Black".
    I let the Thanes dry overnight and the next day I gave them a coat of Americana "DuraClear Matte" varnish.  Then when the varnish was dry, I used some white glue to glue some sand onto the bases.  When this was dry I  painted it with Citadel Contrast "Black Templar".  When that was dry,  I drybrushed the sand with Folk Art "Rock Grey", and then a bit of Folk Art "Porcelain White".  Another overnight dry, and I sprayed the figures with Testor's Dullcote".     


     I was a bit disappointed that the basic pose on these.  It is really simple from a sculpting standpoint, with everything molded close to the body.  They lack any dynamic "Zombie-ness".  To be fair, the detail itself is very good though.   They were fun to paint and despite the static nature came out looking rather good I think. 

Monday, September 13, 2021

Ghost of the Dwarf King and Everliving Flames: Bones 5 Encounter Figures

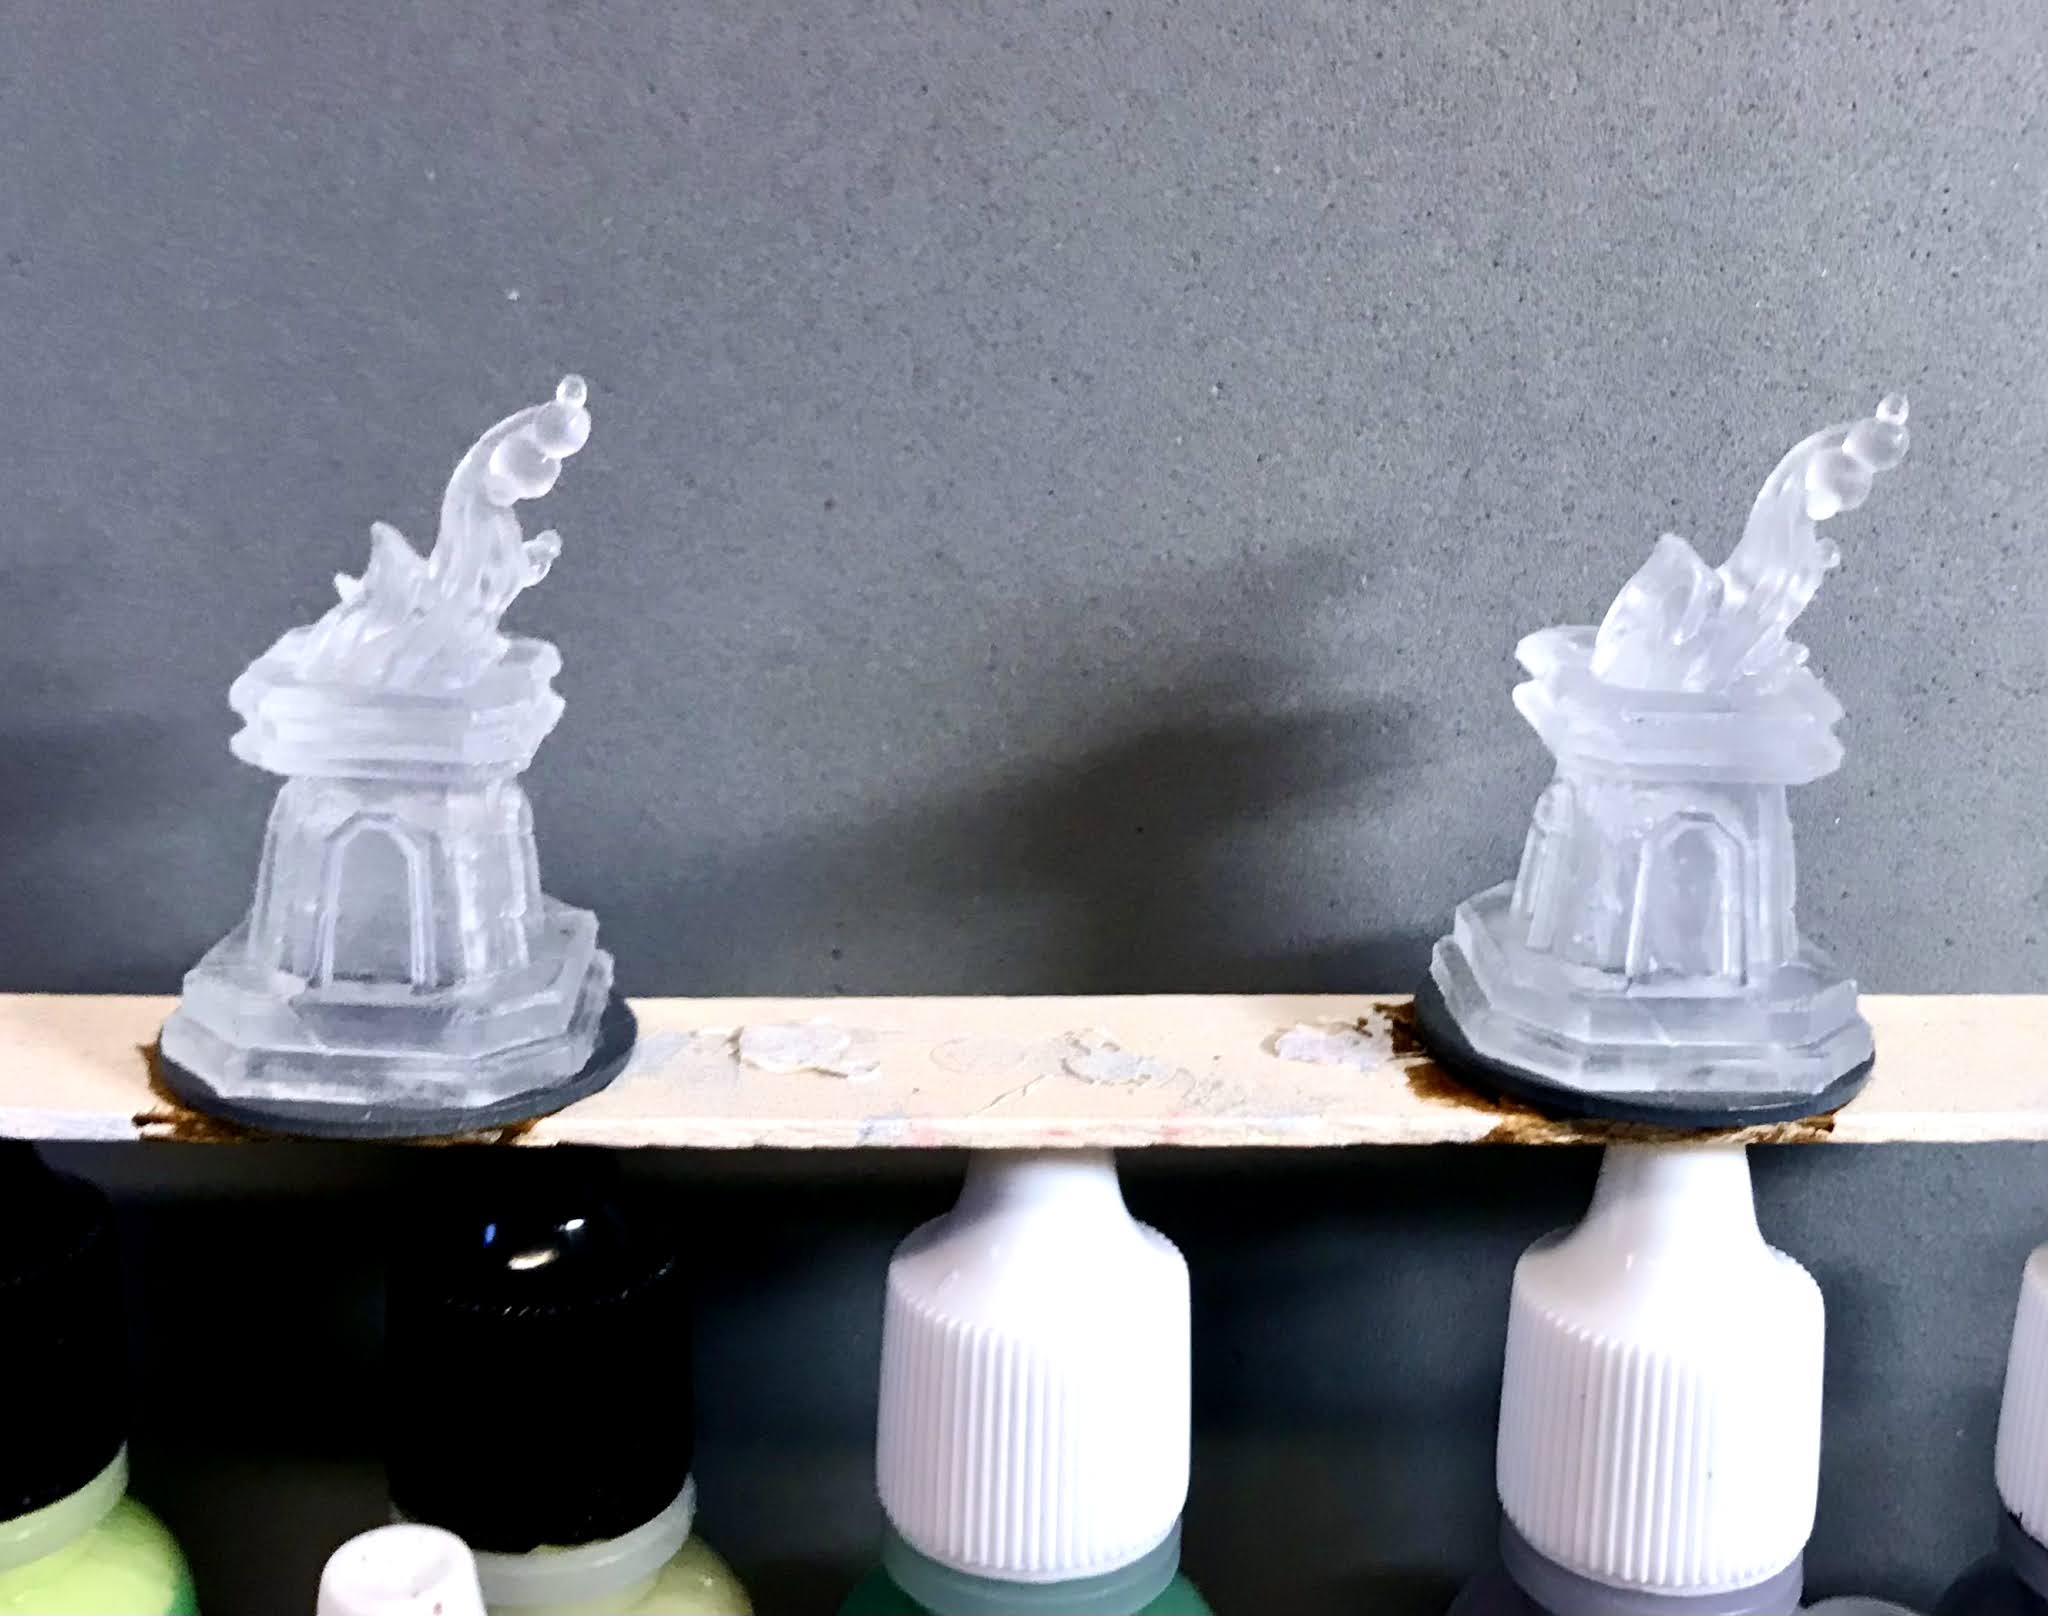
      This past week I painted the "Ghost of the Dwarf King Durman the Mad", and two of the "Everliving Flame" pieces, from the Bones 5 The Dwarf King's Crypt Encounter set.  The set only comes with one of the Everliving Flame terrain pieces, but I ordered two of the Encounters as I wanted pairs of a number of the set's scenery items, as well as a bunch of the Dwarf Zombies that came with it.
     As you can tell from my past entries, I've really had a lot of fun experimenting with all the translucent figures that came in this Kickstarter.  This gave me an excuse to start working on the excellent Dwarf Kings Crypt set.  I was interested to see what I could do with the King's ghost which had been cast in blue.
         I prepped the figures in the usual way, soaking them in a dish of water with a couple drops of dish-soap added, then giving them a light scrub with a soft toothbrush, and then rinsing and drying them.  I then glued the Dwarf King and the Flames to 1" primed metal washers, using Aleene's Tacky for the King, and some Gorilla Super Glue Gel glue for the Flames.  I then put the King into my painting grip, and glued the Flames to a tongue depressor with a couple drops of Elmer's School Glue.

          I started with the King, and began by painting the entire figure completely with Americana "DuraClear Matte" varnish.  Then, when the varnish was dry, I painted the figure completely again using thinned Citadel Contrast "Ultramarine Blue" to help provide some shadows in the recesses.
     When the "Ultramarine Blue was dry, I drybrushed the body with, first Citadel Dry "Hellion Green", and then Folk Art "Celadon Green", careful to avoid the weapon and the wisps coming from his left hand.  I then drybrushed the weapon, and the wisps in his left hand, using Crafter's Acrylic "Daffodil Yellow", and then Apple Barrel "Lemon Chiffon".  After that, I painted his eyes with Tamiya Color "Clear Red".  When dry, I added pupils with Reaper MSP "Holly Berry", and highlight dots with the "Lemon Chiffon".  Lastly, I painted his open mouth with Contrast "Black Templar".
     
     Next, I turned to the Eternal Flames. Like the Dwarf King,  I began by painting both the figures completely with Americana "DuraClear Matte" varnish.   When dry, I started on the flames, and painted the bottoms with Citadel Contrast "Iyanden Yellow", and then painted the midsections with Citadel Contrast "Gryph-Hound Orange". After that, I painted the tops of the flames with Citadel Contrast "Blood Angels Red", and then a tiny bit of Citadel Contrast "Black Templar" at the very tips.  
      I was really pleased with the flames until I painted the bases with Ceramcoat "Charcoal". Making the bases dark and opaque cut off a lot of the light that had helped brighten the translucent flames. 
     So, I decided I would need to paint the bases of the flames with regular acrylic paint to brighten them, and blend it with the more translucent Contrast paint as it went up.  So, I painted some areas with Reaper MSP "Hearth Glow, and then added some Crafter's Acrylic "Daffodil Yellow", and a little Apple Barrel "Lemon Chiffon".  I then added some dots of the "Lemon Chiffon" near the top to try and look like floating sparks. I then put a little of the "Black Templar" around the base of the flame to blend the bottom with the base of the braziers. 
     I then worked on highlighting the braziers, drybrushing with, first, Americana "Zinc", then, Crafter's Acrylic "Storm Cloud Grey", and then a bit of Americana "Grey Sky".   After that, I tried to do a bit of an OSL (object source lighting) effect by drybrushing the tops of the braziers, as well as the bottom where the flames leaned over the edge, with Crafter's Acrylic "Pure Pumpkin", Crafter's Acrylic "Bright Yellow", and the "Daffodil Yellow". I lastly used a bit of Reaper MSP "Holly Berry"  

    When everything was dry, I used some white glue to glue some sand onto the base of the Dwarf King.  When this was dry I  painted it with the "Black Templar".  When that was dry,  I drybrushed the edges of the base with some of the Crafter's Acrylic "Tropical Blue", and then I blended in some Crafter's Acrylic "Cool Blue" closer to the figure, to again try a little OSL effect to make it look like the ghost was glowing.
      I let all the figures dry overnight and the next day I gave them a coat of Americana "DuraClear Matte" varnish.     


     I'm generally pleased with these figures.  I think the translucence helps give them a unique look.  The OSL I feel is not my best, but works okay.  I probably should have spent more time with it, but was eager to get these figures finished up.

Monday, September 6, 2021

Invisible Servant and Spiritual Weapon: Bones 5 Figures

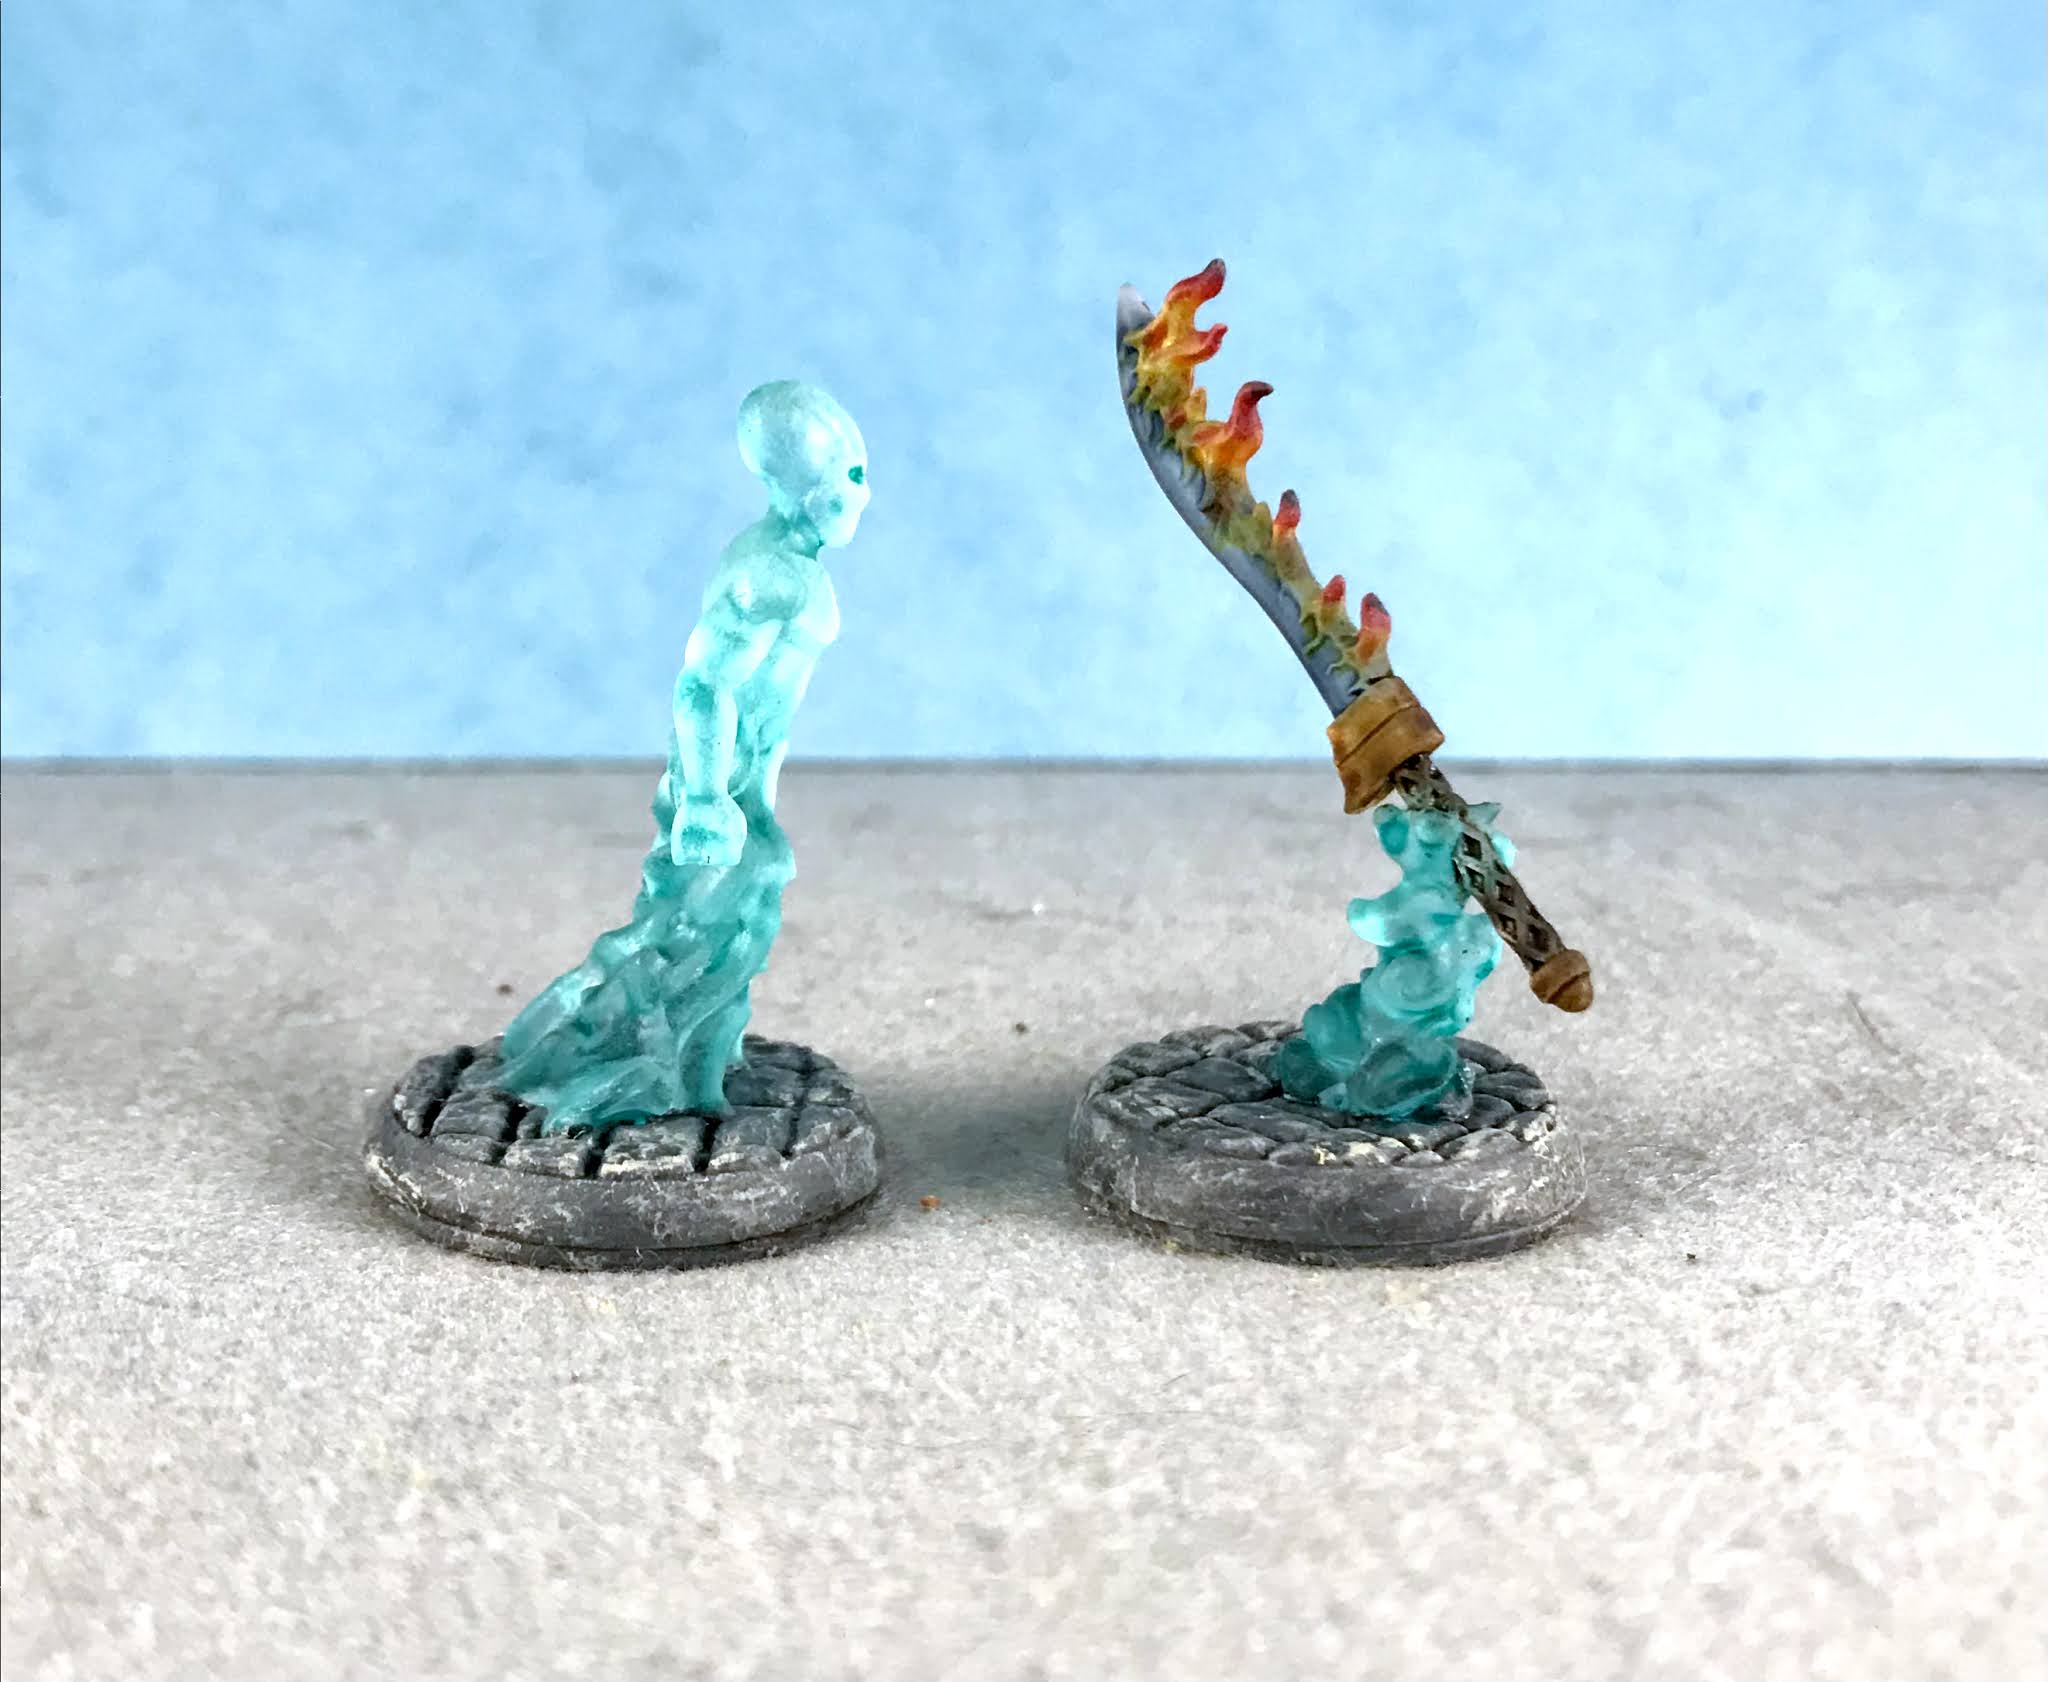
    This past week I painted the "Invisible Servant" and "Spiritual Weapon" from the Bones 5 Spell Effects set.
      I prepped the figures in the usual way, soaking them in a dish of water with a couple drops of dish-soap added, then giving them a light scrub with a soft toothbrush, and then rinsing and drying them.  I then glued the figures to 1" grey-primed metal washers with some Gorilla Super Glue Gel glue.  I then put the Invisible Servant into my painting grip.
     I began by painting both figures completely with Americana "DuraClear Matte" varnish.  When the varnish was dry, I painted the entire figure with Citadel Contrast "Aethermatic Blue".  When the Contrast paint was dry, I went back and did a second application of the same color just in the eyes, letting it pool a little.
     I then put that aside, and worked on the Sword Spell Effect.
     I began by painting the sword blade with Citadel Contrast "Space Wolves Grey".  I then painted the base of the guard and the pommel with Citadel Contrast "Snakebite Leather", and the grip with Citadel Contrast "Wyldwood".  Next, I worked on the flame, painting the base of the flames with Tamiya Acrylic "Clear Yellow", then add some Tamiya Acrylic "Clear Orange", and then Tamiya Acrylic "Clear Red" on the ends of the flames.  Lastly, I added a bit of Citadel Contrast "Black Templar" to the very tips of the flames.  When everything on the sword was dry, I painted the cloud beneath it with the "Aethermatic Blue".  
       I then painted the bases of both figures with Americana "Neutral Grey".  When dry, I gave both bases a coat of Citadel "Nuln Oil" wash.  When the wash was dry, I drybrushed the stones with Folk Art "Platinum Grey". 
      I let the figures dry overnight and the next day I gave them a coat of Americana "DuraClear Matte" varnish.  Another overnight dry, and I sprayed the figures with Testor's Dullcote".      


     I'm pleased with how these Spell Effects turned out.  They are really cool pieces, I just wish they were a little smaller. 


Monday, August 30, 2021

Zombie Giant: Bones 5 Figure (Part 2, Completion)

     This past week I finished painting the "Zombie Giant" from the Bones 5 Core Set.  To check out part one of this painting article, see: Zombie Giant: Part 1 .
    When we ended last week's post, I had just applied the shading wash coat to the giant, and had begun to do the details on the face.
         First, I highlighted al his akin with the base "Jade Green", and then mixed in some Ceramcoat "White" for lighter highlights.  Next, I worked on the club, drybrushing it with the base "Barn Wood", and then some of the "Graveyard Bone".  After that, I highlighted the exposed bones with Crafter's Acrylic "Light Antique White", and then highlighted the wounds with  mix of the base "Urgathea Red" and then mixed in some Folk Art "Milkshake".
     Next, I highlighted the wood splints  and the wagon wheel using the base "Mississippi Mud", and then added in some Americana "Fawn".   I then highlighted the loin fur with Americana "Sable Brown", and the  lighter Americana "Khaki Tan".  After that, I worked on the metal bands on the leg and club as well as the chain around his neck; dabbing them with, first, Americana "Light Cinnamon", then some Accent "Golden Oxide", and lastly, Americana "Tangerine".  I finished them  by giving them a drybrush of Folk Art Metallics "Gunmetal Grey".  I worked on the hair next, highlighting with the base "Charcoal", mixed with some Americana "Neutral Grey".  I highlighted the big bead in his hair with Folk Art Pearl "Aqua Moire", then the smaller beads with the "Gunmetal Grey" and some Folk Art Metallics "Pure Gold".
     I then highlighted the bandages with Folk Art "Porcelain White".  I had noticed some ares of bumpy pimply looking skin, and had wanted to do something moldy looking to them, and finally decided to give them some dabs with Citadel Contrast "Militarium Green".   Likewise, I decided the scar down his back looked too plain, so I went down the seam with Citadel Contrast "Fireslayer Flesh" to make it look a little seeping.  
     I the worked on the vultures, first painting them Ceramcoat "Black".  When dry, I drybrushed them with the "Sable Brown".  I then painted their heads and legs with Americana "Burgundy Wine", and when dry, drybrushed them with Reaper MSP "Brains Pink".  After that, I painted their beaks and feet with Americana "Moon Yellow", and when dry gave them a wash with the "Nuln Oil".  I wrapped things up by adding Back dots for eyes.  Lastly, I painted the bases with the "Mississippi Mud".
     I let the Giant dry overnight and the next day I gave him a coat of Americana "DuraClear Matte" varnish.    Then, when  the varnish was dry,  I used some white glue to flock the bases.  Another overnight dry, and I sprayed the figure with Testor's Dullcote".   When the Dullcote was dry, I went back and gave his eye, wounds, and mouth, a coat of Americana "DuraClear Gloss" varnish.  


    I'm really thrilled with how this figure turned out. It really is a dynamic and excellent sculpt with lots of fun details.


Monday, August 23, 2021

Zombie Giant: Bones 5 Figure (Part 1)

      This past week I started painting the "Zombie Giant" from the Bones 5 Core Set.  I thought it might be fun to start tackling some of the Kickstarter's bigger figures. 
      I prepped the figure in the usual way, soaking it in a dish of water with a couple drops of dish-soap added, then giving it a light scrub with a soft toothbrush, and then rinsing and drying it.  I then trimmed the figure's integral base a little, and glued the figure to a 2" black-primed metal washer with some Aleene's Tacky glue.  I then glued the figure to a pill bottle with a couple drops of white glue.       
     To begin, I painted all the skin with Americana "Jade Green".  I then painted the open wounds with Pathfinder MSP "Urgathea Red".  I then mixed a little of the "Urgathea Red" with some of the "Jade Green" and splotched the skin around the open woulds to give it a stained, rotting, look.  After that, I painted the club with Folk Art "Barn Wood".
     Next, I painted his loin fur with Americana "Charcoal Grey".  I then painted the bandages with Reaper MSP "Alien Flesh", and then the wagon wheel and splints with Americana "Mississippi Mud".  After that, I painted the necklace chain, and metal straps on the right leg, with Americana "Asphaltum".  
     I then painted the rope with Reaper MSP "Ginger Cookie", and the inside of his mouth with Reaper MSP "Drow Nipple Pink". After that, I painted the exposed bones with Reaper MSP "Graveyard Bone", and the hair bead on his left with Ceramcoat "Denim Blue".  I painted the other beads with Reaper MSP "Fresh Blood", Ceramcoat Charcoal", and Accent "Mustard Seed"
     I then used the "Charcoal" to paint his hair, and I having noticed the metal band around the club I went back and painted that with the "Charcoal Grey".  I also painted the teeth with Accent "Golden Harvest".   then let the figure dry for a while.  When dry, I gave the entire thing a coat of Citadel "Agrax Earthshade".  While I was doing that, I noticed I missed his toe and finger nails, so when the wash was dry, I went back and painted those with Vallejo "Brown Violet".  When the nails were dry, I went back and gave them, and the inside of the mouth, a coat of  Citadel "Null Oil" wash. After that, I highlighted the teeth with Americana "Moon Yellow", and then pained the eyeball with Apple Barrel "Apple Barrel" "Apple Parchment".  I then painted the iris/pupil with Americana "Zinc".  When dry, I went back and went over the iris/pupil with a wash of the "Apple Parchment" to try to give it a milky appearance.
    That is all I got done for now.  Be sure to tune in next week for the highlighting and completion of this figure!  Part 2 can now be seen here: Zombie Giant Part 2

Monday, August 16, 2021

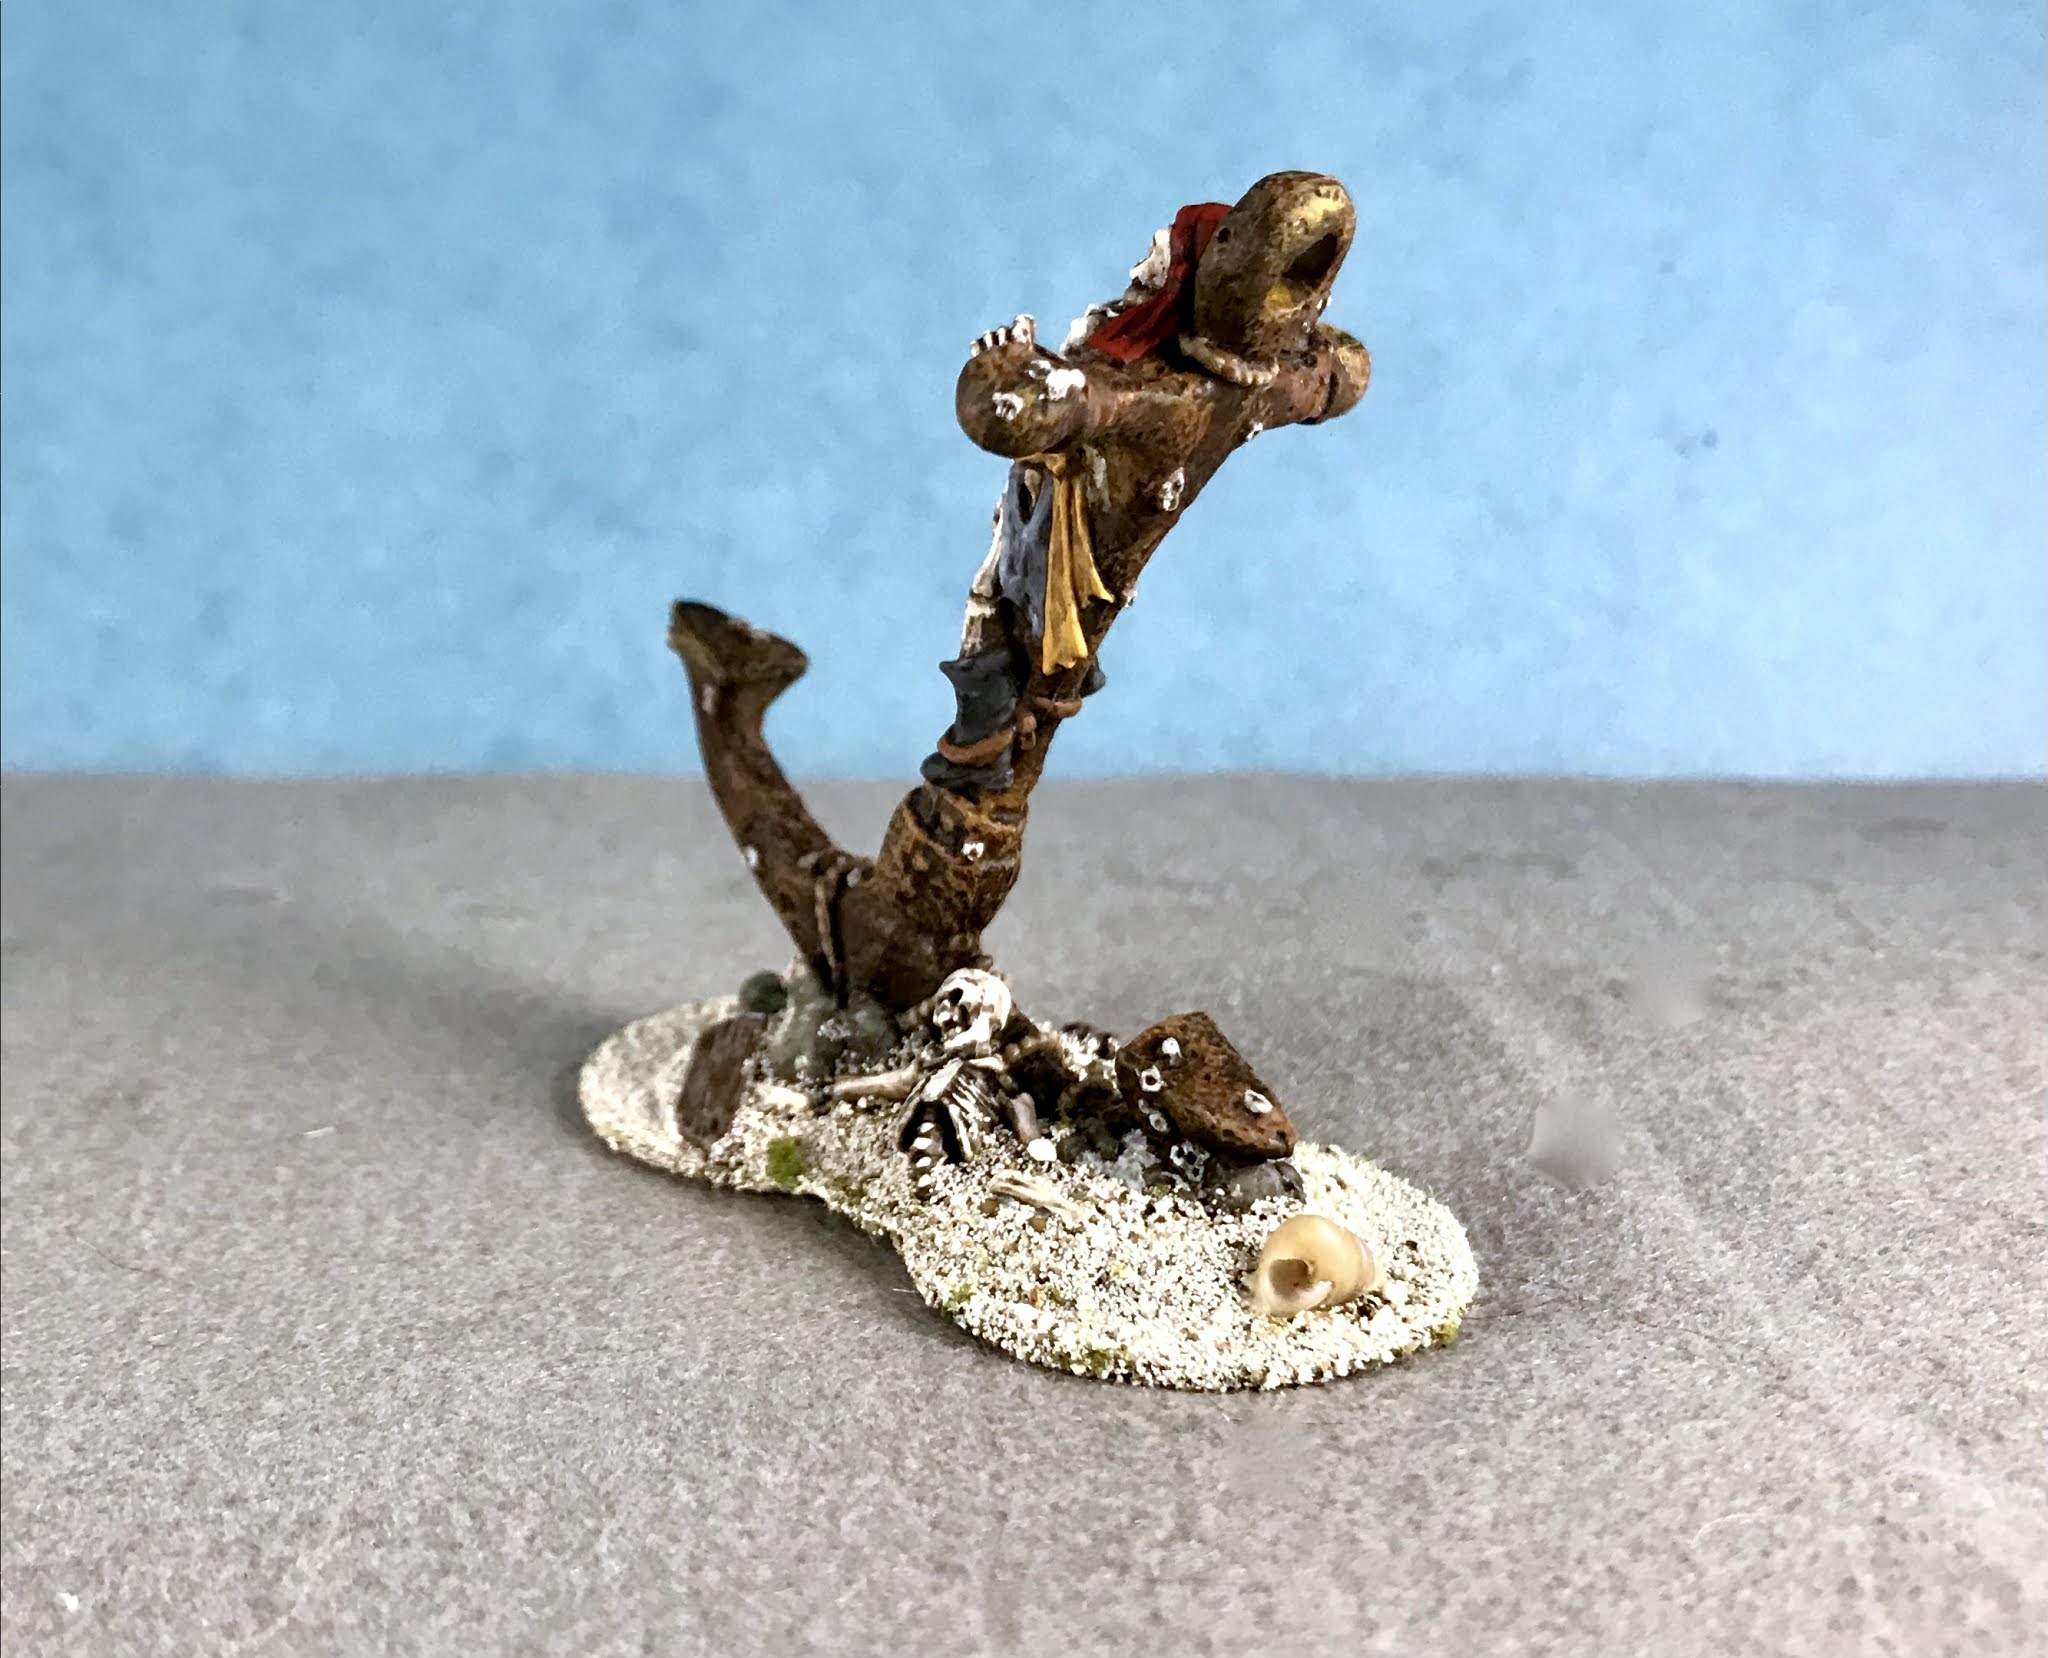
Anchor of Damnation: Bones 5 Brinewind Figure

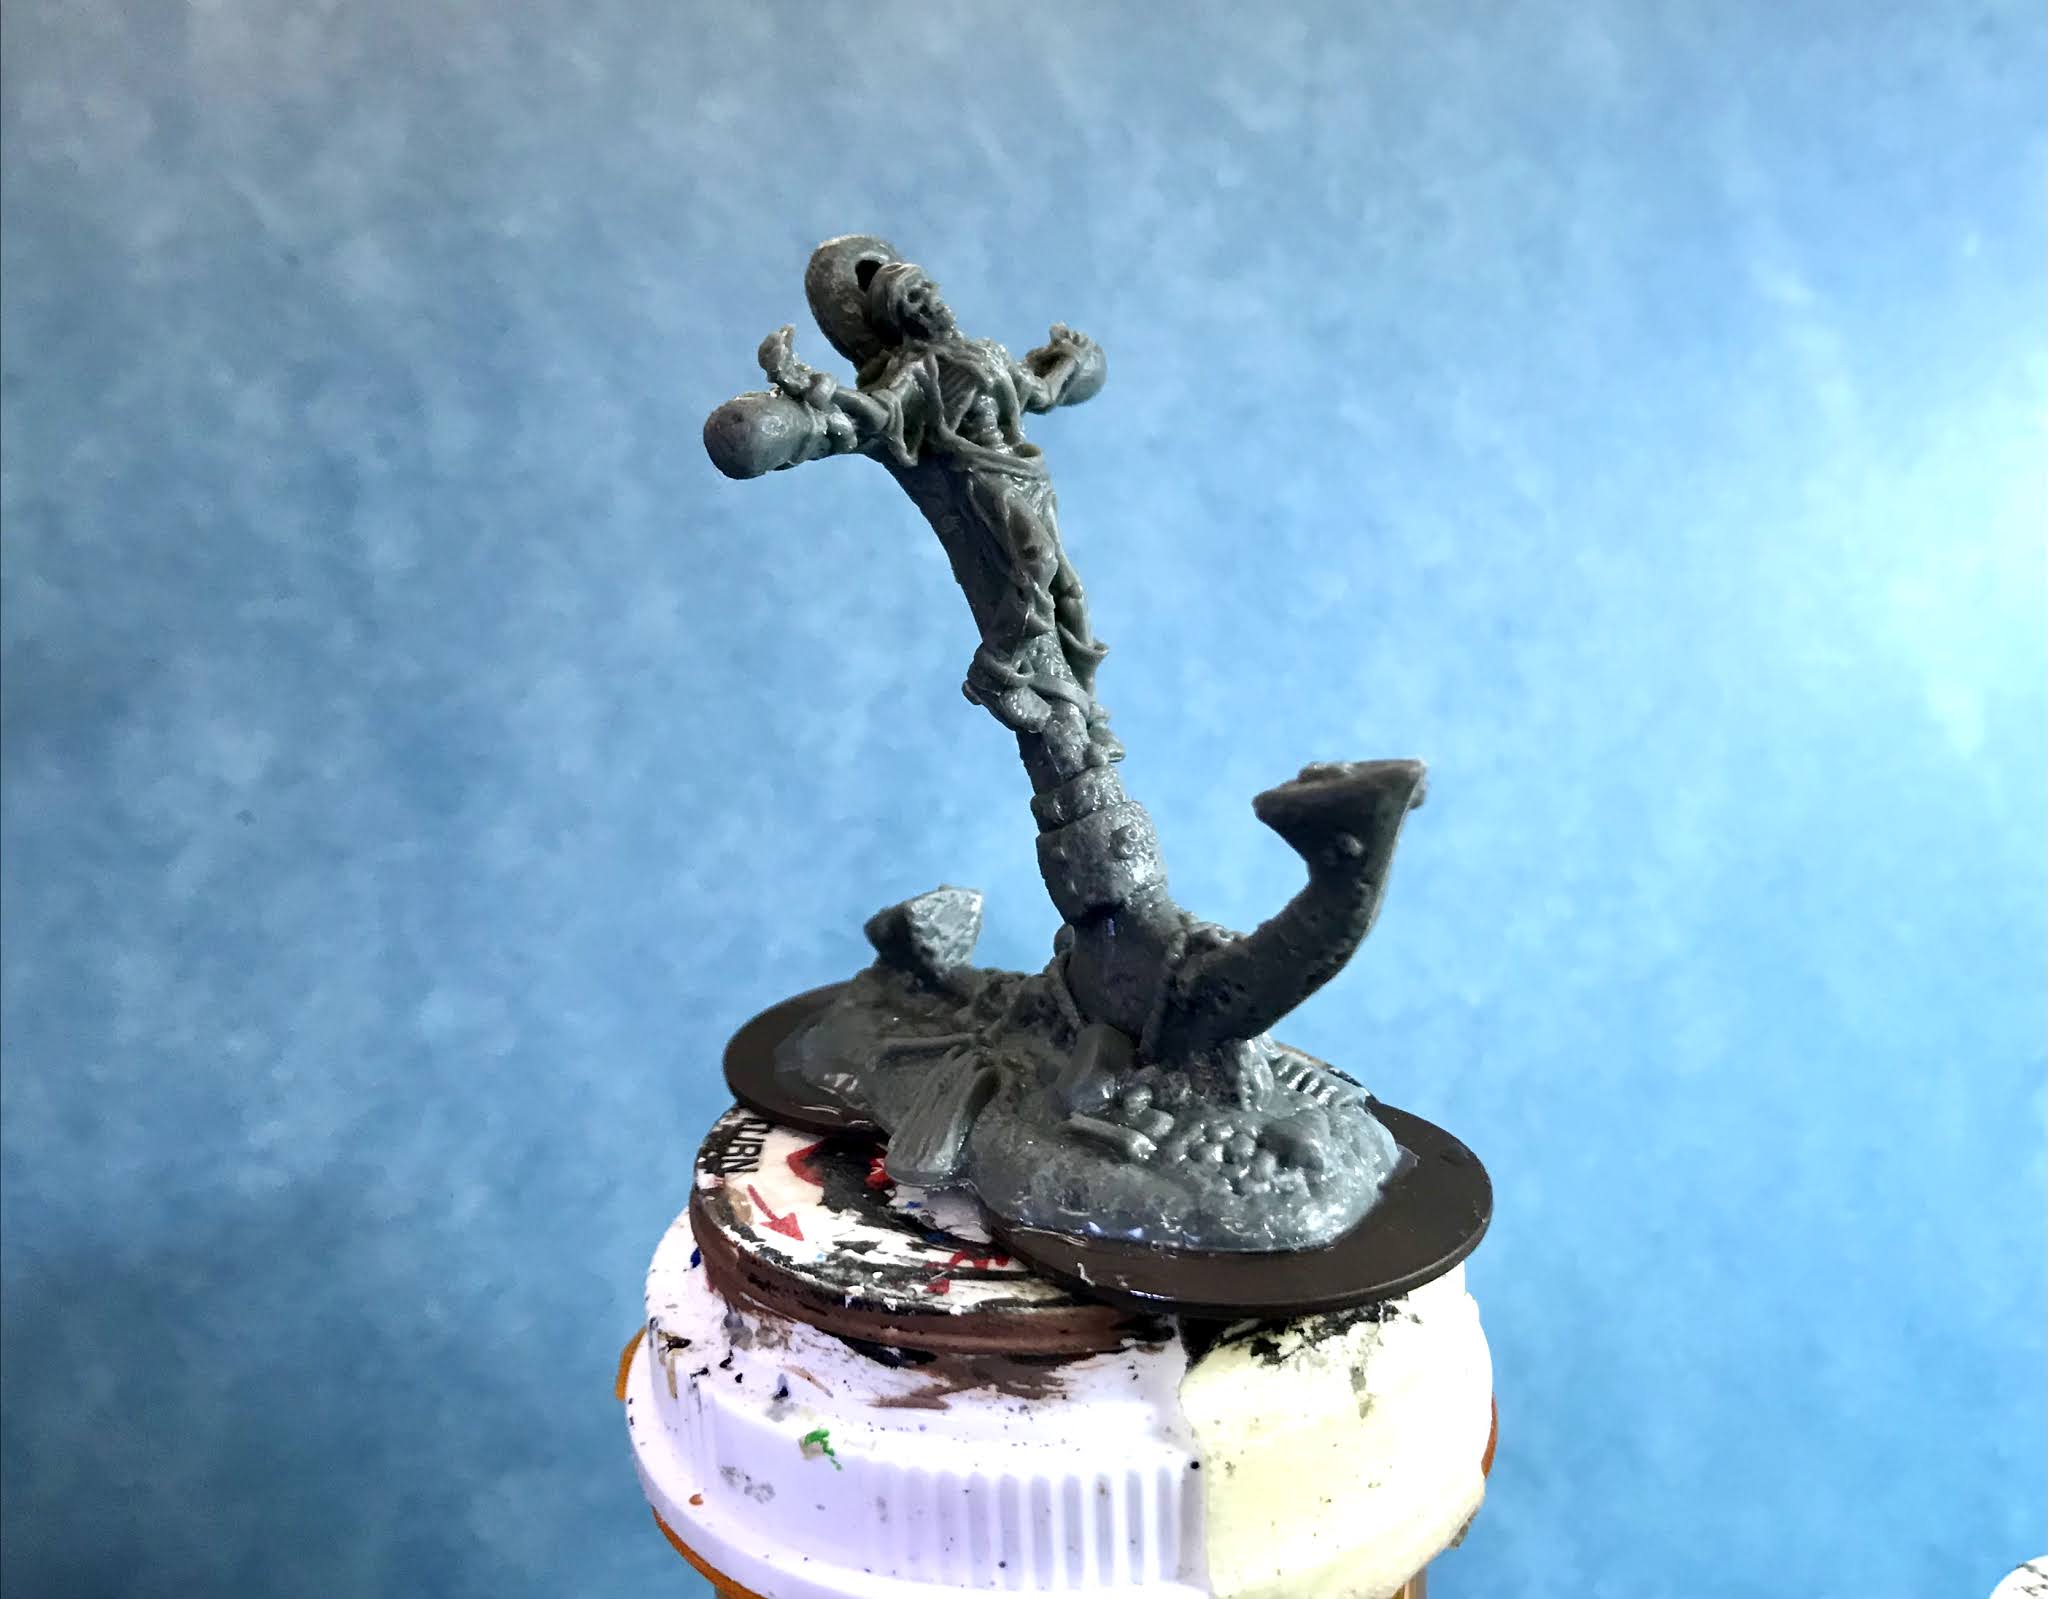
     This past week I painted the "Anchor of Damnation" from the Bones 5 Brinewind Expansion. 
     I prepped it in the usual way, soaking it in a dish of water with a couple drops of dish-soap added, then gave it a light scrub with a soft toothbrush, and then rinsed and dried it.  I then glued the figure to a pair of 1.25" brown-primed metal washers with some Aleene's Tacky glue.  I then glued the figure to a pill bottles with a couple drops of white glue.    
     I began by painting the figure entirely with Americana "Charcoal Grey". When dry, I dabbed the anchor here and there with Americana "Light Cinnamon", and then followed with dabbing the anchor with Accent "Golden Oxide".
     I did a few lighter anchor dabs with Reaper MSP "Lantern Yellow", and then turned to the skeletons.  I began by painting the all bones with Reaper MSP "Graveyard Bone".  I then painted the anchor skeleton's boots with Ceramcoat "Charcoal", and the pants with Folk Art "Cloudy Day"
     Next, I painted the shirt with Folk Art "Porcelain White", and the  head scarf with Pathfinder MSP Urgathea Red". After that, I painted The rocks with Folk Art "Dapple Grey", and then the straps holding the skeleton on the anchor with Americana "Asphaltum".
     I then painted the pirate's sash with "Antique Gold", and then did the ropes on the anchor with Reaper MSP "Ginger Cookie".  After that, I painted the broken planks with Folk Art "Barn Wood", and the assorted barnacles and shells with Folk Art "Gray Green".  I followed with painting what looked to be coral to me with Reaper MSP "Brains Pink", and the coins with Folk Art Brushed Metal "Brushed Bronze".
          I let everything dry for a while and then gave the entire thing a coat of Citadel "Agrax Earthshade" wash.  When the wash was dry, I did some highlighting on the anchor with Americana "Sable Brown", and some of the "LanternYellow".  I then highlighted the barnacles with the base "Gray Green".  Next, I highlighted the skeletons with Reaper MSP "Graveyard Bone", and then some Crater's Acrylic "Light Antique White".
          Next, I highlighted the pirate's shirt with Reaper MSP "Bleached Linen", and Reaper MSP "Peppermint White".  I then highlighted the head scarf with Reaper MSP Bones "Cinnamon Red", and Reaper MSP "Fresh Blood".  After that, I highlighted the pants with the base "Cloudy Day", and then some Crafter's Acrylic "Cool Blue"; and followed by doing the sash with Americana "Antique Gold", and Reaper MSP "Palomino Gold".  
          I then highlighted the boots with the base "Charcoal, and mixed in a little Americana "Zinc"; and afterwards did the highlights on straps holding the pirate on the anchor using the base "Asphaltum with some Americana "Terra Cotta mixed in. After that, I highlighted all the rope sing Folk Art "Butter Pecan", and then highlighted the planks with he base "Barn Wood".  Next, I highlighted the rocks with the base ""Dapple Grey", and then mixed in some Folk Art "Porcelain White", and then moved to what I interpreted as coral, and highlighted that with Apple Barrel "Apple Lt. Pink".  I finished by highlighting the coins with some Folk Art Metallics "Pure Gold".  
        I let the figure dry overnight and the next day I gave it a coat of Americana "DuraClear Matte" varnish. When dry, I used some white glue to glue some sand to the figure's base. I also added a mini seashell for decoration. Another overnight dry, and I sprayed the figures with Testor's Dullcote". 


     I'm really pleased with how this piece turned out.  It will add a lot of character as scatter terrain in either a jungle, seaside, or underwater setting.  And players can always wonder if the skeletons are really "just" scenery or not... :) 
  

    In other news, I decided to start working on the "Townsfolk" Add-On set a couple at a time on the side.  Often when I squeeze out dropper-bottle paint, like Reaper's, I have some left over and my plan is to take a moment and use up this extra on these side figures; thus finishing more of my Bones, and not wasting as much paint.  I'll just post photos when I complete a pair, but not bother with doing step by step articles for these since they are such simple figures.


Monday, August 9, 2021

Stained Glass Knight: Bones 5 Figure

      This past week I painted a pair of the "Stained Glass Knights" from the Bones 5 Core Set.  The Core came with one of these figures, and I thought it was such a fun figure I ordered an extra Constructs set to get a second one.   
     I prepped the figures in the usual way, soaking them in a dish of water with a couple drops of dish-soap added, then giving them a light scrub with a soft toothbrush, and then rinsing and drying them.  I then glued the figures to 1" green-primed metal washers with some Aleene's Tacky glue.  I then glued the figures to a tongue depressor with a couple drops of white glue each.   
          To begin, I gave both figures complete coats of Americana "DuraClear Matte" varnish.  When this coat was dry, I picked out some details on the armor and painted them with Citadel Contrast "Snakebite Leather", front and back.  I then painted the rest of the armor with Citadel Contrast "Space Wolves Grey", both front and back.  With the arms behind the shields, I just painted the backs since the fronts were covered by the shields.
     Next, I painted both the sword blades with Citadel Contrast "Basilicanum Grey", both front and back. I then painted the shield on the left knight with Citadel Contrast "Talassar Blue", and Citadel Contrast "Blood Angels Red"; and on the right night with Citadel Contrast "Creed Camo", and Citadel Contrast "Iyanden Yellow".  On the shields, I painted the front, and the parts of the back that were'd covered by the armored arm. After that, I painted the faces with Citadel Contrast "Gulliman Flesh".
     I then painted all the lines between the panes with Ceramcoat "Black".  When dry, I went over them again using Accent "Princely Pewter".   After that, I painted the bases with Americana "Neutral Grey", and when dry, gave them a drybrush with Folk Art "Platinum Grey". 
      I let the figures dry overnight and the next day I gave them a coat of Americana "DuraClear Matte" varnish.  Another overnight dry, and I sprayed the figures with Testor's Dullcote".  


    I'm really pleased with how these turned out, and am impressed with how the Contrast paint works on these translucent/clear minis.  I'm looking forward to experimenting with some of the other translucent figures from Bones 5.