Monday, September 28, 2015

Rosie, Chronotechnician: Figure 172 of 265

     This week I continued working on the big Bones I Chronoscope set, and completed the Rosie, Chronotechnician, figure.
        I prepped the figure in the usual way; soaking it in a dish of water with a couple drops of dish- soap added, then giving it a light scrub with a soft toothbrush, and then rinsing and drying.   I then glued the figure to a 1" black-primed fender washer with Aleene's Tacky glue, and glued the washer to a tongue depressor with a couple drops of Elmer's White Glue.
      I began by painting her skin with Americana "Mocha".  I then painted her shirt with Crafters Acrylic "Pure Pumpkin", and her overalls with Crafters Acrylic "Navy Blue".
      Next, I painted her gloves with Apple Barrel "Burnt Sienna", and her boots and toolbelt with Americana "Territorial Beige".  I then painted her neckerchief with Crafters Acrylic "Christmas Red", and then did her hair with Folk Art "Dark Brown",
           I let the paint dry a bit, an then I gave the figure a wash with Winsor Newton "Peat Brown" ink, using a wet brush.  As best I could, I tried to avoid getting any on her blue overalls.  When the wash was dry, I painted her gun, communications head set, and some of the tool handles Black. I also painted some of the tool handles with Americana "Zinc".    Then I painted her boot augmentations and belt buckle with Accent "Princely Pewter".  I then went back and painted the side supports of her boot augmentations with Apple Barrel "Yellow".  When the "Yellow" was dry, I went back over it and painted thin slanted black stripes.
     Next, I used some Duncan "Slate Blue" to drybrush the gun and (carefully) the comms headset. I then took some of the "Zinc", and highlighted the ammo clip on the gun.  I then did highlights on her hair with Americana "Sable Brown", and followed with painting her eyes.  I then did her lips with Some Americana "Shading Flesh" with a little of the "Mocha" mixed in, then worked on highlighting all her skin with the base "Mocha", then mixing in a little Crafters Acrylic "Flesh" to do lighter highlights.  Now it was on to her clothing, highlighting first her shirt with the base "Pure Pumpkin", then some Americana "Tangerine". Next, was her overalls, which I highlighted first with a mix of the "Navy Blue" and the "Slate Blue", and then just pure "Slate Blue".  Her gloves I highlighted with Crafters Edition "Orange Spice", and her boots and tool belt with Folk Art "Butter Pecan". I used the base "Christmas Red" to highlight her neckerchief.
     Next, I added a red dot to the laser sight on the gun, and another to her headset, using the "Christmas Red".  I also painted a part of the headset with Crafters Acrylic "Storm Cloud Grey".  I then highlighted her boot augmentations, her belt buckle, and painted some of the tool and headset parts, with Cermacoat "Metallic Pewter".  Then I took a some "White", and added little reflection highlights to the red dots and the "Storm Cloud Grey".  I finished up by painting her base with Cermacoat "Walnut".
      After the figure had the afternoon to dry, I gave it a coat of Ceramcoat "Matte Varnish" in the evening.  The next morning I flocked the base using a sand mixture and a little static grass, and later that afternoon I sprayed the figure with Testor's Dullcote.
     I'm happy with the way she turned out.  The mouth was molded a little funky, and that shows a bit, but in general I think it's a pretty nice figure.

Figure 172 of 265: Complete

Thursday, September 24, 2015

Alistrilee, Elf Archer: Bones II Figure

      This week I also completed the Alistrilee, female elf archer, figure from the Bones II Core Set.  I had actually put this figure in my Bones "out" box when I first sorted my Kickstarter, to sell at a con flea market. But since I have been bitten by the Frostgrave bug recently, and needed to boost my warband recruits, I pawed through the "out" box to look for suitable candidates who look attired for winter adventuring.  I had culled this figure originally as it is rather plain and lacks a dynamic pose, and I already had a selection of elf archers from Bones I, but her hood and cape made her perfect for exploring the ruins of Felstad.
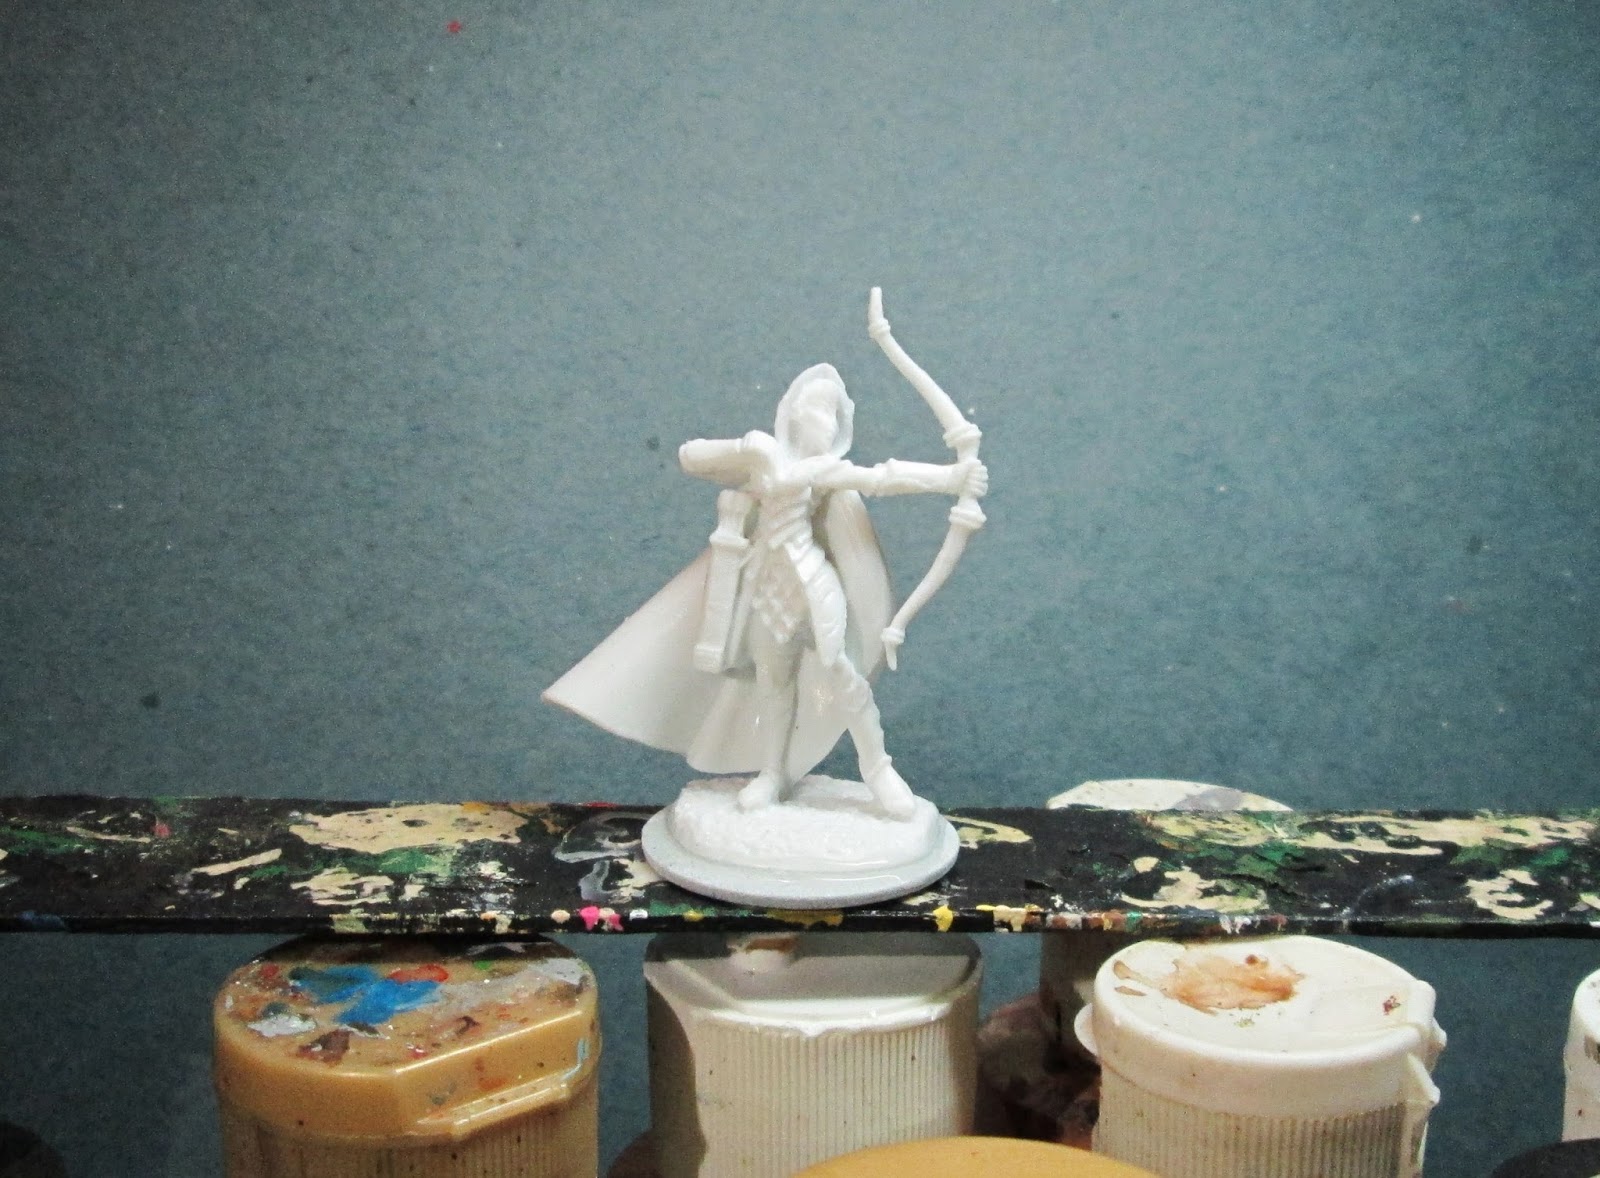
       I prepped the figure in the usual way; soaking it in a dish of water with a couple drops of dish- soap added, then giving it a light scrub with a soft toothbrush, and then rinsing and drying.   I then glued the figure to a 1" white-primed fender washer with Aleene's Tacky glue, and glued the washer to a tongue depressor with a couple drops of Elmer's White Glue.
   I began by painting her under armor Black, as I had originally intended to drybrush it with a metal color.  Then I changed my mind, as archers in Frostgrave wear leather armor, and not metal. So, I decided to do it in a non-metal color to look perhaps like some sort of dyed scale leather armor.  I chose Duncan "Slate Blue" and used that to drybrush it.  I then painted her pants Aleene's "Dusty Khaki", and her jerkin with Americana "Territorial Beige".
    Next, I painted her sleeves with Folk Art "Dapple Grey", and her boots and arm guards with Folk Art "Butter Pecan"  Then I painted her face and hands with Crafters Acrylic "Flesh", and her hair with Americana "Buttermilk".  I worked on her scabbard next, painting it Americana "Jade Green", with Duncan "Olive Green" trim. The arrow shafts I painted Folk Art "Porcelain White", and the fletchings with Crafters Acrylic "Light Antique White (L.A.W.)".  Next I did her bow, painting it Folk Art "Grey Green" with Aleenes "Deep Khaki" trim.
      After the paint had a while to dry, I gave the figure a wash with thinned Winsor Newton "Peat Brown" ink, being careful not to get any on the cape or base.  When the wash was dry, I did some highlighting on her under armor, first with the base "Slate Blue", and then with Crafters Acrylic "Cool Blue". I then worked on her cape and hood; first painting the cape with Folk Art "Celadon Green", and then when that was dry, adding shadows with thinned Americana "Salem Blue".
      I finished up with the cape by doing highlights on it with White.   I then worked on her face and hands, first doing her eyes, and then mixing a little Americana "Shading Flesh" with the "Flesh" to do her lips, and then adding a little White to do her lip highlights.  I then used the base "Flesh" to add highlights to her skin, and then added a little of the "L.A.W." to do finer highlights. Next, I did her hair, first highlighting with the base  "Buttermlk, and then mixing in a little of the "L.A.W." to do finer highlights.  I now worked on her clothing, highlighting her pants with the base  "Dusty Khaki", and her shirt with the base "Dapple Grey" with a little of the "Dusty Khaki" mixed in.  I then highlighted her jerkin with the "Butter Pecan", and her boots and arm guards with the "Butter Pecan" mixed with a  little of the "L.A.W."  Her scabbard I highlighted with the base "Jade Green" mixed with a little "L.A.W.", and the trim I highlighted with the base "Olive Green" with a little of the "Jade Green" mixed in.  Her arrow shafts I highlighted with the base "Porcelain White", and the fletchings with plain White.   I moved now to the bow, highlighting it with the base "Gray Green", and the trim with the base "Deep Khaki".  I finished up with some metallics; first with her earring, painting it first with Ceramcoat "Bronze", and then doing highlights with Ceramcoat "14k Gold".  I then added a little dab of thinned "Peat Brown" ink to the earring to help it pop. I then did the little circle trim around her hood, painting each dot with Folk Art "Metallic Blue Sapphire" first and then adding a tiny pinpoint highlight of Folk Art "Aqua Moire" Pearl paint to each dot.   Lastly, I painted her base White.  
     When everything had overnight to dry, I gave the figure a coat of Ceramcoat "Matte Varnish".  The next morning I flocked the base with Woodland Scenics "Snow" flock.  Late that afternoon I sprayed the figure with Testor's Dullcote.
      I'm really happy with how this figure turned out, and quite honestly it was a nice change of pace to paint a simple fantasy figure without 5 layers of clothing and a dozen things hanging off them, many of which you need to guess at what exactly they are.   In the end I'm glad she was rescued, as I think this figure has a lot of subtle grace to it, that I missed on first passing.
  For them that likes a close up, here you go:  

Bones Soup

    In other news, I spent part of the morning boiling some Bones terrain (the Dragons Don't Share ruins and the Mashaaf base to be exact) in an old pot I picked up earlier this week at the local Goodwill.  After a 15-20 minute boil, I dropped the pieces into pot of ice water, and did my best to hold the bases flat on the bottom of the ice-water pot so the pieces would set up correctly.  So far I'm pleased with the results; not 100% flat but about 90%-95%, which I can live with.

Friday, September 18, 2015

Ape-X: Figure 171 of 265

    This week I completed another figure from the Chronoscope Set: Ape-X.  I wanted to paint him to look a little more Victorian Science Fiction than regular Science Fiction, so I planned on lots of iron and brass along with some natural leathers in my color scheme.
       I prepped the figure in the usual way; soaking it in a dish of water with a couple drops of dish- soap added, then giving it a light scrub with a soft toothbrush, and then rinsing and drying.   I then glued the figure to a 1.5" black-primed fender washer with Aleene's Tacky glue, and glued the washer to a tongue depressor with a couple drops of Elmer's White Glue.
     I began by painting his entire body Black.  I then drybrushed the areas of skin with Duncan "Slate Blue", and the fur areas wih Folk Art "medium Grey", followed with some spot drybrushing using Crafters Acrylic "Storm Cloud Grey".
   I then painted the inside of his mouth with Americana "Shading Flesh", and his teeth with Americana "Buttermilk".  Next, I painted his eyepiece with Americana "Leaf Green." I then  began some of the metals, painting his gatling gun, powerfist, head piece, the motor on his back, and the center of his upper stomach port, all with Accent "Princely Pewter".
     Next, I painted the tubes running from his back to his arms with Accent "Real Umber". The finger pieces and some of the side pieces of his power fist I painted with Apple Barrel "Burnt Sienna".  The tubes running up his back to his headpiece, as well as some of the bits on the top of the finger parts of his powerfist, and a couple of the bits and bobs on the engine,  I painted with Ceramcoat "Copper".   I then painted some of the fittings on his gatling gun, powerfist, headpiece, engine, as well as head and stomach implants with Ceramcoat "Bronze".  I waited a bit, then gave the inside of his mouth and the leather on his powerfist, a wash with GW "Agrax Earthshade" wash using a wet brush.
      At this point I thinned some Black ink and applied it in very thin lines at all the metal joints and wherever the tubes plugged into a socket.     Next, I added a bit of shadow to his eyepiece with Accent "Deep Forest Green", and then a highlight with a bit of White. Then, I highlighted his teeth with Crafters Acrylic "Light Antique White", and then mixed a little of the "Light Antique White" with the "Shading Flesh", to highlight his tongue. I then painted his real eye with the "Real Umber" and gave it a highlight with a dot of White". Next up was drybrushing the arm hoses with Accent "Mustard Seed", and then doing highlights on the powerfist leather with the base "Burnt Sienna".  I finished up with highlighting the metals.  All the "Princely Pewter" pieces I highlighted with Ceramcoat "Metallic Pewter", and then did spot highlights with  Folk Art "Silver Sterling". I then mixed a little of the "Silver Sterling' with the "Copper" to highlight the "Copper" parts. Finally, the bronze parts I highlighted with Ceramcoat "14K Gold". And the last painting was to do the figure's white base with Cermcoat "Walnut".
  After the figure had the afternoon to dry, I gave it a coat of Ceramcoat "Matte Varnish" in the evening.  The next morning I flocked the base, and later that afternoon I sprayed the figure with Testor's Dullcote.


    I'm really pleased with how this big boy turned out.  I had originally been hesitant to paint him due to his size, but I realized after I started that much of the figure is simply skin or fur, and in the end it went rather quickly.

Wednesday, September 16, 2015

Bones Return to Frostgrave: A Battle Report

  This past Sunday I got to try out the new Frostgrave rules again, this time with real opponents.  Two of my friends came over and we got to play a couple games. The first game we played was a three way battle between a Necromancer band controlled by me, an Illusionist party controlled by Buck, and a Chronomancer group controlled by Greg.  Greg and I had talked a while back how much the Chronomancer type of wizard reminded us of a Time Lord like Dr Who.  So, sure enough, for his faction Greg brought the Eleventh Doctor, and River Song, as his Wizard and Apprentice, which I thought was mighty cool.  He also brought three pieces of the rare material, Jethrik, as his treasure tokens.
Team Illusionist: The Wizard, Apprentice, Templar, Archer, Archer, Thief, Thief, Thief, Thug, Thug

Team Necromancer: Wizard, Apprentice, Man-at-Arms, Infantry, Archer, Treasure Hunter, Thief, Thug (Yes, he's a goblin thug). The Necromancer was also able to raise a Zombie before the game began.

Team Chronomancer: Wizard (The Doctor), Apprentice (River Song), Infantry, Treasure Hunter, Crossbow, Crossbow, Crossbow, Thug
 We played a straight up game with no optional rules, and no campaign goals, as we all were still getting a feel for the rules.  While this was the first game for my two friends, I had played a solo match a week ago. As there was no chance of eliminating both enemy factions in a three-way match, claiming treasure became the primary goal of the game.
A view of the table near the beginning of the game. Buck entered his Illuisonist group from the far long side of the table, Greg from the near long side, and I entered from the short far side.
    As can be imagined, the action was chaotic.    The beginning level wizards were not having a good day as lots of spells failed. My Necromancer and his Apprentice tried numerous times to launch Bone Dart spells but they always seemed to miss, they soon were dubbed the "rubber chicken" bone darts. However, this made the spell successes all the more memorable.  The highlights being a well tossed grenade by the Illusionist; and the Illusionist's apprentice managing to mind control the Chronomancer's thug, with the sacrifice of some health to empower the spell. The Thug had just picked up a treasure, and was forced to carry it across the board; and as the game neared the end, the Illusionist Apprentice did a spectacular Push spell on him that shoved him over a foot and off the table edge with his treasure.
A swirling battle developed in the middle of the table between the Chonomancer's forces and the Illusionist's 
    As the game neared the end, my Necromancer had removed 4 treasures, the Illusionist 3, and the Chronomancer had 1.  There was one more treasure left, and my infantry woman was climbing down from the third floor of a ruined building with it. She had been wounded on top of the building by one of the Illusionist's archers and now he finished her off with a spectacular shot through one of the buildings windows as she climbed down.  The Chronomancer teleported to the spot where the treasure now lay, as my Necromancer and his Apprentice moved up to claim it as well. My Apprentice finally managed a successful Bone Dart attack against the Chronomancer, putting him out of the game, just as the Illusionist successfully teleported to the spot as well.  I had a chance to Bone Dart him as well, as he picked up the treasure, but failed; and the next activation he teleported away.  The game ended in a tie of 4 treasures each for my Necromancer and Buck's Illusionist, and one for  Greg's Chronomancer. Everyone had a great time.
My Infantry lies dead next to the treasure as the Illusionist and the Chonomancer teleport in to claim it, as my Necromancer (visible in the lower left of the photo) moves up.  Out of view is my Apprentice who is on the other side of the rocky otcrop that the Necromancer is standing by, taking aim at the Chronomancer.
 At this point Buck had to leave, so Greg and I reset the terrain a bit and prepared to fight another game; this time with the plan to use the campaign rules and wandering monster rolls.   I took the Illusionist group this time, and Greg re-ran his Chronomancer gang.  Again, another good game was had.  The addition of the creatures was fun, especially when a ghoul appeared directly on the table edge behind my Illusionist. The creature badly injured my illusionist, before my wizard could teleport out of the engagement, and my archer then quickly finished off the Ghoul.
My Apprentice teleports to the top of the tower to retrieve a treasure (The treasure is a piece of jethrik.   To go along with the Dr Who figures, Greg used three pieces of this rare stuff as his treasure tokens. :)  )
    Another highlight included the same Chronomancer's thug that got mind controlled in the first game getting mind controlled again with a treasure in his hands, this time by the Illusionist himself. Much humor ensued at the expense of this poor weak-minded thug.
As if from nowhere, a Ghoul appears and makes a dash for my wizard.  Luckily the nearby archer is able to dispatch the foul creature. 
 Best of all was a spectacular battle atop some tower ruin, as my Apprentice teleported up there to grab a treasure, followed by the Chronomancer infantry soldier who began to climb the tower after her.  The Chronomancer himself then teleported up to the tower's top on the Wizard phase of the next turn. Desperate, the Apprentice tried a Push spell on the Chonomancer and succeeded spectacularly pushing him 9 inches back and off the tower.  The 6 inch drop then did 9 points of damage to the Chronomancer as he fell. The next turn my Apprentice picked up the treasure, and as the infantryman neared her, she teleported off the tower the following turn.
Duel atop the tower. The Doctor and my Apprentice face off
      The game ended soon after that, with the movement of the last of my soldiers off the table after retrieving 4 of the treasures.  Both wizards were badly battered but not dead.  While I had managed to get four of the treasure again, Greg got two this time.   We then spent a few minutes to run through the after-game book keeping.  I had lost two thugs and a thief during the game, and while one of the thugs and the thief were quick to recuperate my other thug was injured badly enough to have to miss the next encounter. Treasure wise, I got a nice pile of gold coins and a pair of grimoires.  I earned 240 experience points, going up two levels.  I used these to increase my health by one, and my skill at teleporting by one.
The result of the duel: The Doctor lay badly hurt where he fell into a ruin, after being pushed 9" off the tower.
     Both games were a lot of fun, and there are a lot of nuances to the game which will be fun to learn and experiment with.  My Illusionist, now named Nikon, and his trusty apprentice, named Cherowyn, are now settled in an old abandoned inn on the edge of the city; fixing it up and preparing for their next excursion. They have put out a call for a Ranger to join their ranks, since they have so much extra space at the inn; and can afford his fes now with the treasure they recovered; he should be here in time to join the next adventure.  It will be just in time too, as the poor injured thug will not make the next outing.

Monday, September 14, 2015

Deadeye Slim: Figure 170 of 265

This week I ended up being very busy, so I chose the simple Deadeye Slim figure from the Chronoscope Set to paint.
       I prepped the figure in the usual way; soaking it in a dish of water with a couple drops of dish- soap added, then giving it a light scrub with a soft toothbrush, and then rinsing and drying.   I then glued the figure to a 1" black-primed fender washer with Aleene's Tacky glue, and glued the washer to a tongue depressor with a couple drops of Elmer's White Glue.
      I began by painting his coat, hat, pants, shoes and belt all Black.  I then drybrushed all the Black with Duncan "Salem Blue".    Then I painted his shirt with Folk Art "Porcelain White"
      Next, I painted his head and hands with Americana "Shading Flesh". I then painted his pistol grips with Americana "Asphaltum".  After they had time to dry, I washed his head and hands with Winsor Newton "Peat Brown" Ink using a wet brush.
      When the wash was dry, I painted his hair, mustache, and eyepatch all Black.  I then painted his  other eye, followed with adding some grey highlights to his hair and mustache with Folk Art "Dark Grey". I then highlighted his skin with a mix of the "Shading Flesh" and some Crafters Acrylic "Flesh". Then I moved to his shirt, highlighting that with plain "White".  I painted the metal parts of his pistols with Accent "Princely Pewter". I then painted the belt buckles with Ceramcoat "Metallic Pewter", and then used this color to add highlights to the guns' metal parts.  Lastly, I painted the bullets in his holster belt with  Ceramcoat "14K Gold".  I wrapped up by painting the white base with Ceramcoat "Walnut".
     After the figure had the afternoon to dry, I gave it a coat of Ceramcoat "Matte Varnish" in the evening.  The next morning I flocked the base, using both a sand mixture and regular green flock; and later that afternoon I sprayed the figure with Testor's Dullcote.
    I'm pleased with how he turned out.  Sometimes the simple path is the most effective. :)

Figure 170 of 265: Complete

Thursday, September 10, 2015

Stone Giant: Bones II Figure

  I also completed the Stone Giant this week from the Bones II Expansion Set 1, as part of my ongoing effort to tackle some of the bigger figures from this Kickstarter.  In thinking about what color to paint him, I decided I didn't want to do him just purely grey, but wanted to give him a little more pinkish flesh-like skin tone to help differentiate that he isn't a troll.
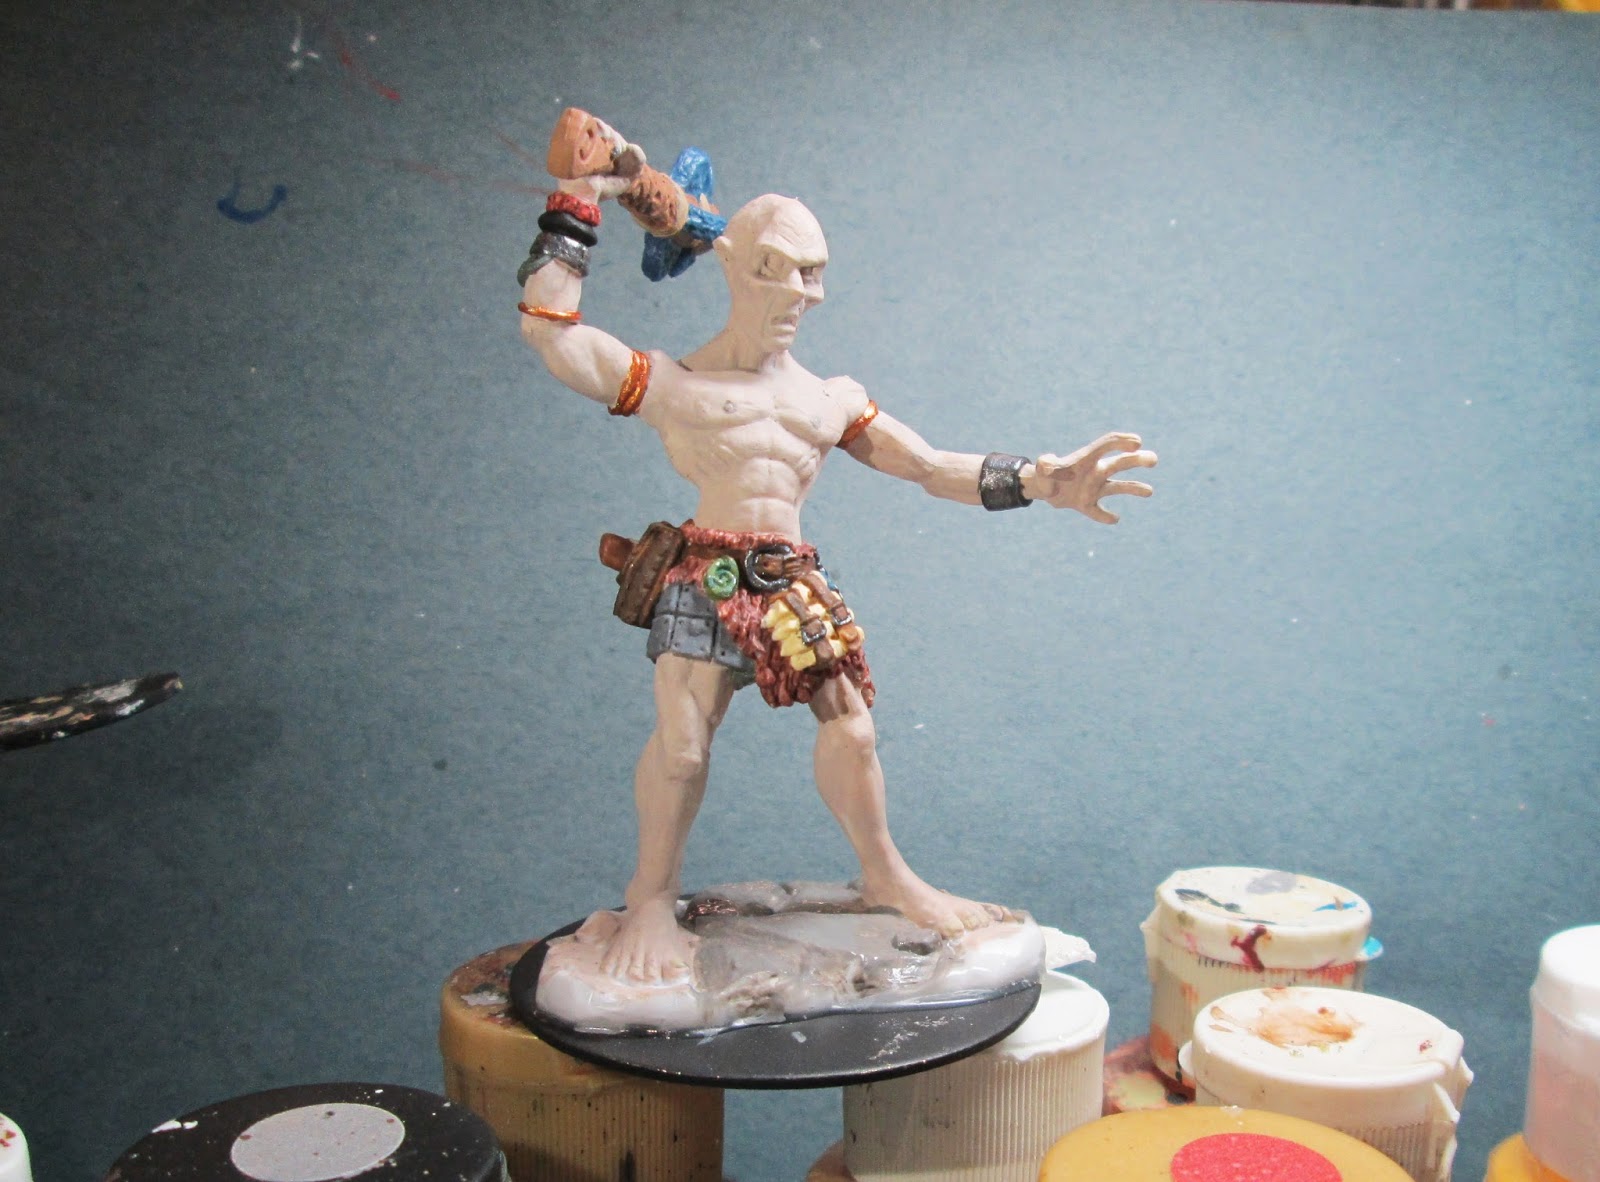
      I prepped the figure in the usual way; soaking it in a dish of water with a couple drops of dish-soap added, then giving it a light scrub with a soft toothbrush, and then rinsing and drying.  I then glued the figure to a 2" black-primed fender washer with Aleene's Tacky glue.   The 2" washer was big enough to just hand hold, so I didn't glue it to a tongue depressor.
   
     I began by painting his skin, mixing equal part Crafters Acrylic "Storm Cloud Grey" and Folk Art "Milk Shake".  I then painted his fur garment with Folk Art "Dark Brown", and his armored skirt with Americana "Zinc", as I wanted it to look like it was made from slate.
     Next, I painted his pack of chisels with Americana "Buttermilk", as my plan was to make them look like they might be dragon teeth. I then painted his belt, straps, and large pouch with Americana "Asphaltum." His hammer handle I painted with Crafters Acrylic "Cinnamon Brown" and the ropes around the handle with Americana "Khaki Tan". His sack-like pouch I painted with Americana "Mississippi Mud". I painted his finger and toe nails with Folk Art "Porcelain White".
   I moved to his club next, painting the handle with Crafters Edition "Spice Brown", the stone "spikes" with GW "Shadow Grey", and the ropes with the "Khaki Tan". I then painted the small rock adornments on his belt; one with Crafters Acrylic "Forest Green", one with Americana "Wedgewood Blue", and the three in a row to the right of his chisel pack with alternating Black and Folk Art "Deep Tomato Red".  I then added little flecks of White and Black to his stone adornments to help them look more like rocks.
         I painted the padding under his wrist guard with Folk Art "Dapple Grey", and two of the bracelets on his right arm with "Black, and the other with the 'Deep Tomato Red" The rest of the guards, bands and bracelets I painted either Accent "Princely Pewter" or Ceramcoat "Bronze.  I also used the "Princely Pewter" to paint the head of his hammer, the chain that supports it, and all the buckles on his belt and straps.  I then painted the rocks on his base with Folk Art "Medium Grey", and used this color to add in a pair of nipples.
       When all the paint had time to dry, I gave the Giant a wash with GW "Badab Black" wash using a wet brush
    When the wash was dry,  I painted his eyes and then worked on the highlighting.  I highlighted is skin with a bit of the "Milkshake" mixed with Americana "Dove Grey".  I then used Americana "Sable Brown" to highlight his club handle and fur wrap, as well as his pouches and his hammer handle.  I used Americana "Salem Blue" to highlight his slate armor and his club's "spikes".   I highlighted his chisels with Crafters Acrylic "Light Antique White", and then plain "White".  While I had the "Light Antique White" out, I painted in his lower teeth.  His stone adornments I highlighted with their base colors.  I then highlighted the rocks he is standing on by drybrushing them with the "Storm Cloud Grey".   I worked on the metallics last, using Ceramcoat "Metallic Pewter" to highlight the parts I had painted with the "Princely Pewter", and  Cermacoat "14K Gold" to highlight those pieces I had painted with the "Bronze".   Lastly, I painted the rest of his base, that I hadn't painted like rocks,  with Ceramcoat "Walnut".
       After the figure had the afternoon to dry, I gave it a coat of Ceramcoat "Matte Varnish" in the evening.  The next morning I flocked the base, and later that afternoon I sprayed the figure with Testor's Dullcote.
     I like how this fellow turned out.  I think his skin tone turned out just the right grey/flesh look I wanted.

Monday, September 7, 2015

Feiya, Iconic Witch: Figure 169 of 265

  This week I took a brief break from working on the Chronoscope set and completed Feiya, Iconic Witch from the Iconics and Officially Licensed Pathfinder Miniatures set.  I did this figure because my playtest of the Frostgrave rules last week (see previous post) made we want a properly winter based figure to act as Apprentice to my Illusionist wizard. I had pressed Cassie the Gnome Wizard in to duty as the Apprentice, but was not happy with her green grass base. (I'm actually working on trading with a friend to get a second Cassie to paint up with a snow base. How's that for obsessive. :) )  Meanwhile, I felt Feiya looked suitable wrapped up for cold weather adventuring.  So many of the remaining wizard figures I have just don't look dressed for a winter trek.
       I prepped the figure in the usual way; soaking it in a dish of water with a couple drops of dish- soap added, then giving it a light scrub with a soft toothbrush, and then rinsing and drying.   I then glued the figure to a 1" white-primed fender washer with Aleene's Tacky glue, and glued the washer to a tongue depressor with a couple drops of Elmer's White Glue.
     I began painting by giving the figure a wash with thinned black ink with a tiny pin-point drop of dishsoap added to help it flow into the crevices and help show the sculpting details.
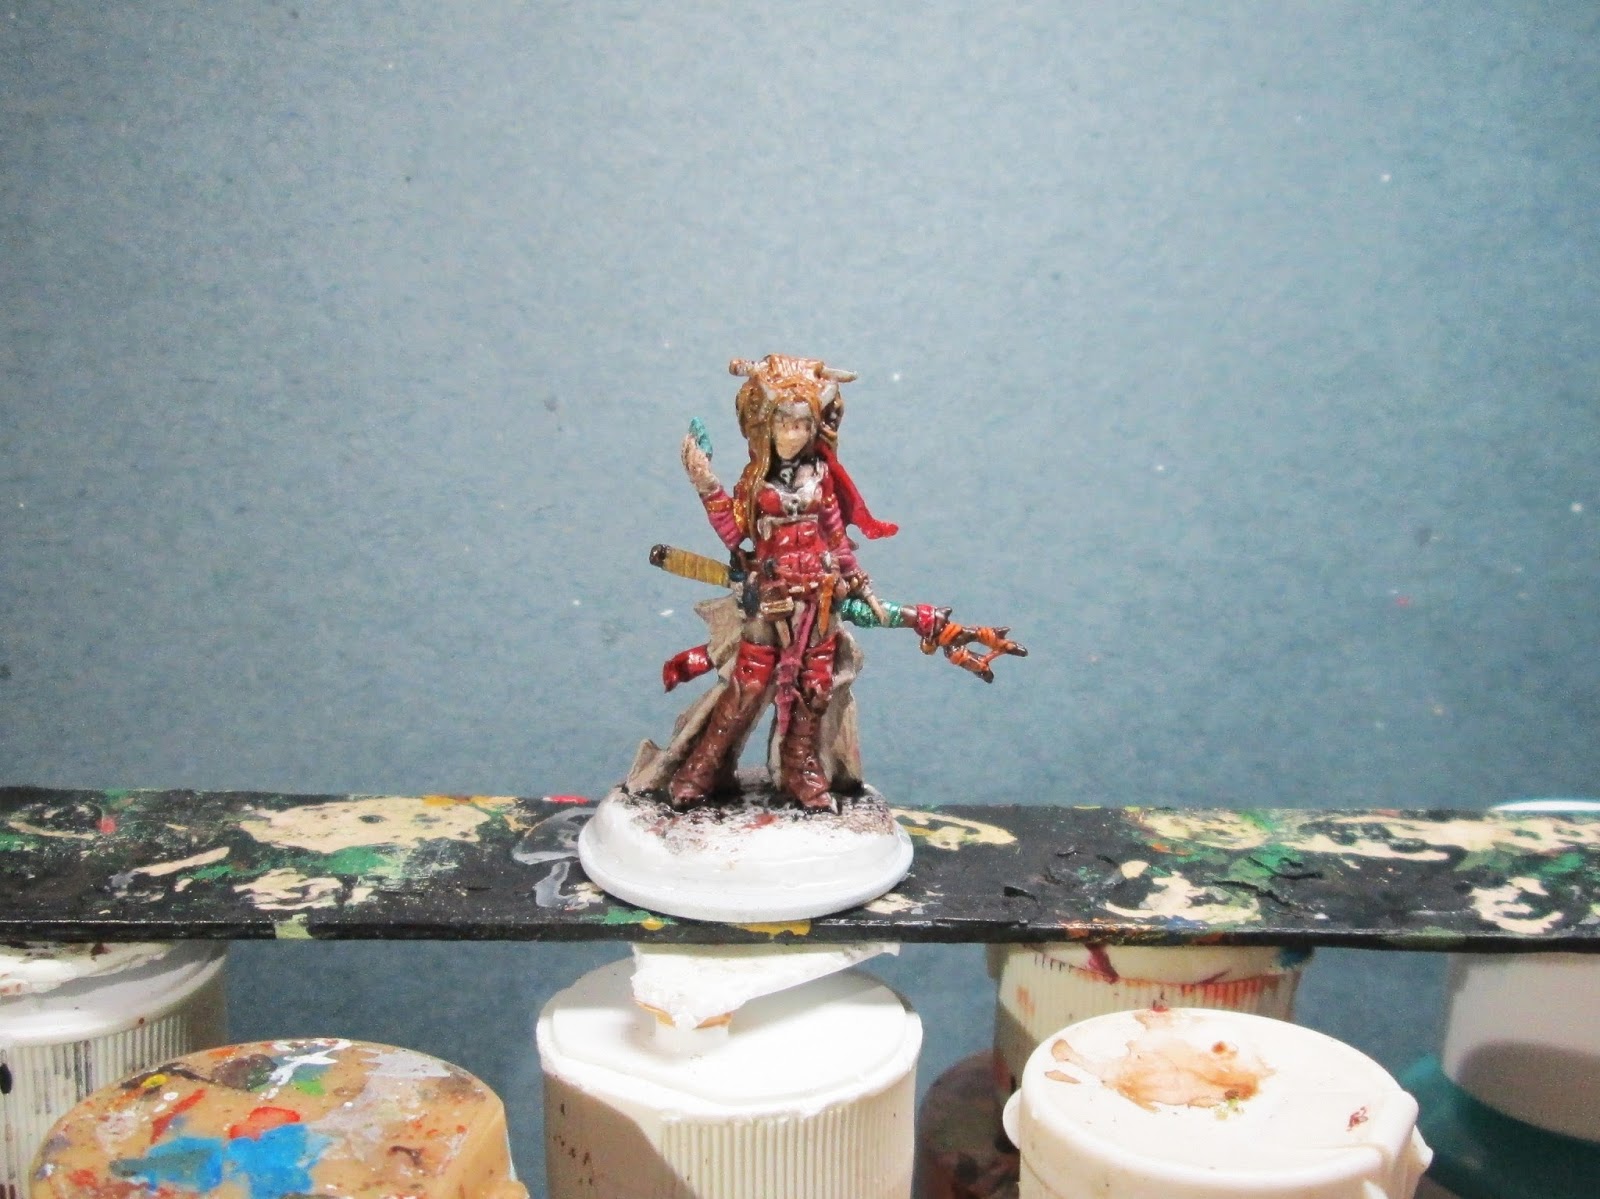
      When the ink wash was dry, I painted her pants Crafters Acrylic "Storm Cloud Grey". I then painted her top and leggings with Folk Art "Deep Tomato Red". Next, I painted her skin with Crafters Acrylic "Flesh".
     I then painted the half-cape-like garment she wears at her waist with Folk Art "Platinum Grey". I followed this with painting her boots  with Folk Art "Dark Brown". Next, her sleeves and the cloth hanging at her front waist I painted Crafters Acrylic "Tutti Fruitti". I painted her hair with Accent "Mustard Seed", and the ribbons hanging from her hair with Deco Art Dazzling Metallics "Festive Red". There also seemed to be a bit of ribbon hanging from her half-cape which I also painted this color.
 I now worked on her staff, painting the main body of it with Accent "Real Umber".  I then painted the ribbons on it: Crafters Acrylic "Bright Yellow, Folk Art "Metallic Emerald Green", and Crafters Acrylic "Pure Pumpkin". There was one last bit of ribbon there and I used the "Festive Red" on it. Next, I painted the belts at her waist with Apple Barrel "Burnt Sienna", and I did the trim on her top, as well as the little bit of sleeve showing at her wrist, with White.  The object in her hand I painted Crafters Acrylic "Dark Turquoise".  I now did all her bracelets and assorted arm bands, as well as the little jingle bell on her staff,  with Cermacoat "Bronze".  I then painted all the bits and bobs hanging at her waist with assort colors I grabbed off my table...too numerous to list.
     After all the paint had a few hours to dry, I gave the entire figure a wash with Winsor-Newton "Peat Brown" Ink using a wet brush.
    When the ink wash was dry, I began on the highlights.  First, I began on the hair; drybrushing it first with Apple Barrel "Apple Maple Syrup", and then Americana "Moon Yellow", and finally adding detail highlights with Americana "Buttermilk".  I then painted her eyes and lips and then did the highlights on her skin with the base "Flesh", and then adding a little White to it to do finer highlights. 
     Next, I painted all the objects in her hair.  First, I painted the knife with Ceramcoat "Metallic Pewter", and while I had this color out I used it to paint the tips of her boots. Next, I did the knife handle with the "Burnt Sienna", and while I had this out, I added some highlights to her belts. Next,I did the various beads  in her hair. First, with Crafters Acrylic "Christmas Red", which I then used to highlight her top and leggings; and then with White, which I also used to highlight the trim on her top, and the little bit of sleeves at her wrists.  Finishing off her head, I painted the tiara-like hair adornment with the "Bronze", and then used some Folk Art "Silver Sterling" to highlight the edges of the knife blade, and the tips of her boots.  At this point I mixed some of the Festive Red with some of the "Silver Sterling" and did highlights on her hair ribbons and the one at her half-cape. 
    I used Crafters Acrylic "Cherry Blossom Pink" to highlight her sleeve wraps and loin hanging. And then I used American "Dove Grey" to highlight her half-cape.  I then worked on her staff, using the base colors to highlight all the ribbons. I highlighted the little object she is holding with the base "Dark Turquoise" and then added some White reflective highlights.  I next did the highlights on the little bit of pants showing with the base " Storm Cloud Grey", and then did highlights on her her boots with Crafters Edition "Spice Brown".  While I had the Spice Brown out, I also did some highlights on the twigs at the end of her staff.   I then highlighted the various bits and bobs at her waist with their base colors.  Lastly, I used some Cermacoat "14K Gold to highlight all the objects I had painted with the "Bronze". I finished off by painting her base White. 
      When everything had overnight to dry, I gave the figure a coat of Ceramcoat "Matte Varnish".  The next morning I flocked the base with Woodland Scenics "Snow" flock.  Late that afternoon I sprayed the figure with Testor's Dullcote.
      I'm really pleased with how she came out.  The Frostgrave rules say that Illusionists dress in bright, multi-colored outfits, and I wanted to bring that across in this Apprentice. My thinking was that she is young and still enjoys playing with colors and different appearances.  The figure I'm using as my older Wizard, is more jaded and knows the wisdom of sometimes using camouflage and blending in.
     I had a request over on the Reaper Forums for a close up of this figure, so here it is.    I'm afraid my brush work doesn't hold up to close inspection. :)