Monday, March 29, 2021

Moor Troll: Bones 4 Figure

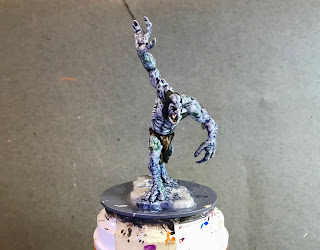
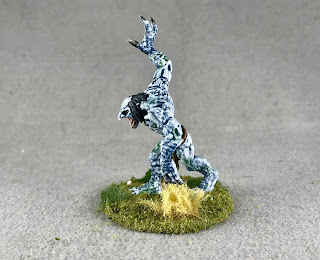
      This past week I painted the "Moor Troll" figure from the Bones 4 Trolls Set. 
       I prepped the figure in the usual way, soaking it in a dish of water with a couple drops of dish-soap added, then giving it a light scrub with a soft toothbrush, and then rinsing and drying it.  I then glued the figure to a grey-primed 2" fender washer with Aleene's Tacky glue.  I then used a couple large drops of Elmer's to glue him to the top of a pill bottle.
     I began by painting the figure entirely with Ceramcoat "White".  I then let it dry for a while, and when I came back I gave it a coat of Citadel Contrast "Space Wolves Grey".  While the "Space Wolves Grey" was still wet, I went over the figure and dabbed it here and there with splotches of Citadel Contrast "Creed Camo". 
          When the Contrast paint was dry, I painted the scaled areas on his legs and forearms with Citadel "The Fang".   When dry, I drybrushed the entire figure with Folk Art "Cloudy Day", and then followed with a lighter drybrush of Americana "Grey Sky".  After that, I did some spot highlighting with some Folk Art "Dove Grey", and a little Americana "Snow White".  I then painted his hair with Ceramcoat "Charcoal". 
          Next, I painted the rope belt on his loincloth with Reaper MSP "Shield Brown", and then painted the loincloth with Vallejo "Brown Violet".  I then painted the fur hanging on the loincloth with Americana "Charcoal Grey", and the skull with Americana "Antique White".  after that, I painted the inside of his mouth with Americana "Shading Flesh", and his teeth with Folk Art "Porcelain White".
     I let everything dry for a while, and then I gave his hair a coat of Citadel "Nuln Oil" wash.  I then the inside of his mouth, and the loincloth, rope, and other items on the loincloth a coat of Citadel "Agrax Earthshade" wash.   After that, I painted his eyes using Americana "Buttermilk" for the "whites, and I then highlighted the inside of his mouth with Reaper MSP "Rosy Skin", and highlighted his teeth with Americana "Bleached Sand".  
         I then highlighted his hair with Americana "Zinc", and Americana "Neutral Grey".  Next, I highlighted the rope belt with Ceramcoat "Territorial Beige, and the loincloth with Duncan "Olive Green" with a little Americana "Jade Green" mixed in.  After that, I highlighted the fur with Americana "Mississippi Mud", and the skull with the base "Antique White", and then used a little Crafter's Acrylic "Light Antique White" for lighter highlights.  Lastly, I painted his base with the "Mississippi Mud".  
     At this point, while I was painting the base, I realized I hadn't painted the claws on his hands or feet.  So I quickly painted them with some Folk Art "Dapple Grey", and when dry, gave them a coat of the "Nuln Oil" wash.  When that was dry, I highlighted them with Folk Art "Gray Green".   
      I let the figure dry overnight and the next day I gave it a coat of Americana "DuraClear Matte" varnish.    Then, when  the varnish was dry, I used some white glue to flock the base.  Another overnight dry, and I sprayed it with Testor's "Dullcote".  


     I'm generally happy with this guy.   As usual, the Contrast paint looks rather splotchy when used on large surfaces, but I think it's an okay look for a troll.  Also, oof!, that mold line really shows in the photos across his shoulders and arms.  Luckily, it's not quite as visible when looking at the figure in person. Must be the way the light and shadow are hitting it in the pictures. 

     No figure for next Monday, as we have some stuff going on Easter weekend that will prevent me from getting any painting done.  So tune back in in two weeks please for my next post.  See you then! 

Monday, March 22, 2021

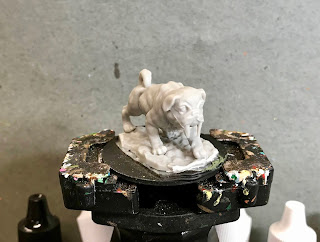
Sabertooth Pug: Bones 4 Figure

     This past week I painted the "Sabertooth Pug" figure from the Bones 4 Trolls Set.  The first thing I did was to Google pictures of pugs to get an idea of the coloring I needed to achieve.
      I prepped the figure in the usual way, soaking it in a dish of water with a couple drops of dish-soap added, then giving it a light scrub with a soft toothbrush, and then rinsing and drying it.  I trimmed down the base a little, and then glued the figure to a black-primed 1.5" fender washer with Aleene's Tacky glue.  I then placed the figure in my painting grip.    

     I began by painting the entire figure with Reaper MSP "Graveyard Bone".  When dry, I gave the entire figure a coat of Citadel "Agrax Earthshade" wash.
     When the wash was dry, I drybrushed the figure.  First with the base "Graveyard Bone", then with Crafter's Acrylic "Light Antique White", and lastly a little Ceramcoat "White".  I tried to apply it heavier towards the bottom to represent the lighter underbelly.
      Next, I painted his ears and muzzle with a mix of Ceramcoat "Black" and Americana "Charcoal Grey".  I then drybrushed this color around his whole face, and down the center of his back.  After that, I painted his eyes and nose with just the "Black", and his fangs with Americana "Antique White".  I let the fangs dry, and then painted a little Citadel "Nuln Oil" wash at the tops to give them a better delineation from the figure's upper lip.
     I then painted his claws with the "Black", and added highlight dots to his eyes with the "White".  After that, I highlighted the fangs with the base "Antique White", then some Americana "Bleached Sand", and lastly, a little of the "White". Lastly, I painted his base with Americana "Mississippi Mud".
      I let the figure dry overnight and the next day I gave it a coat of Americana "DuraClear Matte" varnish.    Then, when  the varnish was dry, I used some white glue to flock the base.  Another overnight dry, and I sprayed it with Testor's "Dullcote". When the "Dullcote" was dry, I went back and repainted the eyes with a little Americana "DuraClear Gloss" varnish.


     In general, I'm pleased with how this fellow turned out.  It's a fun little figure and was fun to paint.  

Monday, March 15, 2021

Dire Bear and Cave Bear: Bones Figures

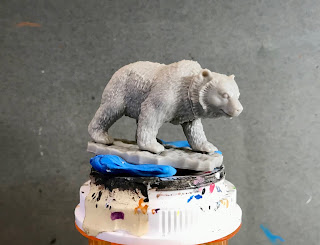
     This past week I worked on the three remaining bear figures for the unit of War Bears that I began the previous week when I painted the Reaper Bones Werebear and a Cave Bear.  I painted two Dire Bears and another Cave Bear this time, to complete the 5-figure unit.  
      I prepped the figures in the usual way, soaking them in a dish of water with a couple drops of dish-soap added, then giving them a light scrub with a soft toothbrush, and then rinsing and drying them.  I then glued the two Dire Bears to a tongue depressor with a couple drops of Elmers glue, and used some blue-tac to attach the Cave Bear to a pill bottle.

      I basically followed the paint scheme I had established last time, beginning by painting the bears entirely with Ceramcoat "Territorial Beige".  I then immediately painted the forearms and lower legs with Americana "Charcoal Grey", blending it in with the still-wet "Territorial Beige".  After that, I painted the insides of the Dire Bears' mouths with Americana "Shading FLesh".

      Next, I painted the Dire Bears'  teeth with Americana "Antique White".  I let everything dry, and then I gave all three bears a complete coat of Citadel "Agrax Earthshade" wash. 
     When the wash was dry,   I drybrushed the dark areas of fur with Folk Art "Teddy Bear Brown".  I then drybrushed the rest of the fur with first, Reaper MSP "Ginger Cookie", and then a little Americana "Bleached Sand".   I highlighted the tongues with a little Crafter's Acrylic "Cherry Blossom", and then highlighted the teeth with some of the "Bleached Sand".  I then painted the noses and eyes with Ceramcoat :Black, and then gave the eyes highlight dots with Americana "Snow White". After that, I highlighted the noses with some Americana "Grey Sky".    Lastly, I painted the figure's base with the "Mississippi Mud".
       I let the figures dry overnight and the next day I gave them a coat of Americana "DuraClear Matte" varnish.   I then glued each figure to a brown-primed 2"x2" steel base and when dry, used some white glue to flock the base.  I let them dry overnight, and sprayed them with Testor's "Dullcote"the next day.  


The whole unit.
     I'm happy with how these guys turned out.  I think theres a nice cohesiveness to them, and yet enough variety to make it not look too static as a unit.

Monday, March 8, 2021

Wearbear: Bones 3 Figure & Cave Bear: Bones 4 Lost Valley Figure

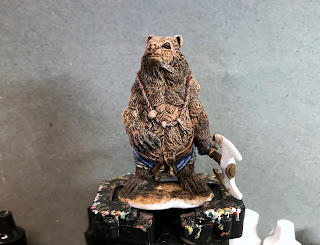
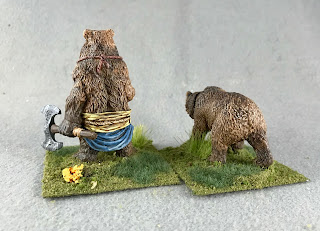
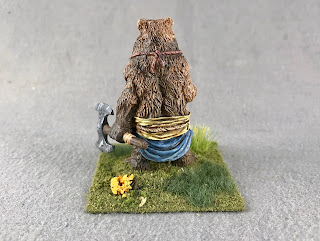
     This past week I painted the "Werebear" from the Bones 3 Lycanthropes set, and the "Cave Bear" from he Bones 4 Lost Valley Expansion.   I want to make a unit of War-Bears for a fantasy army I'm building, (See: Arakus Landarzad), and thought a selection of the Reaper bear figures would fit the bill.  I chose the Werebear to be the leader of the unit; similar to Beorn, the man who could change into a bear as depicted in the Hobbit.  The Cave Bear would just serve as one of the rank and file in the unit.  My plan was to mount these with 2 figures on a 2"x2" base.
       I prepped the figures in the usual way, soaking them in a dish of water with a couple drops of dish-soap added, then giving them a light scrub with a soft toothbrush, and then rinsing and drying them.  I then put the Werebear directly into my painting grip, and used some blue-tac to attach the Cave Bear to a pill bottle.

     I painted these two figures basically the exact same way, so I will only show the Werebear in the step-by-step photos.  I wanted to make them look kind of like grizzly bears, so I googled some images to give myself some inspiration of the coloration.
     I began by painting the bears entirely with Ceramcoat "Territorial Beige".  I then immediately painted the forearms and lower legs with Americana "Charcoal Grey", blending it in with the still-wet "Territorial Beige". I then painted the claws with Americana "Dark Chocolate".  After that, I painted his under-shorts with Folk Art "Dapple Gray", his over-shorts with Ceramcoat "Denim Blue", and his sash with accent "Mustard Seed".
     Next, I painted his rope belt with Americana "Buttermilk", and his rope necklace with Reaper MSP "Auburn Shadow".  Aftr that, I painted the axe handle with Reaper MSP "Shield Brown", and the wrap on the axe handle with Reaper MSP "Hallowed Orange".   I let the figures dry for a while, and then gave them both a complete coat of Citadel "Agrax Earthshade" wash. 
    When the wash was dry,   I drybrushed the dark areas of fur with Folk Art "Teddy Bear Brown".  I then drybrushed the rest of the fur with first, Reaper MSP "Ginger Cookie", and then a little Americana "Bleached Sand".  Next, I highlighted the under-shorts with a mix of the base "Dapple Gray", and some Folk Art "Gray Green".   After that, I highlighted the over-shorts with a mix of the base "Denim Blue' with some Apple Barrel "Apple Scotch Blue". 
     I then highlighted the sash with Americana "Antique Gold", and a little Crafter's Acrylic "Daffodil Yellow".  Next, I painted one feather on his necklace with Ceramcoat "Black" and the other with Americana "Grey Sky".  After that, I painted one of the beads with Reaper MSP "Ultramarine Blue", the other with Pathfinder MSP Urgathea Red", and the fringe decoration with Apple Barrel "Burnt Sienna". 
      Next, I highlighted the axe handle with Folk Art "Barn Wood", and the wrap on the axe handle with Reaper MSP "Bronzed Highlight".  I then painted the axe head with Americana "Zinc" and highlighted the belt with Folk Art "Butter Pecan".   I followed that with touching up the necklace cord with the "Auburn Shadow" where the fur drybrushing had gotten on it, and afterwards highlighted it with Americana "Shading Flesh". After that, I highlighted the blue bead with Reaper MSP Bones "Tropical Blue", and the red bead with Reaper MSP "Blood Red".  I then highlighted the black feather with some of the "Apple Scotch Blue", the white feather with Ceramcoat "Snow White", and the tassel with Ceramcoat "Maple Sugar Tan".  
    I then painted the nose and eyes with the "Black", and gave the nose highlights with the "Grey Sky" and the eyes highlights with the "Snow White".     Afterwards, I painted the axe head with  Folk Art Metallic "Gunmetal Gray" and then the clasp holding the tassel on the necklace with Folk Art Brushed Metal "Brushed Bronze".  I then applied a coat of Citadel "Nuln Oil" wash to the center pattern of the axe head.  When dry, I went back and highlighted the axe head with Ceramcoat "Metallic Silver", and the tassel clasp with Folk Art Metallic "Pure Gold".   Lastly, I painted the figure's base with the "Mississippi Mud".
     I let the figures dry overnight and the next day I gave them a coat of Americana "DuraClear Matte" varnish. My plan had been to mount these two figures side-by-side on a 2"x2" base, and I had just assumed they would both fit.  I had a bit of set back though when I test fitted them, as the figures' bases were too large, and the feet not placed well to even consider trimming the bases down.  So I made the decision to change to a 1-figure per base unit, as that seemed to be my only choice.       
Ooops!

   I then glued each figure to a brown-primed 2"x2" steel base and when dry, used some white glue to flock the base.  I let them dry overnight, and sprayed them with Testor's "Dullcote"the next day.  


     I'm really happy with how these guys turned out.  The fur on both is really sculpted well to take advantage of drybrushing.  And in the end, I think they are big enough to not look too lonely mounted individually on their bases.  I now have 3 more to paint to complete a unit of 5 bases


Monday, March 1, 2021

Sheriff Drumfasser: Bones 4 Dreadmere Figure

     This past week I painted the "Sheriff Drumfasser" figure from the Bones 4 Dreadmere Expansion set.  
     I prepped the figure in the usual way, soaking it in a dish of water with a couple drops of dish-soap added, then giving it a light scrub with a soft toothbrush, and then rinsing and drying it.  I then glued the figure to a brown-primed 1" fender washer with Aleene's Tacky glue.  I then placed the figure in my painting grip.    
I forgot to take a "before" picture prior to applying paint, so this is the shot from the Reaper webstore.

     I began by painting his face and hands with Reaper MSP "Bronzed Skin".  I then painted his vest with Apple Barrel "Apple Maple Syrup", and his coat with Accent "Forest Green". 
     Next, I painted his lapels, jacket lining, and cuffs with Americana "Antique Gold", and his boots, hat, scabbard pouch, and strap with Ceramcoat "Black".  After that, I painted his boot tops with Americana "Terra Cotta", and the scroll he's reading with Americana "Antique White". 
       While painting the cuffs, I had debated with myself whether they were in fact gauntlets that covered his hands, but had gone ahead and done them as cuffs.  I reversed my decision at this point, and went back and repainted them with the "Black" to be gauntlets.  I then painted all the buttons, fittings, etc., that I thought should be metal, with Folk Art Brushed Metal "Brushed Bronze".
     I let the figure dry for a while, and then I applied a coat of Citadel "Reikland Fleshshade" wash to his face. After that, I applied some Citadel "Agrax Earthshade" wash to his vest, collar, coat lining, and scroll. And, finally, I applied some Citadel "Nuln Oil" wash to the outer coat, boots, hat, gauntlets and scabbard. 
     When the washes were dry, I painted his eyes, and then highlighted his face with the base "Bronzed Skin", and a bit of Reaper MSP "Bronzed Highlight".  I then painted his beard and hair with Reaper MSP "Coal Black", and then highlighted it with a little Crafter's Acrylic "Cool Blue". After that, I highlighted is vest with the base "Apple Maple Syrup", and a little Americana "Buttermilk".  I then applied a stippled pattern of Apple Barrel "Lemon Chiffon" in an attempt to give it the appearance of a little texture. 
     Next, I highlighted the boot tops with some of the base "Terra Cotta", and some Reaper MSP Hallowed Orange".   I then highlighted his coat with the base "Forrest Green" mixed with some Crafter's Acrylic "Holiday Green".   After that, I highlighted the lapels, and lining of the coat with the base Antique Gold", along with some Crafter's Acrylic "Bright Yellow", and some Crafter's Acrylic "Daffodil Yellow".
       I then highlighted the scroll with the base "Antique White", and then used Americana "Bleached Sand", and Crafter's Acrylic "Light Antique White" for further highlights.  Next, I highlighted the boots, scabbard, pouch, strap, and gauntlets with Americana "Zinc", and a little Americana "Grey Sky".  I went back and did some writing on the scroll with the "Black", and then highlighted the metal parts on the figure with some Folk Art Metallics "Pure Gold".   Lastly, I painted the figure's base with the "Mississippi Mud".
     I let the figure dry overnight and the next day I gave it a coat of Americana "DuraClear Matte" varnish. I then used some white glue to glue some fine sand to the base.  When the sand was dry, I painted it with a coat of Americana "Charcoal Grey". When this was dry, I drybrushed the sand with the "Mississippi Mud", and then with some Apple Barrel "Rock Grey"; lastly I drybrushed it with a little Americana "Dove Grey".  Another overnight dry, and I sprayed the figure with Testor's Dullcote".       


     I'm pleased with how he came out.  I noticed in the final photo that there is a black splotch under his right eye...and I'm not sure how it got there unless I smudged the black paint there accidentally while doing  the script on the scroll.  His right eye, located as it is under the hat, and wedged between his raised arm and the scroll, was not fun to work on from the start. And even now I can see it's a little lopsided.  But good enough; as trying to work further on it in that tight space will most likely not help.  I may however go back and try to fix that cheek splotch.