Monday, February 29, 2016

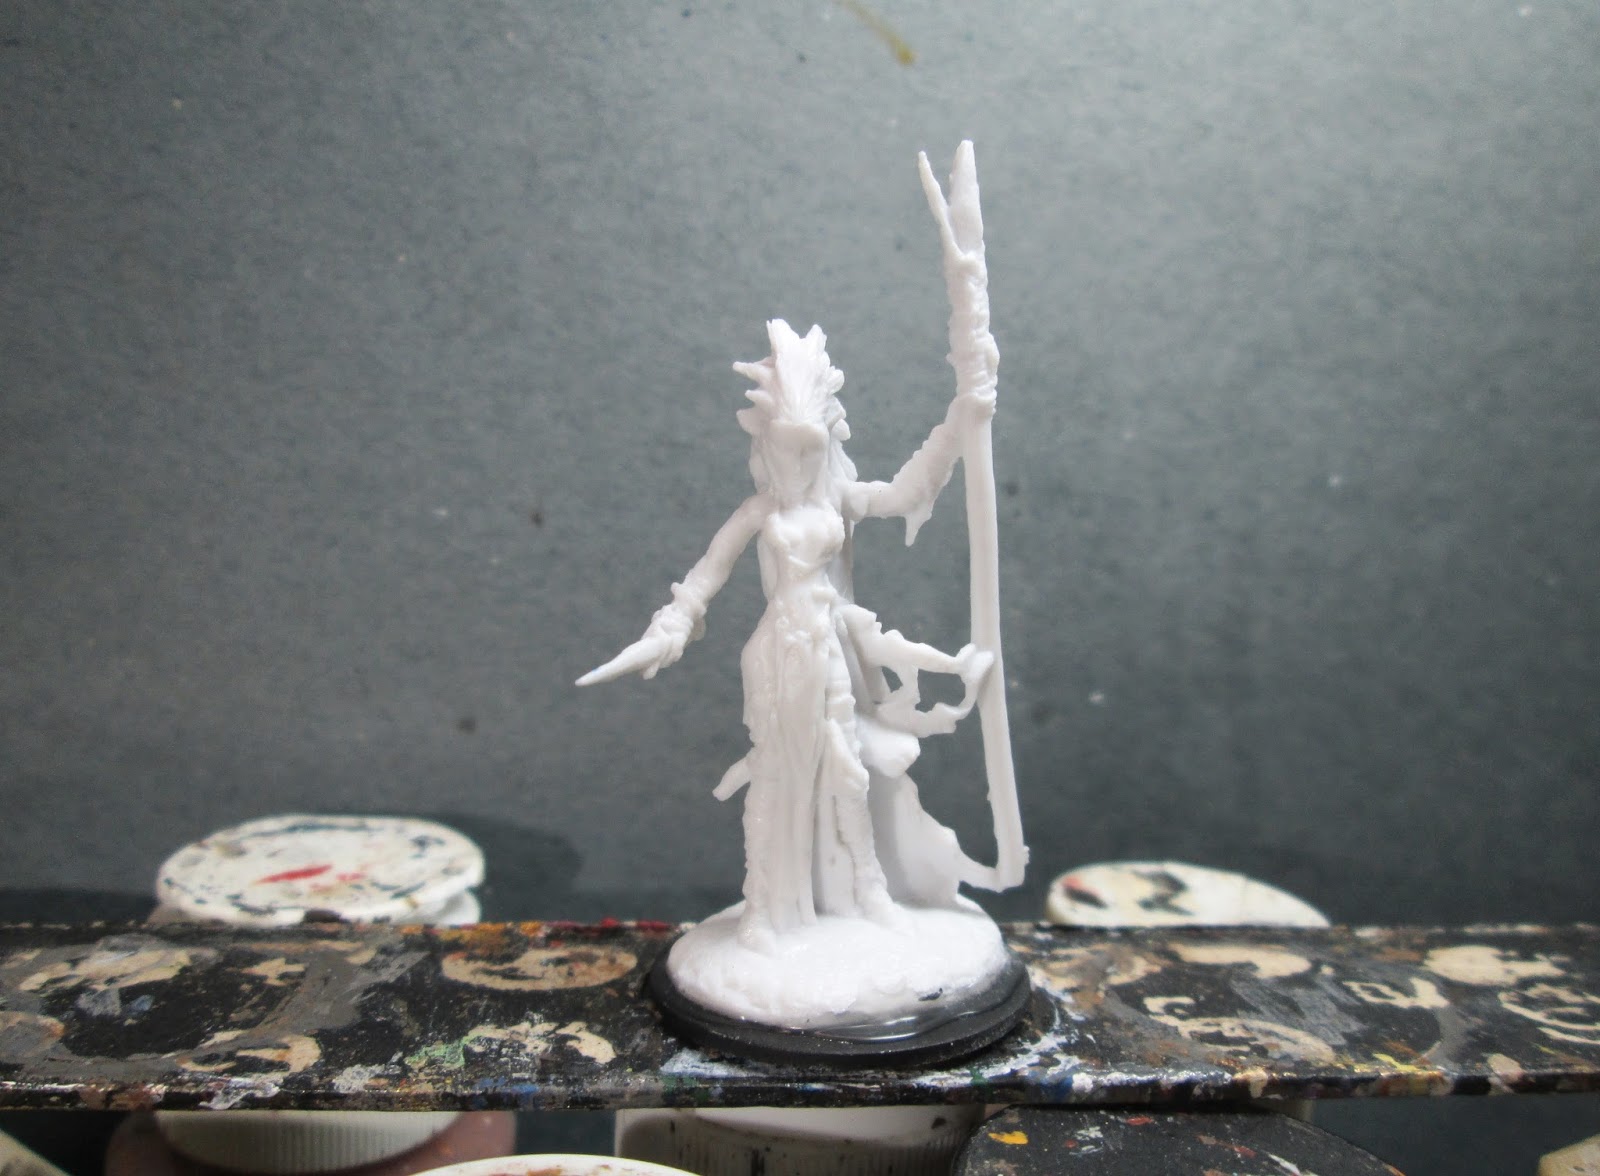
Tierdeleira, Dark Elf Cleric: Figure 201 of 266

     This past weekend I finished Tierdeleira, Dark Elf Cleric, from the Dark Elves set.  This wraps up this set for me, and it joins the list of completed sets over on the right.
      I prepped the figure in the usual way; soaking it in a dish of water with a couple drops of dish- soap added, then giving it a light scrub with a soft toothbrush, and then rinsing and drying it.  I then glued the figure to a black-primed 1" fender washer with Aleene's Tacky glue, and then glued the washer-mounted figure to a tongue depressor with a couple drops of the Elmer's glue.
   I began by painting the figure almost entirely Black; and then when the Black was dry, I drybrushed it entirely with Folk Art Metallics "Gunmetal Grey".  I then passed over it with a lighter drybrush of Folk Art Metallics "Silver Sterling".  I then went back and repainted her face and hands with Black.
   I then painted her cape with Folk Art "True Burgundy; and her ribbon-like hangings, and the front of her shield, with Ceramcoat "Black Cherry".  After that, I painted her hair with Folk Art Platinum Grey".
     Next, I painted her belts with Americana "Terra Cotta", and the handle wrap on her mace and the straps on her shield with Folk Art "Dark Brown".   Then, after everything had a while to dry, I gave all her clothing, hair, belts, straps, etc. a wash with GW "Badab Black" wash using a wet brush.
     When the wash was dry,  I first painted her eyes, then I highlighted all her skin with a mix of Apple Barrel "Apple Black Green", and Americana "Avocado".  I then highlighted her hair with White.  Next, I highlighted her cape with Americana "Burgundy Wine", and her ribbon-like hanging with Crafter's Acrylic "Christmas Red". Her straps I highlighted with the base "Dark Brown", and her belts with the base "Terra Cotta".  I then painted the detail on her shield with Apple Barrel "Yellow", and added two red dots with DecoArt Dazzling Metallics "Festive Red".  I then went back and added some spot highlights on her armor and weapon with the "Silver Sterling".  Lastly, I painted her integral base with Ceramcoat "Walnut".
    After the figure had overnight to dry, I gave it a coat of Ceramcoat "Matte Varnish" the following morning.  Later that morning I flocked the base, and that evening I sprayed the figure with Testor's Dullcote.

   I'm really pleased with how this figure turned out.  I think I finally got the hang of highlighting the black skin.  The only thing I'm not happy with is that I wanted the two different reds, of her cape and the ribbon-like hangings, to look more different; and as you can see they're almost indistinguishable.
   For next week, I'm going to work on painting another four of the Orcpocalypse figures.

Figure 201 of 266: Complete

Thursday, February 25, 2016

Bones II: Town Guard (Anhurian) Spearman

  This week I finished up the last of the Town Guard from the Bones II, Expansion 2, "Town Guard" set, by painting the Spearman figure.  He was destined to provide more fodder for my Frostgrave warbands.
  I prepped the figure in the usual way; soaking it in a dish of water with a couple drops of dish-soap added, then giving it a light scrub with a soft toothbrush, and then rinsing and drying it.  His spear was all bent out of shape, and I tried the usual Bones boiling water straightening method to get it right again, but to no avail.  While I don't mind a little "wonkiness" in a wizards staff, I felt the spear really needed to be straight.  So, I used a conversion method I had used before on one of the Orcs in the Bones I original set, which was to replace the Bones spear shaft with one made from a round toothpick.  It was no problem slicing off the original shaft, drilling through the hand, and drilling a small indent in the bottom of the spear head, and then gluing it all back together again with Gorilla Superglue.
     I then glued the figure to a white-primed 1" fender washers with Aleene's Tacky glue, and then glued the washer-mounted figure to a tongue depressor with a couple drops of the Elmer's glue.  
      I began by painting his face and hands with Americana "Shading Flesh".  I the painted his pants with Apple Barrel "Burnt Sienna", and his tunic with Folk Art "Dark Brown".
        Next, I painted his quilted jerkin with Citadel "Snakebite Leather", and his shoulder armor with Citadel Foundation "Khemri Brown".
     I then painted his boots and cap with GW "Scorched Brown", and then his belts and straps, and the sword grip, with Ceramcoat "Walnut".  After that, I painted the spear shaft with Crafter's Acrylic "Cinnamon Brown", and then his hood with Folk Art "Barnyard Red".  I then painted his shield and scabbard with Reaper MSP Bones "Cinnamon Red"
      After everything had a while to dry, I gave the entire figure a wash with GW "Agrax Earthshade" wash using a wet brush.  When the wash was dry, I paint his eyes, and then did highlights on his face and hands using the base "Shading Flesh".
     I then began work on the rest of the highlighting.  First I highlighted his pants with Crafter's Acrylic "Orange Spice".  I then highlighted his jerkin with the base "Dark Brown", and his tunic with Ceramcoat "Maple Sugar Tan".   I highlighted his shoulder pads with Americana "Khaki Tan", and his hood with the base "Barnyard Red". Next, I used Crafter's Edition "Spice Brown" to highlight his boots and cap, and Americana "Mississippi Mud" to highlight his belts and straps.  I drybrushed his spear shaft with Americana "Sable Brown".
      I then moved to the metallics, painting all the metal parts with Folk Art Metallics "Gunmetal Grey". I then highlighted them with Folk Art Metallics "Silver Sterling".   Lastly, I applied a spare Space Marine transfer to the shield.
        I painted the base White, and when dry I applied an area of white glue to the base and glued on a small piece of cork and some course sand.   When the glue was dry, I painted the cork and sand Black, then drybrushed the sand and cork with Americana "Neutral Grey". Then drybrushed them with Folk Art "Porcelain Grey". When everything had overnight to dry, I gave the figure a coat of Ceramcoat "Matte Varnish" early the next morning.  Midday, I flocked the white areas with Woodland Scenics "Snow" flock and late that afternoon I sprayed the figure with Testor's Dullcote.
     I like how the figure turned out.  He'll make a good addition to some wizard's warband.

Monday, February 22, 2016

Liela Dark Elf Wizard: Figure 200 of 266

    Let the fanfare play; here we are at figure 200!   It feels good to hit another milestone on this adventure!  It seems all down hill from here, with only 66 figures left to go. With some real determination I think I get this done by the end of the year.  So without further ado, on to figure 200!     This past week I completed Liela, Dark Elf Wizard, from the Dark Elves set.  With the completion of this figure, I have only one left from this set to paint.
     I prepped the figure in the usual way; soaking it in a dish of water with a couple drops of dish- soap added, then giving it a light scrub with a soft toothbrush, and then rinsing and drying it.  I then glued the figure to a black-primed 1" fender washer with Aleene's Tacky glue, and then glued the washer-mounted figure to a tongue depressor with a couple drops of the Elmer's glue.
     I began by painting her clothing with Crafter's Acrylic "Purple Passion". I then painted her cape with Crafter's Acrylic "African Violet", and her legging and arm wraps with Folk Art "Porcelain Grey"
     Next, I painted her hair with Folk Art "Celadon Green".  I then painted over her clothing with Folk Art "Metallic Amethyst".  I worked on her staff next, painting the shaft with Crafter's Acrylic "Navy Blue, and the object on top with Crafter's Acrylic "Citrus Green".
     I completed the staff by painting the binding on it with Folk Art "Porcelain White".  I then let the figure dry for a while, and then gave the complete figure a wash with GW "Badab Black" wash.   When the wash was dry, I painted all her skin Black
     When the "Badab Black" wash was dry, I began work on the highlights.  I first painted her eyes, and when finished, I highlighted all her skin with a mix of Apple Barrel "Apple Black Green", and Crafter's Acrylic "Forest Green".  I then highlighted her hair with White, and highlighted her legging and arm wraps, as well as the binding on the staff, with Crafter's Acrylic "Light Antique White".  Next, I highlighted her cape with a mix of the "African Violet", and Apple Barrel "Apple Lavender". Her clothing I highlighted with the "Metallic Amethyst" with a little Folk Art "Silver Sterling" mixed in.   I hen moved to the staff, highlighting the shaft with the base "Navy Blue", and the object on top with the base "Citrus Green".  I then added a little White to the "Citrus Green" to do some spot highlights. I painted the dagger scabbards she's wearing with "Americana "Zinc".
   I then painted her knee and elbow armor, as well as her headband and some of the dingle-dangles on her belt, with Ceramcoat "Metallic Copper".  When the "Metallic Copper" was dry, I gave it a wash with some GW "Agrax Earthshade" wash.  When the wash was dry, I went back and added some highlights with the base "Metallic Copper".  I then painted the dagger she's holding, as well as metal parts on the daggers in the scabbards she's wearing, with Folk Art Metallics "Gunmetal Grey".   I then did highlights on the metal with the "Silver Sterling".  I painted the dagger grips Black, and then did quick highlights on them with the "Navy Blue".   Lastly, I painted her integral base with Ceramcoat "Walnut".
    After the figure had overnight to dry, I gave it a coat of Ceramcoat "Matte Varnish" the following morning.  Later that morning I flocked the base, and that evening I sprayed the figure with Testor's Dullcote.
     I'm pleased with how she came out, though I wish I had done more with her face and expression.  She looks rather blank faced.

Figure 200 of 266: Complete.  On to the last 66!

Thursday, February 18, 2016

Bones II: Town Guard (Anhurian) Crossbowman

   I also completed this week the Town Guard (Anhurian) Crossbowman from the Bones II, Expansion 2 "Town Guard" set.  It's probably no surprise that I painted him up to use in Frostgrave.
       I prepped the figure in the usual way; soaking it in a dish of water with a couple drops of dish- soap added, then giving it a light scrub with a soft toothbrush, and then rinsing and drying it.  I then glued the figure to a white-primed 1" fender washers with Aleene's Tacky glue, and then glued the washer-mounted figure to a tongue depressor with a couple drops of the Elmer's glue.
    I had already painted his pants using Folk Art "Dapple Grey", before I remembered to take the first photo. :)
  I then continued by painting his armored shirt and helmet with Black, and then drybrushing them with Folk Art metallics "Gunmetal Grey".  Next, I painted his tunic with Ceramcoat "Denim Blue" and his hood with Americana "Zinc".
     His boots, belts, straps, quiver and backpack were next using Americana "Asphaltum".  I then painted his helmet with Crafter's Acrylic "Cinnamon Brown", and his crossbow with Ceramcoat "Walnut".  I painted the underside of his armored jerkin's sleeves, and the the area at the upper back with Americana "Neutral Grey".  I then painted the bolts in his quiver with Folk Art "Rock Grey", and their fletchings with Folk Art "Porcelain White".    I painted his scabbard with Crafter's Edition "Navy Blue", and the sword grip with Black.
     After the paint had a while to dry, I gave the whole figure a wash with GW "Badab Black" wash.   When this wash was dry, I painted his face and hands with Americana "Shading Flesh".  When that was dry, I gave his hands and face a wash with GW Devlan Mud" wash.
     When the last wash was dry, I painted his eyes, and then highlighted his face and hands with the base "Shading Flesh".  I then highlighted his pants with the base "Dapple Grey", and his tunic with the base "Denim Blue".  I mixed a little of the "Navy Blue" with the "Denim Blue", and used that to highlight the edges of the scabbard.   I then used Crafters Edition "Spice Brown" to highlight all the boots, belts, straps, quiver, backpack, helmet, and crossbow. I used the base Porcelain White to highlight the fletchings", and Crafter's Edition "Storm Cloud Grey" to highlight the bolt shafts.
    I then painted the metal fittings on the scabbard sword, and crossbow with Folk Art Metallics "Gunmetal Grey", and then highlighted all the metal parts on the figure with Folk Art Metallics "Silver Sterling".
      Lastly, I painted the base White.  I then applied two little areas of white glue to the base and sprinkled a couple bits of gravel and some course sand.   When the glue was dry, I painted the gravel and sand Black, then drybrushed the sand and gravel areas with Americana "Neutral Grey". Then drybrushed them with Folk Art "Porcelain Grey". When everything had overnight to dry, I gave the figure a coat of Ceramcoat "Matte Varnish".  Then, the next morning, I flocked the white areas with Woodland Scenics "Snow" flock.  Later that afternoon I sprayed the figure with Testor's Dullcote.
     I'm happy with how this fellow turned out.  Nothing exceptional, but a nice solid gaming figure.

Monday, February 15, 2016

Zalash, Dark Elf Assassin: Figure 199 of 266

  This week I completed Zalash, Dark Elf Assassin, from the Dark Elves set.  As I stated with my previous figure from this set, I'm not a fan of these Dark Elf sculpts, as I think they look too spindley, and their wrapped layers of clothes just look odd to me.  So, I thought I would take the opportunity to try an experiment with this figure; painting him all in black, and simply using drybrushed highlights to give a hint of color.
 I prepped the figure in the usual way; soaking it in a dish of water with a couple drops of dish- soap added, then giving it a light scrub with a soft toothbrush, and then rinsing and drying it.  I then glued the figure to a black-primed 1" fender washer with Aleene's Tacky glue, and then glued the washer-mounted figure to a tongue depressor with a couple drops of the Elmer's glue.      
      I began by painting the figure entirely in Black.  I then drybrushed him with Americana "Zinc, followed by a lighter drybrushing with Crater's Acrylic "Strom Cloud Grey".
      Next, I drybrushed his legging and arm wraps with Ceramoat "Denim Blue", and his hands with a mix of Folk Art "Dapple Grey" and Folk Art "Hauser Green Medium".  I highlighted the edge of his armor bits with Americana "Asphaltum".
     Next, I painted  his eyes, as I wanted to be able to see them peering out from behind his face covering.  I then painted his weapons, the studs on his studded armor and the triangular armor bits,  with Folk Art Metallics "Gunmetal Grey", and highlighted the weapons with Folk Art Metallics "Silver Sterling". Lastly, I painted his integral base with Ceramcoat "Walnut"
     After the figure had overnight to dry, I gave it a coat of Ceramcoat "Matte Varnish" in the morning.  Later that morning I flocked the base, and that evening I sprayed the figure with Testor's Dullcote.     

     I'm pleased with how he came out, and enjoyed the challenge of doing this figure in all black. 

     Figure 199 of 266: Complete (almost!)

Thursday, February 11, 2016

Bones II: Gelatinous "Ice" Cube

   This week I also completed the Gelatinous Cube figure from the Bones II Gelatinous Cube add-on set.   I traded a friend for this figure as he was disappointed with its lack of "cube-ness". I have to agree that it doesn't match my idea of what an old school D & D  Gelatinous Cube should look like either.  I had always pictured something more geometric and cube-like, with more well defined shape and sides (like a Jello cube!).  However, I saw the possibility of using this as some sort of ice monster for Frostgrave...a living ice cube if you will.  Maybe a product of some ancient magic, or something to evolve in the froze wastes of the magic-riddled city.  From what I understand ice, actually can move on is own, so it's locomotion isn't beyond the realm of reality.  Being sentient and scavenging for food, however, puts us back into the realm of fantasy. :)
   I prepped the figure in the usual way; soaking its parts in a dish of water with a couple drops of dish- soap added, then giving them a light scrub with a soft toothbrush, and then rinsing and drying.  I then glued the base of the cube to a 2" white-primed fender washer with Aleene's Tacky glue.  I didn't need to glue the washer to a tongue depressor, as the big 2" size gave me a good surface to hold onto while painting.
      The first thing I did was give the Cube's base a wash with some Iron Wind Metals "Mid Blue" ink using a wet brush, to help bring out the details.   I then painted all the various skeletons, clothing, weapons ,and shields that litter the base.  I'm not going to go into much detail about this, as it turns out you really can't see any of this when the Cube is placed on top of it anyway.  If I had realized this, and had it to do over again, I probably would have just painted it all brown and called it a day.
    I finished up this step by giving everything sculpted onto the Cube's base a wash with GW "Agrax Earthshade" wash.
      When this was dry, I glued the two halves of the cube together, and the halves to base, (all at the same time) with Gorilla gel superglue.  I used rubber-bands to hold it all together and in position while it dried.   When the glue was dry, I filled any gaps in the seams, and helped blend them together, with Woodland Scenics "Water Effects".
     I must say at this point I was a little disappointed that you can't really see the interior details once the cube is applied to the base.  I wasted a lot of time painting all the base details, when I could have just painted the whole mass brown and it wouldn't have looked much different when viewed through the cube walls.
     When the Water Effects were dry, I gave the entire cube a wash with some Iron Winds Metals "Mid Blue" ink using a wet brush.  When this wash was dry, I drybrushed the cube with some White and then painted some areas here and there on the top of the cube with White, to represent some areas of settled snow.  I then painted these areas and the base with some white glue, and applied some snow flocking.  Lastly, I extended the drip hanging from the tall corner using some Water Effects, to make it look more like an icicle.
     I like how this Ice monster turned out.  Now I just need to find a way to work it into a scenario.

Monday, February 8, 2016

Dark Elf Warrior: Figure 198 of 266

  For this week, I completed the Dark Elf Warrior from the Dark Elves set.  I'm not particularly thrilled with these sculpts; their spindly, wrapped in layers of clothing, look just doesn't do it for me. But, the only way to get through them is to start doing them, so here goes.
    I prepped the figure in the usual way; soaking it in a dish of water with a couple drops of dish- soap added, then giving it a light scrub with a soft toothbrush, and then rinsing and drying it.  I then glued the figure to a black-primed 1" fender washer with Aleene's Tacky glue, and then glued the washer-mounted figure to a tongue depressor with a couple drops of the Elmer's glue.  
     I began by painting all his wrapped legs, arms, and torso with Crafter's Acrylic "Storm Cloud Grey".  I then painted his cape with Americana "Burgundy Wine".
     I then gave the whole figure a wash with Iron Wind Metals "Purple" ink.  When the ink was dry, I painted his head, hands, boots, belts, and the armor-like plates on his chest, all with Black.  I then painted his swords, buckles, and the triangular armor parts at his waist, hips, and shoulders, all with Ceramcoat "Metallic Pewter".
     Next, I gave the triangular armor parts a wash with GW "Badab Black" wash using a wet brush.  I then painted his hair with Americana "Neutral Grey",  and then did highlighting on his boots, belts, and the armor like plates on his chest all with Americana "Zinc".
     I then did highlights on his hair with first Folk Art "Porcelain Grey", and then some White.  Next, I painted his eyes, and then highlighted his face and hands with Folk Art "Dapple Grey".  I mixed some Apple Barrel "Apple Lavender" with some of the "Porcelain Grey" to highlight  his clothing wraps, and the mixed some of the "Burgundy Wine" with the the "Apple Lavender" and a little Crafters Acrylic "Cherry Blossom Pink" to highlight his cape.  I finished up painting the figure by highlighting all the metal areas with Folk Art "Silver Sterling". Lastly, I painted his integral base with Ceramcoat "Walnut"
     After the figure had overnight to dry, I gave it a coat of Ceramcoat "Matte Varnish" in the morning.  Later that morning I flocked the base, and that evening I sprayed the figure with Testor's Dullcote.

  Well, for a figure I wasn't enthusiastic about painting, I'm pleased with the results.  After I started, I was worried he might turn out a little too "pinkish" in coloration, but I think the colors came out suitably muted for him to maintain his menacing look.

Figure 198 of 266; Complete