Monday, October 26, 2020

Skeleton Warriors: Bones 2 Figures

     This past week I did a pair of Skeletons from the Bones 2 Shambling Dead set.  I had prepped these back when we were playing Ghost Archipelago a couple years ago, but never got around to painting them, and they had just kind of been floating around my painting table ever since.  I finally got tired of seeing them, so thought I'd slap some quick paint on them and get them finished.
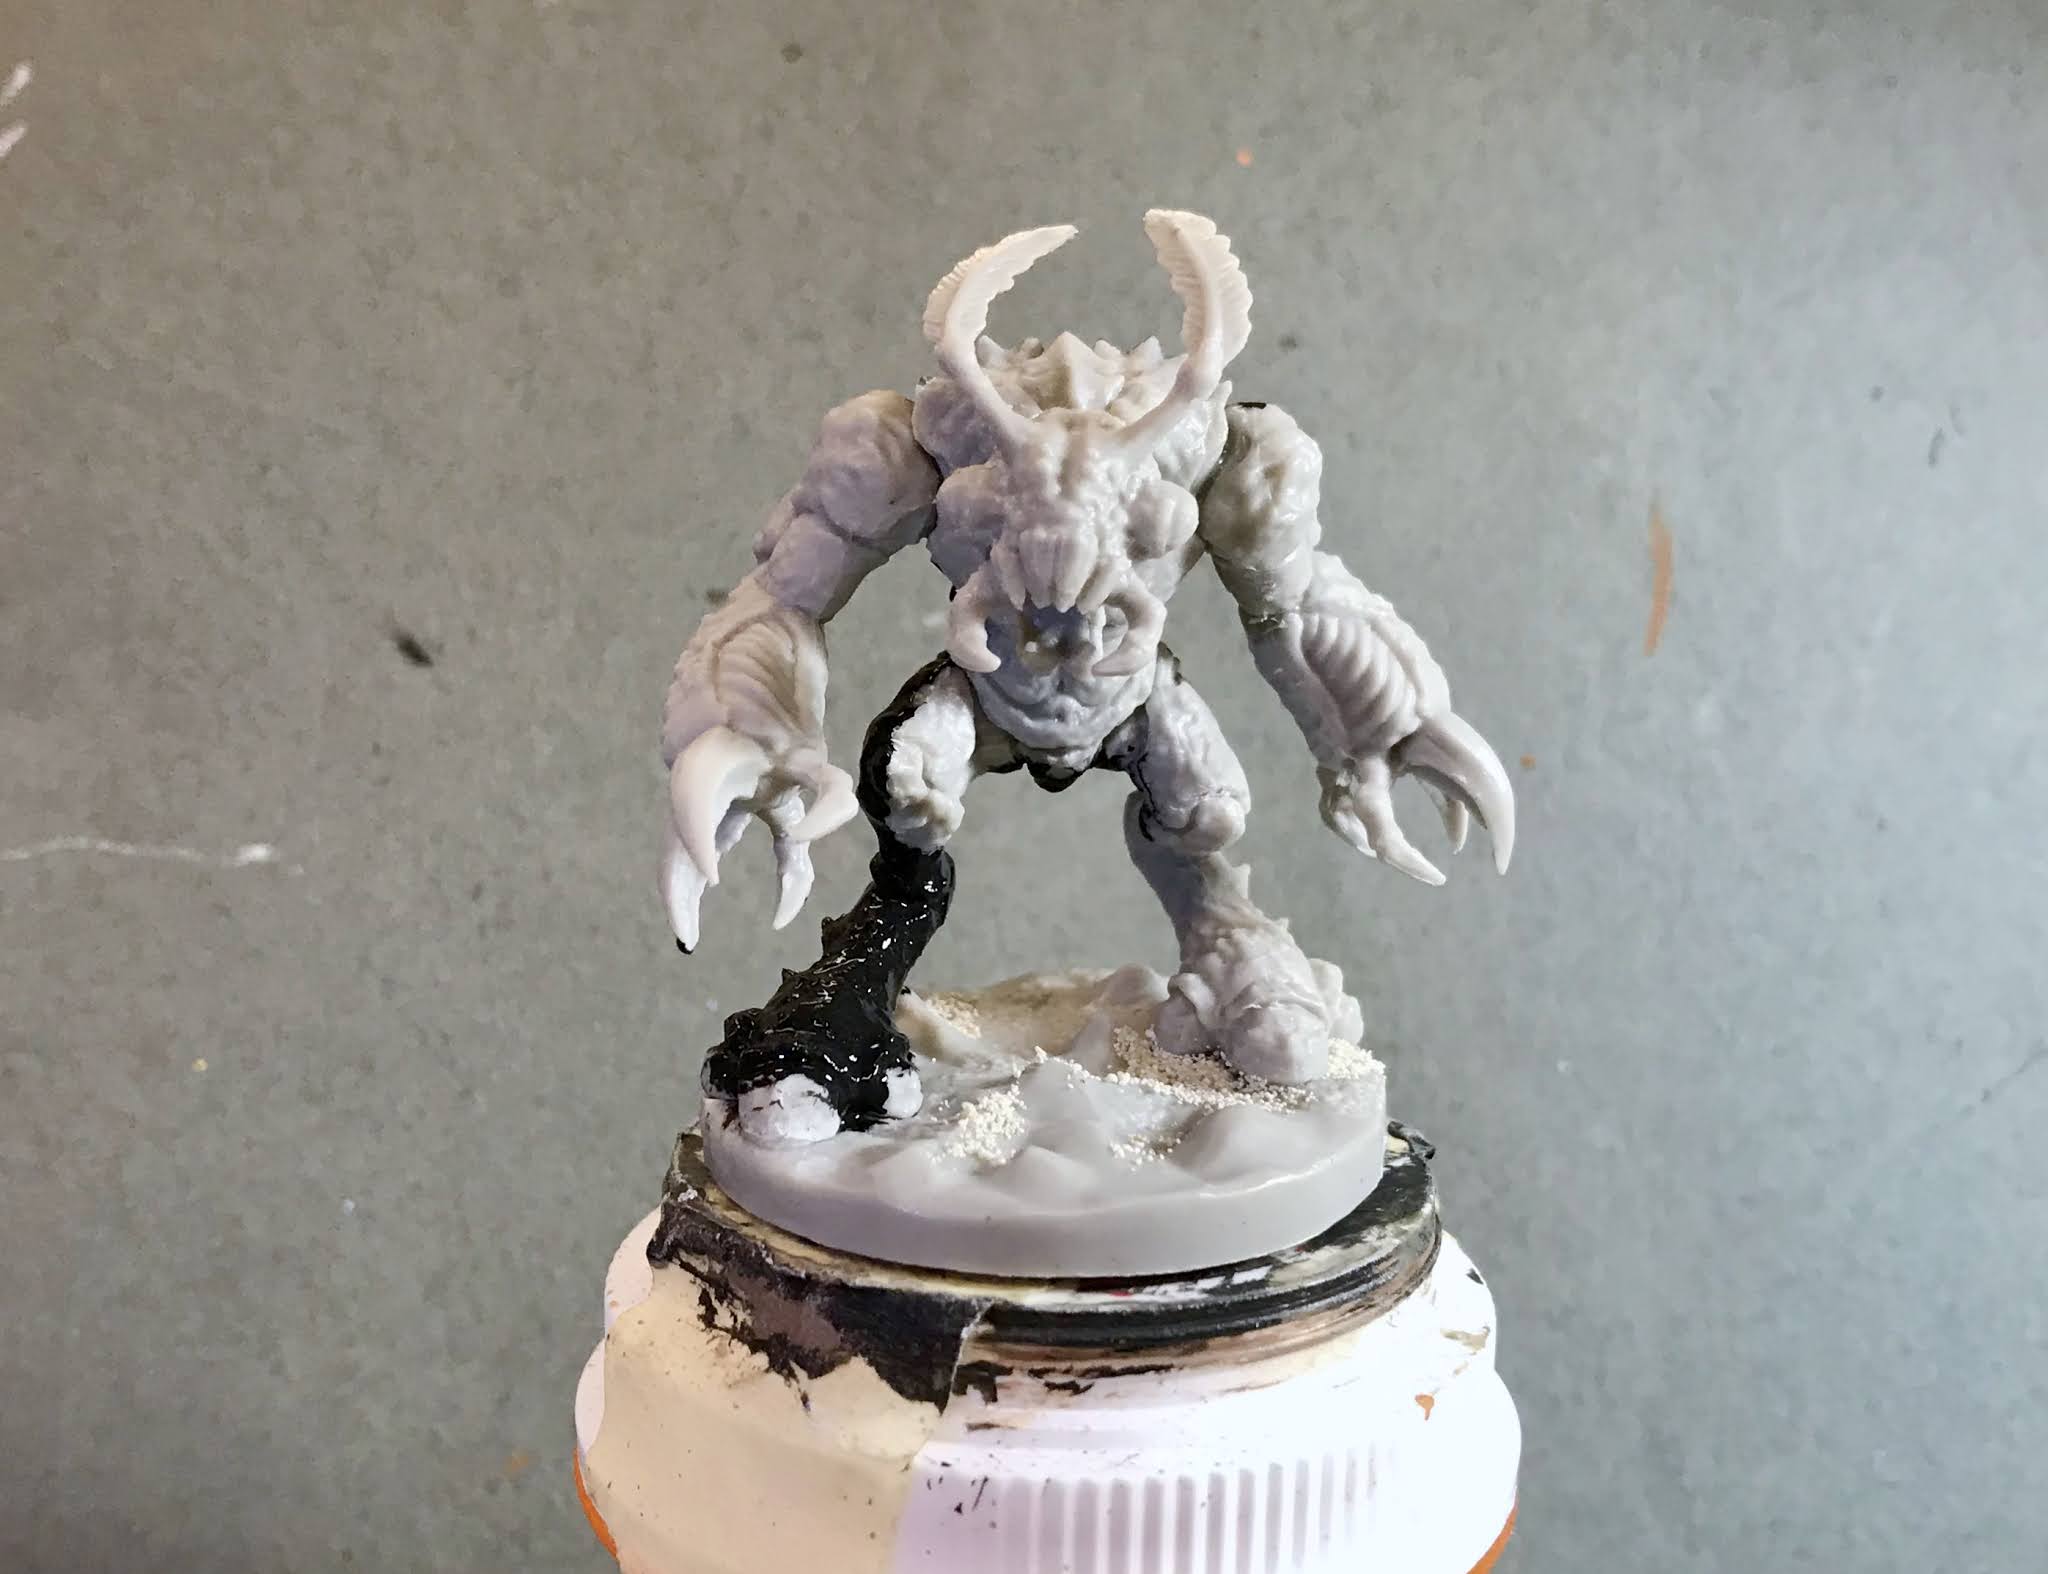
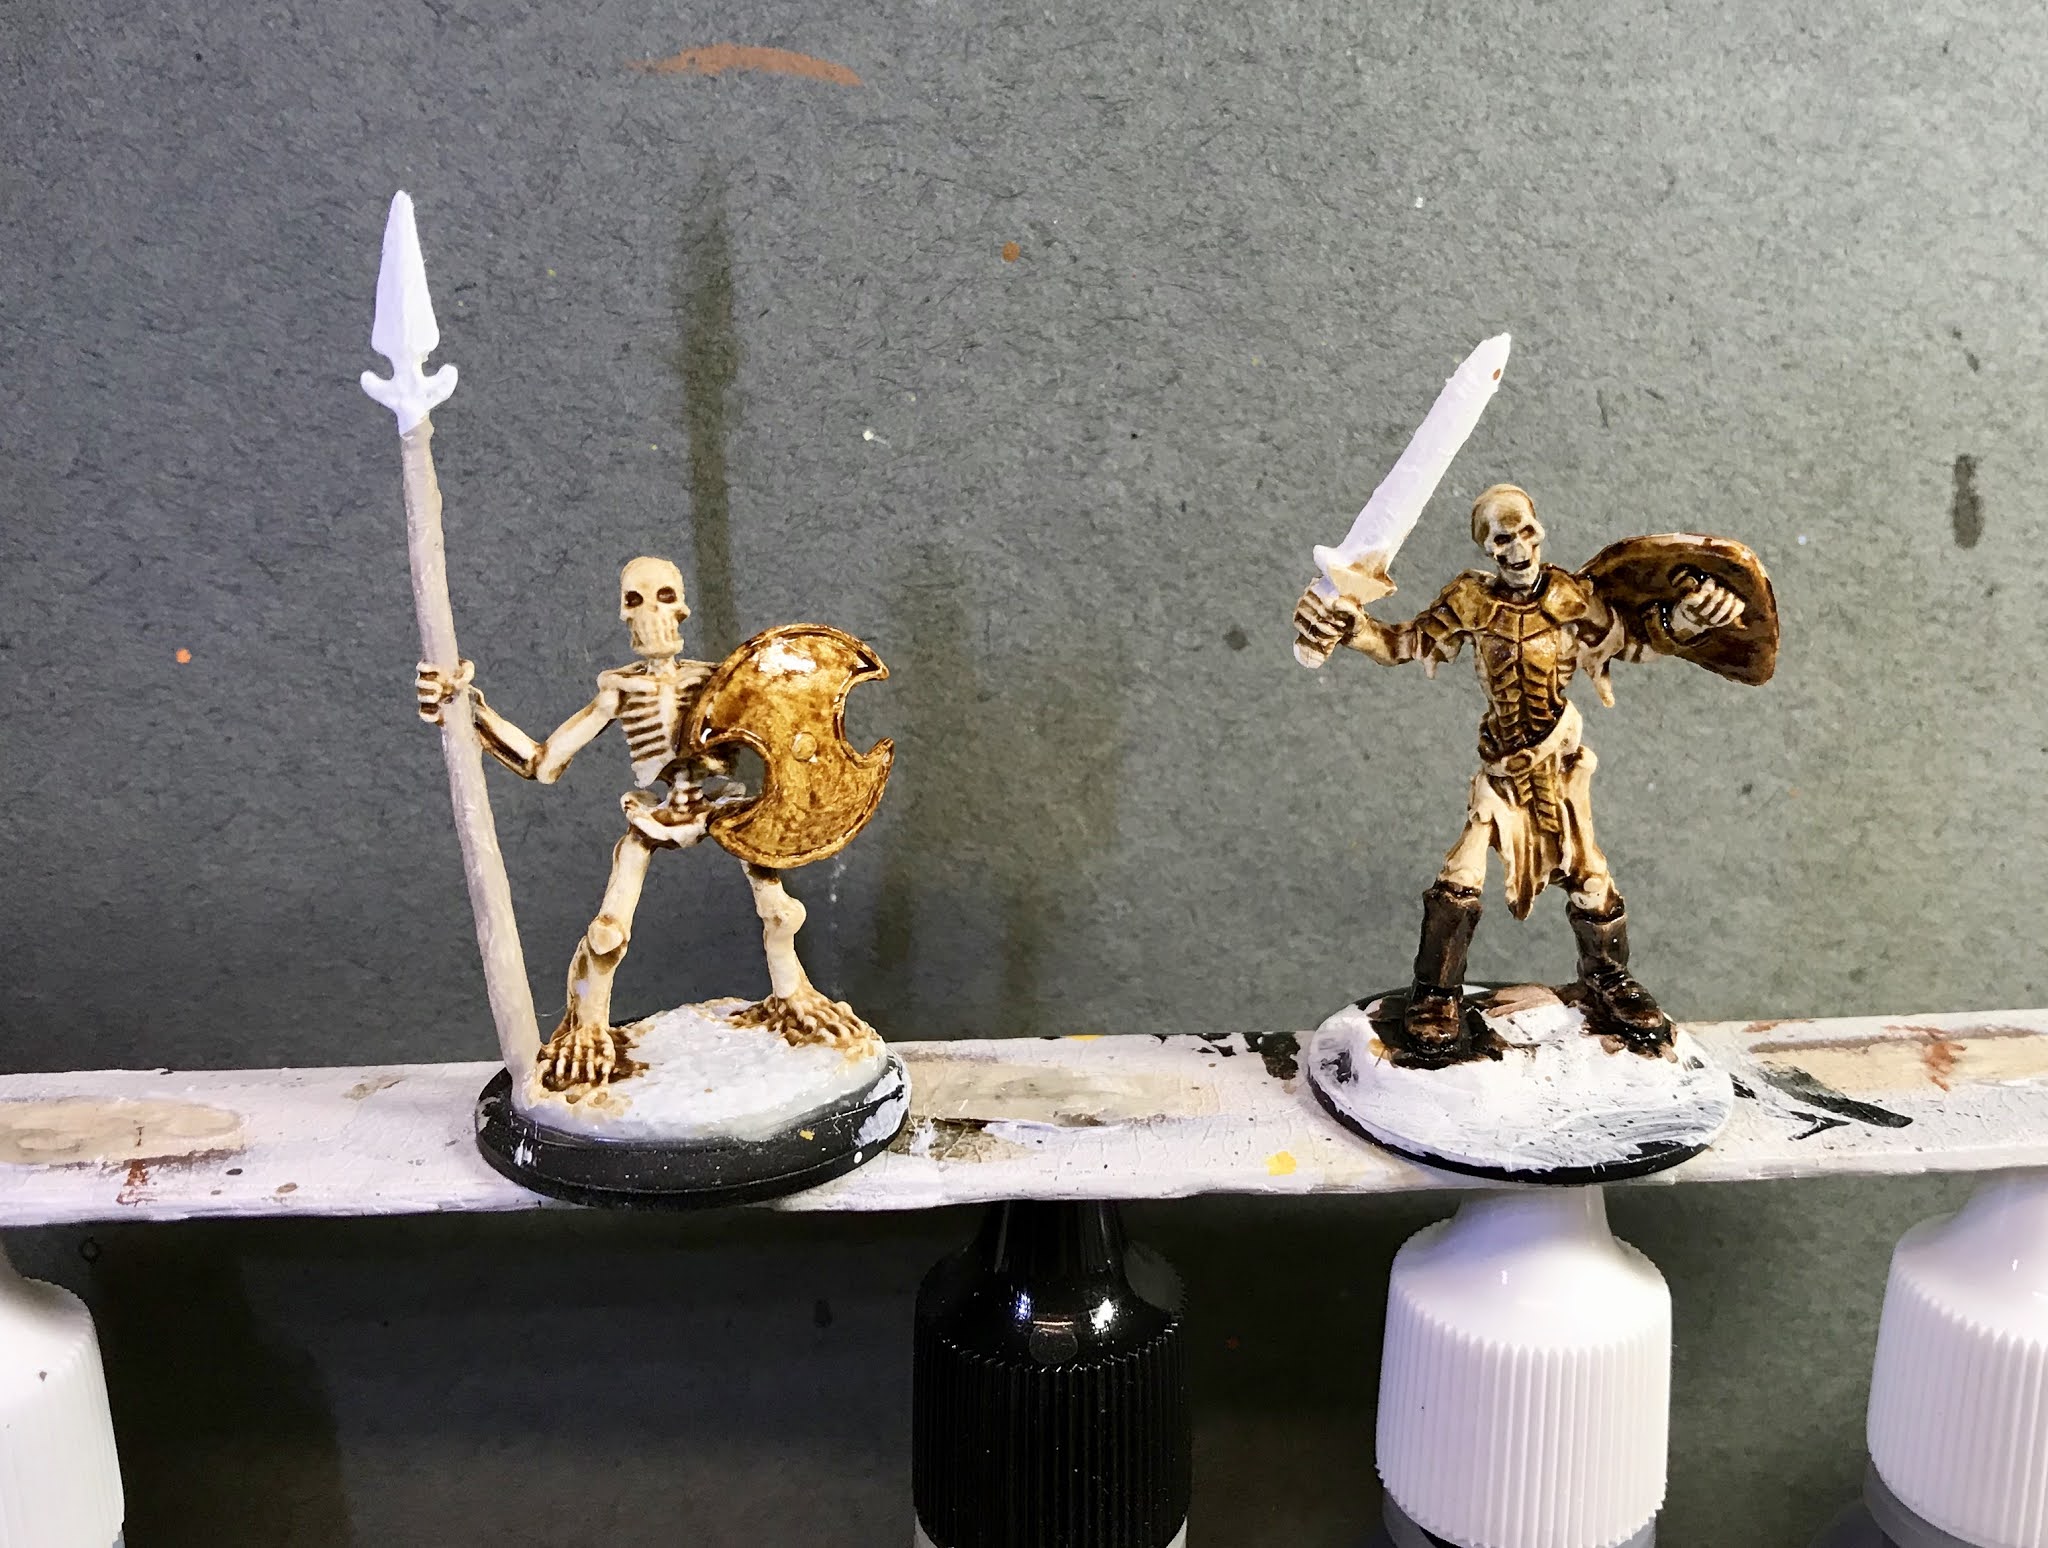
      I had prepped the figures in the usual way, soaking the parts in a dish of water with a couple drops of dish-soap added, then giving them a light scrub with a soft toothbrush, and then rinsing and drying them. I then had glued them to 1" black-primed fender washers with Aleene's Tacky glue.  I now glued the washers onto a tongue depressor with a couple drops of Elmer's white glue.
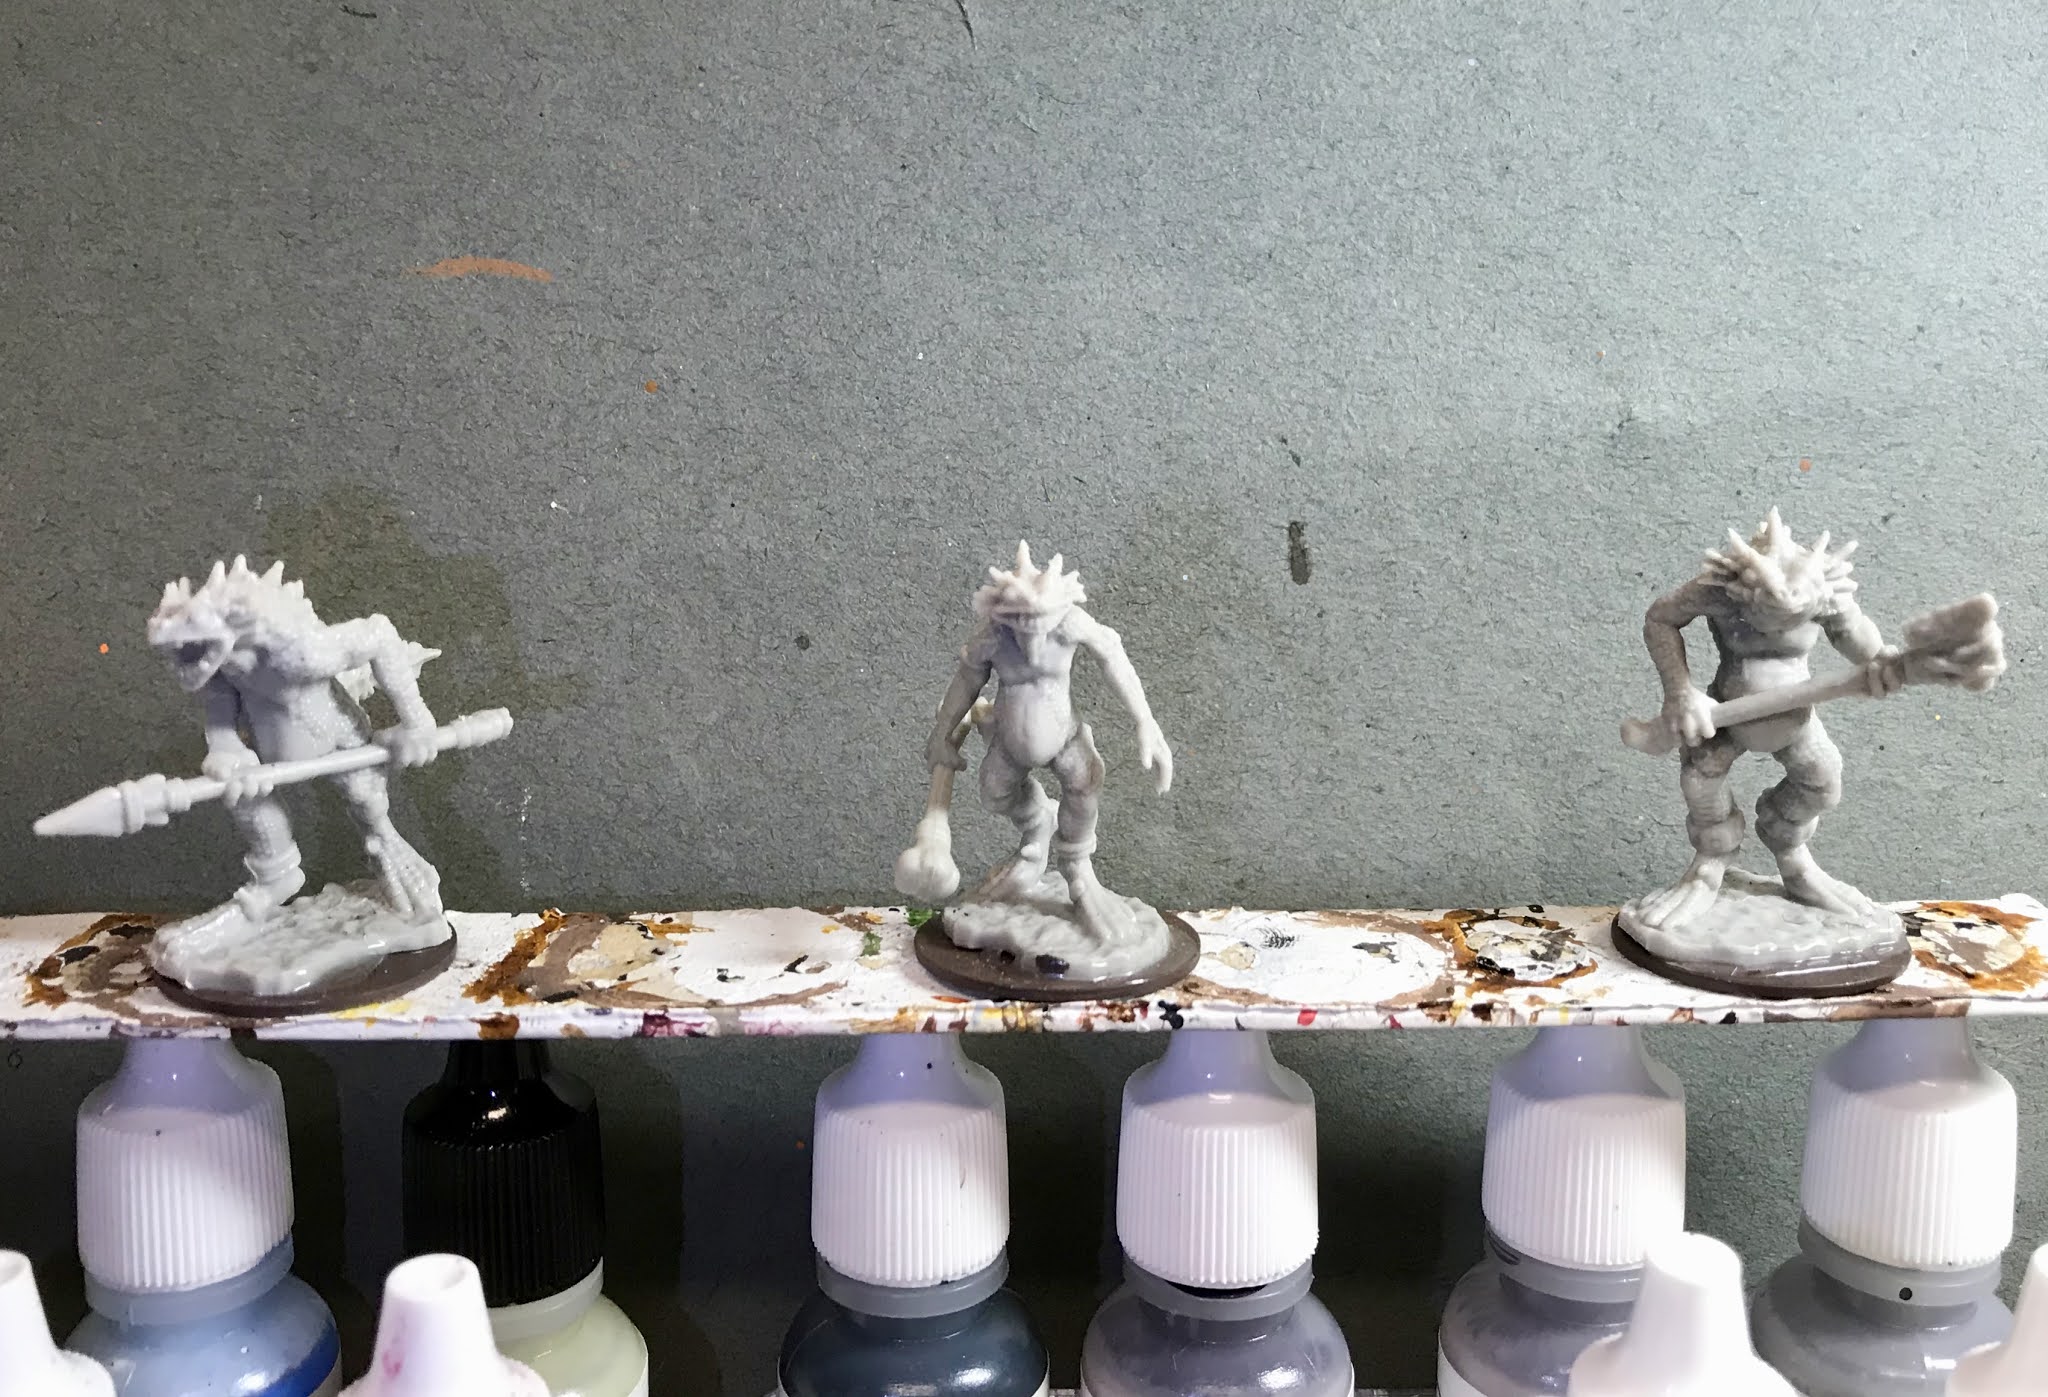
     Since I planned to use some Citadel Contrast Paint on these, I started off by giving them a base coat of Ceramcoat "White".
     When the base coat was dry, I gave them a coat of Citadel Contrast "Skeletal Horde".  When that was dry, I went over their armor and shields and shield straps with Citadel Contrast "Snakebite Leather".  After that, I did the boots with Citadel Contrast "Wyldwood", and the spear shaft with Folk Art "Barn Wood. 
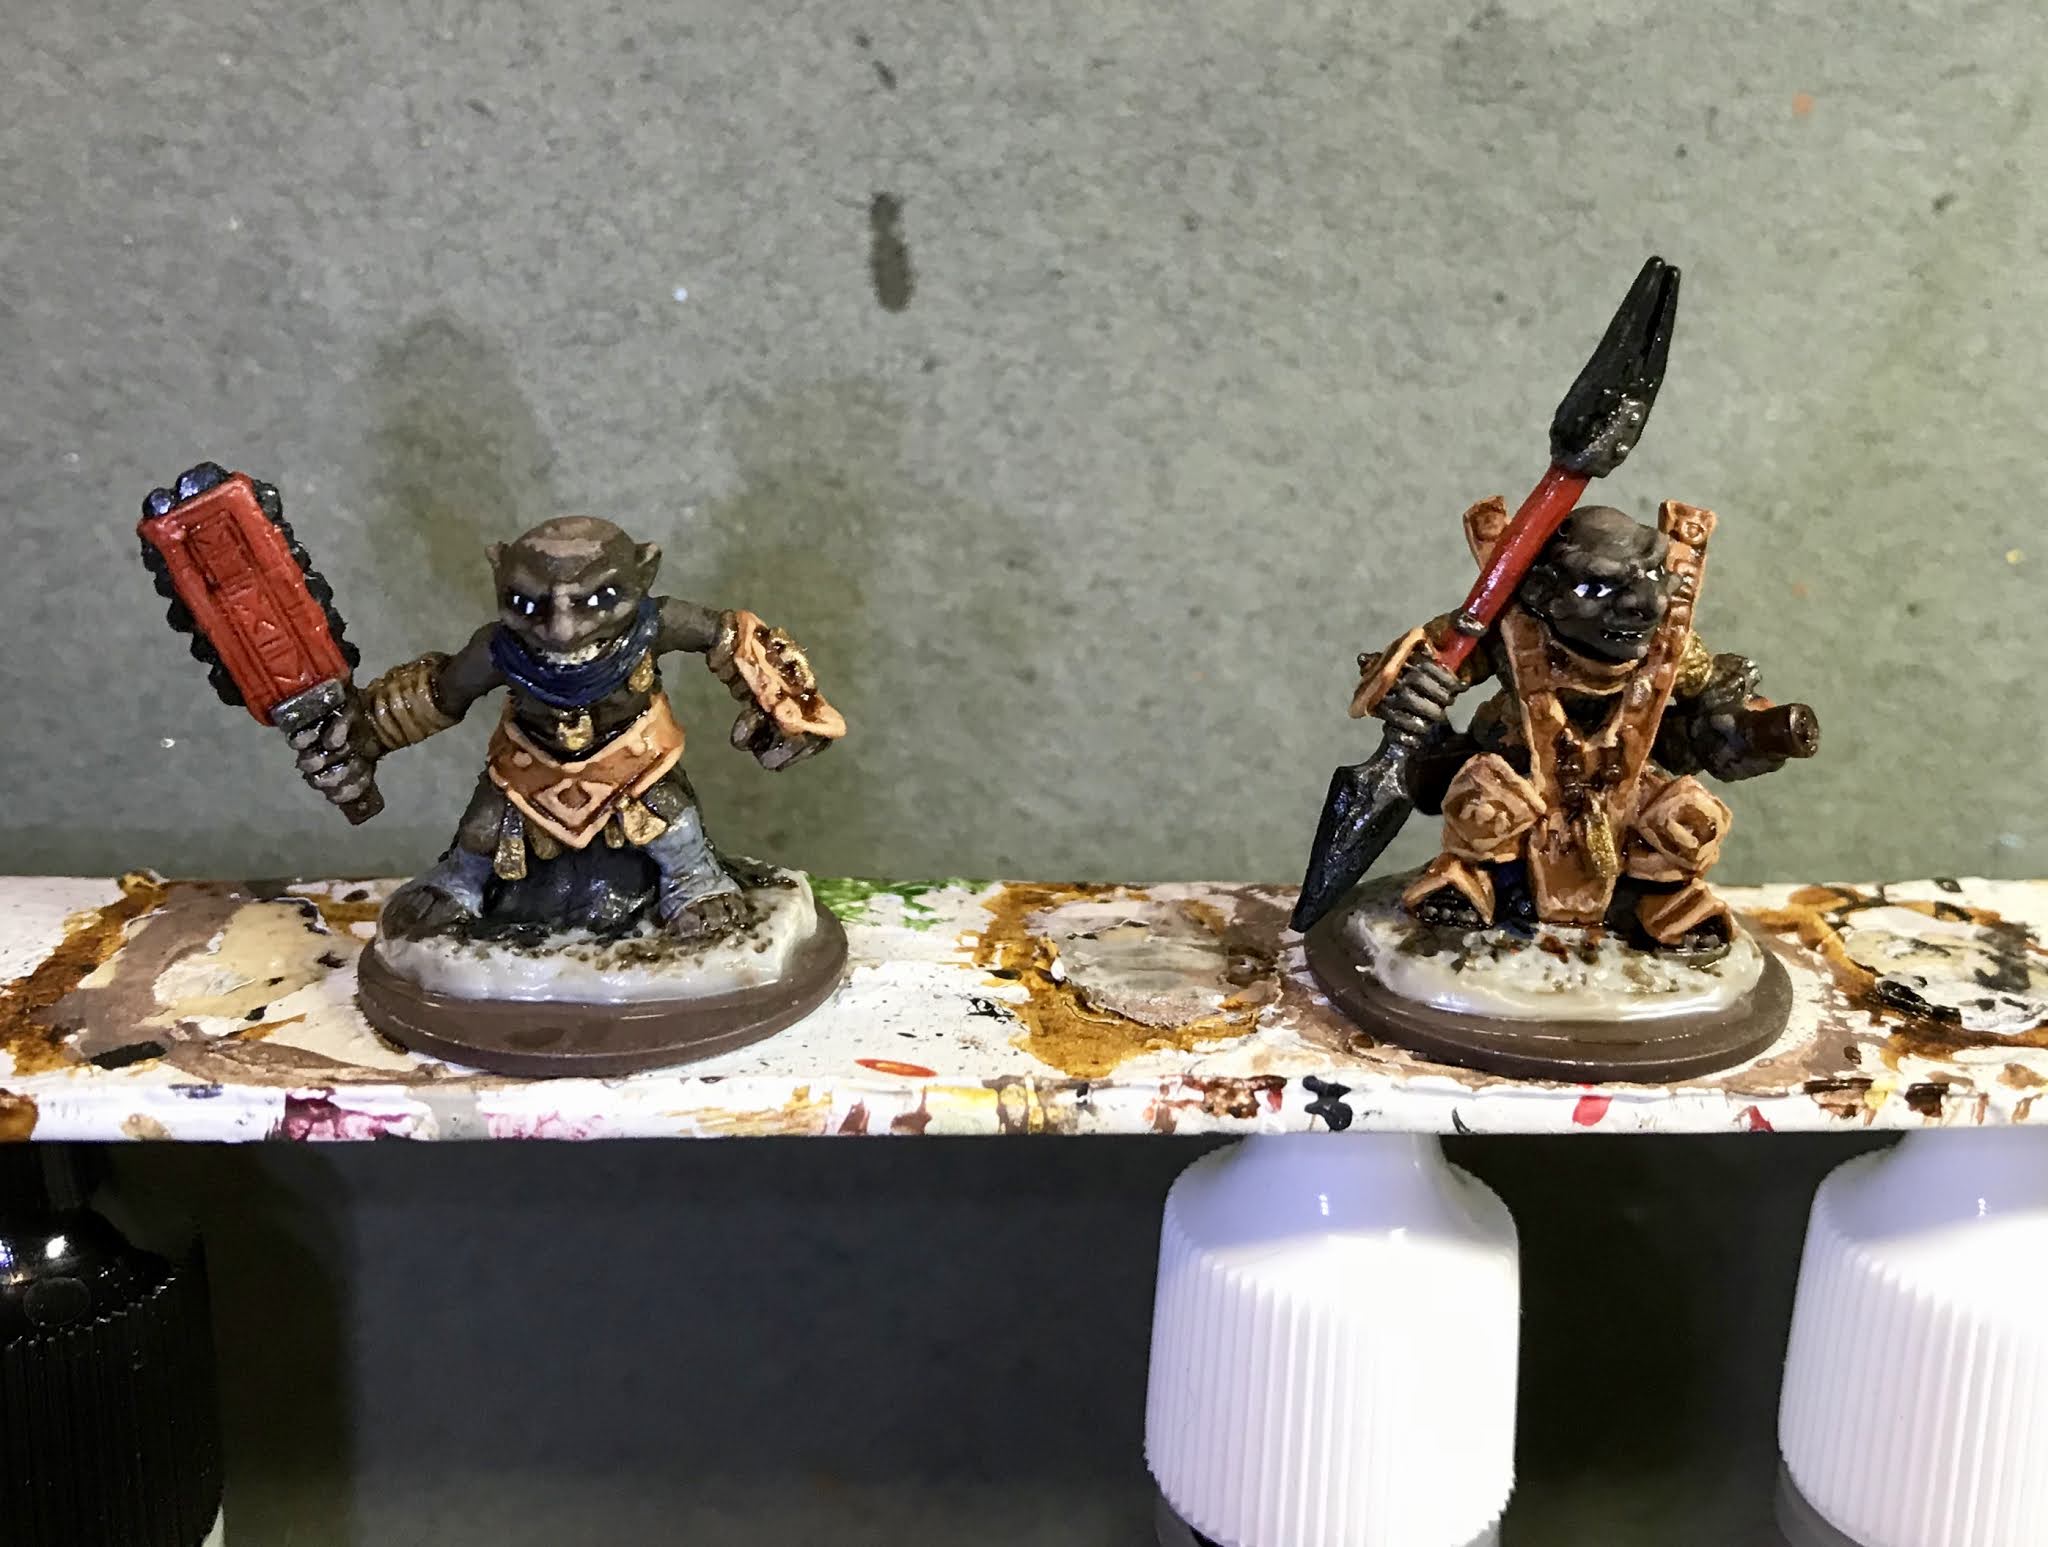
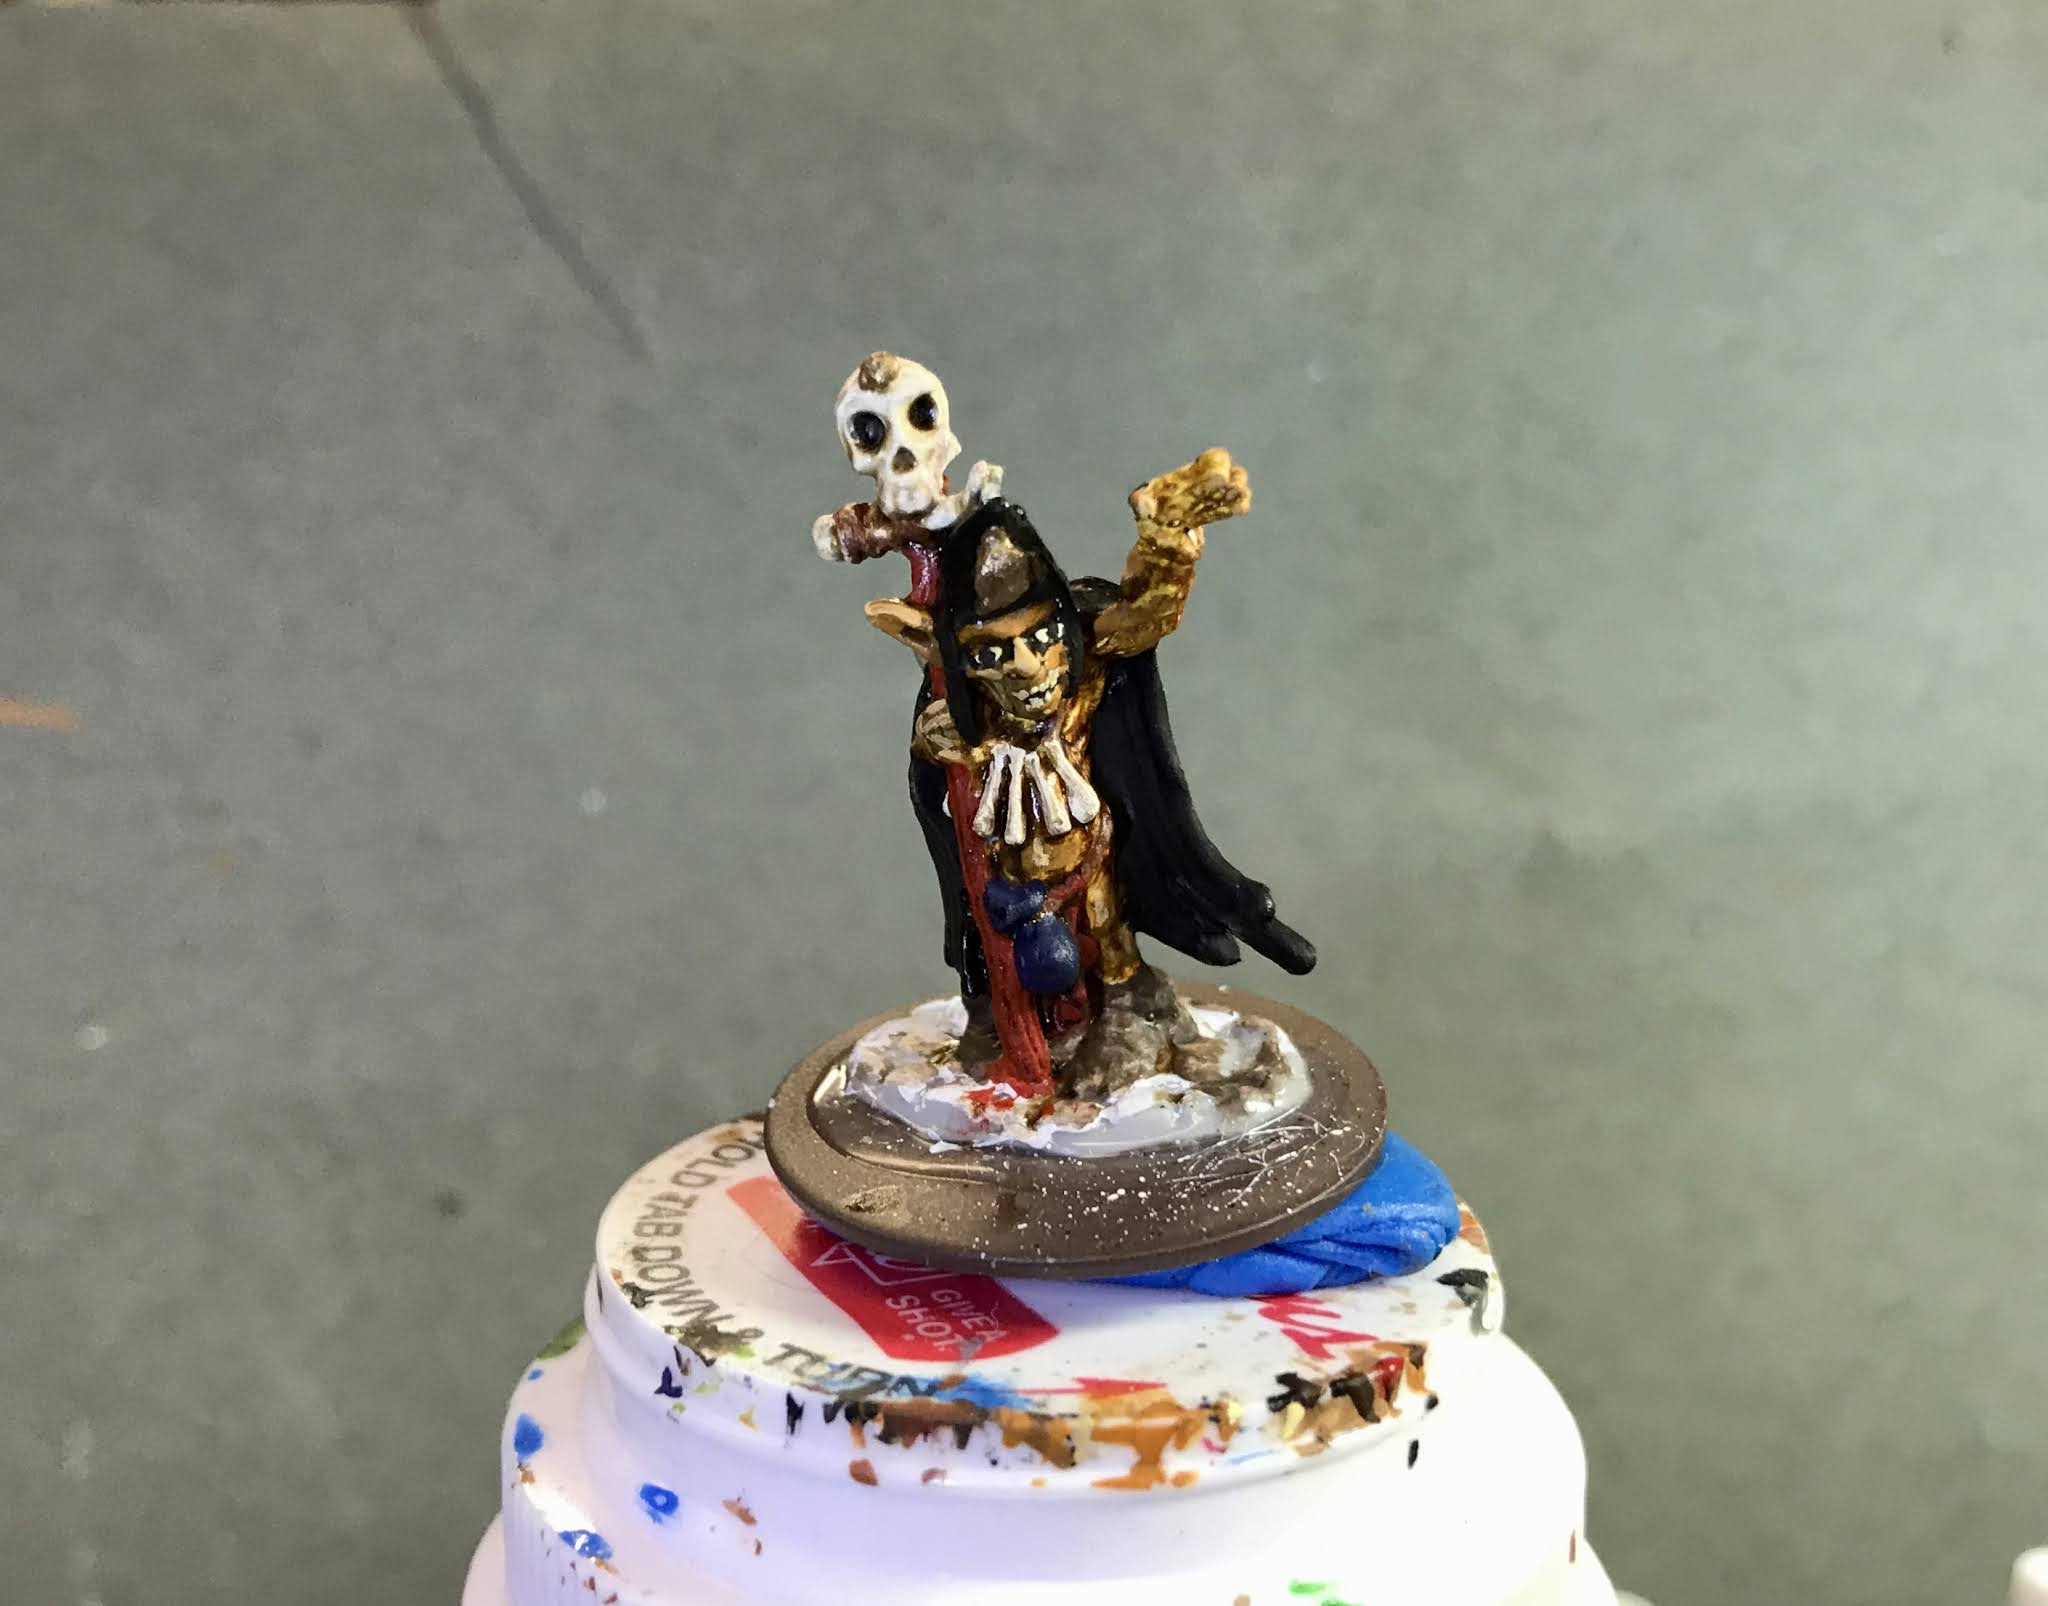
    Next, I painted the tunic on the righthand one using Reaper MSP Bones "Cinnamon Red", and then I painted the spear point, sword blade, and belt with Americana "Asphaltum".   After that I painted the armor, shields, and sword grip with Folk Art Brushed Metal "Brushed Bronze".
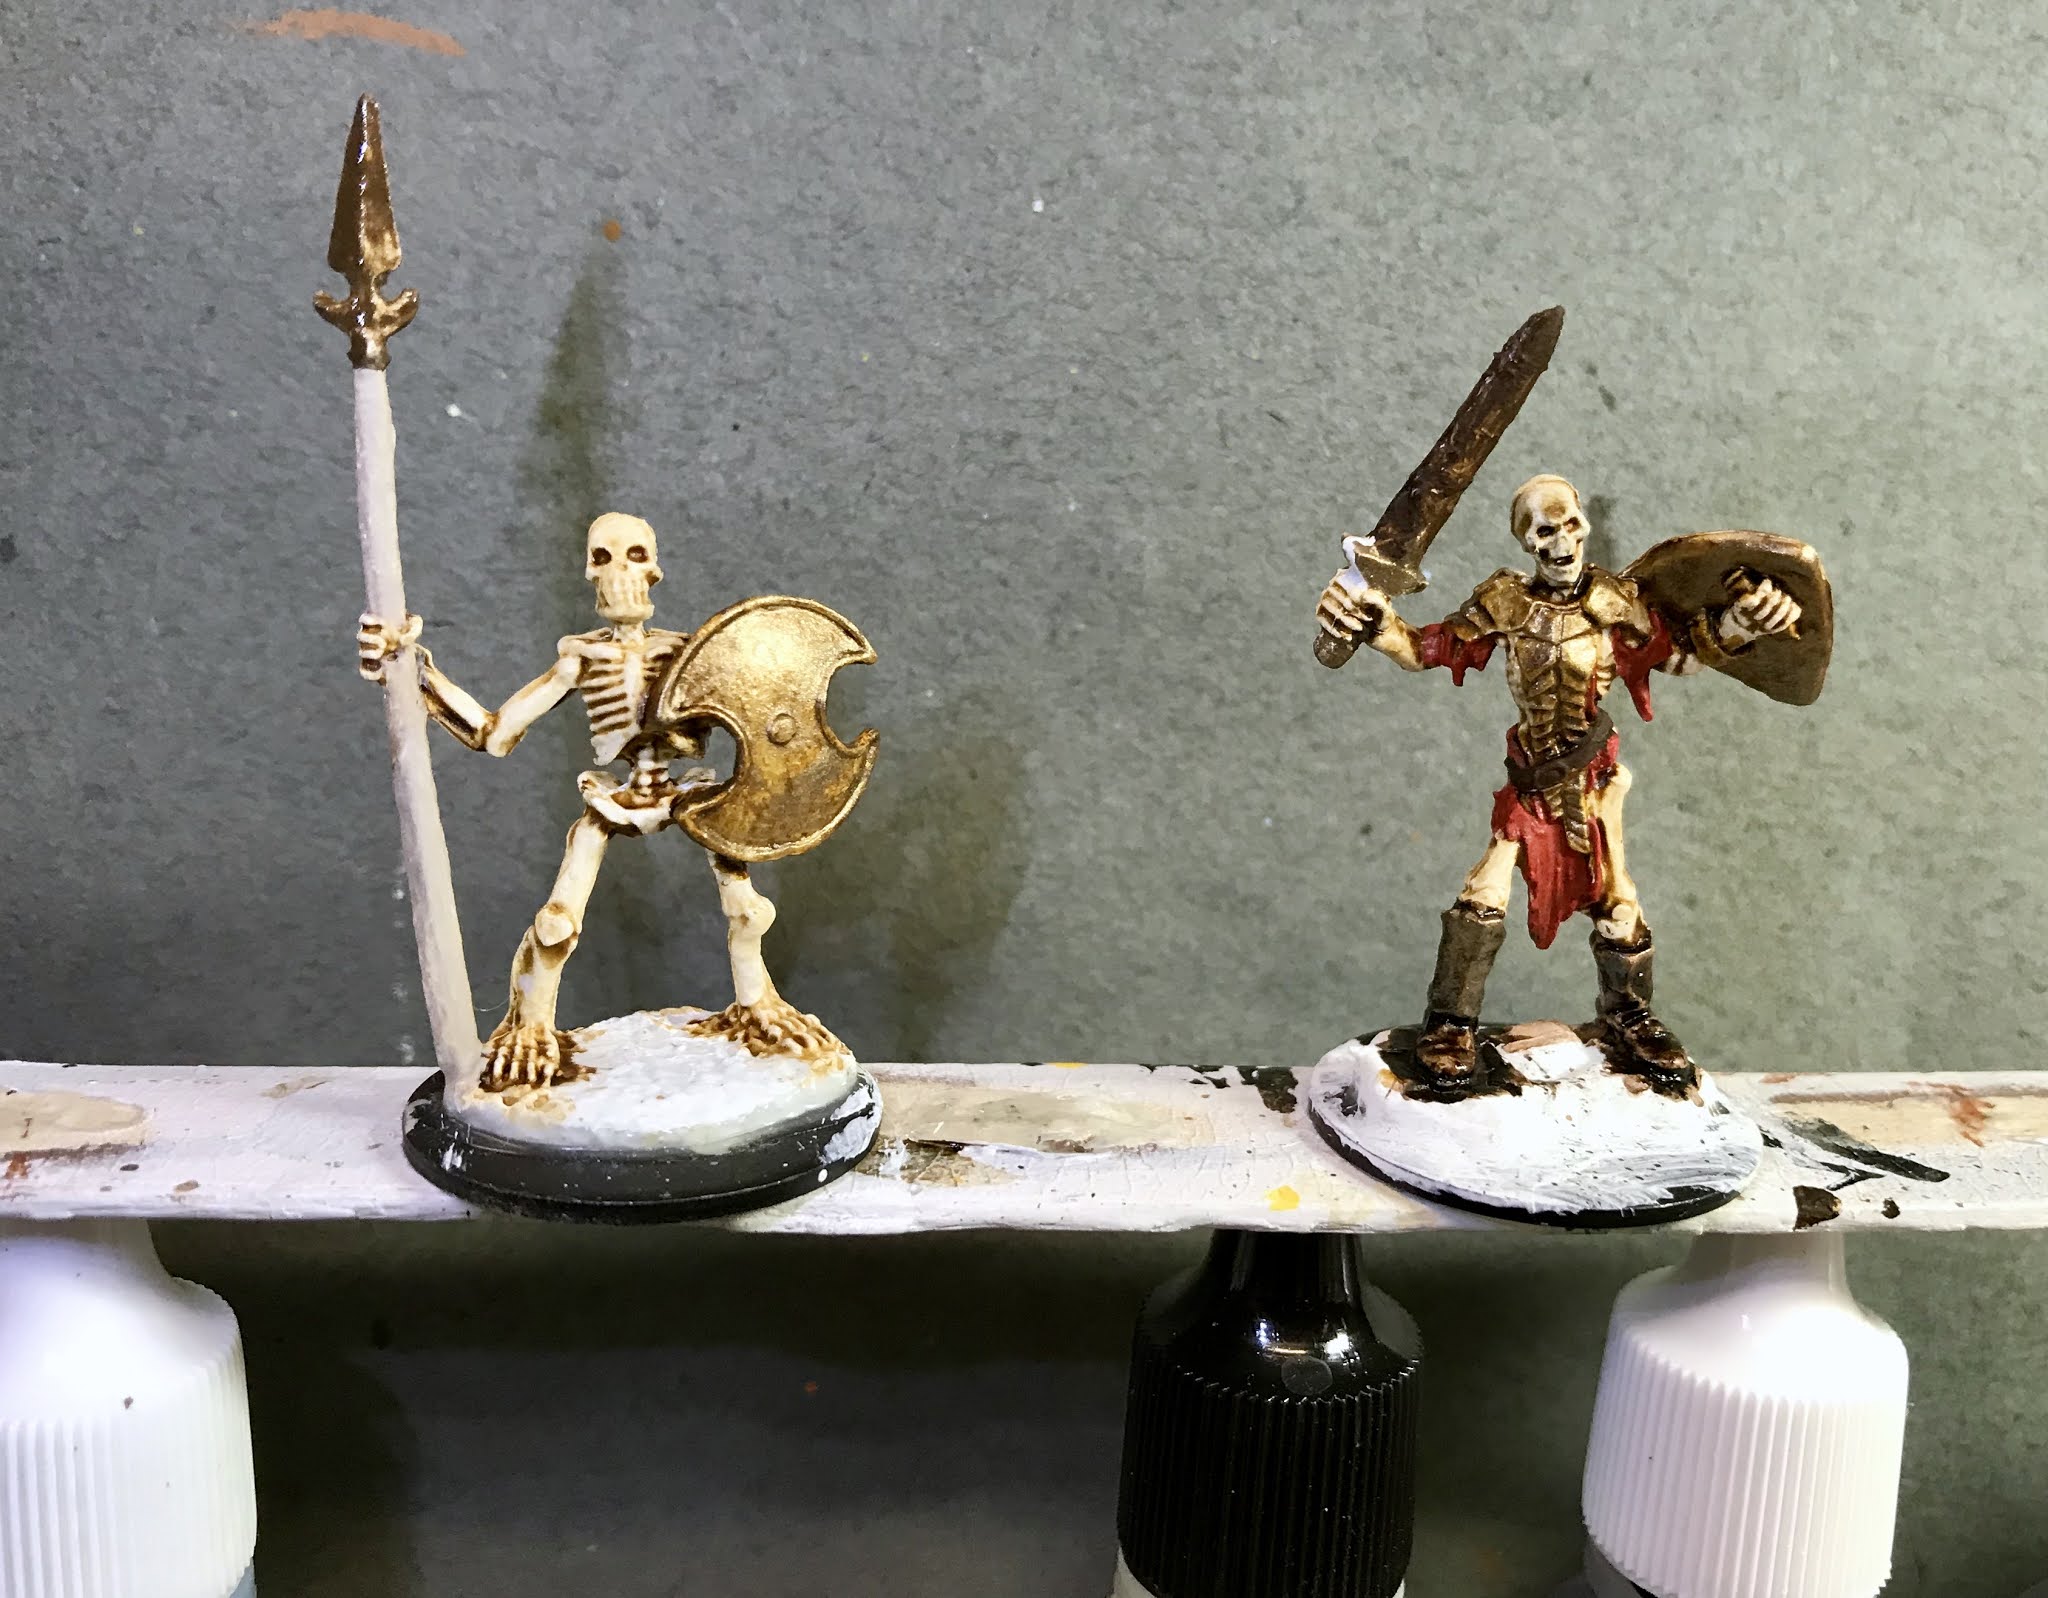
     I then went over the shields and armor with  some thinned Americana "Sea Breeze" to give a verdigris look. When it was dry, I added some splotches to the left shield with Crafters Acrylic "Bright Yellow", and the right shield with Americana 'True Blue, to represent the remains of old paint on the shields.  I let the figures dry for a while, and then went over everything but the skeletal bones themselves with a coat of Citadel "Agrax Earthshade" wash.  I then filled the eye holes and mouths with some Citadel "Nuln Oil" wash to help define them better.
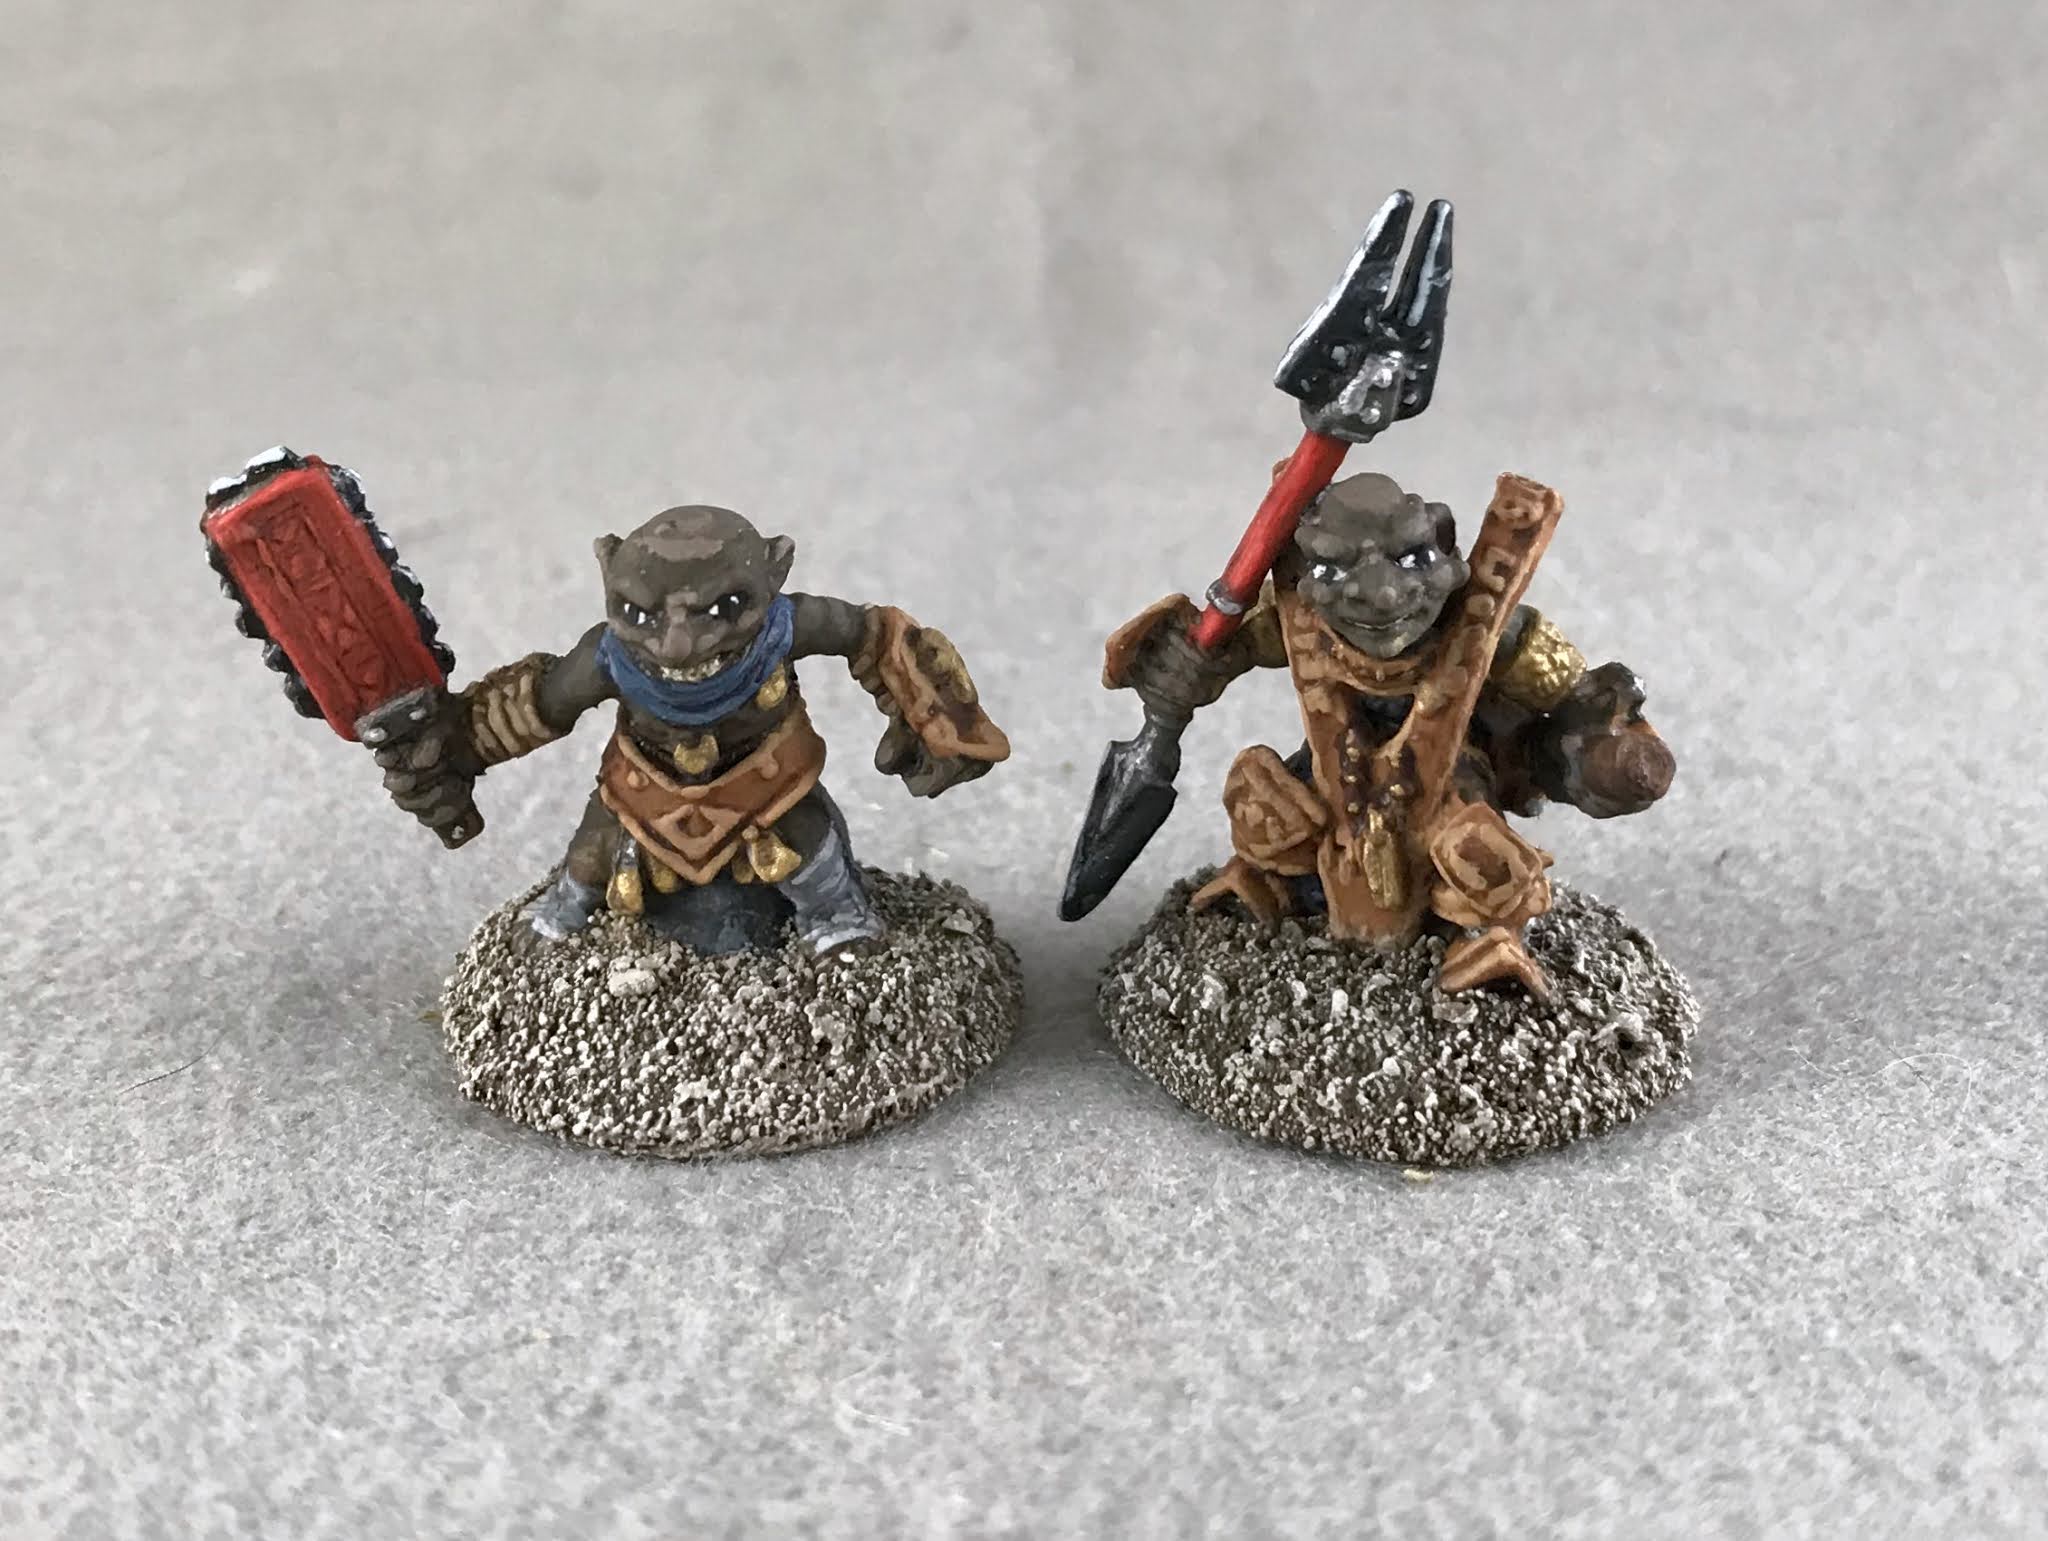
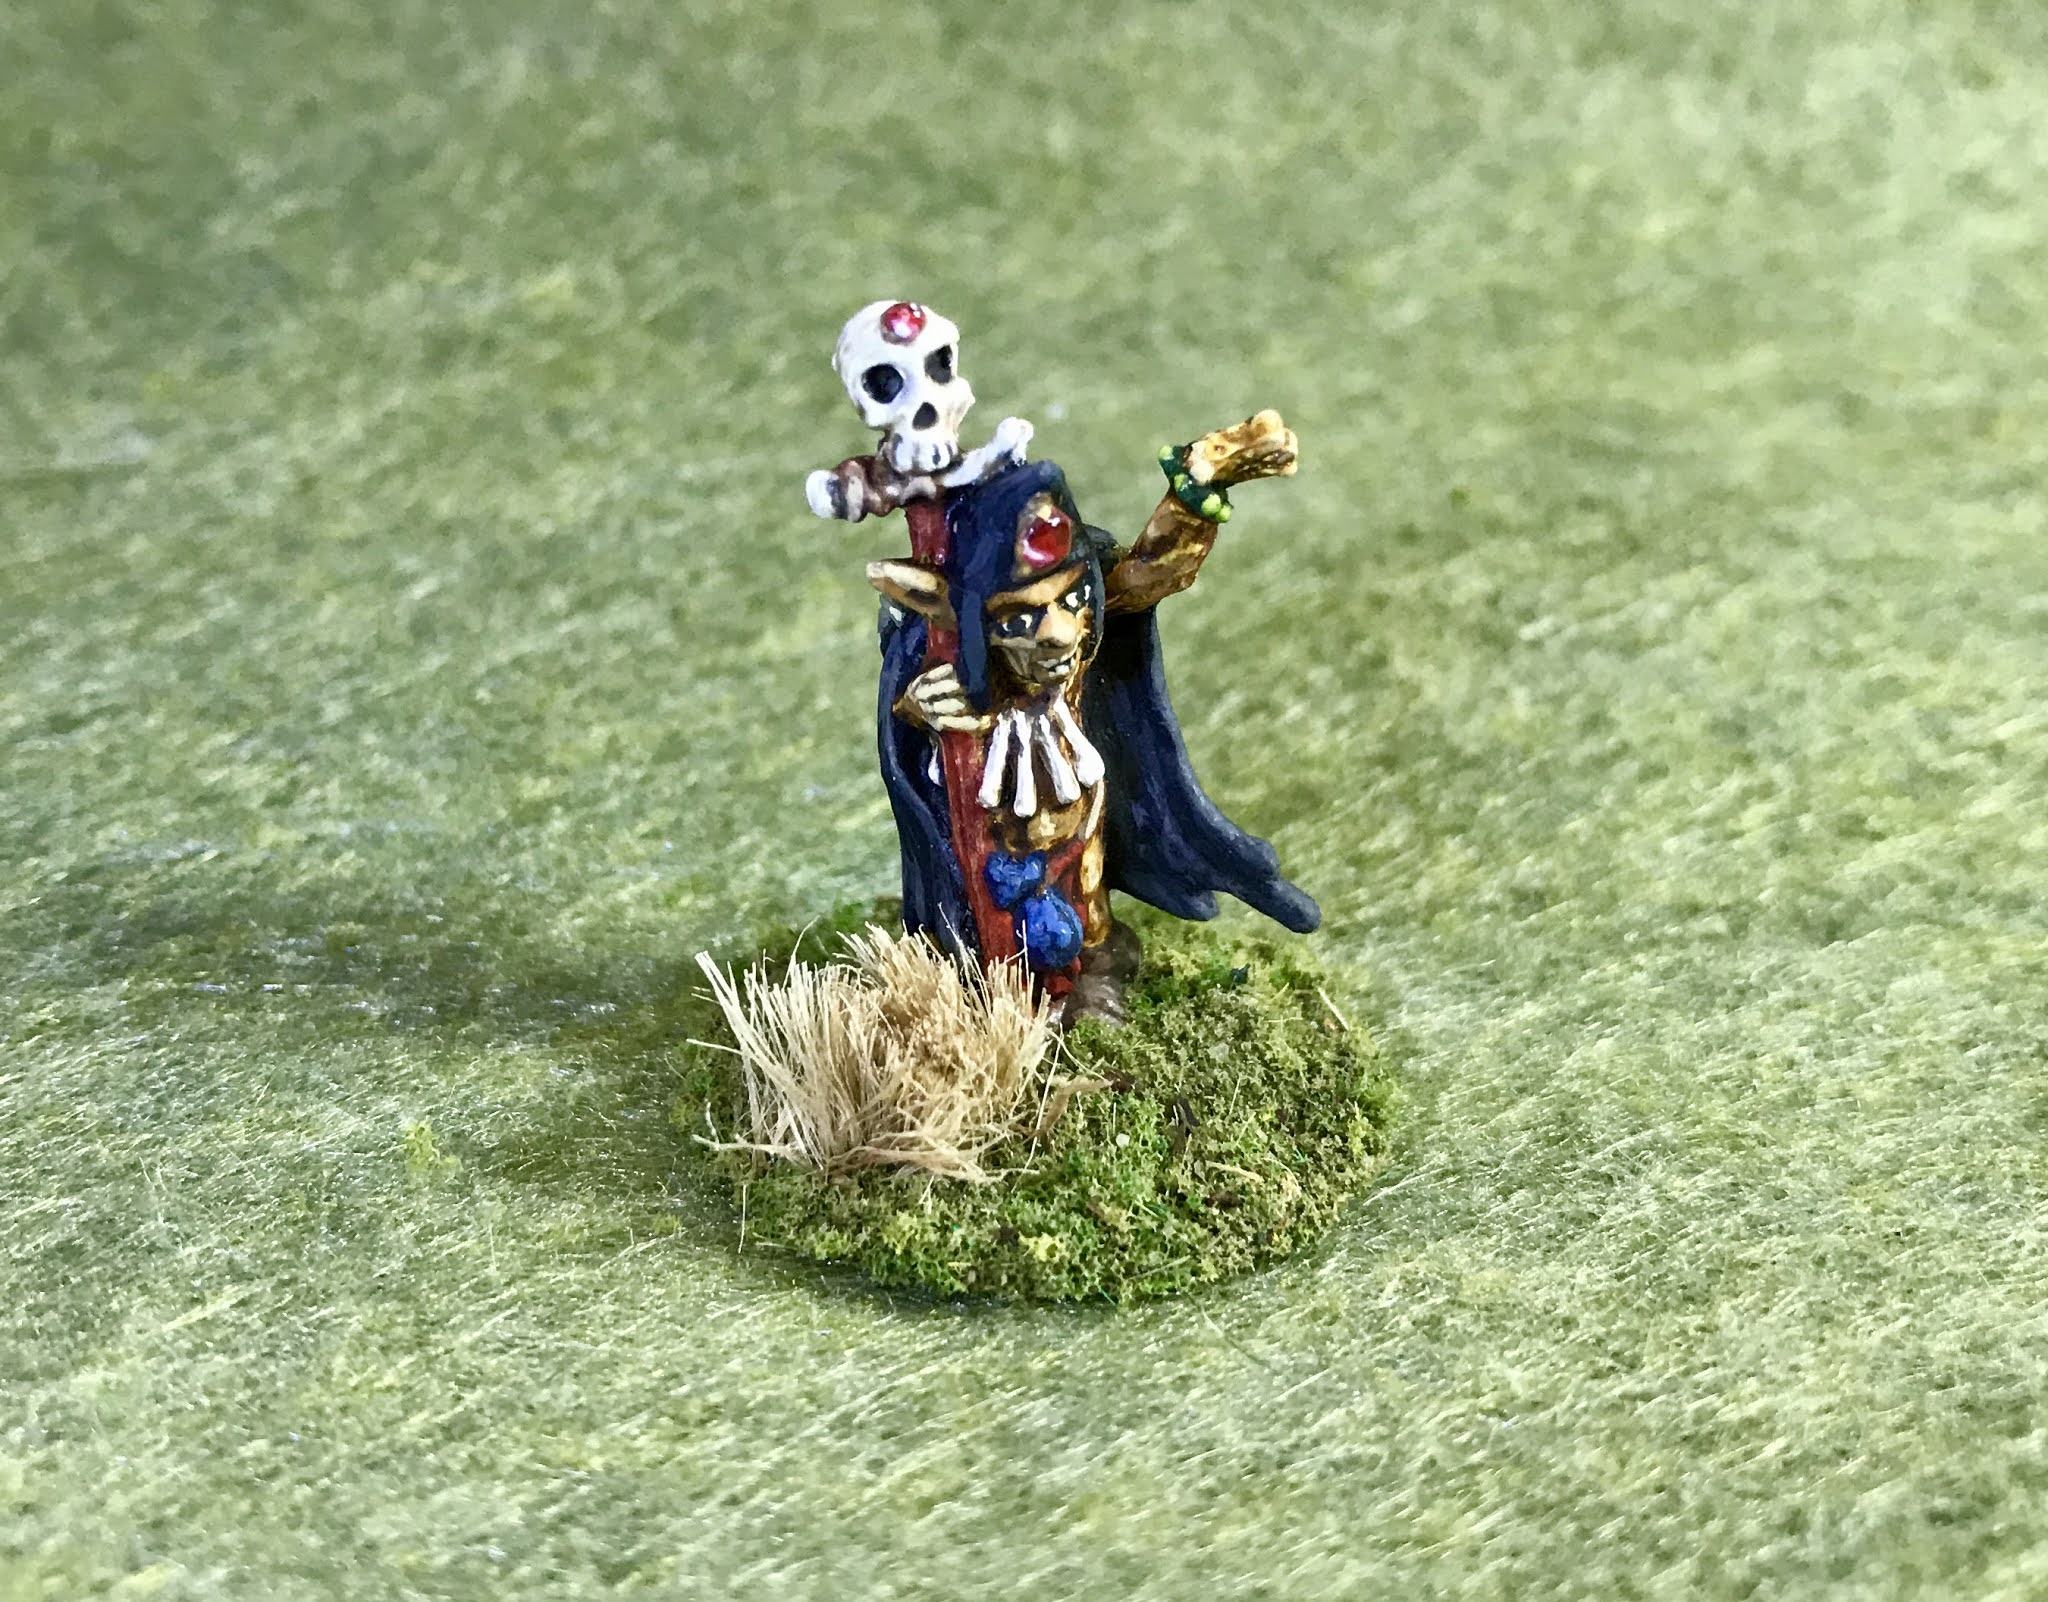
     When the washes were dry, I drybrushed the spear shaft with some Americana "Bleached Sand", and then hit the bones of the skeletons with a light drybrush of some Crafter's Acrylic "Light Antique White".  I then applied some splotchy rust to the spearpoint and sword blade with some accent "Golden Oxide", and then did highlights on the righthand skeleton's tunic with some Crafter's Acrylic "Orange Spice".  After that, I went over the paint remands on the shields again; using Crafter's Acrylic "Daffodil Yellow" for the one on the left, and Americana "Wedgewood Blue" for the righthand one.  I then painted on the remnants of some decorations, using Ceramcoat "Black"on the left, and Americana "Snow White" on the right.  Lastly, I painted the bases with Americana "Mississippi Mud".
     I let the skellies dry overnight and the next day I gave them a coat of Americana "DuraClear Matte" varnish.    Then, when  the varnish was dry, I used some white glue to flock the bases.  Another overnight dry, and I sprayed them with Testor's "Dullcote". 

     Not great, but good enough for the tabletop and I'm happy to finally get them finished and ready for action.

Monday, October 19, 2020

Gloom Stalker: Bones 4 Darkreach Figure

      This past week I painted the "Gloom Stalker" from the Bones 4 Darkreach Expansion; this is Reaper's version of the D&D Hook Horror.   This is the last figure from the Darkreach Expansion I had left to paint.  So it feels good to get one expansion completed. (Note: I traded or sold the Fungoids, and all but two of the Bloodstone Gnomes.) 
     I began by painting the body of the figure with Ceramcoat "Black".   Then when the "Black" was dry, I drybrushed it with Crafter's Acrylic "African Violet".  After that, I gave it a lighter drybrush of Apple Barrel "Apple Lavender".  I then worked on the underbelly, first using a mix of the "Black" and the "African Violet" around the outer edges, and then adding in some of the "Apple Lavender" to blend it lighter towards the center.  Lastly, I mixed in some Folk Art "Milkshake" for the center.  I then drybrushed it with Americana "Dove Grey", and then directly painted some "Dove Grey" highlights.
     Next, I painted the feet with the "Milkshake", and then painted the blade-like "hooks", talons, and beak with Folk Art "Barn Wood".  When dry, I attempted to blend them all into the black body by mixing the base color, ("Milkshake" for the feet, "Barn Wood" for the blade-like "hooks", talons, and beak,) with Citadel Contrast "Black Templar".  When that was dry, I gave the blade-like "hooks", talons, beak, and feet all a coat of Citadel "Nuln Oil".
     When the wash was dry, I drybrushed the blade-like "hooks", talons, and beak, with the base "Barn Wood".  I then did some direct brush highlights with the same color where it was too close to the black body to drybrush well.  Next, I mixed some Crafter's Acrylic "Light Antique White" with the "Barn Wood" and did another round of lighter highlights.  After that, I did a few spot highlights with just the plain "Light Antique White".  I then highlighted the feet with the base "Milkshake".  
     Moving on to the eyes next, I painted the immediate area around them with the "African Violet", and then painted the eyeball with Americana "Zinc".  When dry, I painted large pupil with Crafter's Acrylic "Daffodil Yellow", and then  a smaller inner pupil with Ceramcoat "White".
   I let the figure dry overnight and the next day I gave it a coat of Americana "DuraClear Matte" varnish. I then used some white glue to glue some fine sand around the edge of the integral base to cover the areas where the black under-base showed.  When the sand was dry, I painted it with a coat of Americana "Charcoal Grey". When this was dry, I drybrushed the sand with the "Mississippi Mud", and then with some Apple Barrel "Rock Grey"; lastly I drybrushed it with a little Americana "Dove Grey". Next, I painted the sculpted bone on the base with the "Light Antique White".  When that was dry, I gave it a coat of Citadel Contrast "Skeleton Horde".
      Another overnight dry, and I sprayed the figure with Testor's Dullcote". When the "Dullcote" was dry, I went back and repainted the eyes with a little Americana "DuraClear Gloss" varnish.


     I'm really happy with how this guy turned out.  I wasn't expecting a lot from the figure, but for some reason the black, purple, and off-white color scheme really seems to make it pop for me.  Sadly this is another figure that suffers from some poorly placed mold lines, and I just don't have the patience to spend a lot of time trying to remove them from uneven and textured surfaces.  

Monday, October 12, 2020

Troglodytes (Spearman, Warrior & Boss): Bones 4 Darkreach Figures

     This past week I painted the "Troglodyte Spearman", "Troglodyte Warrior", and "Troglodyte Boss" figures from the Bones 4 Darkreach Expansion.  I've only got one Darkreach figure left to do after these guys, and I'll have completed all the figures I kept from that expansion.   These guys had a lot of nice detail sculpted into their scaly skin, so I thought they might be good candidates for some Citadel Contrast paint.  So I thought I'd try something of a hybrid approach using both the Contrast paint and regular paint.
      I prepped the figures in the usual way, soaking the parts in a dish of water with a couple drops of dish-soap added, then giving them a light scrub with a soft toothbrush, and then rinsing and drying them. I then glued them to 1" brown-primed fender washers with Aleene's Tacky glue.  I then glued the washers onto a tongue depressor with a couple drops of Elmer's white glue.
     I began by giving all of them complete coats of Ceramcoat "White".  When that was dry, I painted their bodies with Citadel Contrast "Militarum Green".
     I began by working on their abdomen, chest, and the bottoms of their feet areas, using a blend of the base "Militarum Green" and mixing in some Americana "Antique White"; I then gradually increased the amount of the "Antique White" as I worked towards the higher center areas.  After that, I used some Americana "Jade Green" to highlight areas of the body like fingers, toes, and lips.  I then used Folk Art "Grey Green" to paint the spikes, horns, and claws; and then highlighted these areas with Folk Art "Porcelain White".  I felt the highlight wasn't enough, so I went back and added some Folk Art "Celadon Green" to the very tips.
          Next, I repainted the center figure's bone club, and the bone handle of the righthand ones' axe, with the "White".  I then painted the lefthand one's spear handle with Americana "Mississippi Mud", then painted the spear point, axe head, and all their ankle bracelets with Accent "Golden Oxide".  After that, I painted the bindings on the spear, club and axe, with Ceramcoat "Territorial Beige". I then moved to their mouths, painting the inside of the lefthand one's mouth with Folk Art "Milkshake", and then painting all their teeth with Folk Art "Barn Wood".  I then went back and gave the center figure's bone club, and the bone handle of the righthand ones' axe a coat of Citadel Contrast "Skeleton Horde".
         I then applied a coat of "Nuln Oil" wash to the teeth and mouth of the figures.  While that dried, I did highlights on the spear shaft using some of the "Barn Wood" mixed with the base "Mississippi Mud".  By now the "Skeleton Horde" Contrast paint had dried, so I did some light drybrush highlights on the bone club, and axe handle with Americana "Bleached Sand".  The "Nuln Oil" was dry too, so I highlighted the teeth with the "Bleached Sand" as well.  After that, I highlighted all the bindings on the weapons with Folk Art 'Butter Pecan".   
     Next, I moved to the metallics, Painting the spear point and axe head with Folk Art Brushed Metal "Brushed Bronze".  I let that dry for a while, and then came back and drybrushed it with some Ceramcoat "MetallicBronze".  I then mixed some of the "metallic Bronze with a little DecoArt Metallic "Bight Brass" to do lighter highlights.
    Finishing up, I painted the back of the open mouth on the lefthand one with a little Citadel "Black Templar" Contrast to give the appearance of a throat.  I then painted the eyeballs with the "Black Templar" as well.   When they were dry, Ipainted the eyeballs again using Crafter's Acrylic "Daffodil Yellow"  and then gave them Ceramcoat "Black" slit pupils.  Lastly, I painted the bases with Americana "Mississippi Mud".
         I let the figures dry overnight and the next day I gave them a coat of Americana "DuraClear Matte" varnish.    Then, when  the varnish was dry, I used some white glue to flock the bases.  Another overnight dry, and I sprayed them with Testor's "Dullcote". When the "Dullcote" was dry, I went back and repainted the eyes and teeth with a little Americana "DuraClear Gloss" varnish.


     I'm really happy with how this trio turned out.  I think the Contrast paint really was effective on the scaly skin, and blended well with more conventional paints.  

Monday, October 5, 2020

Burrowing Behemoth: Bones 4 Darkreach Figure

      This past week I painted the "Burrowing Behemoth" from the Bones 4 Darkreach Expansion.  This is apparently Reaper's version of an Umber Hulk, so I consulted my old original Monster Manual for color inspiration.   
      I prepped the "Burrowing Behemoth" in the usual way, soaking the pieces in a dish of water with a couple drops of dish-soap added; then giving the pieces a light scrub with a soft toothbrush, and then rinsing and drying everything.  I then glued the arms, legs, head, and mouth into place using Gorilla Superglue gel.    I didn't glue this figure to a washer because I planned to sell it, and it already had an effective circular base build onto it.   The feet didn't fit as snugly onto the base as I would have liked, so I added a little white glue around the feet and here and there on the base; and sprinkled some sand on the glue, to help hide the feet joints and add a little more texture to the base.   When dry, I shook off the extra sand, and I then affixed the integral base to the top of a large pill bottle with a couple blobs of blue-tac. 
This was another figure with terrible mold lines on hard to reach and uneven surfaces.  Who's idea was it to have three intersecting mold lines meet in the middle of each eye ball! 

(Oops! I started my black base coat on the leg before I realized I hadn't taken a "beginning" picture)

     I began by giving the entire figure a base coat with Ceramcoat "Black".  I then drybrushed it with Americana "Charcoal Grey", followed by a lighter drybrushing with "Americana "Mississippi Mud", and lastly a highlight drybrush with a little Americana "Fawn".
     Next, I wet blended the lighter yellow-grey stomach area using first a base of Ceramcoat "Charcoal", followed by mixing in a little Americana "Antique Gold" (non-metallic).  I then mixed in some Crafter's Acrylic "Storm Cloud Grey", and lastly a little crafter's Acrylic "Daffodil Yellow".  After that, I painted the to of the head with a little of the "Charcoal Grey", and Storm Cloud Grey mixed together, blending it in to the surrounding darker head, and then added some highlights with the base "Storm Cloud Grey"
     I then painted the ridged areas of the forearms with Accent "Real Umber" (Something on an Umber Hulk needed to be painted with an Umber Brown!), and then painted the claws and toenails(?) with Americana "Bittersweet Chocolate".  After that, I painted the mandibles with Americana "Antique White".
     Next, I applied a coat of Citadel "Nuln Oil" wash to the ridged forearm areas, mandibles, claws, and toenails.  While the wash was drying, I painted the eyes with Reaper MSP "Fresh Blood", and drybrushed the antenna with DecoArt Dazzling Metaalics "Rich Espresso", followed by a lighter drybrush of Ceramcoat "Wedding Gold".  
     When the wash was dry, I highlighted the ridges in the forearm areas with first, Pathfinder MSP "Urgathea Red", and then mixed it with a little Reaper MSP "Holly Berry" for a lighter highlight.  I then Highlighted the toenails and claws with Ceramcoat "Territorial Beige".  After that, I highlighted the mandibles, first with the base "Antique White", and then with a little "Americana "Bleached Sand", and then I highlighted the other mouth bits with some Folk Art "Barn Wood".  I wrapped things up by repainting the eyes with some Folk Art Color Shift "Red Flash", and then added small highlight dots with Americana "Snow White".   
     I let the figure dry overnight and the next day I gave it a coat of Americana "DuraClear Matte" varnish.   When the varnish was dry, I painted the base with a coat of Americana "Charcoal Grey". When this was dry, I drybrushed the base with some of the "Mississippi Mud", and then with some Apple Barrel "Rock Grey"; lastly I drybrushed it with a little Americana "Dove Grey".
      Another overnight dry, and I sprayed the figure with Testor's Dullcote". When the "Dullcote" was dry, I went back and repainted the eyes with a little Americana "DuraClear Gloss" varnish.


      I'm really happy with how this turned out.  There's still some annoying mold lines here and there, but I think the color scheme came out looking pretty good.

Monday, September 28, 2020

D'Vandra Lukesia: Bones 4 Dreadmere Figure

      Starting to work again on the Dreadmere Expansion this past week, and painted the D'Vandra Lukesia figure.   I've seen this figure painted up two ways; one is as a necromancer type with pale skin and dark clothing, ready to go dig up some bones; and the other is as a druid-nature type in light colors with more normal skin coloration, ready to go plant some flowers.  After some deliberation, I decided to go with the second of the two.
        I prepped the figure in the usual way, soaking it in a dish of water with a couple drops of dish-soap added, then giving it a light scrub with a soft toothbrush, and then rinsing and drying it.  I then glued the figure to a brown-primed 1" fender washer with Aleene's Tacky glue, and then placed the figure in my painting grip.
     I began by painting her face and arms with Reaper MSP "Bronzed Skin".   I then painted her under skirt with Americana "Antique Gold", and followed with painting her dress with Americana "Avocado".  I then went back and painted her sash and bodice with the "Antique Gold".
     Next, I painted her hair with Accent "Golden Harvest", and then painted her shovel handle with Americana "Light Cinnamon".  After that, I painted her belts and straps with Accent "Forest Green", and then some of the stuff on her belts, as well as her wrist guards, with Citadel "Snakebite Leather". 
     I then painted the wraps on her shovel with Folk Art "Butter Pecan", and the flowers on the shovel with Folk Art "True Burgundy".   After that, I painted clasps and some of the belt accouterments that I eventually planned to make metallic gold, with Accent "Mustard Seed".   I followed that with painting the bone hanging from her belts with Reaper MSP "Graveyard Bone", and the shovel blade with Americana "Zinc". 
     I then let the figure dry overnight, and the next day I applied a coat of Citadel "Reikland Fleshshade" wash to her face and arms.  I let that wash dry for a while, and then applied a coat of "Agrax Earthshade" wash to the rest of the figure.    When that wash was dry, I painted her eyes, and then highlighted her skin using the base "Bronzed Skin", and some Reaper MSP "Bronzed Highlight".
     Next, I highlighted her under skirt, the sashes, and the bodice with; the base "Antique Gold", then Crafter's Acrylic "Bright Yellow", and lastly, Crafter's Acrylic "Daffodil Yellow" for the lightest layer.  After that, I highlighted her dress with the base "Avocado",then some Americana "Olive Green", and the fasteners and lightest highlights with Raper MSP Bones "Dungeon Slime". 
     I then highlighted her hair using, Americana "Moon Yellow", Apple Barrel "Lemon Chiffon", and Americana "Snow White" for the lightest highlights.   After that, I highlighted her belts and straps with, first, Americana Forest Green", followed by Americana "Festive Green".   I followed by highlighting the canister hanging on her right side, as well as her wrist guards, using the base "Snakebite Leather", followed by some Reaper MSP "Bronzed Skin". 
     Next, I highlighted the bone hanging at her side using Crafter's Acrylic "Light Antique White".  I then worked on her shovel, highlighting the handle with Americana "Fawn", and the bindings with Americana "Bleached Sand".  After that, I highlighted the flowers with Crafter's Acrylic "Tutti Fruitti", and Apple Barrel "Apple Lt. Pink". 
     I then worked on the metal parts, repainting the containers I had painted with the "Mustard Seed", as well as the assorted buckles, using Folk Art Brushed Metal "Brushed Bronze".  I then added highlights with Folk Art "Pure Gold" and then Ceramcoat "Wedding Gold". After that, I worked on the shovel, painting it first with Ceramcoat "Silver", followed by a little Citadel "Mitrhil Silver" highlight.   Lastly, I painted his base with Americana "Mississippi Mud".
         I let the figure dry overnight and the next day I gave it a coat of Americana "DuraClear Matte" varnish.    Then, when  the varnish was dry, I used some white glue to flock the base.  Another overnight dry, and I sprayed it with Testor's "Dullcote". 


     I'm really happy with this one.   Once I got painting her, I realized she was accessorized a little more like a necromancer than I has originally thought, with both a bone and what looks like a canopic jar on her belts; which I hadn't noticed at first.  Nevertheless, I still think she makes a good druid type nature wizard as well.

Monday, September 21, 2020

Bones 4: Bloodstone Gnome Scragger and Bodyguard

      This past week I painted the "Bloodstone Gnome Scragger" and "Bloodstone Gnome Bodyguard" from the Bones 4 Darkreach Expansion.   I have to say, I  wasn't excited about doing these minis, as I really didn't like the Aztec ascetic for Dark Gnomes.  I also found the sclupts to be particularly fussy for such little figures, with all kinds of details and bits and bobs on them. 
      I prepped the figures in the usual way, soaking the parts in a dish of water with a couple drops of dish-soap added, then giving them a light scrub with a soft toothbrush, and then rinsing and drying them. I then glued them to 7/8" brown-primed fender washers with Aleene's Tacky glue.  I then glued the washers onto a tongue depressor with a couple drops of Elmer's white glue.
     I began by panting their skin with Americana "Charcoal Grey".  I then painted the loin cloth on the lefthand one , and the shirt on the righthand one, with Ceramcoat "Charcoal". After that, I painted the scarf on the lefthand one, and the loincloth on the righthand one with Crafter's Acrylic "Navy Blue". 
    Next, I painted their armor with Americana "Terra Cotta", and then painted their feet/leg wraps with Folk Art "Cloudy Day".  After that, I painted the wrist wraps on the lefthand one, and the neck collar and belt pouches on the righthand one, with Ceramcoat "Territorial Beige". 
     I then painted both sword grips, and sword blade on the righthand one, with with Accent "Real Umber", and the sword blade on the lefthand one and spear shaft on the righthand one with Reaper MSP HD "Rusty Red". After that, I painted the parts I was going to paint gold with Americana "Antique Gold", and the parts I was going to paint as metal with Americana "Zinc". 
     Next, I painted the obsidian "blades" on all the weapons with Ceramcoat "Black".  After that, I repainted the metal parts I had previously paint with the Zinc, using Folk Art  Metallics "Gunmetal Grey"; and repainted the parts I had previously painted with the "Antique Gold", using Folk Art Brushed Metal "Brushed Bronze".   I let the figures dry for a while, and then gave them both a coat of Citadel "Agrax Earthshade" wash.
    When the wash was dry, I painted the eyes, and then highlighted the skin with a mix of the base "CharcoalGrey", and some Americana "Mississippi Mud".  At that point, I realized they had exposed teeth, so I took a moment to paint those with Americana "Bleached Sand", and then gave them a quick wash with the "Agrax Earthshade".  After that, I highlighted the leather armor with Reaper MSP "Bronzed Skin".
          Next, I highlighted their leggings with Folk Art "Cloudy Day", and then highlighted the left one's loin cloth, and the right one's shirt with Americana "Zinc".  I then highlighted the left one's  scarf, and the right one's loin cloth, with Citadel "The Fang" mixed with a little Folk Art "Settler's Blue".  After that, I highlighted the wrist wraps on the lefthand one, and the neck collar and belt pouches on the righthand one, with Americana "Fawn".
        I then highlighted the body of the lefthand one's sword and the righthand one's spear shaft with some Reaper MSP "Holly Berry" mixed with a little Crafter's Acrylic "Pure Pumpkin".  After that, I highlighted the righthand one's sword blade body with Americana "Light Cinnamon", and then highlighted all the obsidian parts with Crafter's Acrylic "Cool Blue".  Wrapping thing up, I highlighted the parts I painted with the "Gunmetal Grey" using Ceramcoat "Silver", and highlighted the  parts I had painted with the "Brushed Bronze", using Folk Art "Pure Gold".   I finished by painting both their  bases with Americana "Mississippi Mud".
      I let the figures dry overnight and the next day I gave them a coat of Americana "DuraClear Matte" varnish. I then used some white glue to glue some fine sand to their bases.  When the sand was dry, I painted it with a coat of Americana "Charcoal Grey". When this was dry, I drybrushed the sand with the "Mississippi Mud", and then with some Apple Barrel "Rock Grey"; lastly I drybrushed it with a little Americana "Dove Grey".
      Another overnight dry, and I sprayed the figures with Testor's Dullcote".  When the "Dullcote" was dry, I went back and repainted the obsidian with a some Americana "DuraClear Gloss" varnish.

     Well, there they are.  They turned out okay, but my heart wasn't in them.  I have decided life's too short for me to paint stuff I really don't like, so the remainder of the set, is going in my sale/trade box. 

Monday, September 14, 2020

Goblin Shaman: Bones 4 Figure

  This  past week I took a break from working on Darkreach and painted the "Goblin Champion" from the Bones 4 Goblin Heroes set.  I had plans of painting all three of the Goblins for the Goblins Heroes set at the same time, so I had prepped  the figures in the usual way, soaking them in a dish of water with a couple drops of dish-soap added, then giving them a light scrub with a soft toothbrush, and then rinsing and drying them. I then had glued them to 1" brown-primed fender washers with Aleene's Tacky glue.  I then had glued the washers onto a tongue depressor with a couple drops of Elmer's white glue.
      I already recently painted both the Goblin Bodyguard and Goblin Champion from this trio, and as I mentioned in those articles, I had began by painting all their exposed skin areas with Citadel Contrast "Snakebite Leather".  Then, as I was studying them, I had realized  they really weren't similar enough to paint as a group, and so I popped them off the tongue depressor.   I now had reattached the Shaman to a pill bottle with some blue tac.  After that, I started by painting his cape and hood with Ceramcoat "Black".  I then painted his boots with Americana "Aspahltum" and his loincloth with Pathfinder MSP "Urgathoa Red"
     Next, I painted the spider on the back of the cape with Pathfinder MSP  "Medusa Green". and then painted his staff with Reaper MSP HD "Rusty Red", and the skull and cross bone on the staff, as well as the bone necklace, with with Americana "Bleached Sand".   After that, I painted  the cord of his loin cloth, the cord of his necklace, and the binding on the staff, with Americana "Light Cinnamon".  I followed with painting the bag tucked into his belt with Crafter's Acrylic "Navy Blue". 
     I painted the gem fittings on his hood and the skull with Folk Art Brushed Metal "Brushed Bronze"  Then I let the figure dry for a while, and then gave everything but the Goblin's skin a coat of Citadel "Agrax Earthshade" wash.  When the wash was dry, I filled in the skull's eye sockets and nose hole with some Citadel "Nuln Oil" wash.   I then painted his eyes, and then painted his teeth with Crafter's Acrylic "Light Antique White".  While I had this color out, I also used it to highlight the skull and cross bone.   After that, since I felt his skin had come out rather splotchy from using the Contrast Paint on it, I tried blending it a bit with some Accent Golden Oxide.  I then used some Apple Barrel "Maple Sugar Tan" mixed with the "Golden Oxide" to highlight his skin.   
          Realizing I had forgotten the bracelet on his left wrist, I painted that with Americana "Forest Green".  I then highlighted his loin cloth with Reaper MSP Bones "Cinnamon Red", and the staff with Crafter's Acrylic "Pure Pumpkin".   After that, I highlighted the bad tucked in his loin cloth with Ceramcoat "Denim Blue", and his cape with Ceramcoat "Charcoal".   I then added further highlights to the cape with a mix of the "Charcoal" and some Apple Barrel "Rock Grey".   The bracelet had dried by then, so I gave it a coat of the "Agrax Earthshade" wash.
     Next, I highlighted the sider on the back of the cape using Americana "Reindeer Moss Green", and then added some eye dots.  I moved then to the bracelet and highlighted that with some Folk Art Color Shift "Emerald Flash", and then some Folk Art Color Shift "Green Flash".   After that, I painted the gems in the hood and skull with Reaper MSP Blood Red, the"Urgathoa Red", and some Americana Snow White".   I finished by highlighting the gem fittings with some Folk Art "Pure Gold".   Lastly, I painted his base with Americana "Mississippi Mud".
         I let the figure dry overnight and the next day I gave it a coat of Americana "DuraClear Matte" varnish.    Then, when  the varnish was dry, I used some white glue to flock the base.  Another overnight dry, and I sprayed it with Testor's "Dullcote". When the "Dullcote" was dry, I went back and repainted the gems with a little Americana "DuraClear Gloss" varnish.


   I'm generally happy with how this figure turned out.  That whole side on the left is kind of smooshed up, with the staff, hand, bone necklace, blue pouch, cape, and hood all pressed in next to each other, which made painting all that an extra challenge,  but for a tabletop figure I think it all looks okay.