Friday, November 22, 2013

Reader Requested Paint Comparison

I had a reader of this blog recently request for me to describe the difference between two colors I used on my Spirit of the Forest figure. (See: http://allbonesabout.blogspot.com/2013/10/spirit-of-forest-figure-41-of-265.html ) Rather than try to use only words to do this, I thought it would save everyone a lot of time if I simply posted a photo of the two colors.
So, here they are, Americana "Khaki Tan", and Folk Art "Barn Wood".   As you can see, the "Khaki Tan" is a little darker and a little yellower than the "Barn Wood", and by comparison, the "Barn Wood" is lighter and a more bluish tan.  These were photographed under my Ottlite painting light so should be, given the varied quality of computer monitors, true to their actual color.

Monday, November 18, 2013

Skeleton Archers and Swordsmen: Figures 44 to 47 of 265

Last week I finished up the remaining four skeletons from the Undead Horde Set: two archers and two swordsmen.  I began by priming the figures with Krylon Camouflage with Fusion Flat Black spray paint, and then glued them to black-primed 1' fender washers.
To start, I gave all four a heavy drybrushing with GW "Bleached Bone".
I then gave them a  lighter drybrushing with plain white paint, then when dry, I gave them a light wash with GW "Devlan Mud" wash. Afterwards, I went over them again with a light drybrush of the plain white.
  This was followed with painting the archers' bows and the arrow shafts with Americana "Mississippi Mud", followed by the quivers and their straps with Apple Barrel "Burnt Sienna".  For the fletchings, I drybrushed a light coat of GW "Codex Grey" over the black primer.
  On the swordsmen, I painted one shield with GW "Blood Red", and the other with plain black.
I then gave the bows, arrow shafts and quivers a drybrushing with Folk Art "Barn Wood".  Next I added decorations to the shields with plain white, and then painted the end caps of the bows, the sword hilts, and the back of the shields, rims, and hubs with Ceramcoat "Bronze". The swords I painted with Ceramcoat "Metallic Pewter". The straps on the shields were next, with Americana "Charcoal Grey". Then I painted some splotches on the swords with Duncan Aged Metal "Iron", and the strap rivets with the "Bronze". Lastly, I gave the shield straps and the swords a wash with the "Devlan Mud" wash. 
   When everything had dried, I gave he figures a coat with Ceramcoat "Matte Varnish", and then flocked the bases.  Afterwards, I sprayed them with Testor's "Dullcoat".
Overall I'm pleased with them, and they mark the completion of the Undead Horde set. They were nice simple figures to paint, and it feels good to get another set behind me

Figures 44 to 47: Complete

Monday, November 11, 2013

Almaran the Gold, Paladin: Figure 43 of 265

This week I painted the Paladin, Almaran the Gold,  from the 30 New Bones Set.  While studying this figure, I found myself picturing him all decked out in white armor (as do-gooders tend to be). :) After doing an all black figure last week, I thought it might be interesting to try my hand at an all white look.  I did my usual prep of soaking overnight in dish soap and water; then, when dry, I glued the figure to a black-primed fender washer, and then glued this to half a tongue depressor,  for ease of handling during painting, with a drop of Elmer's white glue.
I began by giving the whole figure a wash with diluted black ink, with a tiny drop of dish soap added to aid it running into the crevices on the figure.
After this had plenty of time to dry, I gave the whole figure a heavy drybrushing with plain white paint. I then went back with a fine tipped brush, and filled in areas that hadn't been hit thoroughly enough with the drybrushing, in an attempt to help even out the tone, and brighten some of the broad flat surfaces and make crisp edges, as well as hit some of the harder to reach recesses.
Next, I painted the gown of the angel on his shield and the ribbon hanging from his back with  Americana "Salem Blue." I also painted his face, as well as the faces and hands on the shield, and face on the armor, with Apple Barrel "Apple Flesh".  I then painted his hair, the sword's grip, the unarmored part of his gloved hands, and the flexible part in the elbow and behind the knees, with Americana "Charcoal Grey". I also painted what I thought was hair, but now think is a hood, on the shield, and armor, heads with the same color.   I then gave the ribbon and gown a wash with Medium Blue ink.
At this point I added some highlights to the ribbon and gown with Anita's "Baby Blue". Next, I gave all the flesh areas a wash with Windsor Newton "peat Brown" Ink.  Then, when dry, I added highlights with the original "Apple FLesh" color. Next, I carefully drybrushed all the hair with Folk Art "Golden Harvest, followed by Americana"Moon Yellow, and lastly added highlights of Apple Barrel "Lemon Chiffon" with a fine tipped brush. I also painted in his eyes at this point; white with  a black dot for the pupil.
Next, I went to work on the metallic parts.  First, I  painted the end borders of the ribbon with Folk Art "Metallic Blue Sapphire".  I then painted the wings, sword hilt, and some of the decorative elements on his armor with Ceramcoat "Bronze". I then gave these parts a wash with the "Peat Brown " ink.  When they were dry, I went back and painted highlights on these parts with Ceramcoat "14K Gold". I also painted his sword, as well as the sword on the shield, with GW "Chainmail", and then highlighted it with GW "Mithril Silver"
My final step was to do the fire on the flaming sword.  I began  by painting all the tongues of flame with the "Lemon Chiffon".  I then worked my way towards the tips of the tongues adding, in order: Apple Barrel "Yellow", Americana "Tangerine", Americana "Burnt Orange", and finally, Apple Barrel "Apple Maroon".  I then went back and thinned some of the "Tangerine", and painted a light coat along the blade right beneath the flames, and along the edged of the shoulder armor opposite the flames, to give the appearance of reflected light.  I then went back over these areas and added some dabs of thinned "Yellow".
   I then let everything dry overnight, and then painted the whole model with Cermacoat "Matte Varnish".  The next day I flocked the base, and after a period to dry, I sprayed the figure with Testor's "Dullcote".

In general, I'm pleased with how the figure turned out, However, I think I could have done the reflective light a little batter, but I was in a hurry to get done at that point.

Figure 43 of 265: Complete

Monday, November 4, 2013

Deladrin, Female Assassin: Figure 42 of 265

This week I finished the female assassin figure from the original 30 New Bones set.  As you may remember, back on October 7th, I used this figure to experiment with applying an ink wash prior to painting to help bring out the details and make them easier to see. (See: http://allbonesabout.blogspot.com/2013/10/ink-washing-bones-to-bring-out-details.html )    I did the usual prep for this figure; soaking in dish soap and water, and then gluing to a black-primed fender washer.
As it turned out, I didn't need to do the ink wash, because I decided to paint the figure mostly black.  Since this was supposed to be an assassin, I wanted her to be dressed to use the cover of darkness, and be able hide in the shadows, and so I picked a black and dark blue paint scheme.  It proved to be a fun experiment to do a figure dressed mostly all in black.
   So, to begin with I painted the whole figure black.  I then picked out her pants and shirt with Accent "Midnight Blue", and her scarf/mask with GW "Regal Blue".
When these colors had dried, I drybrushed  the whole figure with GW "Shadow Grey". I then went back and carefully lined some of the edges of her armor and garments with the "Shadow Grey", to help make crisper delineations between parts of her outfit.
I followed that step up up by going back and picking out some of the edges and other highlight areas, like all the little studs on her armor, with Apple Barrel "Apple Scotch Blue".  When finished, I painted her face with GW "Elf Flesh".   I wanted her weapons to look like they had black blades, so I painted black over any of the blue-grey highlights that had gotten on them from my earlier whole-figure drybrushings I had done. I then painted the very edge of the weapons with GW "Chainmail".
When her face had dried, I gave it a wash with Windsor Newton "Peat Brown' ink, and then when this dried, I went back and added highlights with the "Elf Flesh", and a little of the "Elf Flesh" with white added to it. I painted her lips with the "Elf Flesh" with a little of GW "Tanned Flesh" added to it.  And finally, I painted her eyes white, and added black pupils.  I then painted her hair Americana "asphaltum", and when dry went back and added some highlights with Americana "Sable Brown", and some finer highlights with Americana "Khaki Tan".
I let the figure dry overnight, and then gave it a coat of Ceramcoat "Matte Varnish".  When this was dry, I then flocked the base, and let the figure sit overnight again. My final step was to spray the figure with Testor's "Dullcoat"
I'm very pleased with how this turned out.  I think the black and dark blue outfit turned out looking very effective.  Interestingly,by way of contrast, I am currently working on an all white figure, which has it's own challenges.

Figure 42 if 265: Complete

Monday, October 28, 2013

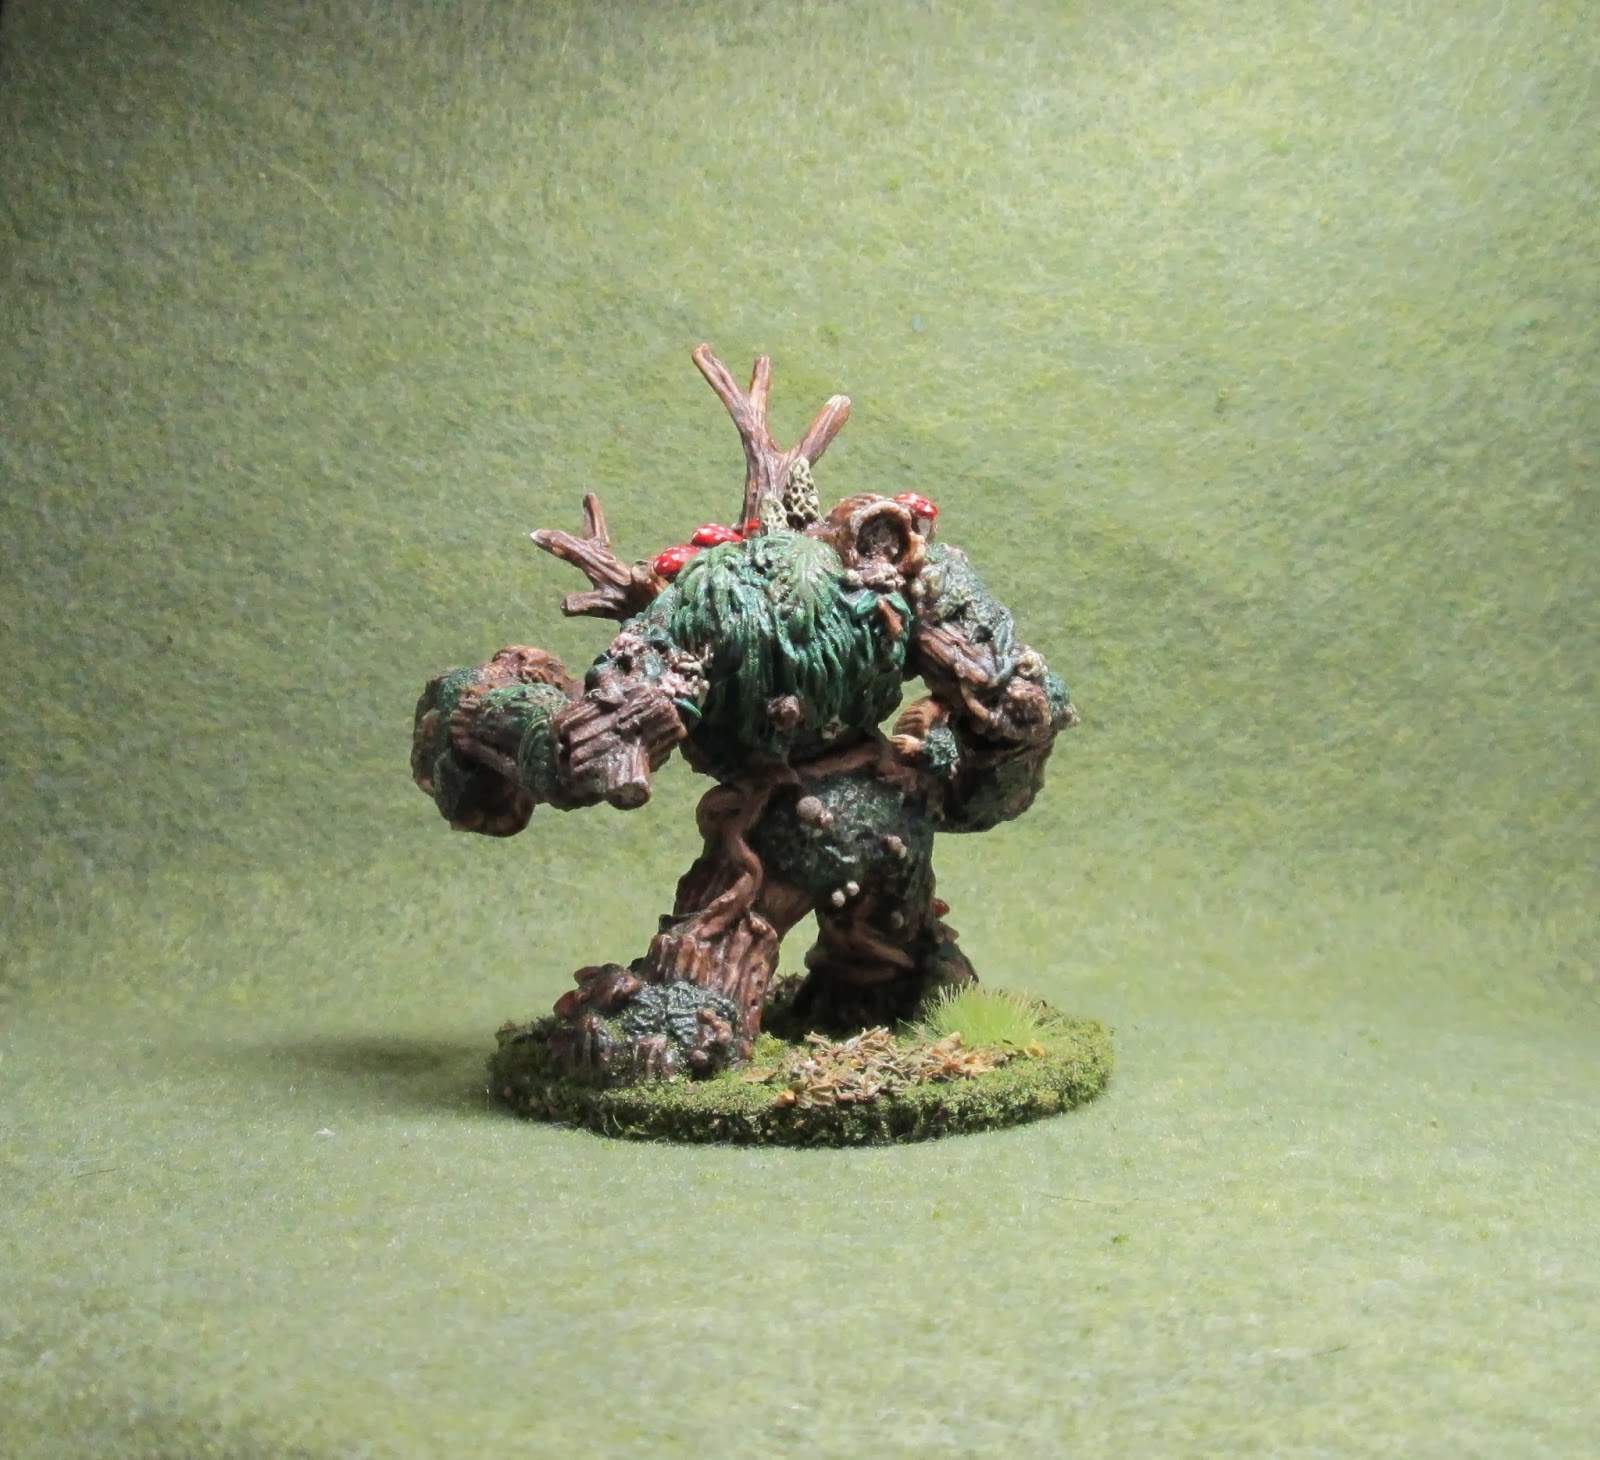
Spirit of the Forest: Figure 41 of 265

This past week I finished the second member of the Forces of Nature set: The Spirit of the Forest. I did my usual prep of soaking in water with a little dish soap added. When dry, I glued the head on with E6000 glue. I then glued the figure to a large black primed washer with Aileen's Mighty Tacky glue.
I began by giving the whole thing a coat of heavily thinned Americana "Asphaltum"paint. And then let this dry
Next I  painted anywhere there was a bare end of a log or stick with Americana "Khaki Tan", and then drybrushed the whole figure lightly with some Folk Art "Barnwood".  I then began picking out the mushrooms and other fungi with various shades of off-whites and greys, and all the foliage with various shades of green. 
I painted some of the mushroom caps with GW "Tanned Flesh", and the vines wrapping around the figure I painted with Americana "Sable Brown".
When this had all dried I gave the whole thing a wash with Windsor Newton "Peat Brown" ink.
I then went back and did some light green drybrushing highlights on the foliage.  I also painted the remaining mushrooms with GW "Blood Red" and added little white dots.  The eyes I painted with Apple Barrel "Maple Syrup", and then gave them black pupils with tiny white highlight dots.
When everything had dried overnight, I painted the whole figure with Ceramcoat "Matte Varnish", and then when dry, I flocked the base.   Finally when the base had had time to dry, I sprayed the figure with Testor's "Dullcoat"
All in all, a neat looking sculpt that really comes to life with some quick and easy painting.  The flora growing on him is so splotchy and jumbled, It's easy to paint and pops nicely with the brown wash.

Figure 41 of 265: Complete

Saturday, October 26, 2013

Final Reaper Reveal is a Big One! (And We're Not Talking about the Monster)

How's this for a big finish! Now if they can only reach 3 million!

Excuse me while I go add $35 to my pledge... :-)

Friday, October 25, 2013

Reaper Bones II Kicksarter Nears the 24 Hour Countdown Mark


The Reaper Bones II Kickstarter has almost reached the 24 hours remaining mark. The rewards should be coming fast and furious now.   It's time to get on board if you've been undecided up to this point.

http://www.kickstarter.com/projects/1513061270/reaper-miniatures-bones-ii-the-return-of-mr-bones